I’ve got VMware Cloud Director Container Service Extension (CSE) 4.0.1 running in my lab to test and demo Kubernetes Clusters as-a-service in Cloud Director.
CSE 4.0.3 was released on the 20th of April 2023 and came with significant improvements.
Let’s take a look at my current environment:
- VCD 10.4.1
- CSE UI Plugin 4.0.1
- CSE Server 4.0.1
- vSphere 7.0U3
- NSX-T 4.0.1.1
- NSX ALB (Avi) 22.1.2-9086
Based on the above, I don’t need to change a single thing for CSE 4.0.3. So let’s get started.
Overview
Reviewing the release notes we can figure out the upgrade process:
- Overview
- Preparation
- Warning
- Upgrade Kubernetes Cluster UI Plug-in from 4.0.1 to 4.0.3
- Upload the new CSE appliance into VCD
- Upload the new TKG 1.6.1 images into VCD
- Update the existing CSE Server configuration
- Deploy the new CSE appliance
- Testing
- Troubleshooting
The last 2 items I’ll do in a different blog post.
Overall, the CSE upgrade process is more of a replacement process, whereby you upload the new UI plugin and CSE appliance and swap the old plugin/appliance out with the new one.
Preparation
Get ahead of the curve and download the materials you need:
- Download Kubernetes Cluster UI Plugin 4.0.3
- Download CSE Server 4.0.3 appliance
- Download TKG 1.6.1 Images
Warning
The upgrade process to CSE 4.0.3 requires a change in the Container Storage Interface (CSI) setting of CSE from 1.3.0 to 1.3.2 as detailed in the release notes. This means that any CSE cluster provisioning operations will fail until this value is updated in the CSE configuration. I cover this change in this blog post. This is not an issue for new deployments of CSE 4.0.3, as they will already have the new CSI in the default server config.
Upgrade Kubernetes Cluster UI Plug-in from 4.0.1 to 4.0.3
Again, it’s not really an upgrade. You need to upload the plugin to the VCD Customize Portal location, disable the old version, and enable the new version. You will also need to publish the plugin to all tenants that had visibility of the old version.
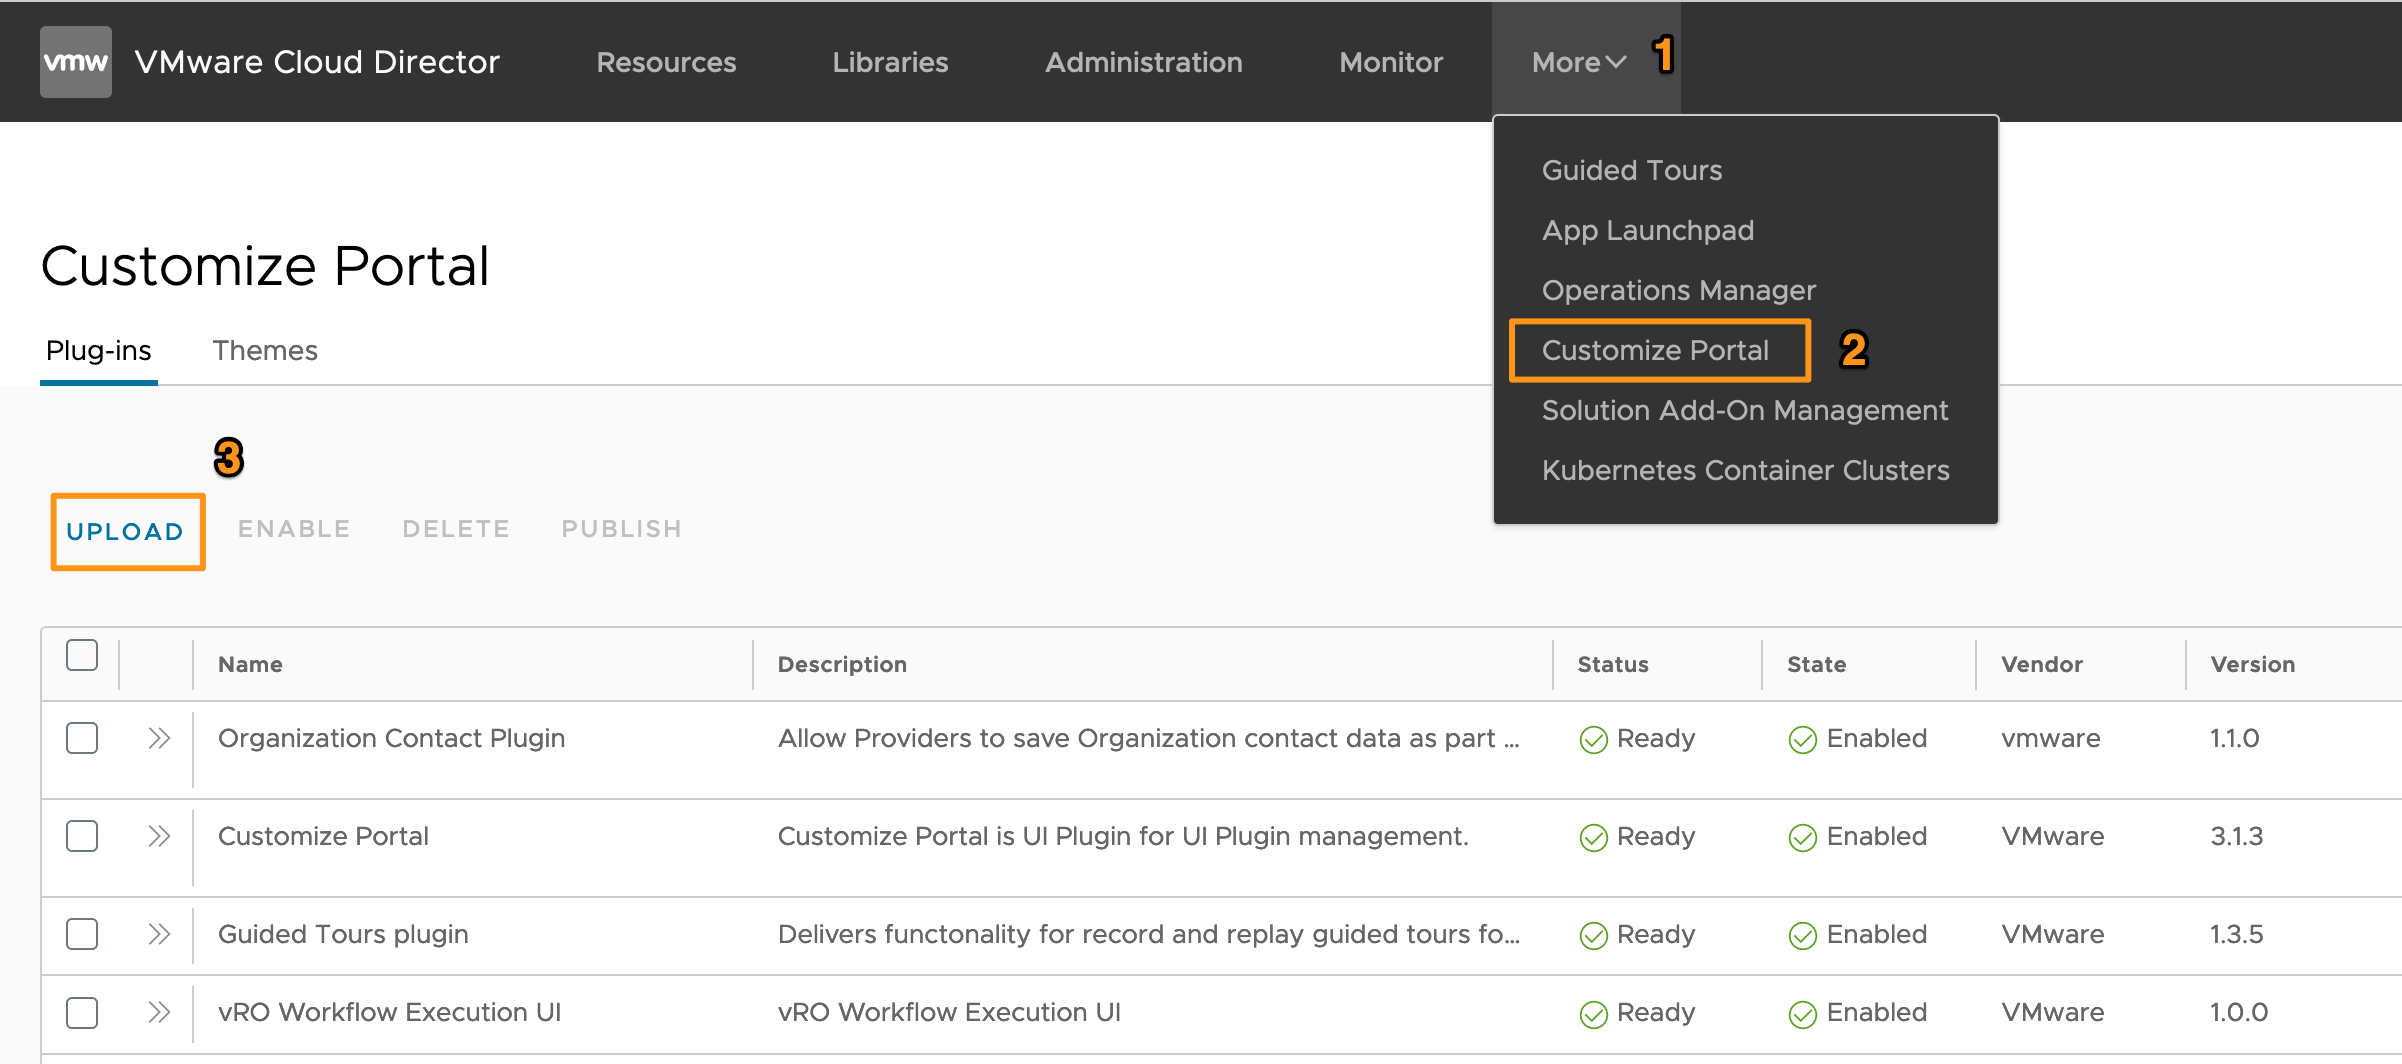
- Login to the Cloud Director
Systemorganisation as the System Administrator. - Navigate to More > Customize Portal and click the UPLOAD button.
- In the file browser, locate and upload the
container-ui-plugin-4.0.3.zipfile you downloaded from VMware Customer Connect.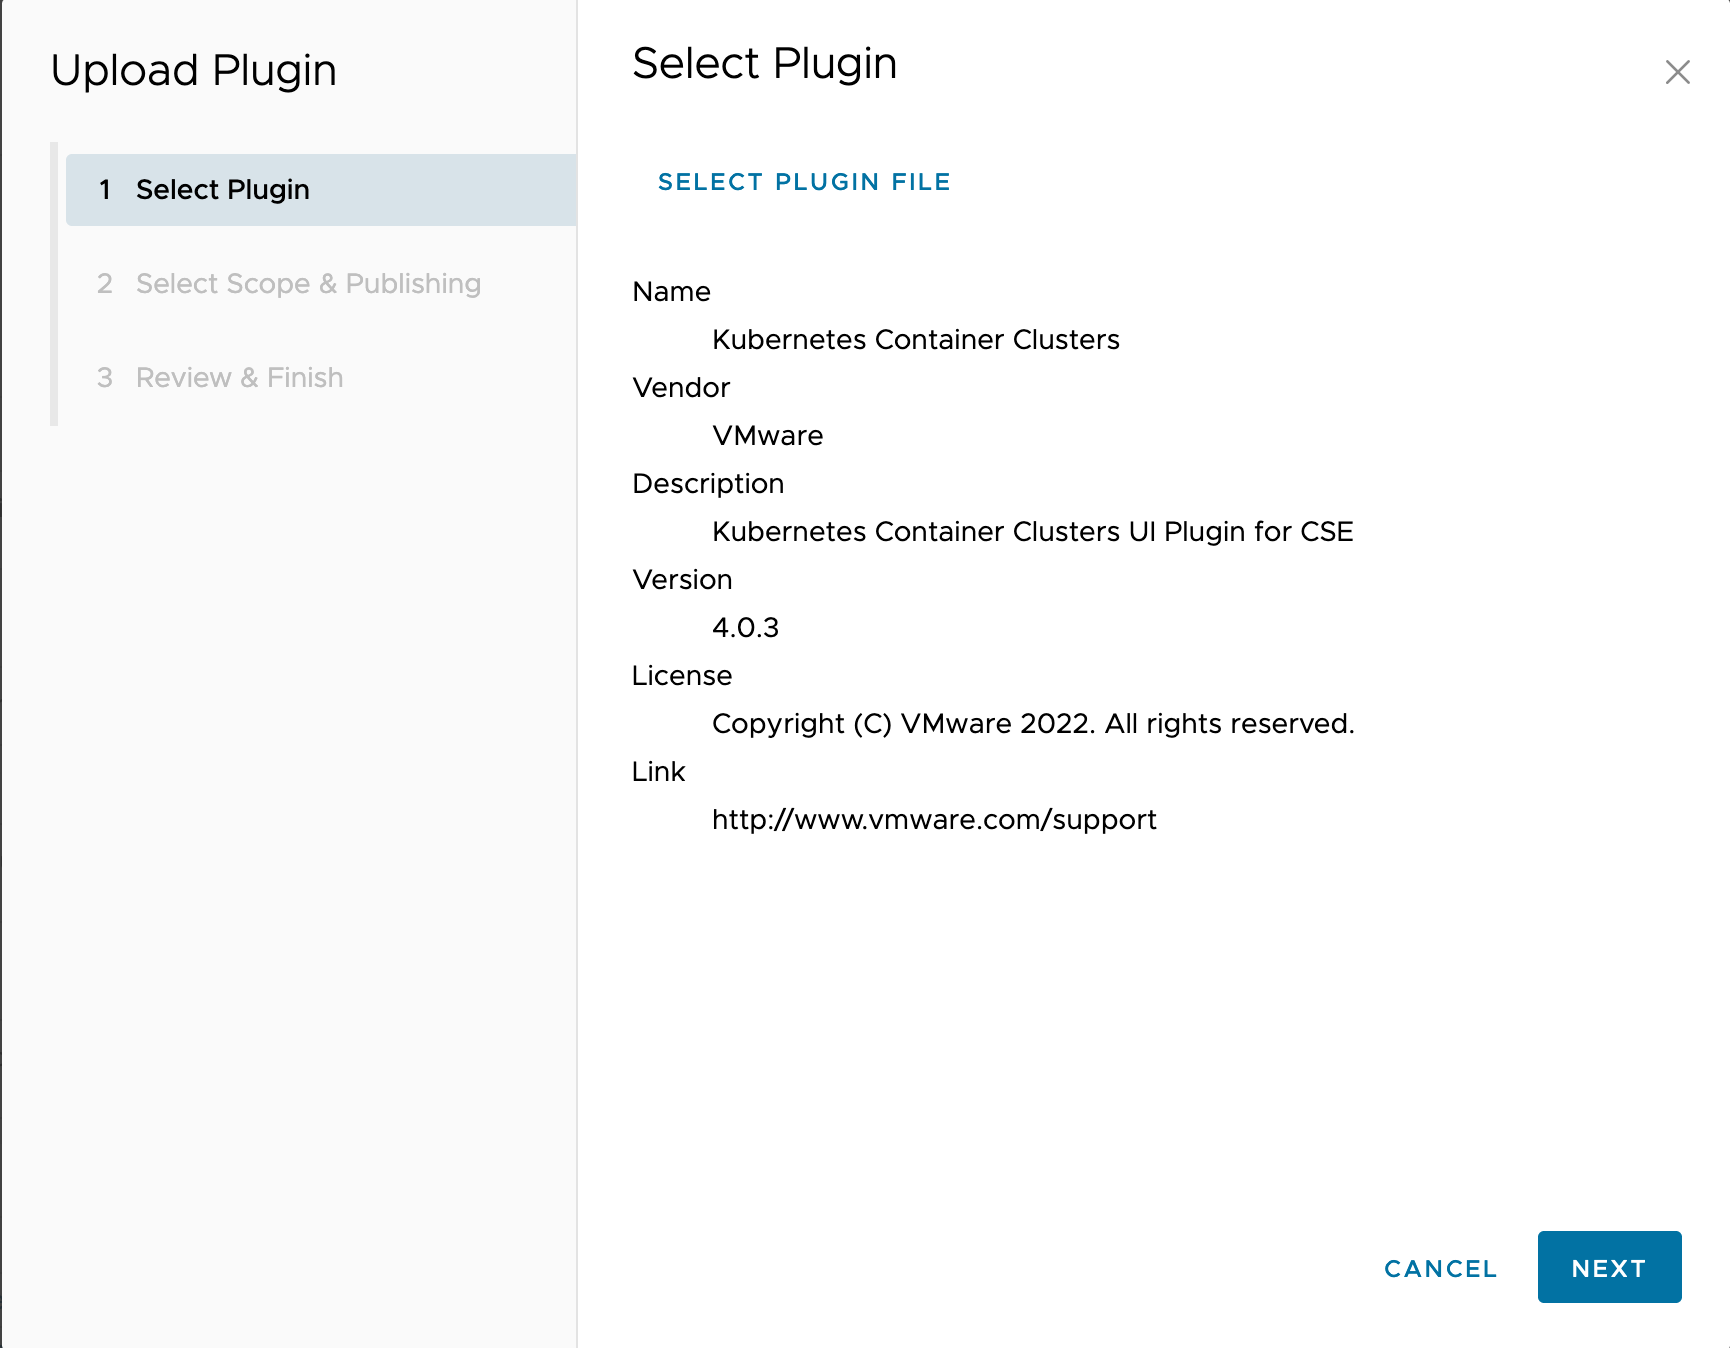
- Click NEXT
- Review the Provider and Tenant scoping options. In my lab, I want all tenants to have access/visibility to this UI plugin. Note: This does not mean they’ll have the rights to deploy Kubernetes clusters, only view the plugin.
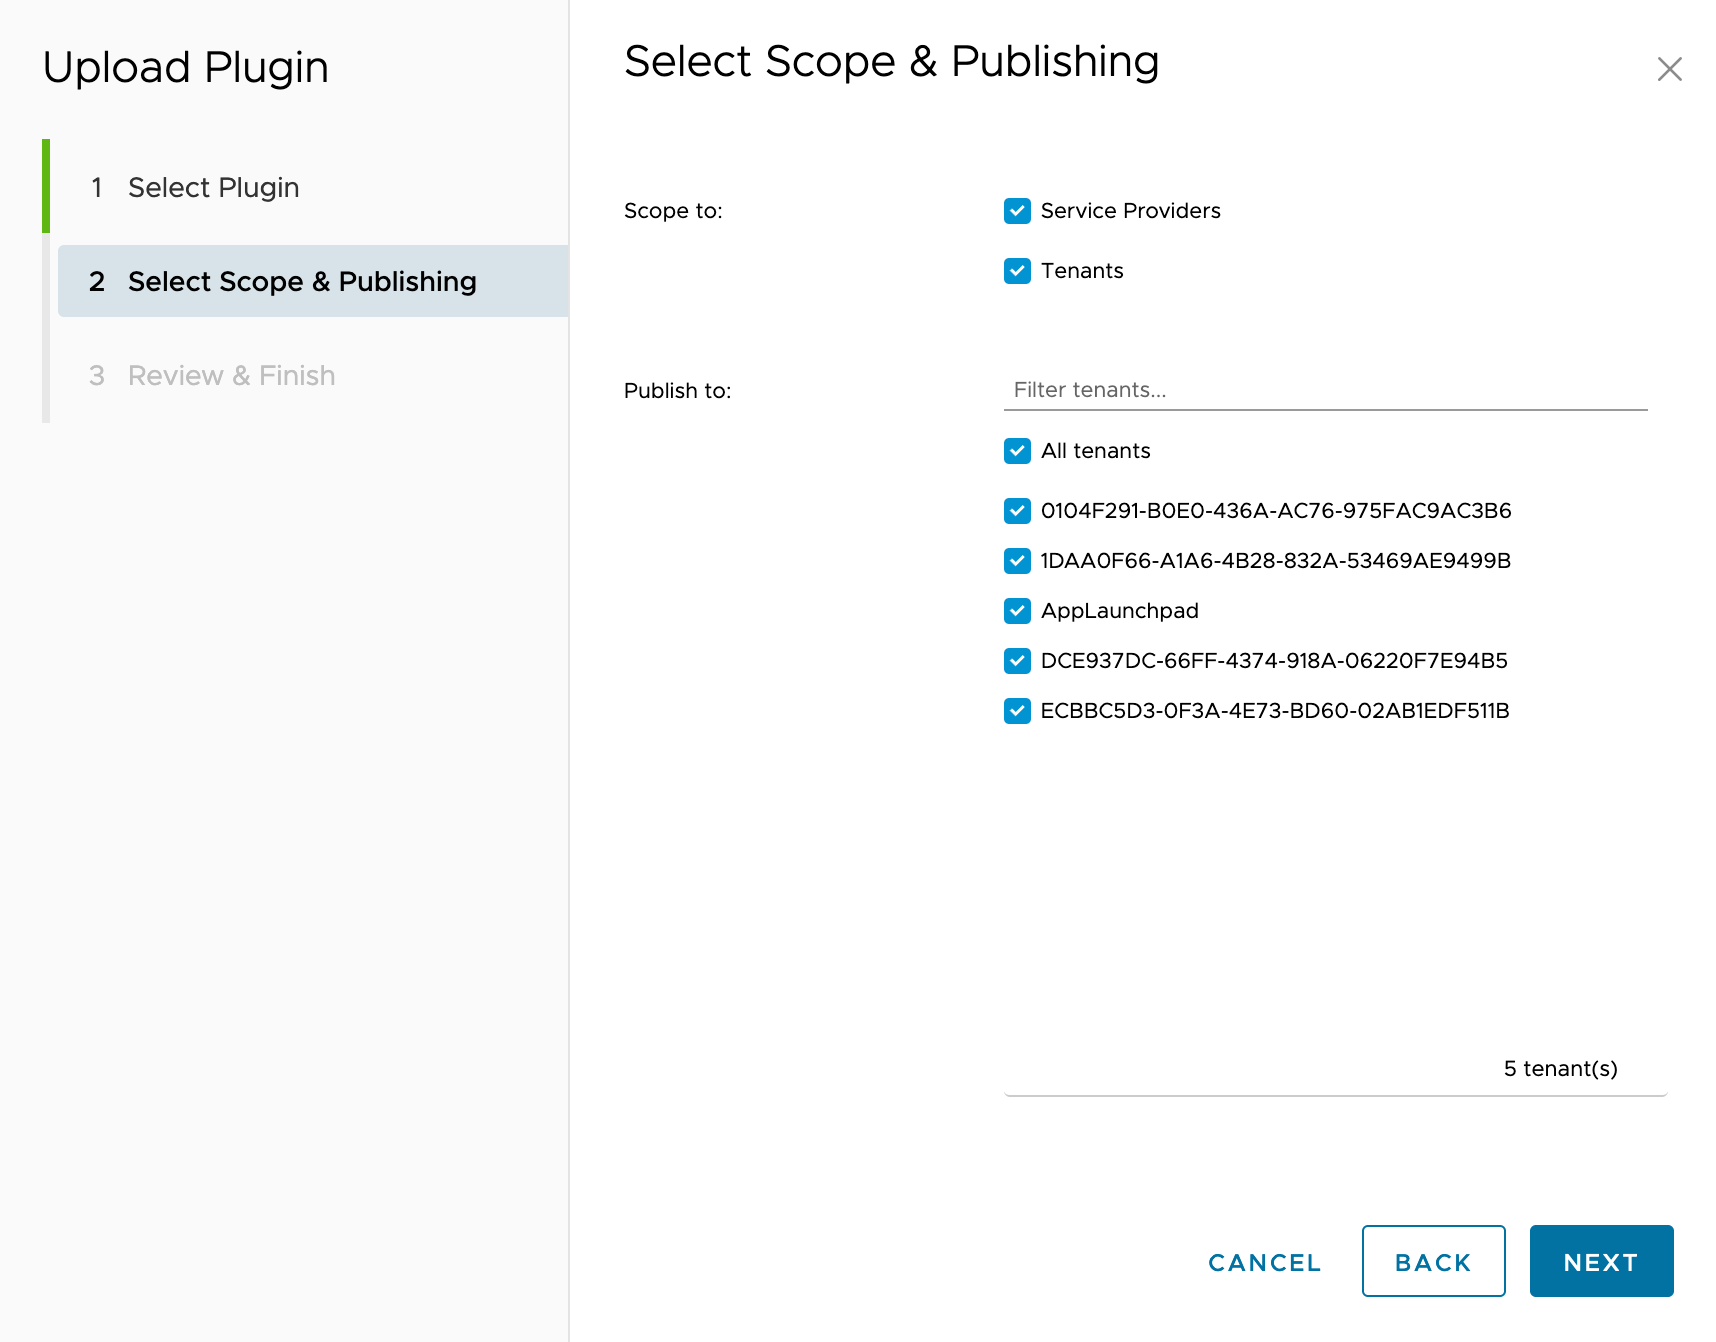
- Click NEXT
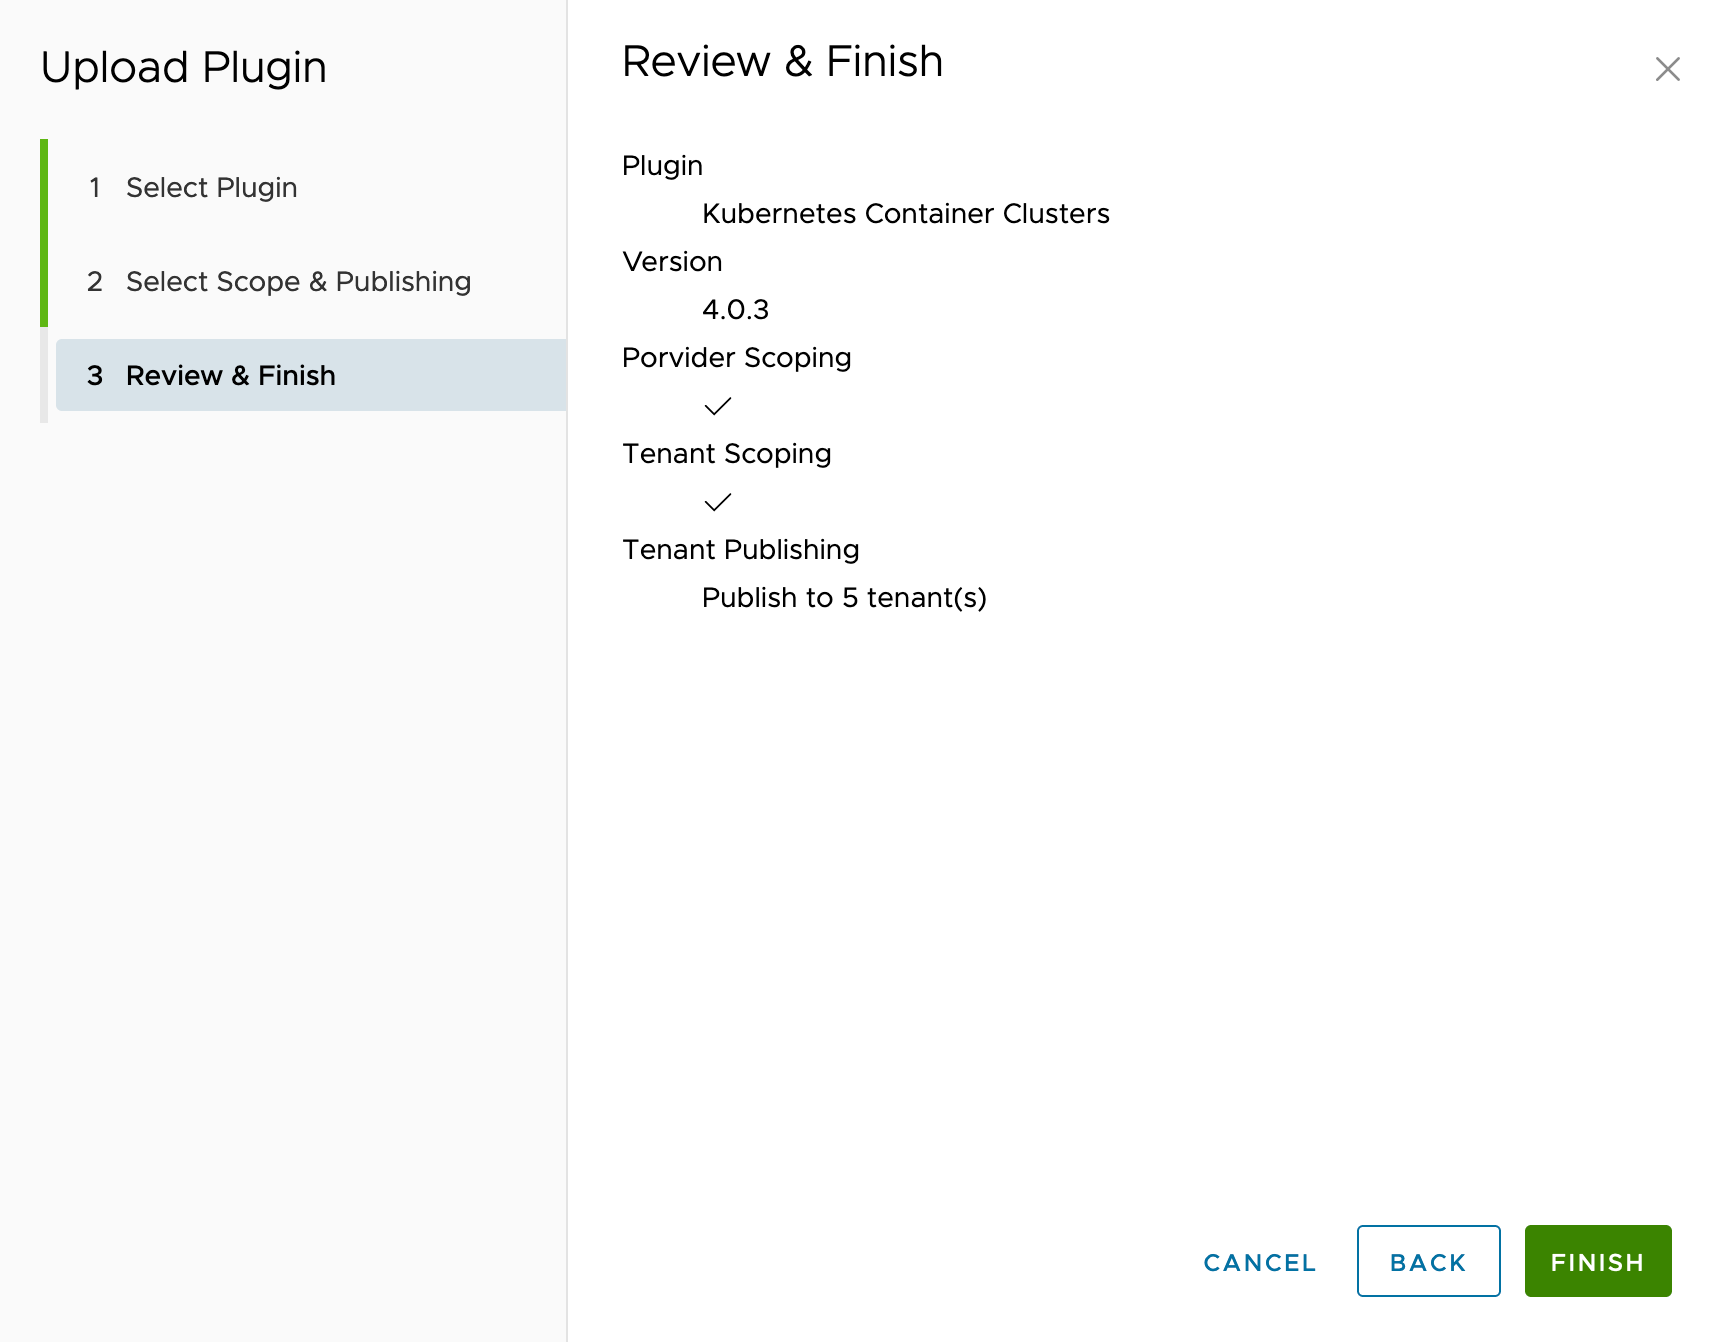
- Review your selection and click FINISH
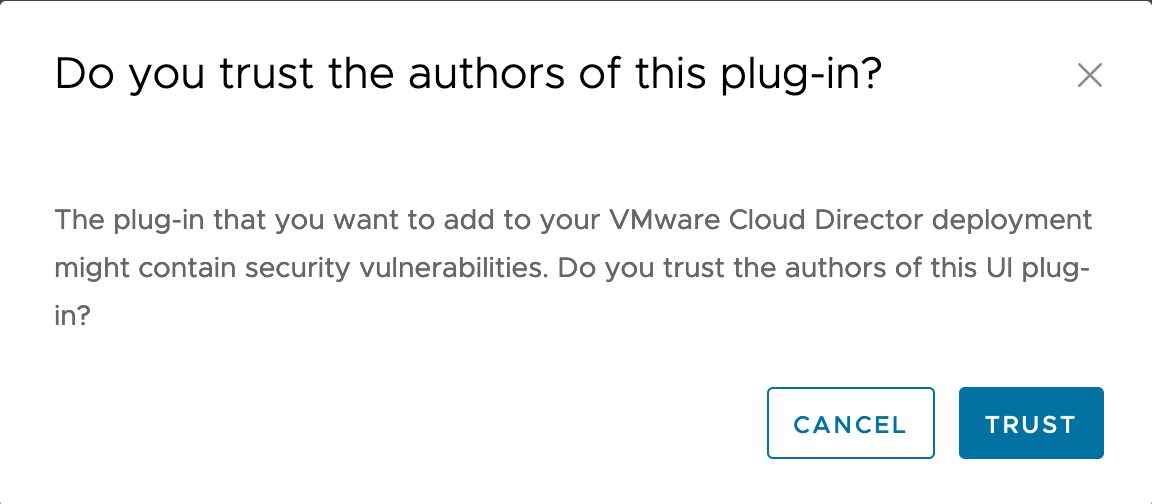
- I would hope by now you trust VMware, so go ahead and click TRUST on the final prompt.
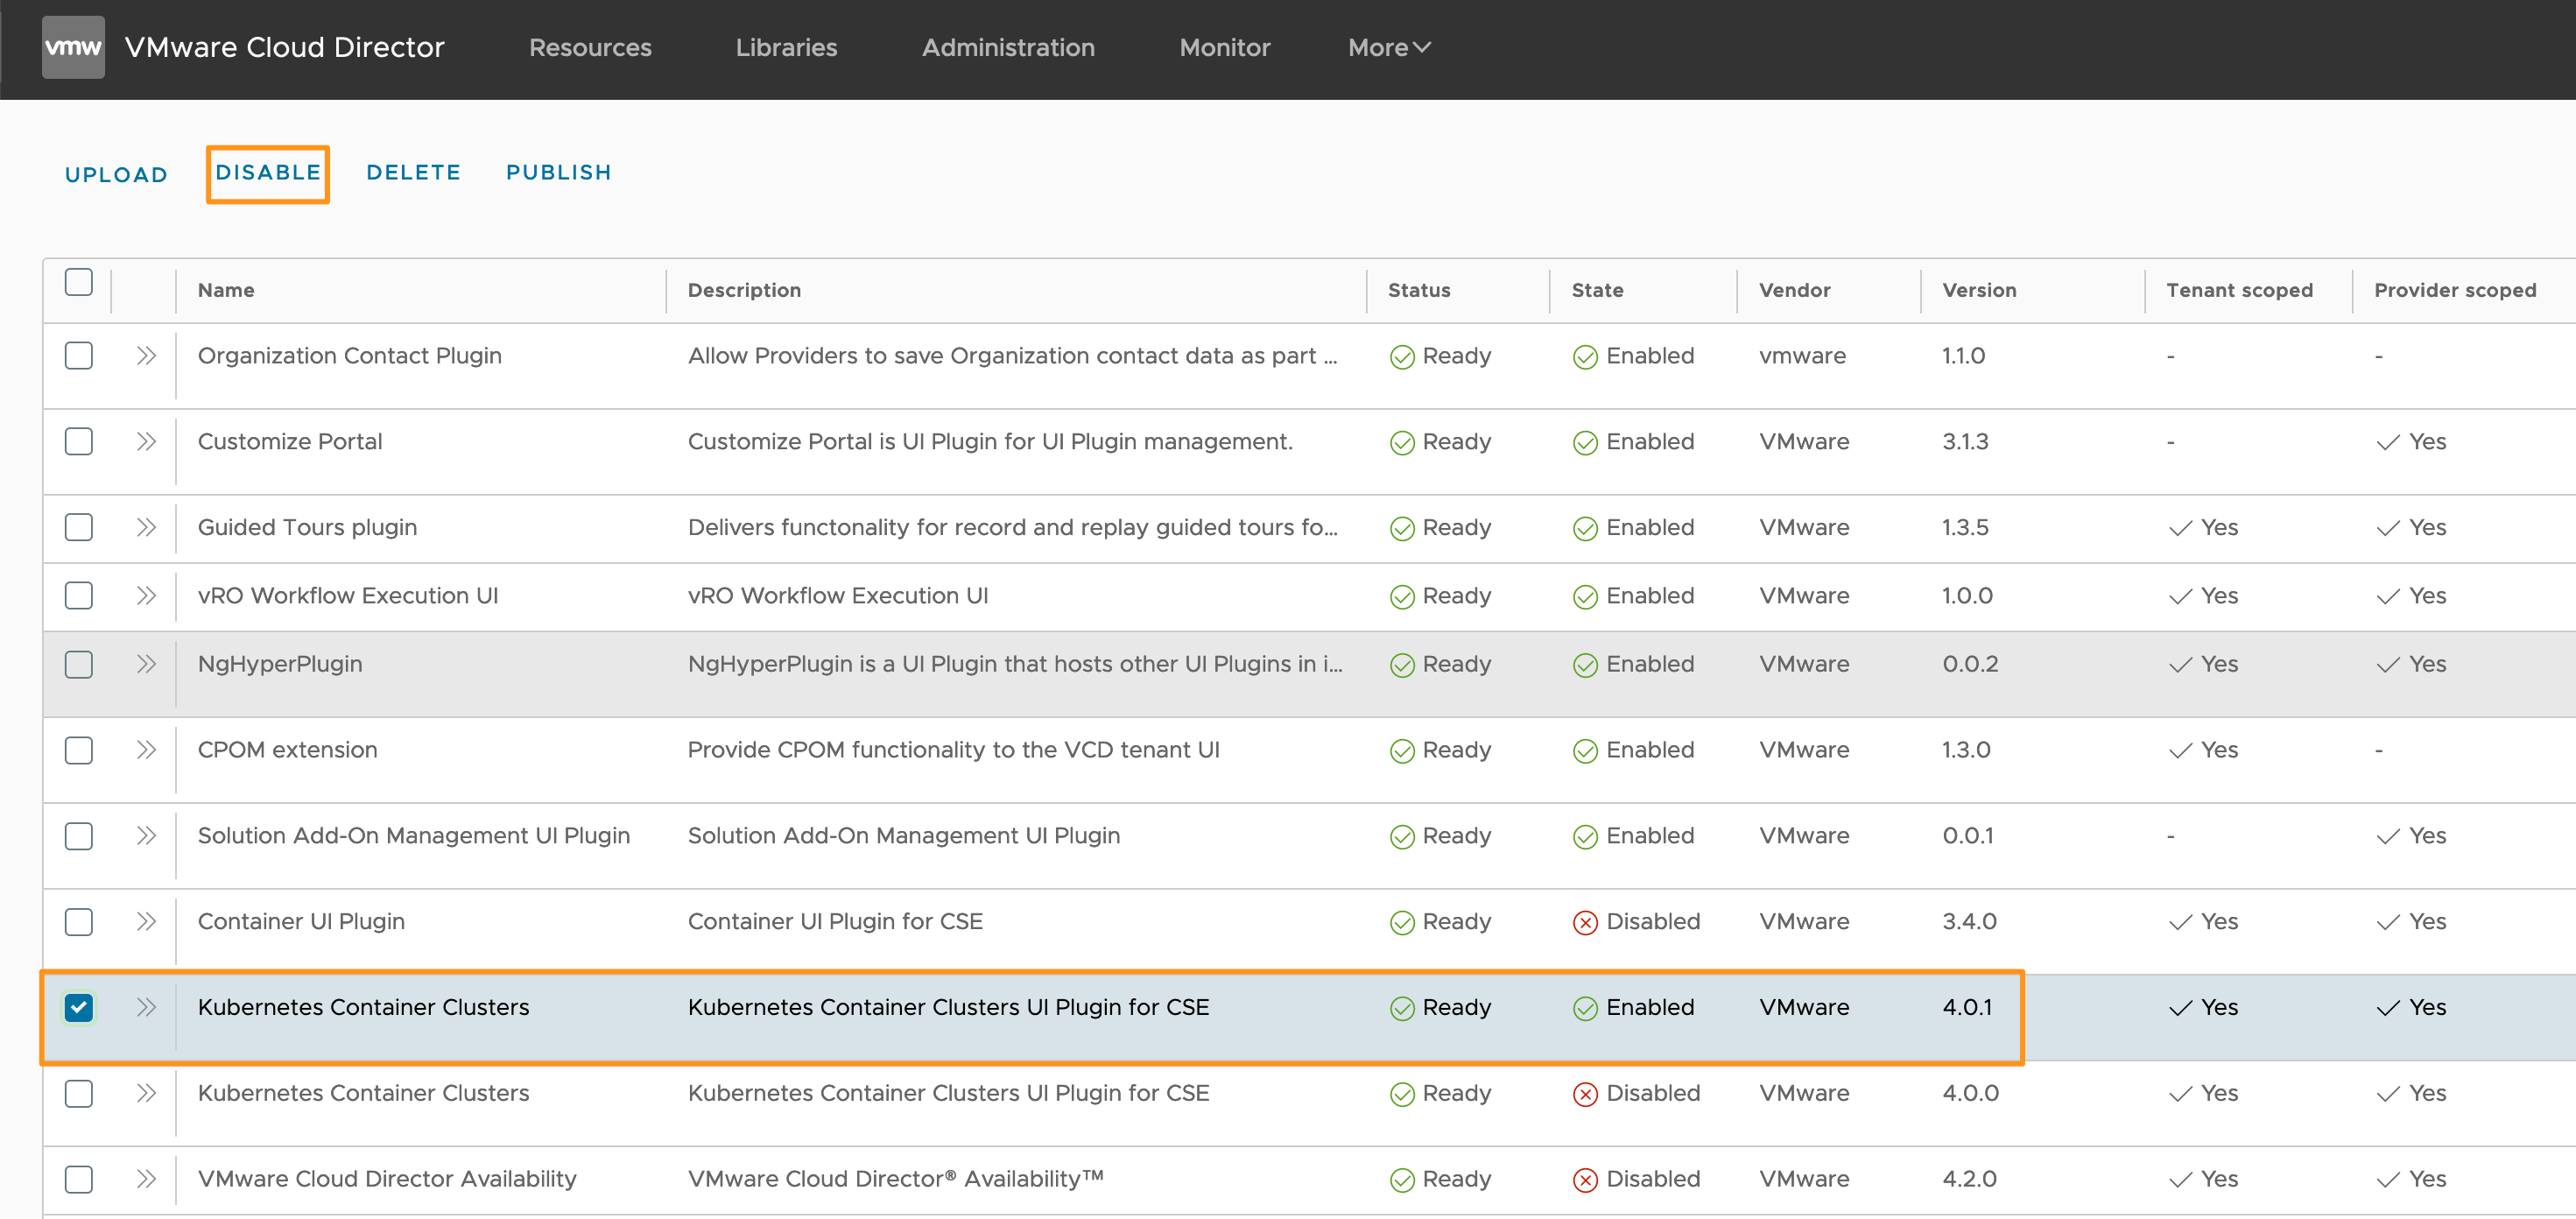
- Scoll down in your list of UI plugins. You’ll find your ‘current’ version and the new version, both enabled.
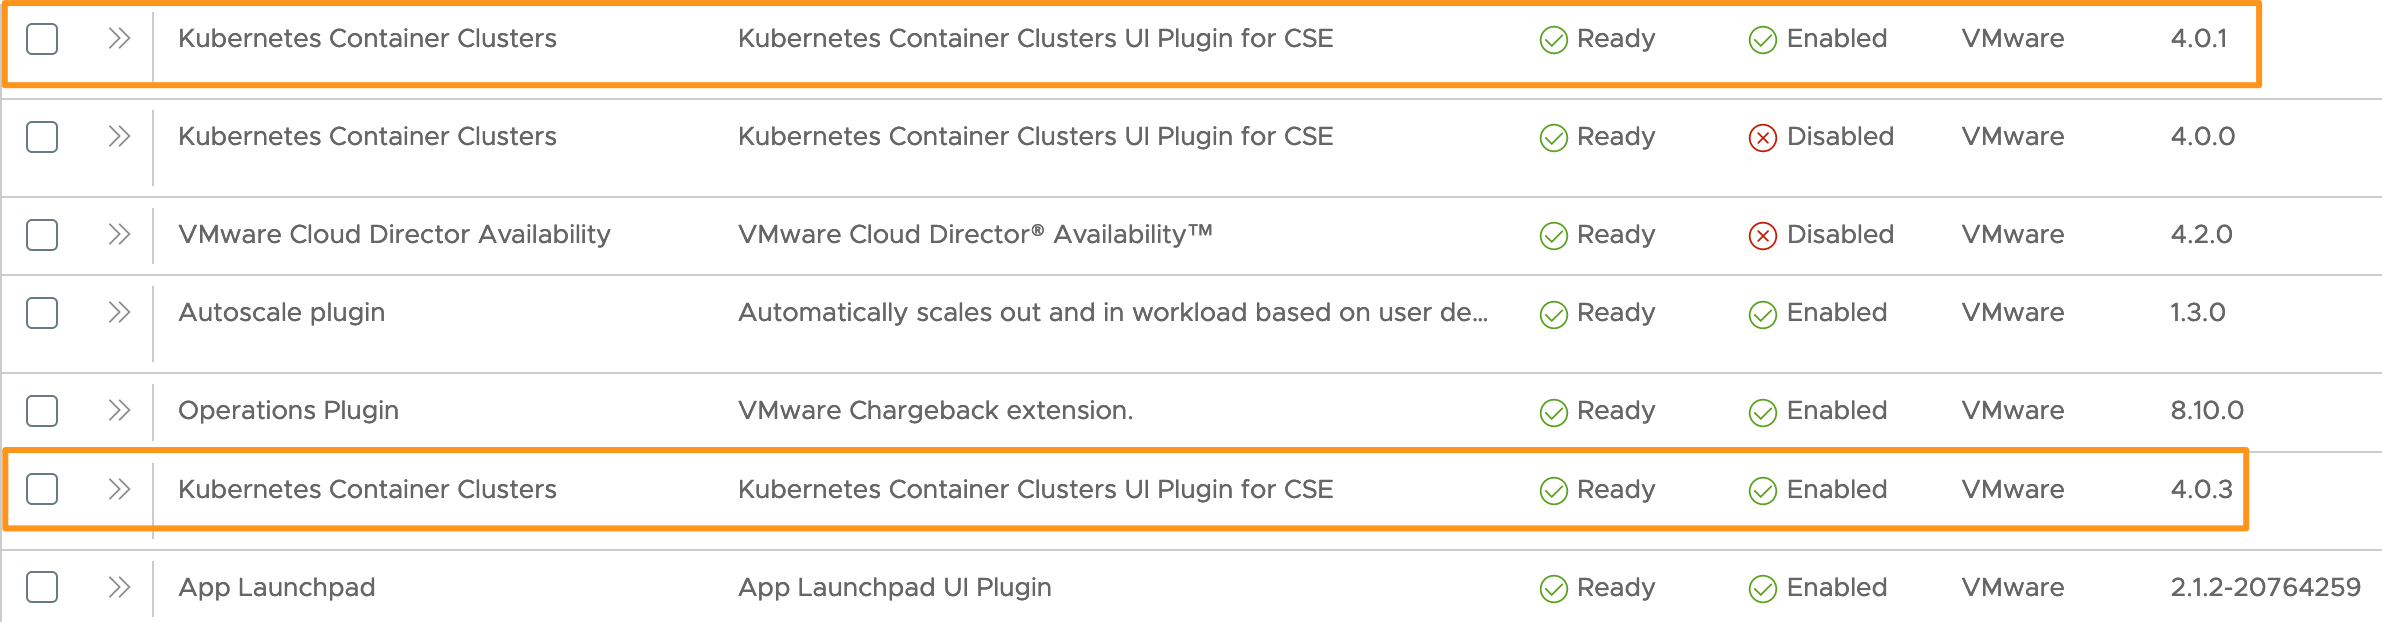
- Select the checkbox for your old UI plugin and click the DISABLE button
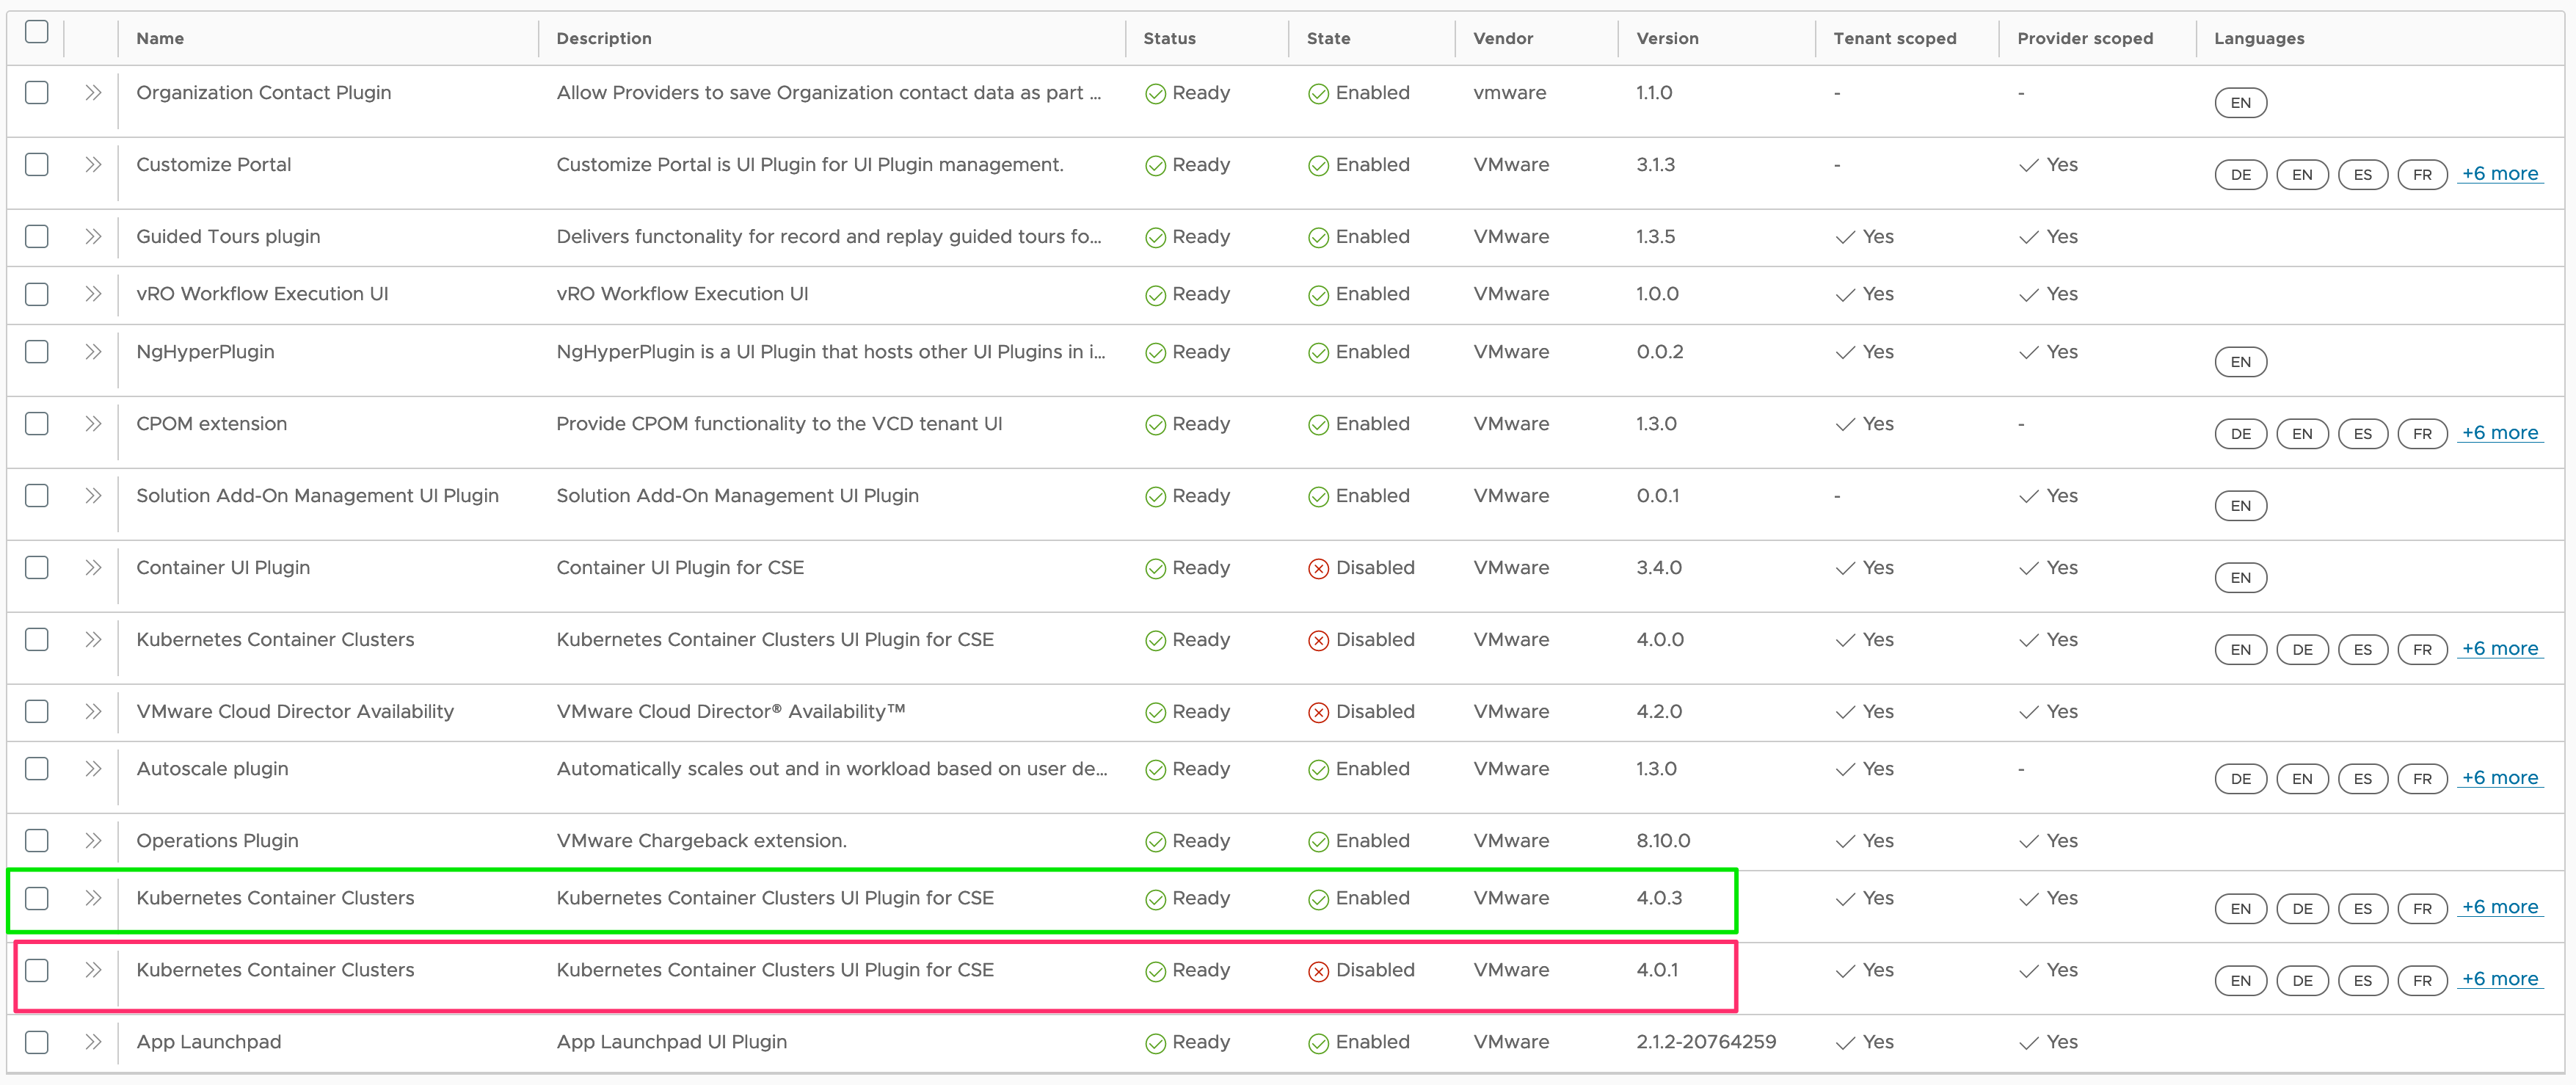
- The old plugin is now disabled:
Upload the new CSE appliance into VCD
Note: Make sure you’ve downloaded the latest CSE appliance from Customer Connect: Container Service Extension 4.0.3 - Virtual Appliance.
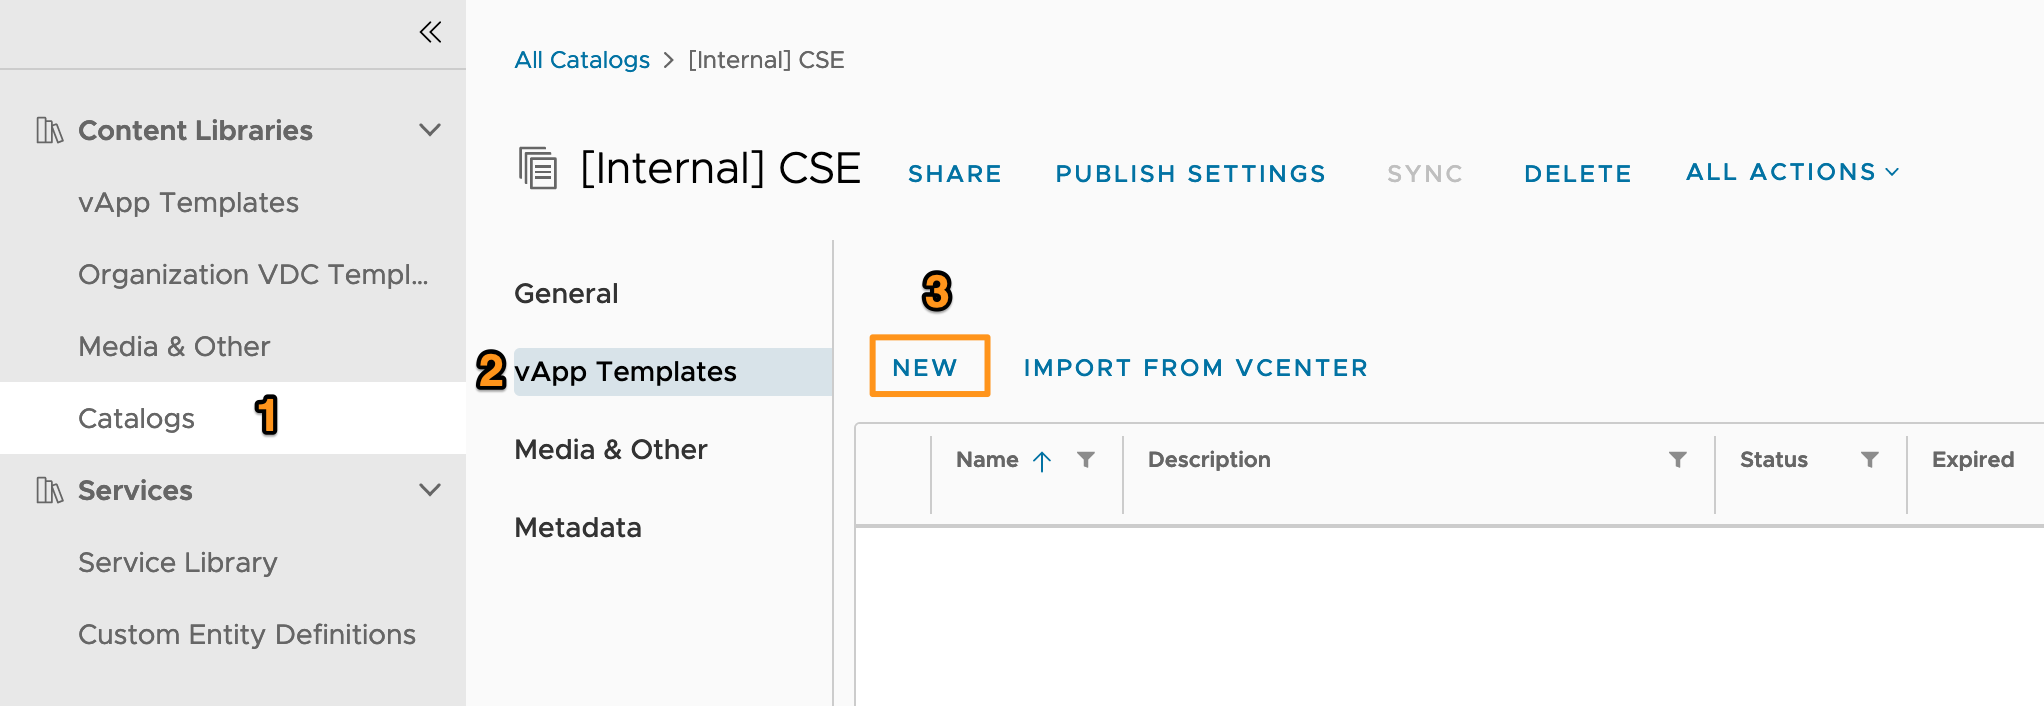
- Login to Cloud Director, more specifically the Organization that stores your Catalog items. I like to dedicate a Cloud Provider-managed Organisation for my Catalog items and share them out from there. I have an Organization called “Cloud Provider” with a “CSE” catalog. This Organisation is also where the CSE appliance runs out of.
- Locate the Catalog to contain your appliance, and under vApp Templates click NEW:
- In the wizard, browse for and select the OVA you downloaded.
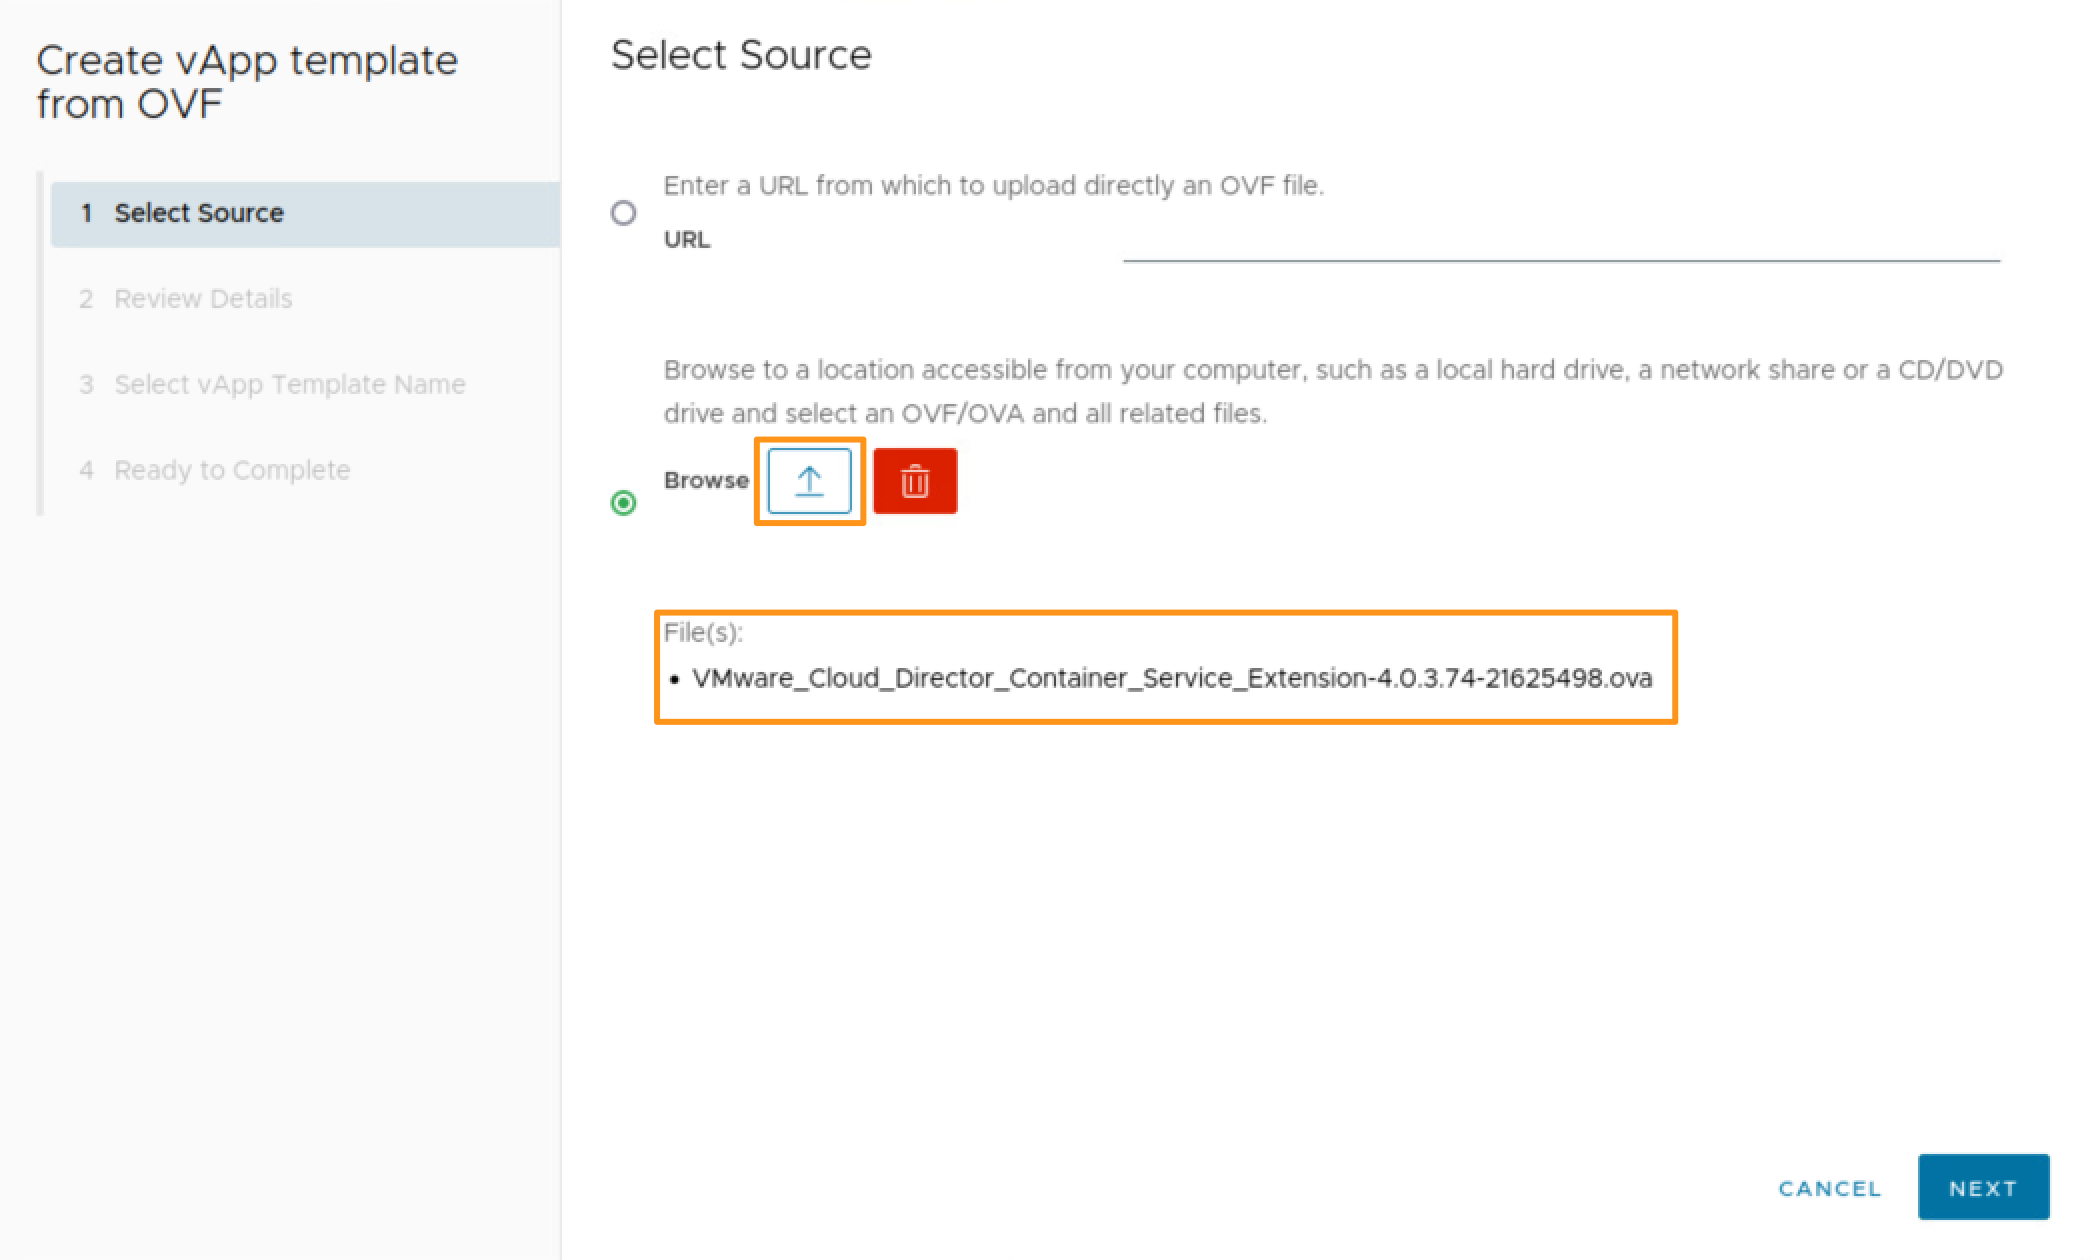
- Click NEXT and review the details. Click NEXT again.
- Enter a Name and Description for your Catalog item and click NEXT.

- Review the final catalog item details and click FINISH.
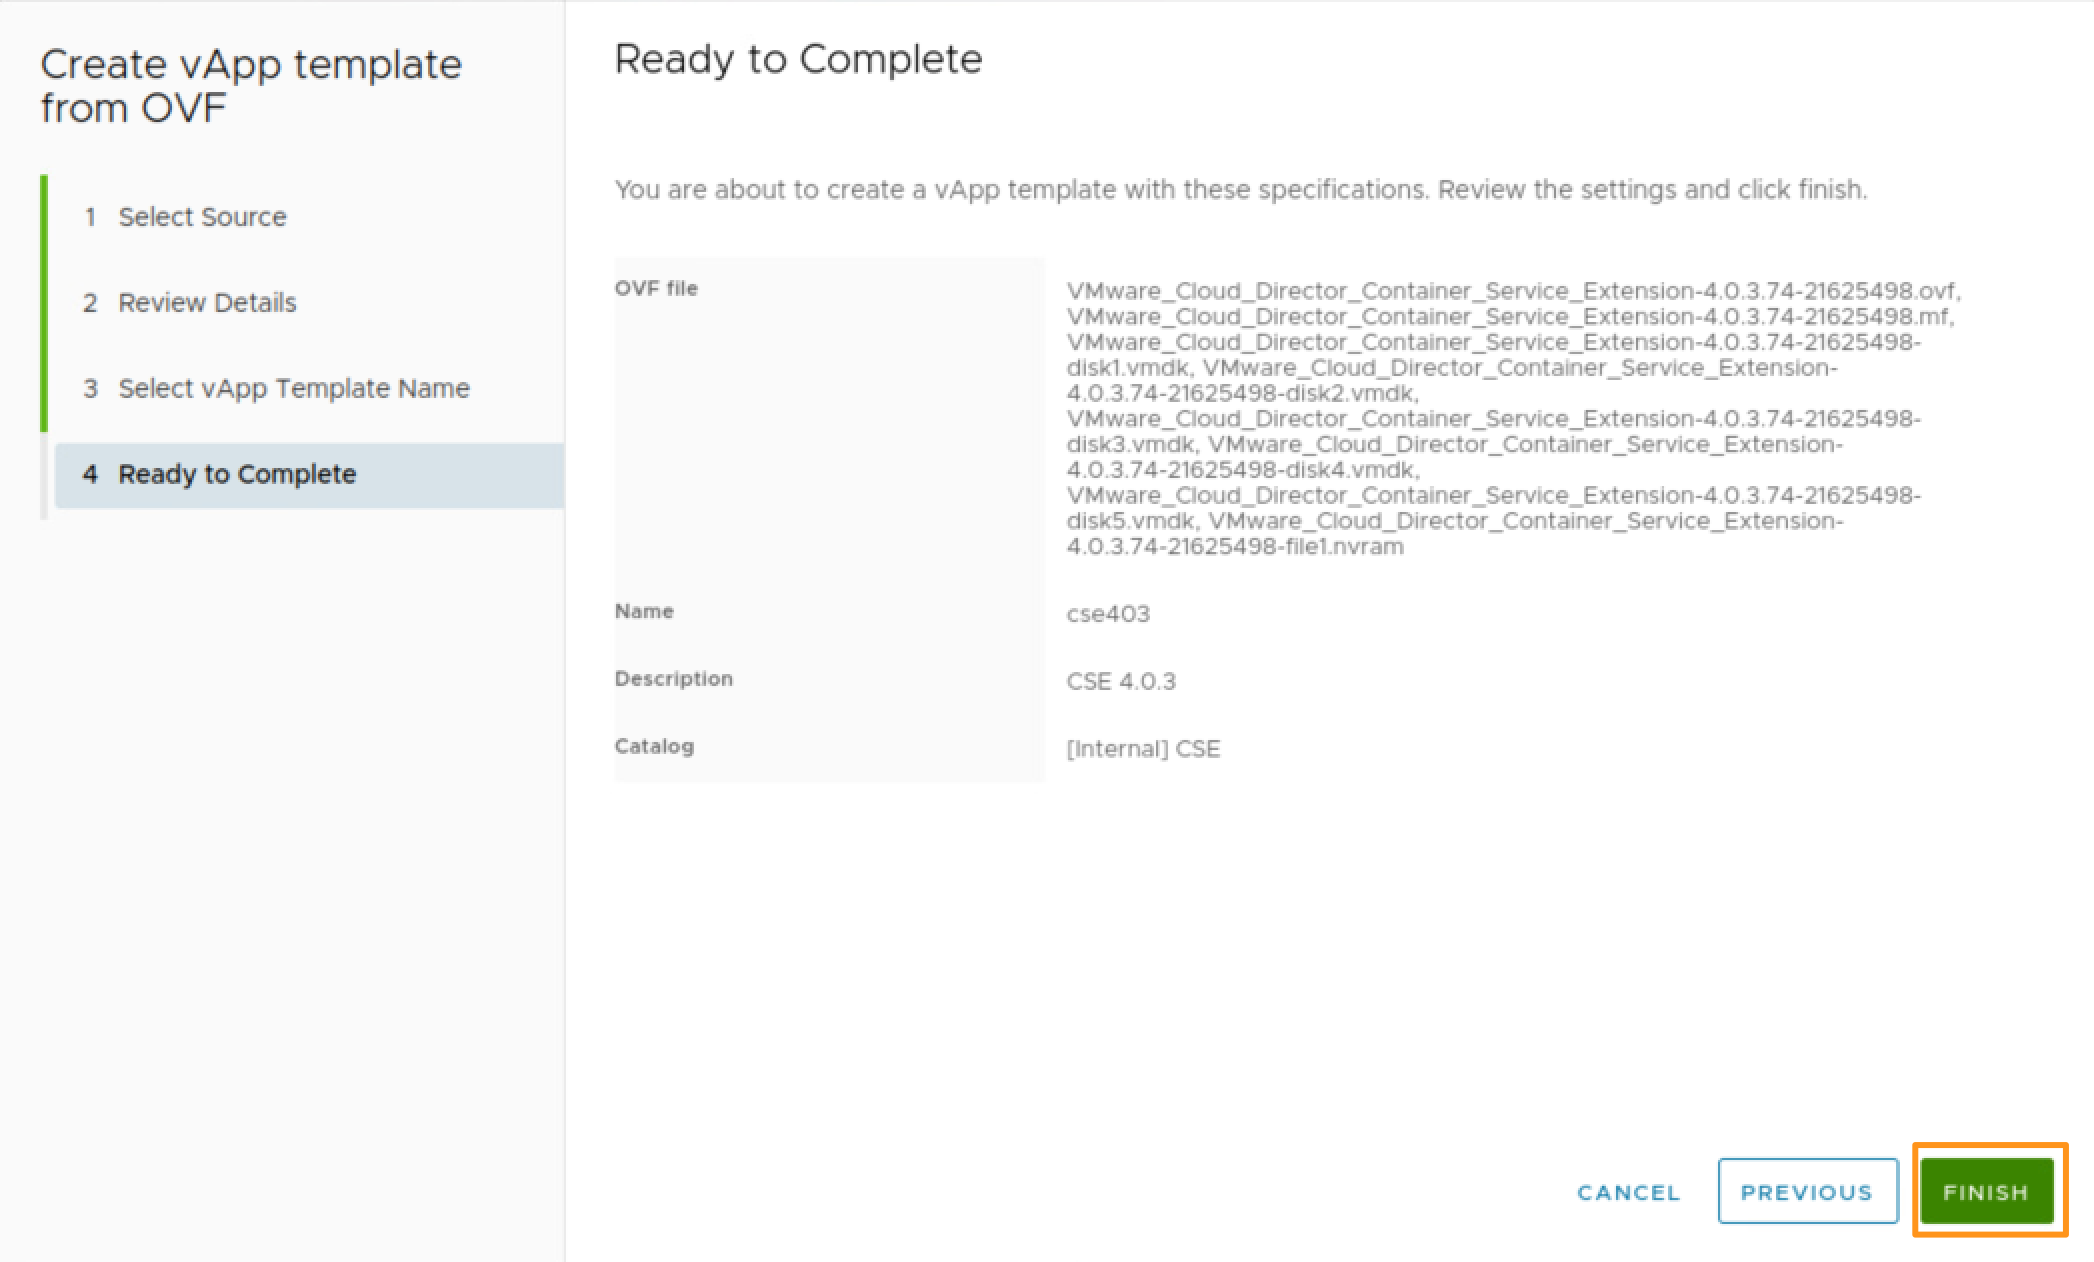
- Your OVA will upload to the catalog.

Upload the new TKG 1.6.1 images into VCD
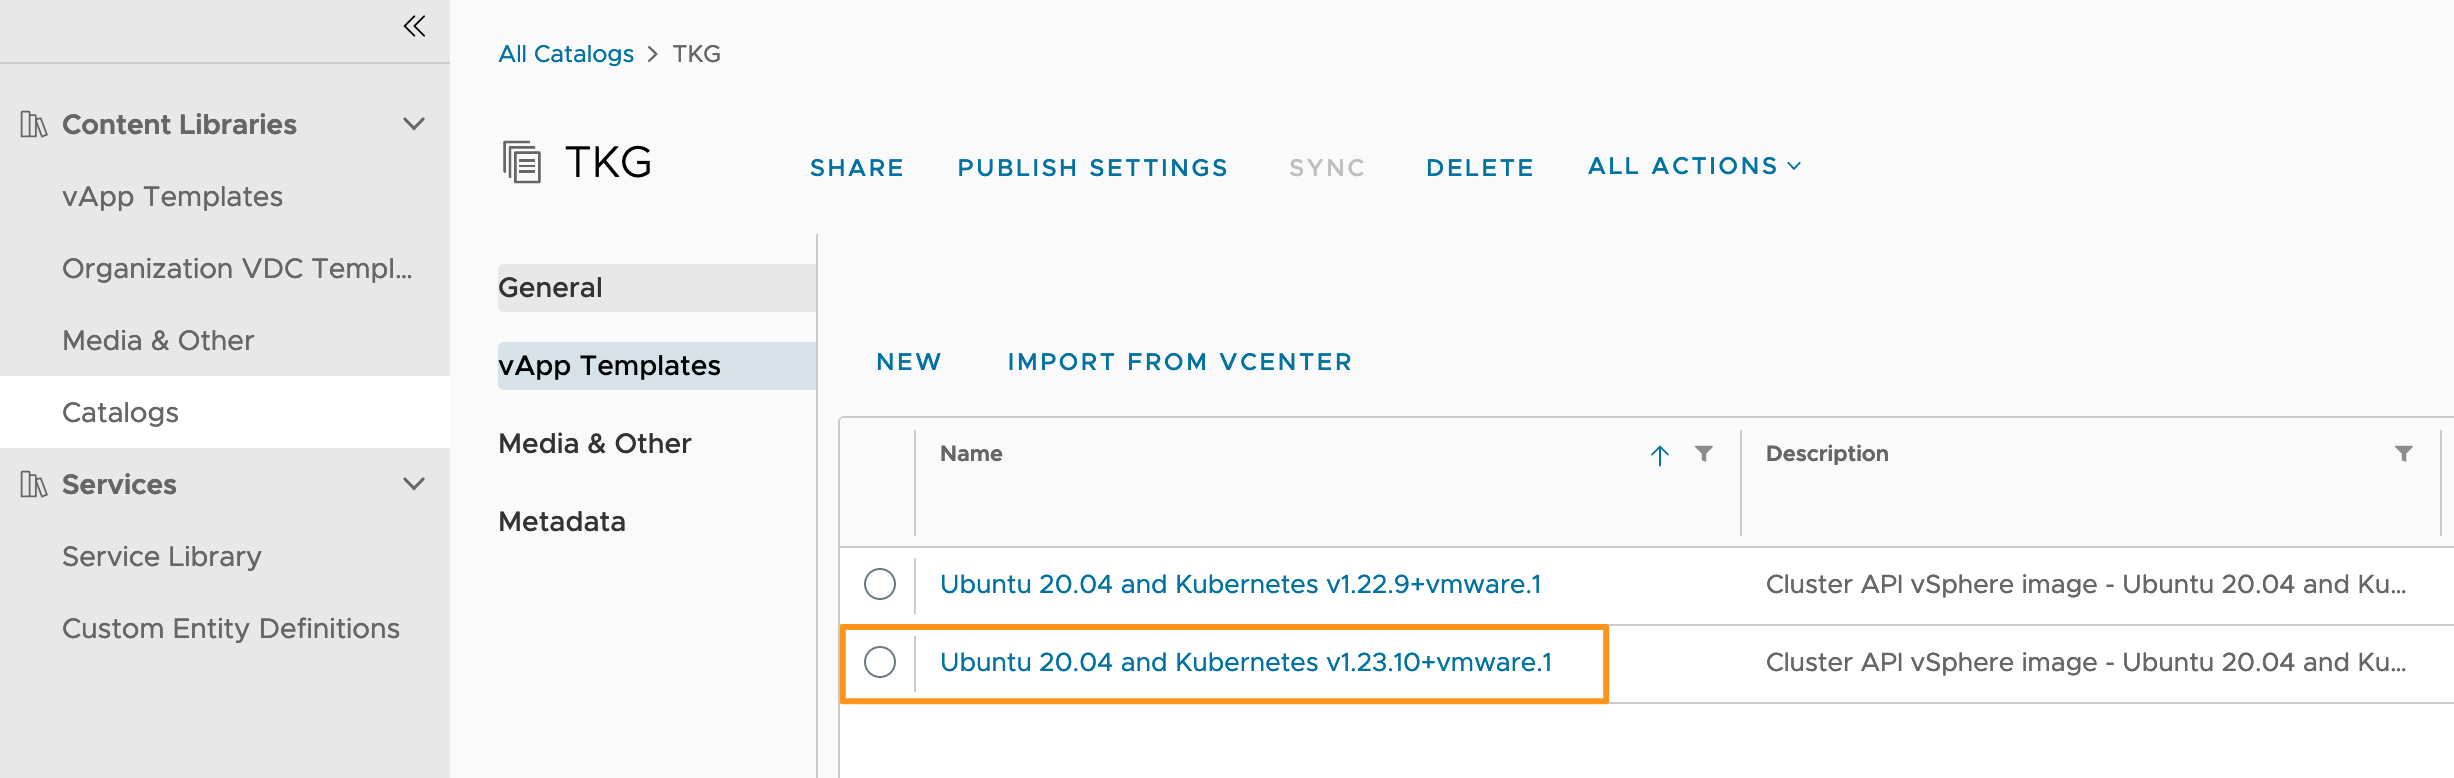
I hope you have a separate TKG image catalog (I do). Loading TKG images to your catalog is the same process as loading your CSE appliance to the catalog. This is what my final TKG catalog looks like:
It’s important to note that this Tanzu Kubernetes runtime won’t be available for CSE to consume until you’ve finished the full CSE upgrade process.
Update the existing CSE Server configuration
As mentioned at the beginning, there are some compatibility changes within the CSE/TKG framework and you are required to update the Container Storage Interface (CSI) version in the CSE Server configuration.
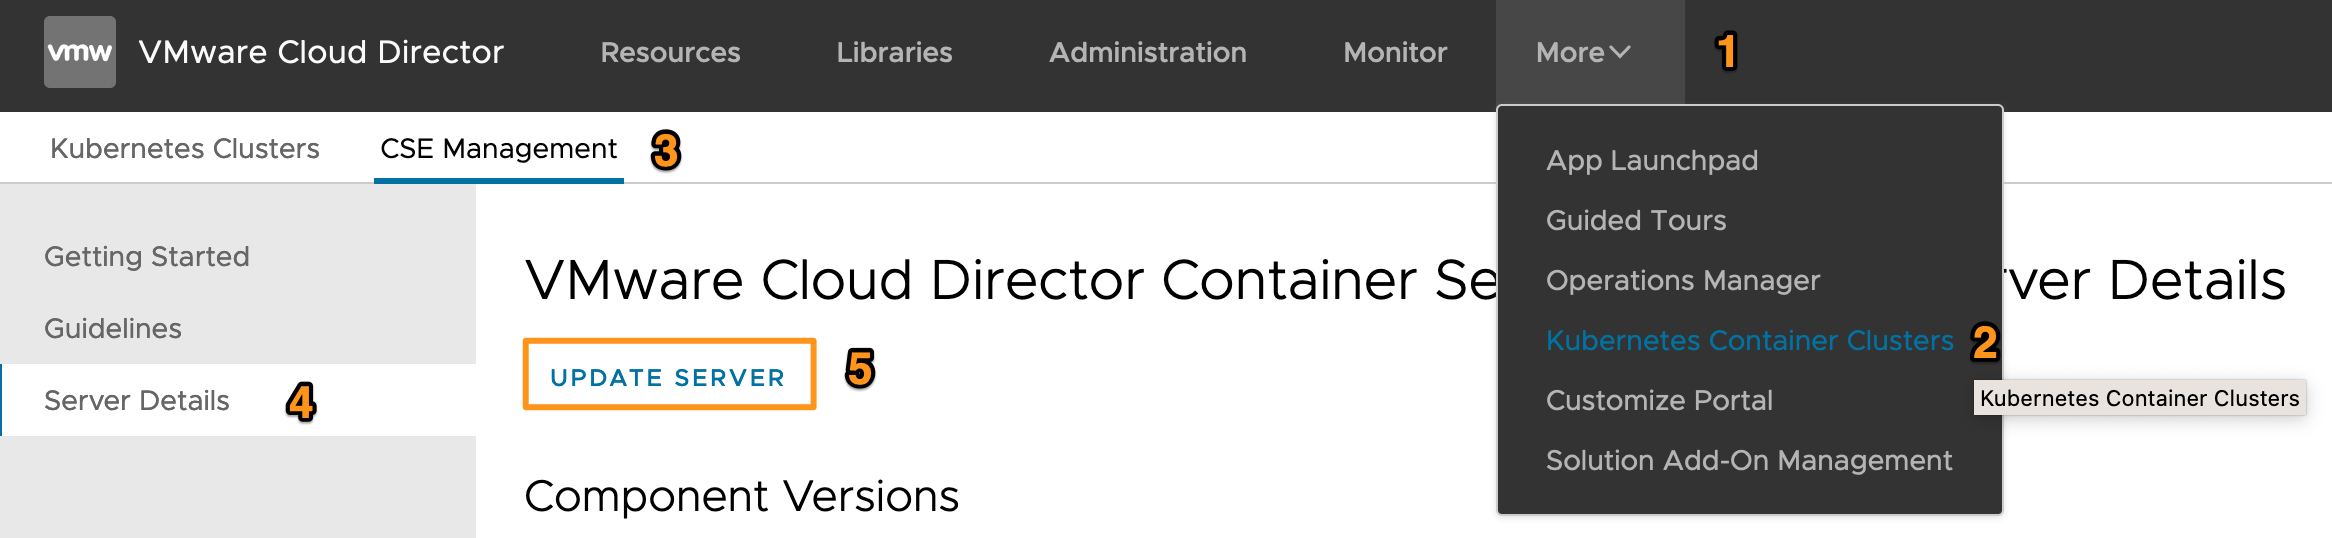
- Log into the Cloud Director
systemOrg as a Cloud Administrator. - Navigate to More > Kubernetes Container Clusters > CSE Management > Server Details and click Update Server
- Select Patch Version Upgrade and change the Container Storage Interface (CSI) Version from
1.3.0to1.3.2.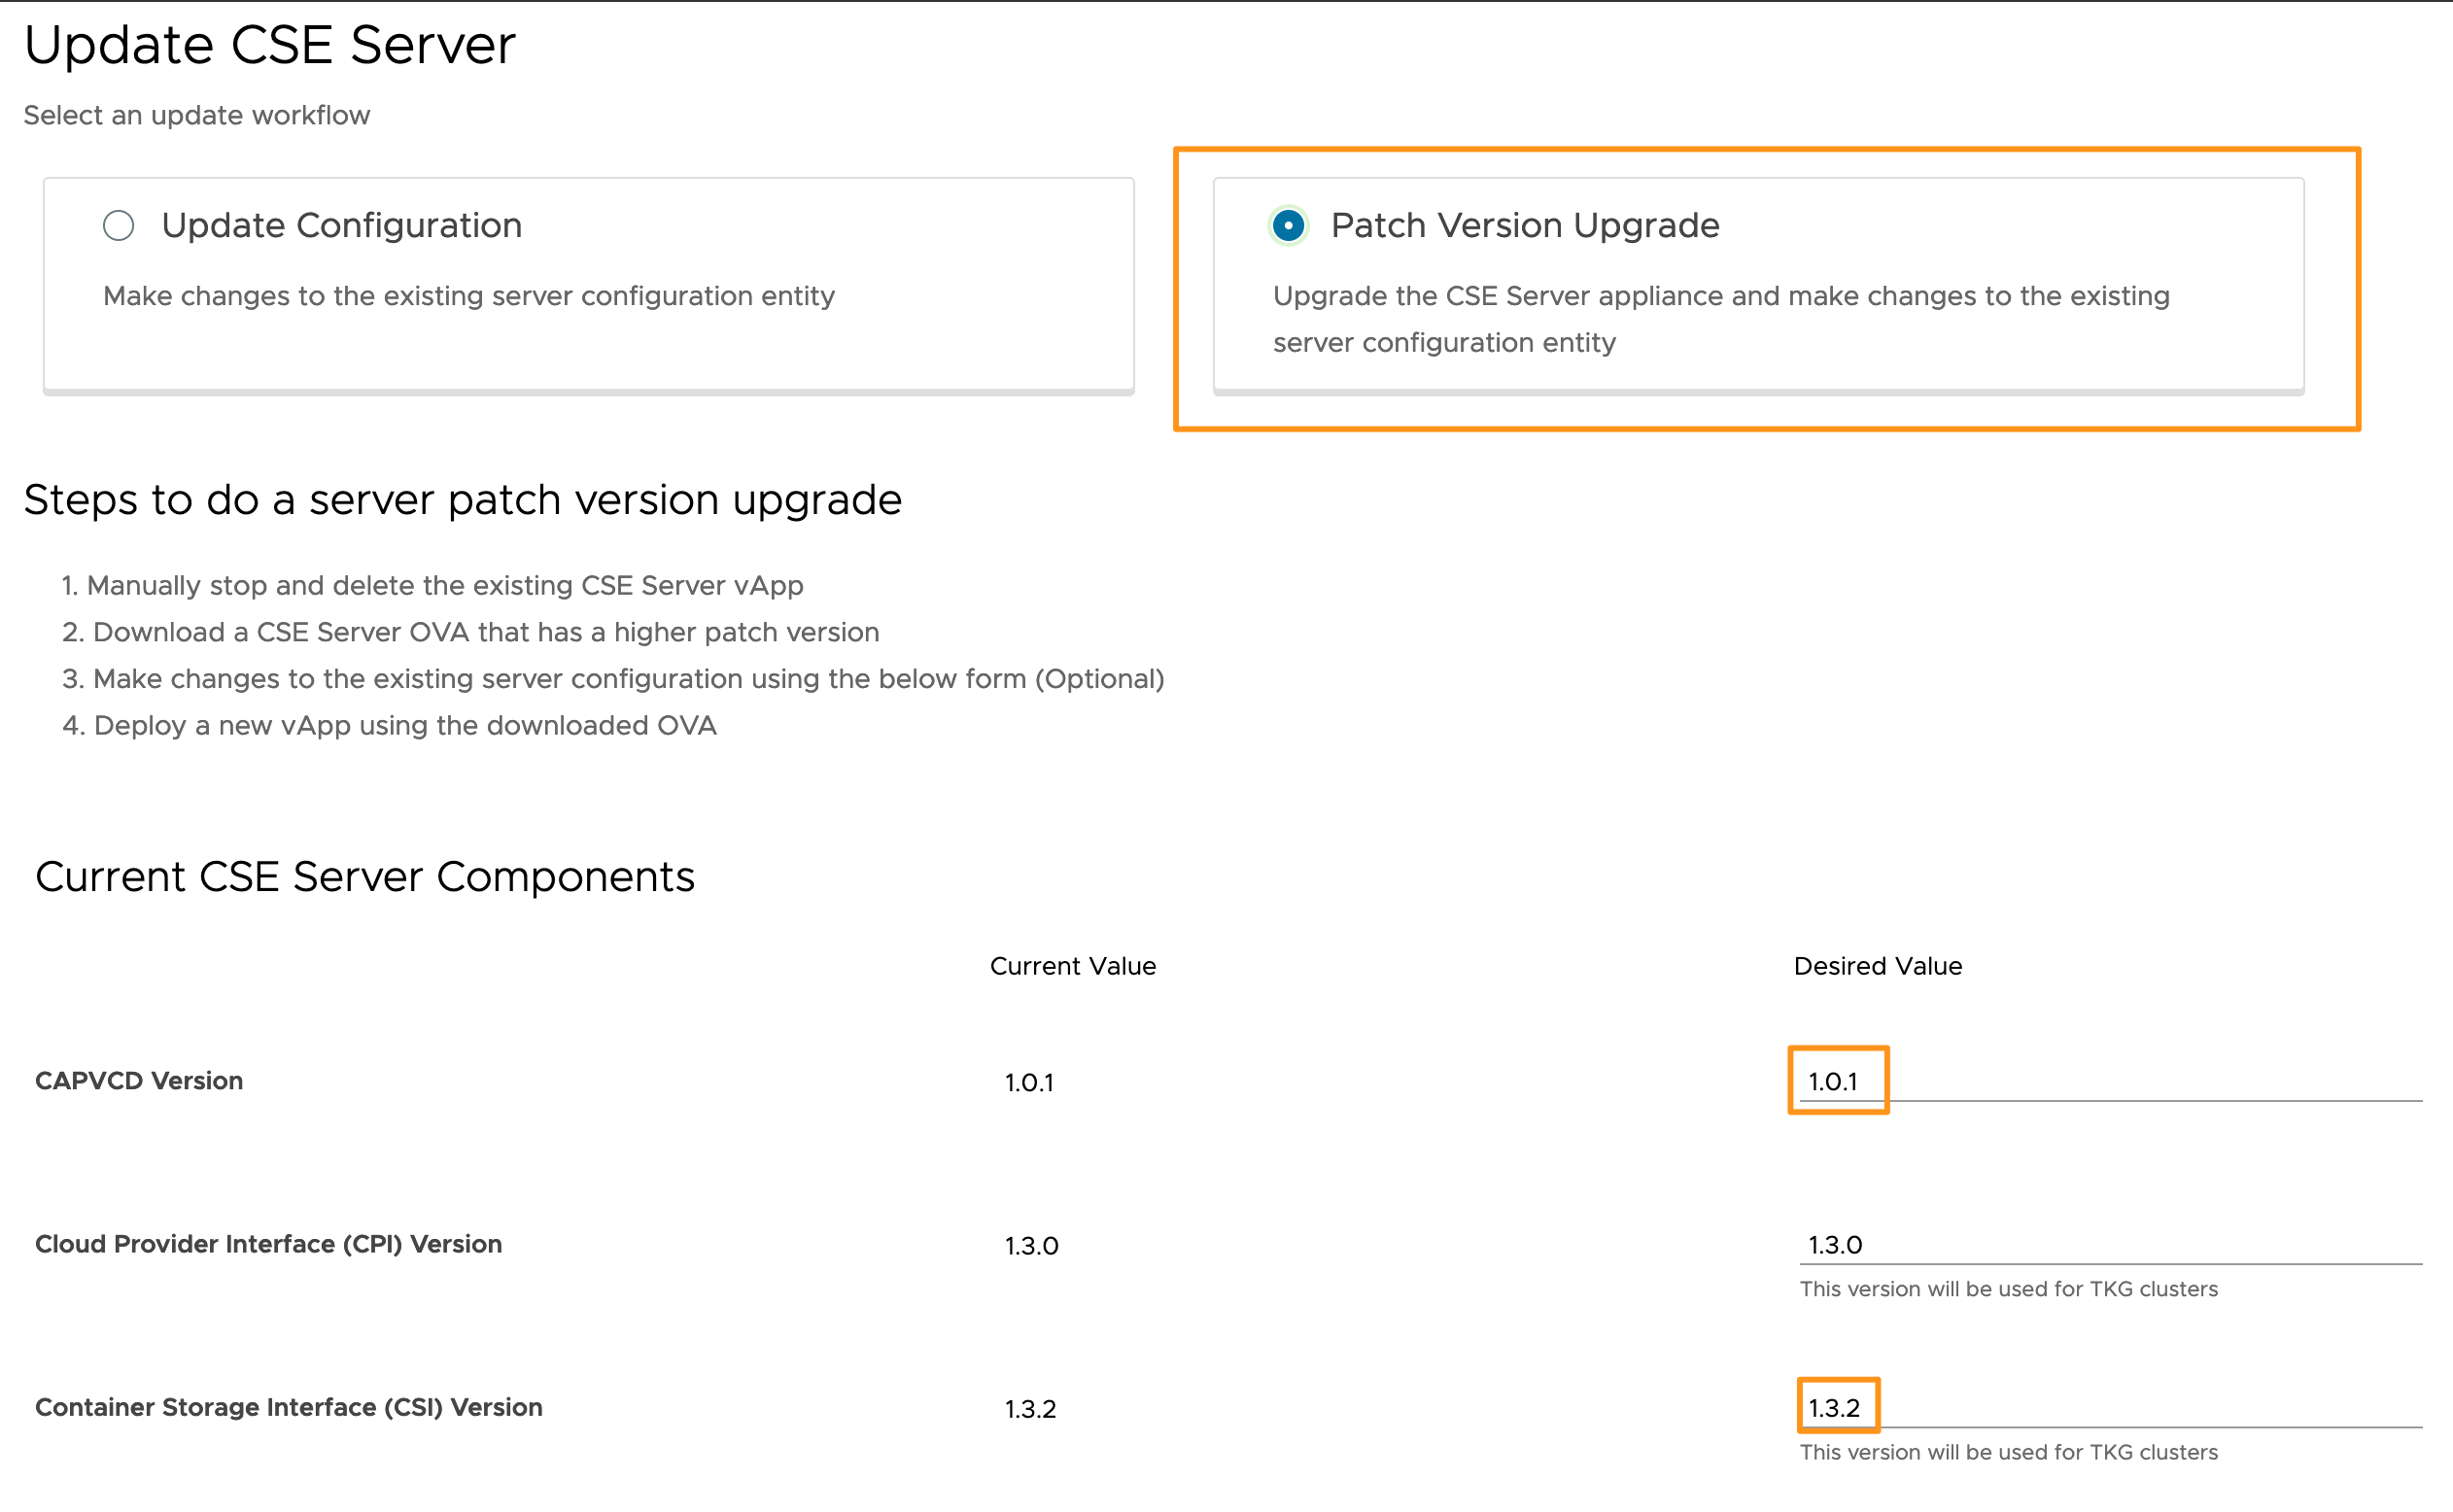 You’ll notice I also changed the CAPVCD Version from
 1.0.0to1.0.1. - Scroll down and click SUBMIT CHANGES. If you were successful:

Deploy the new CSE appliance
Note: Your experience here will depend on how close you’ve stuck to the official documentation during your initial deployment.
To upgrade the CSE appliance, as per the documentation we need to delete the old CSE appliance and deploy a new one. This isn’t as impactful as you’d imagine, as the CSE tasks will queue in VCD until CSE is back up and ready to process the tasks.
This process will also require you to have the CSE API token for the CSE Service Account. If not, you’ll have to make another one for the CSE Service Account
- While still logged into Cloud Director, locate and open the Org VDC that contains your existing 4.0.1 CSE appliance. For me, I have an Org VDC called “Core Services” for my CSE and ALP appliances.
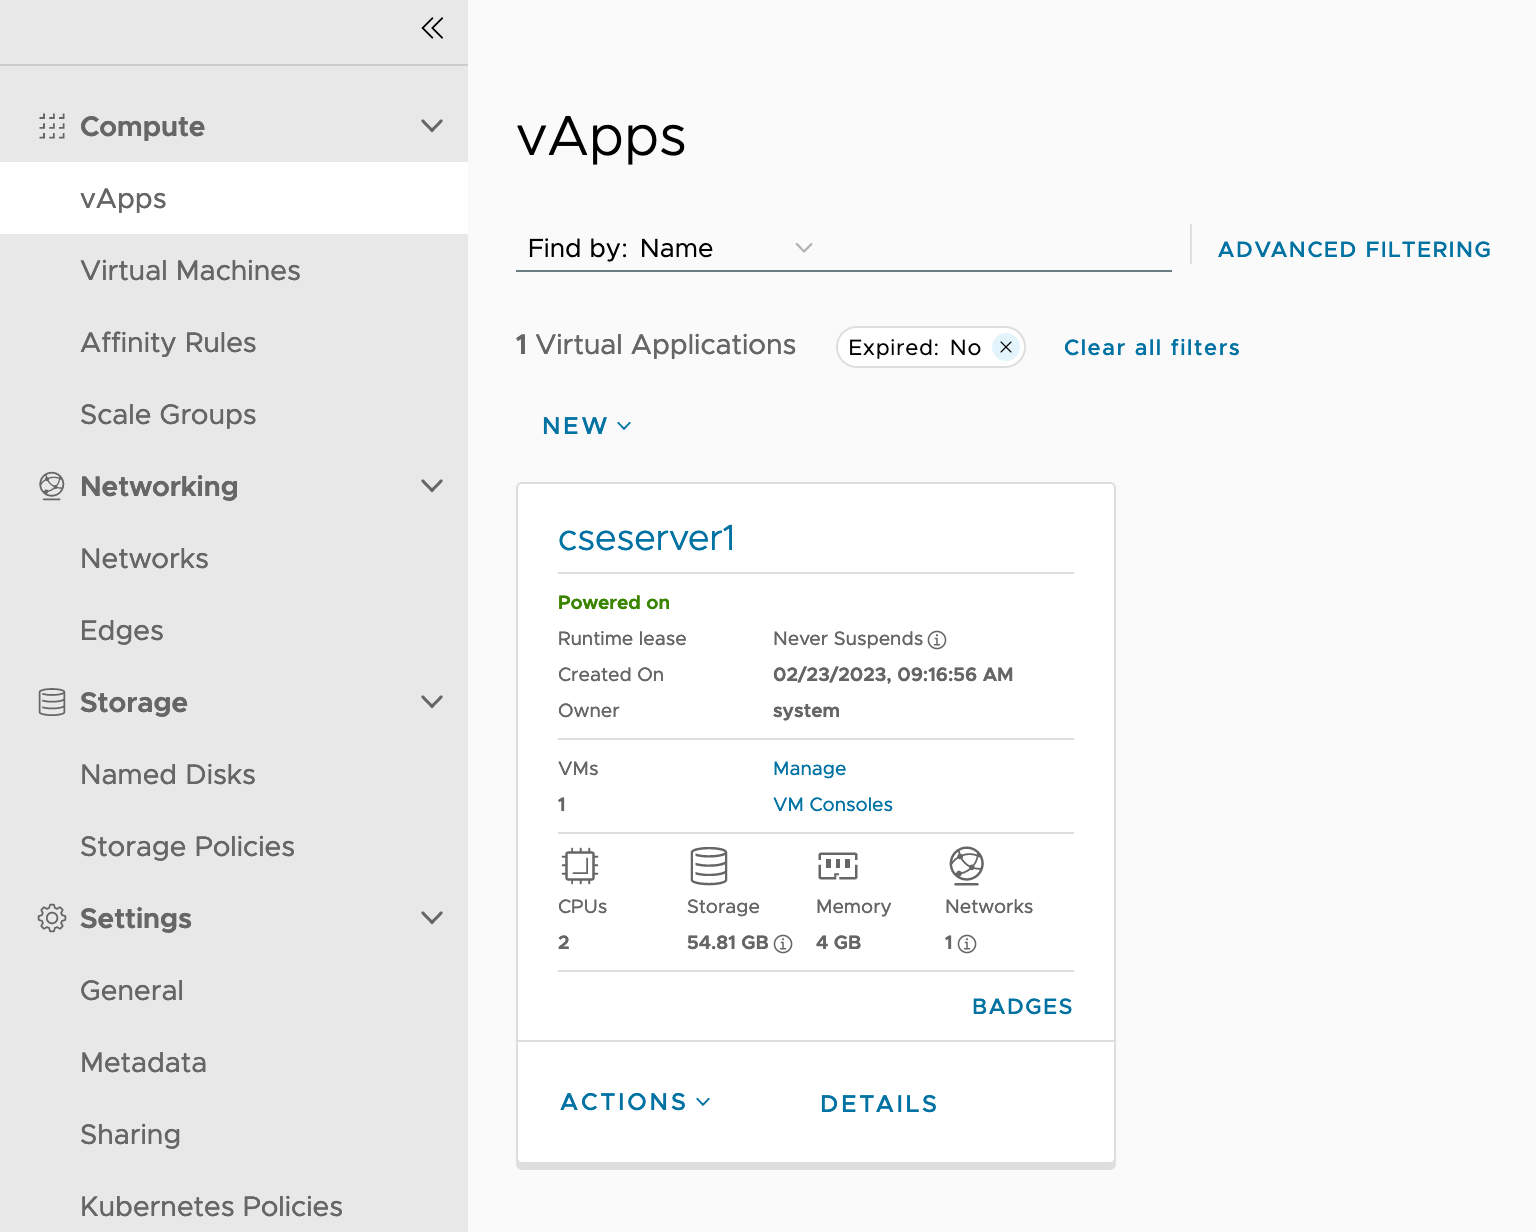
- Shutdown and delete the old CSE 4.0.1 appliance. I’m not including a screenshot here, you should know how to do that ;)
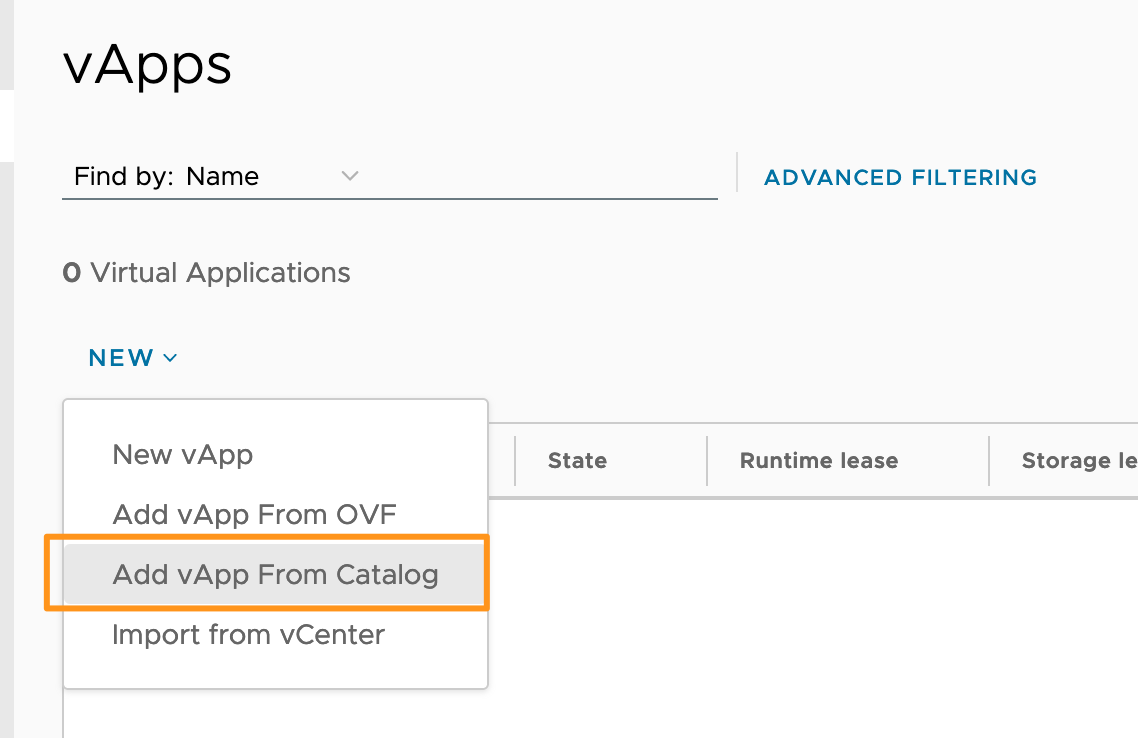
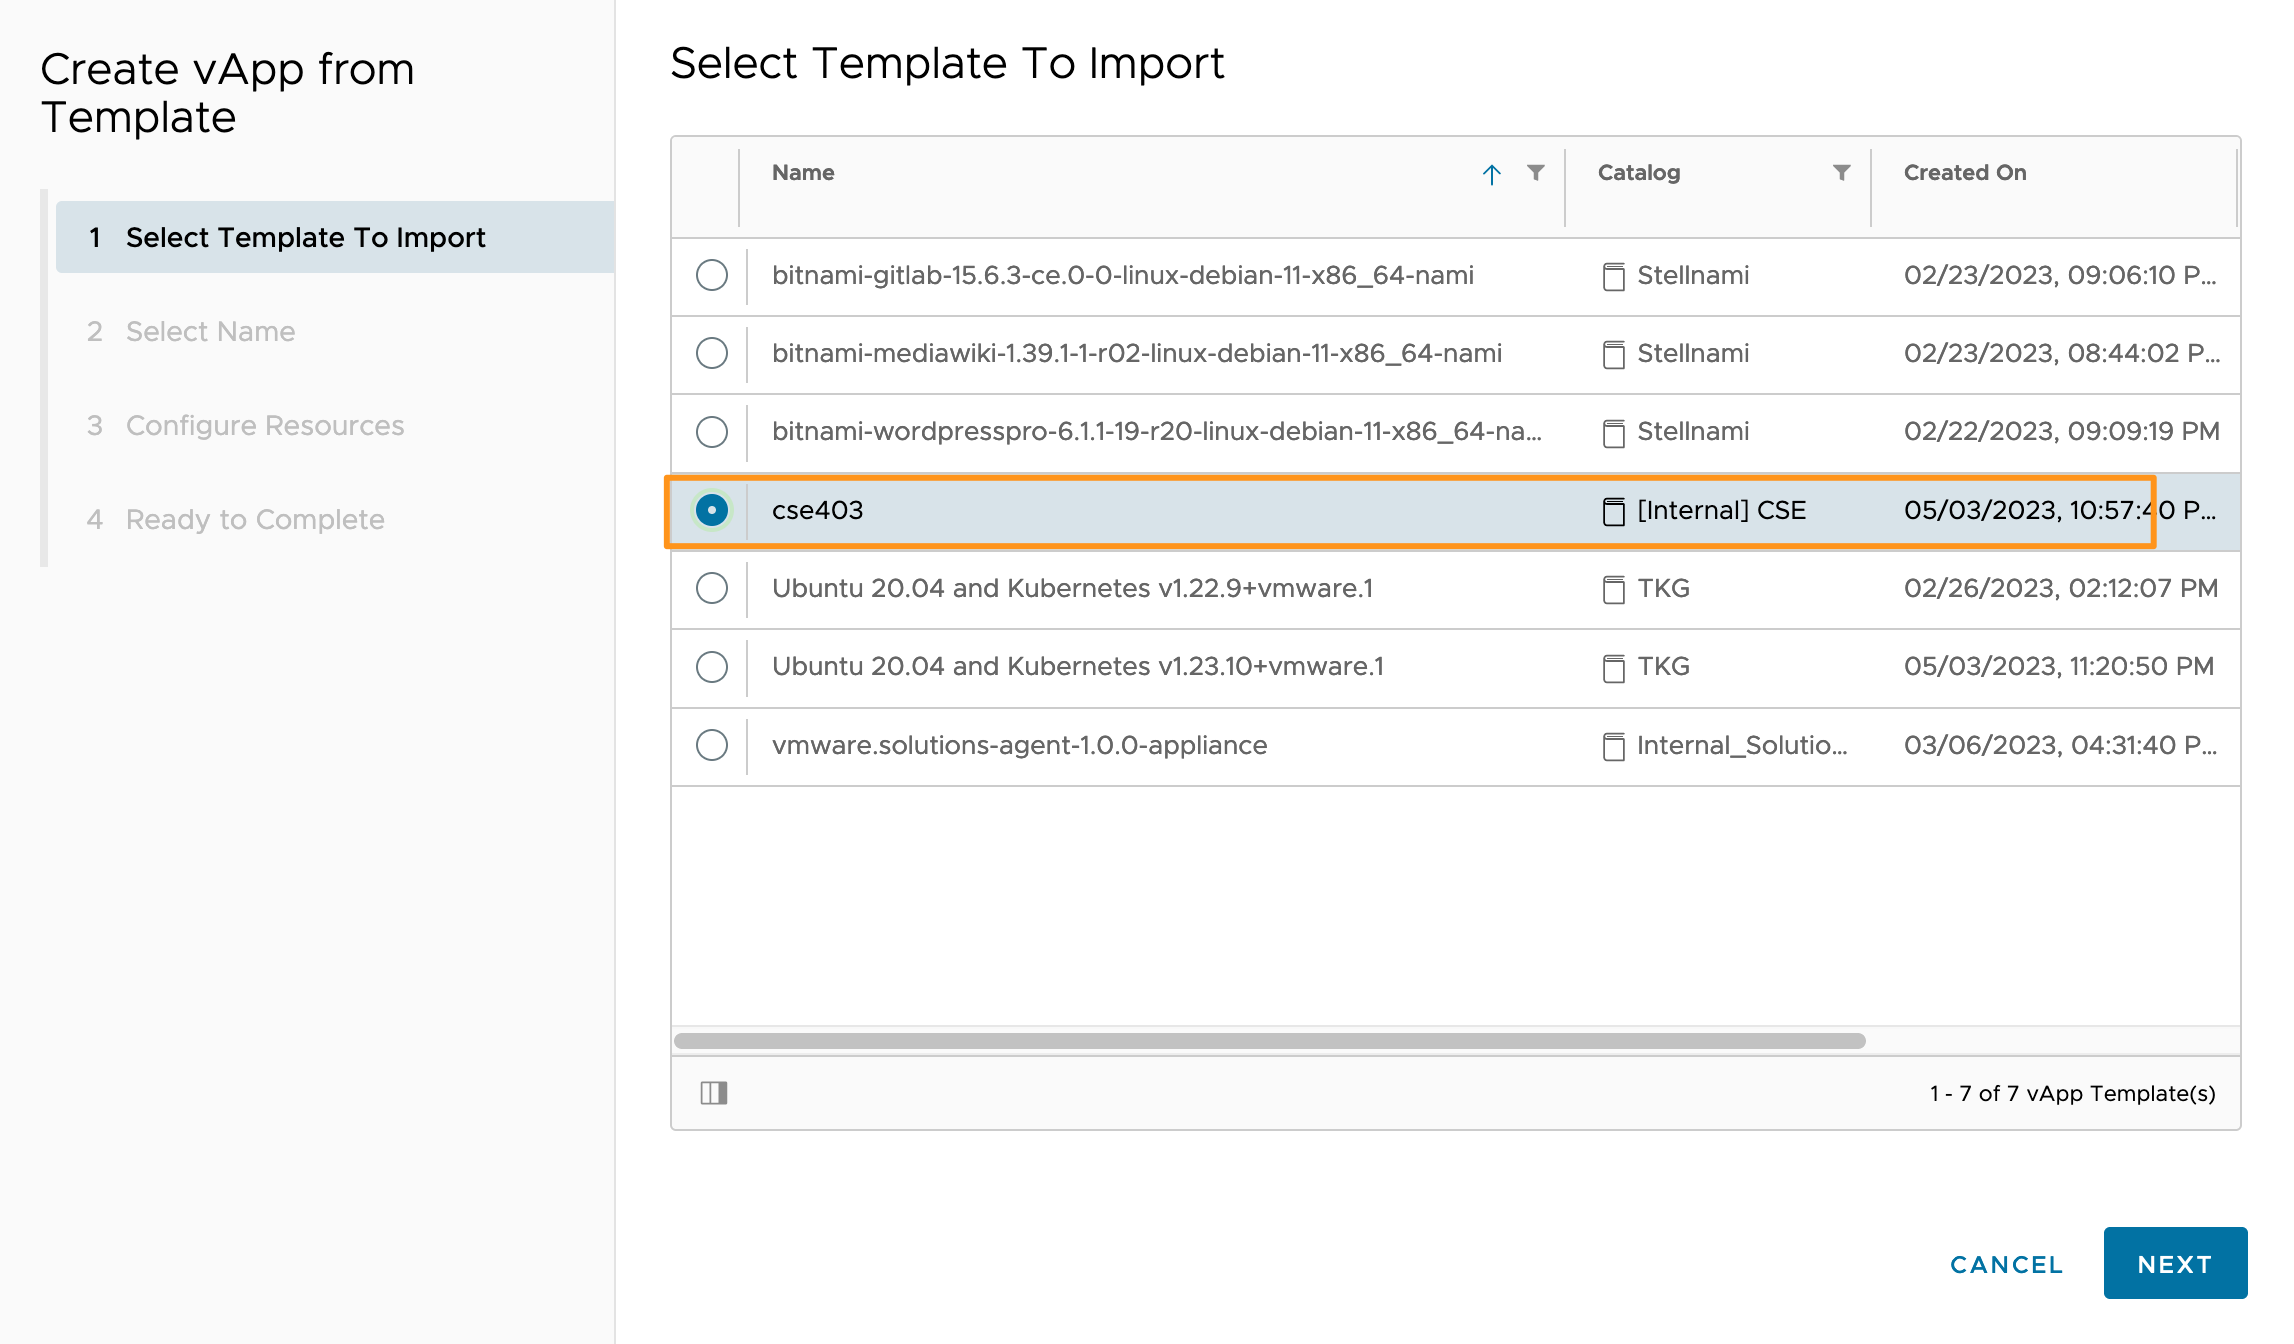
- Deploy a new vApp from the CSE 4.0.3 catalog item.
- Select the CSE 4.0.3 catalog item you uploaded and click NEXT
- Read and Accept the EULA for CSE and click NEXT
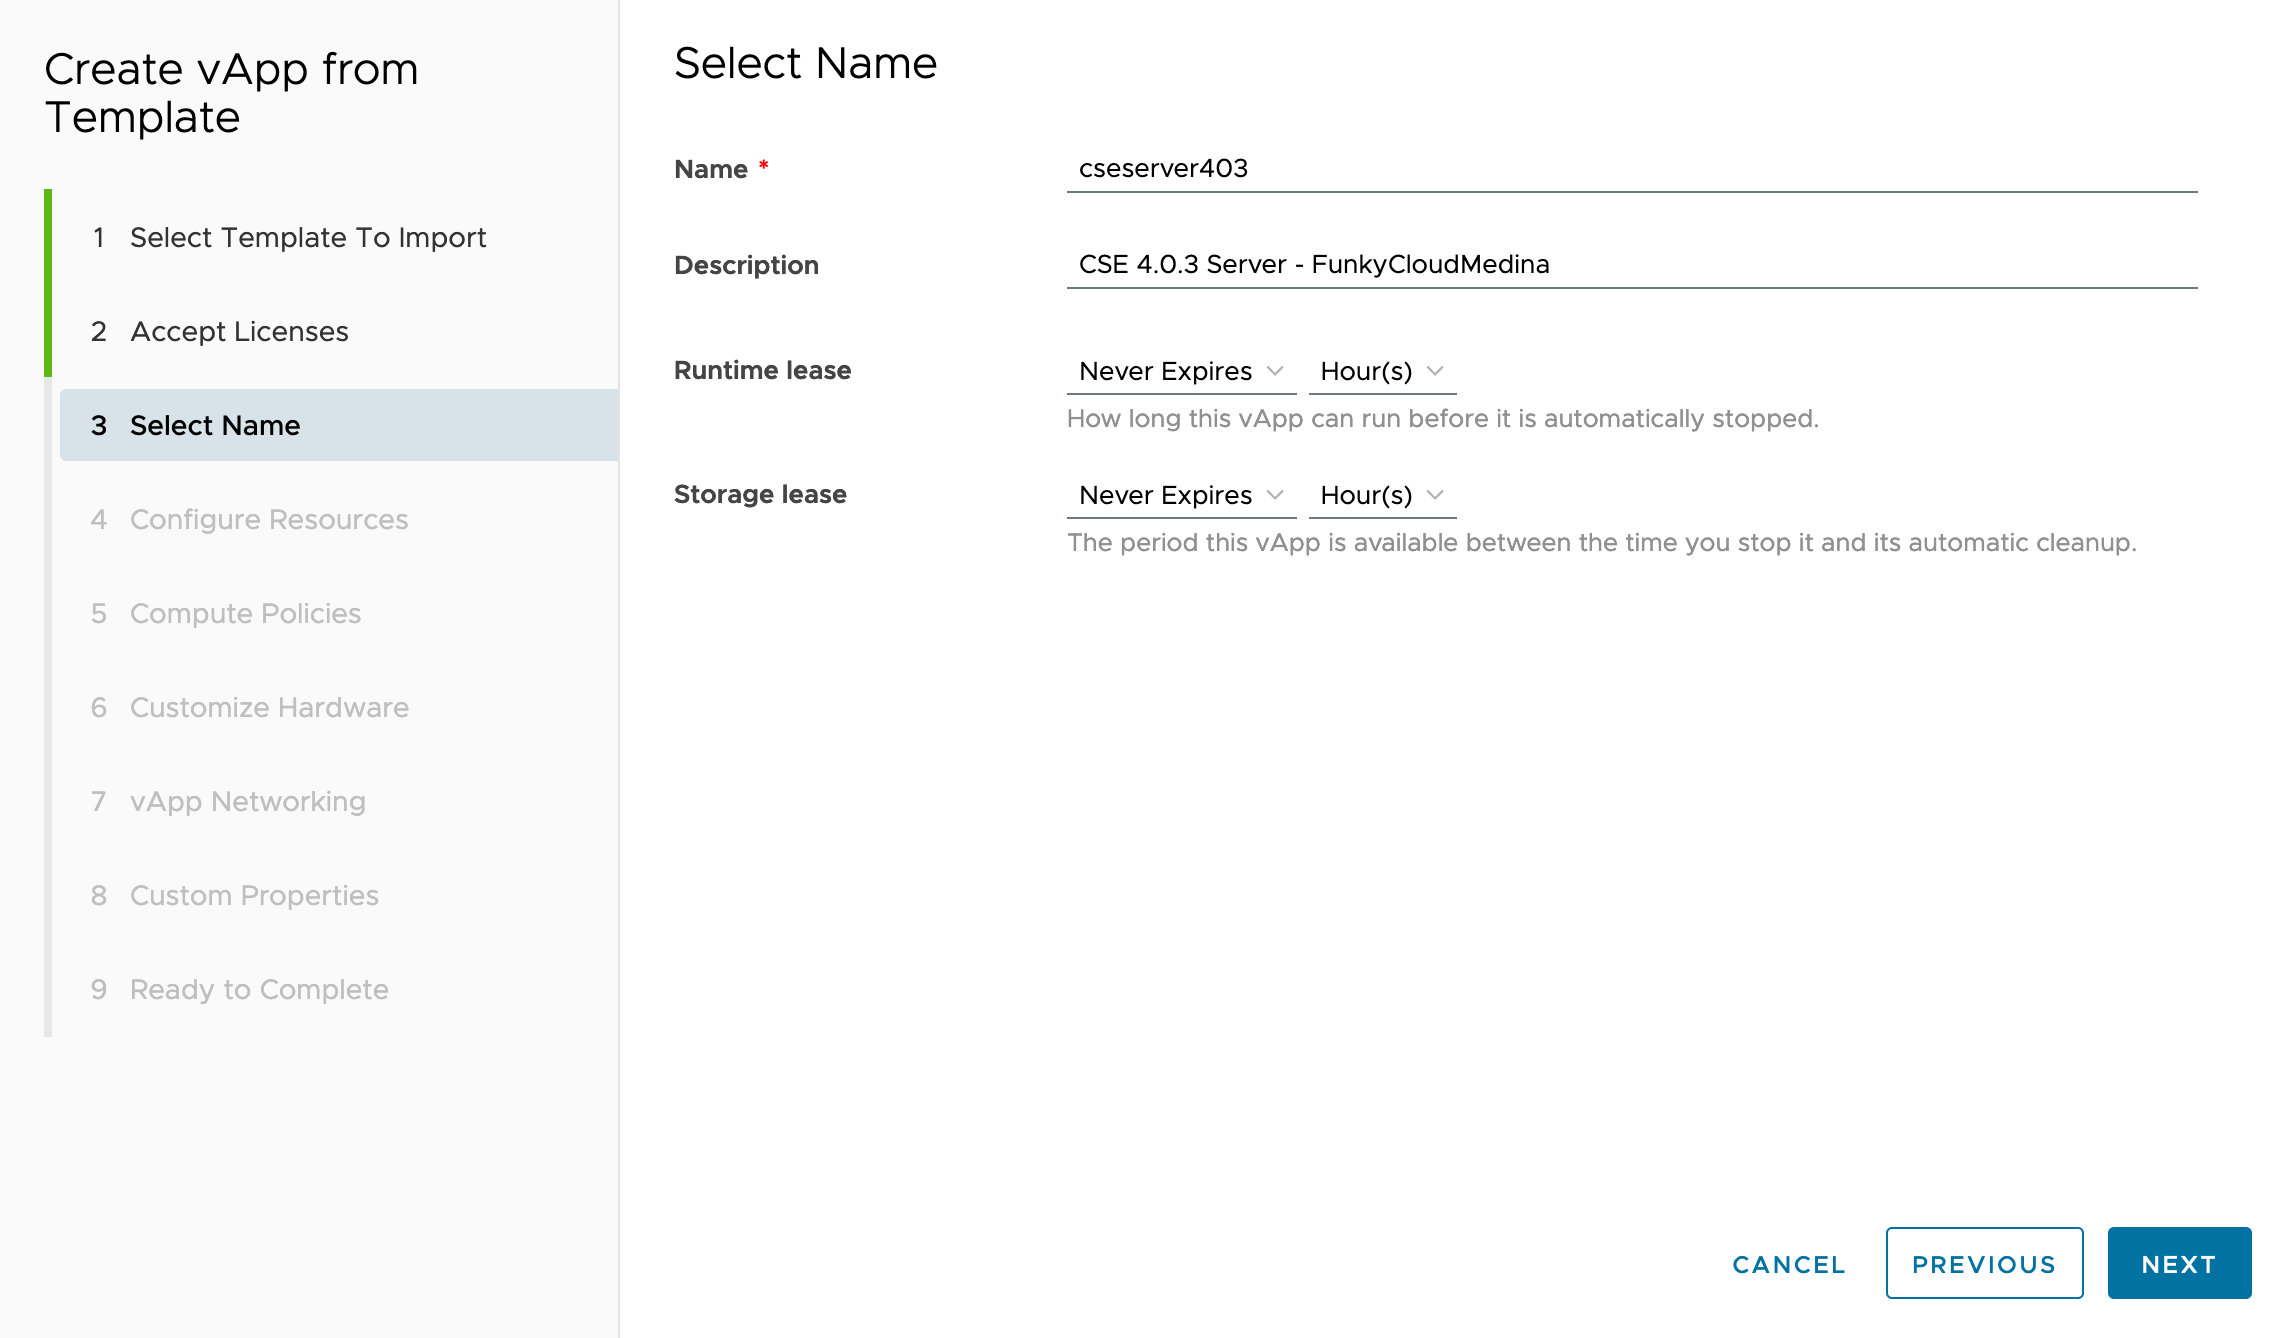
- Provide a Name and Description, and set the lease times to Never Expires
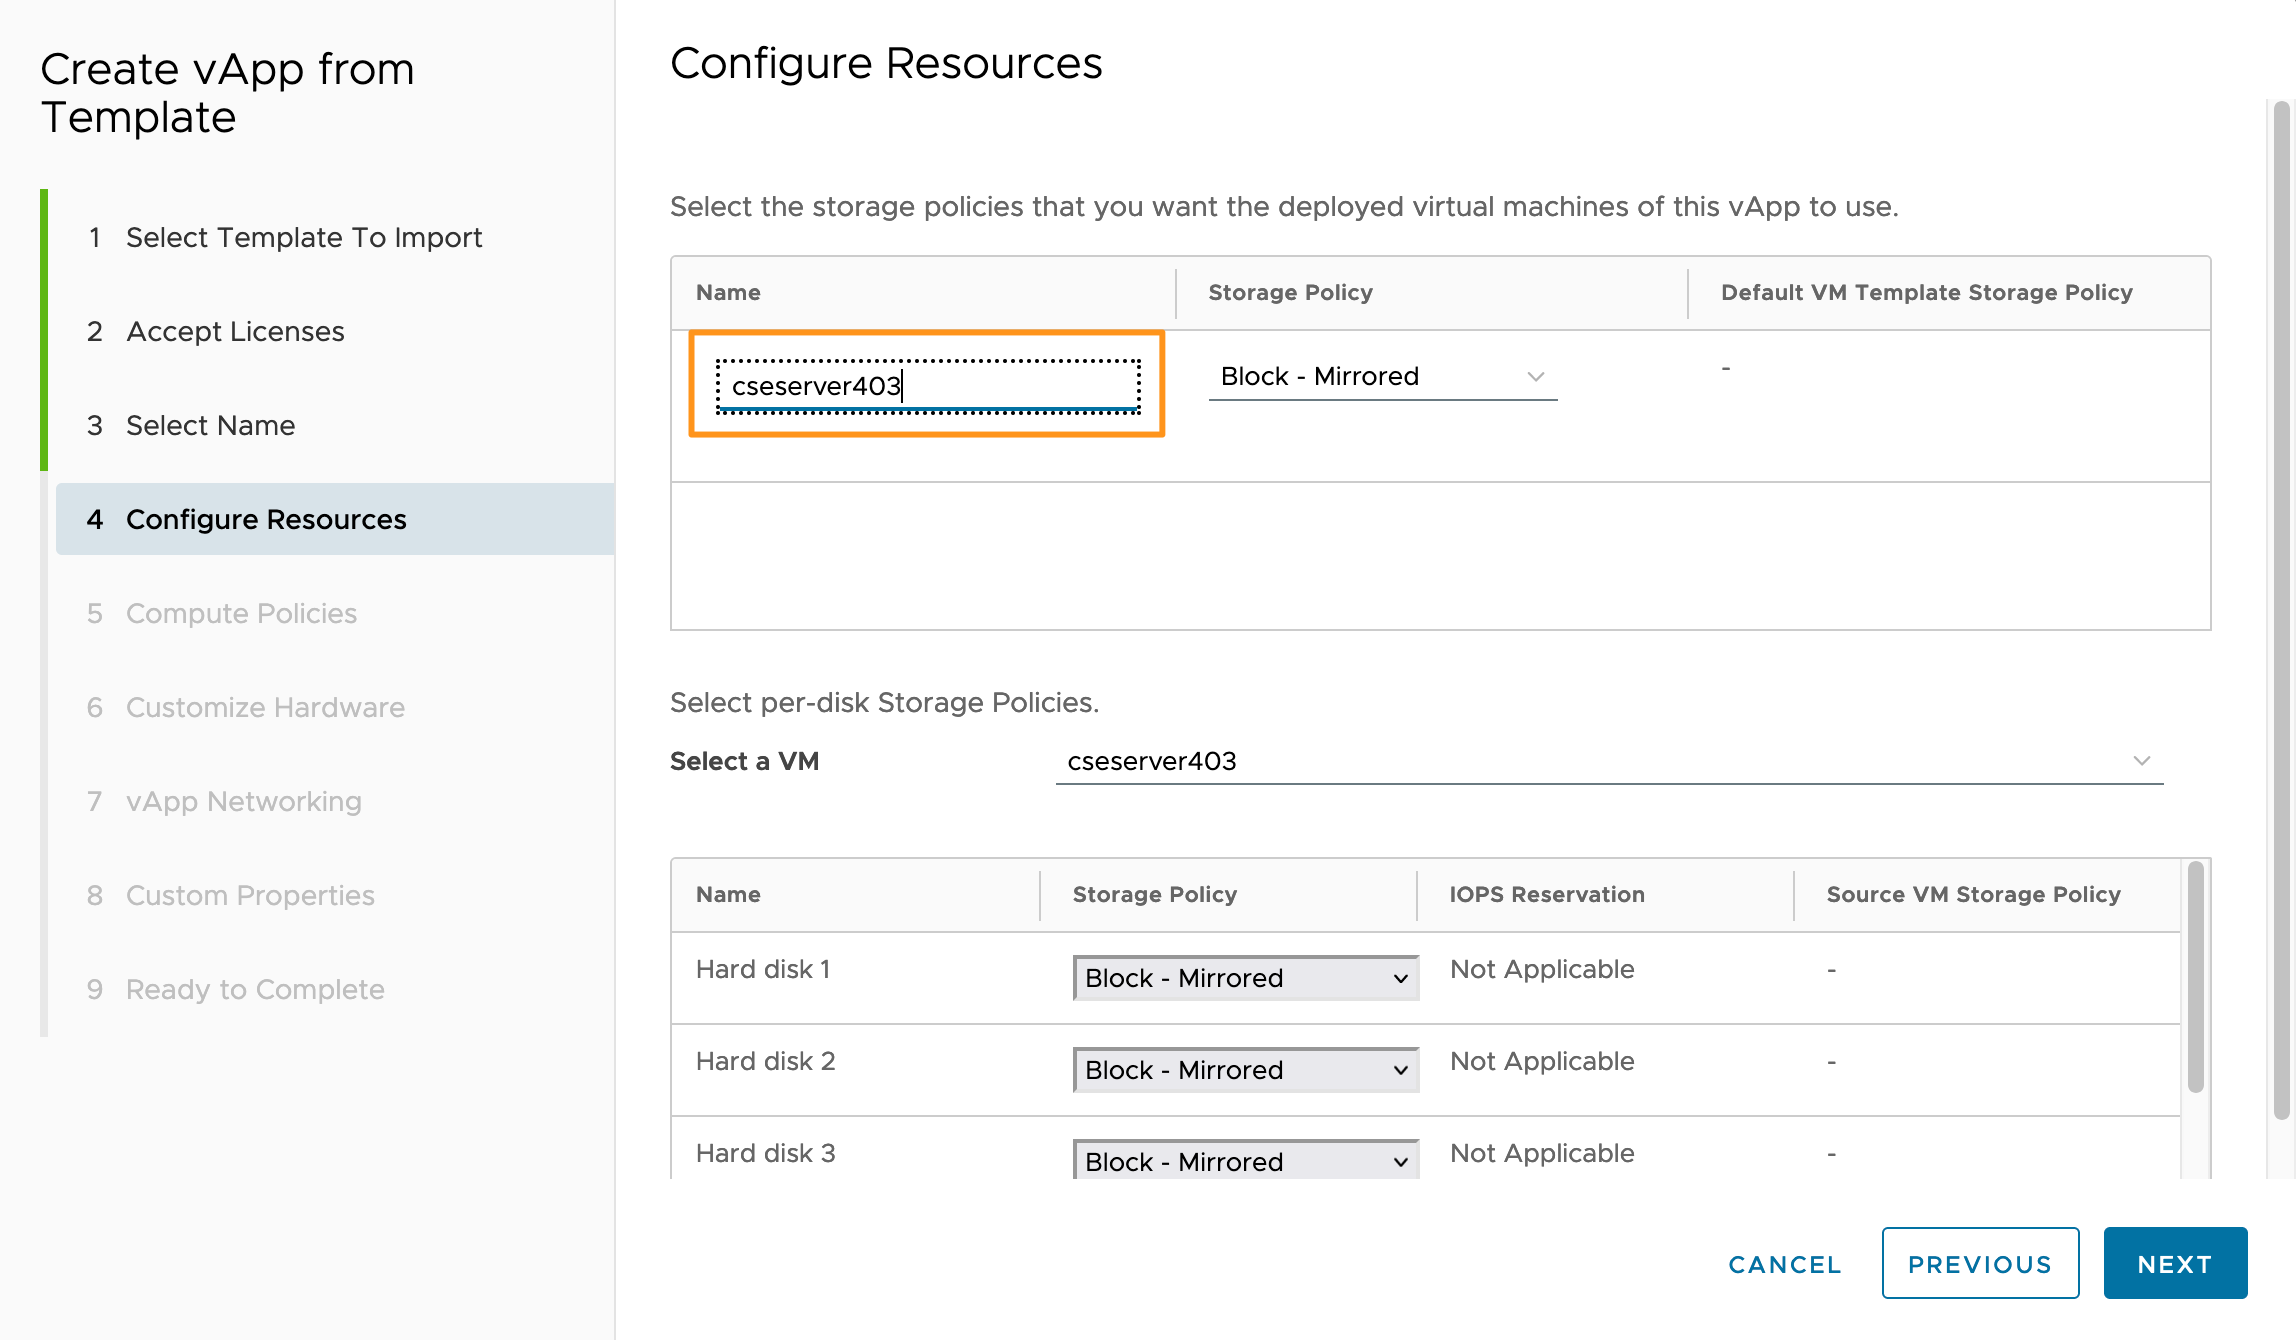
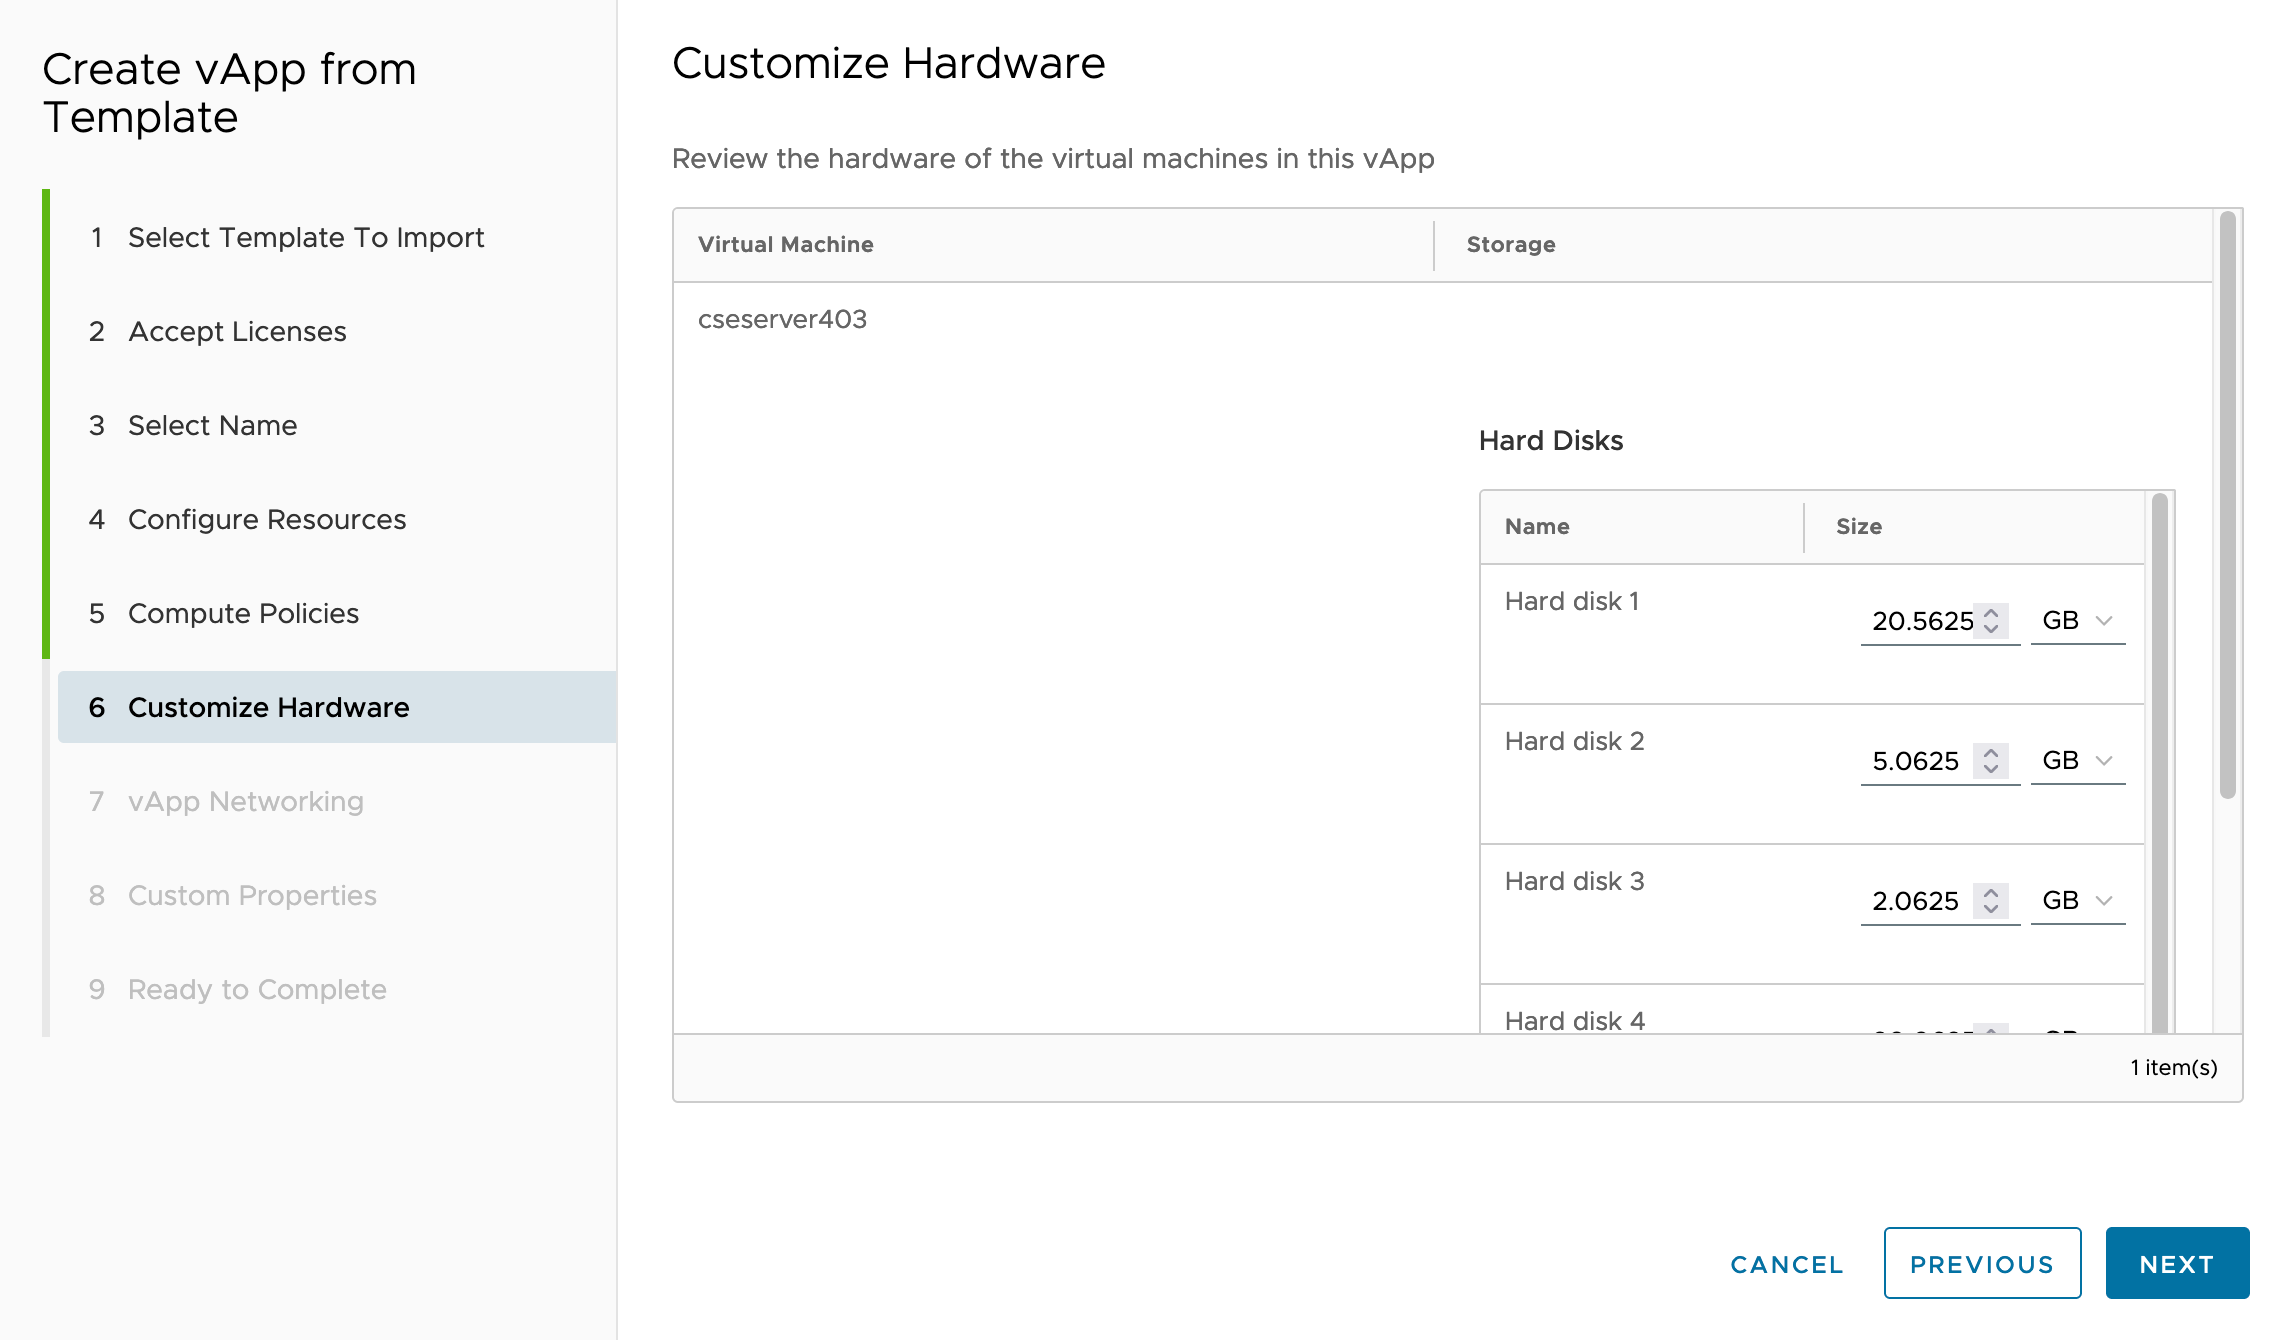
- Name the VM within the new vApp and configure your storage options. Click NEXT.
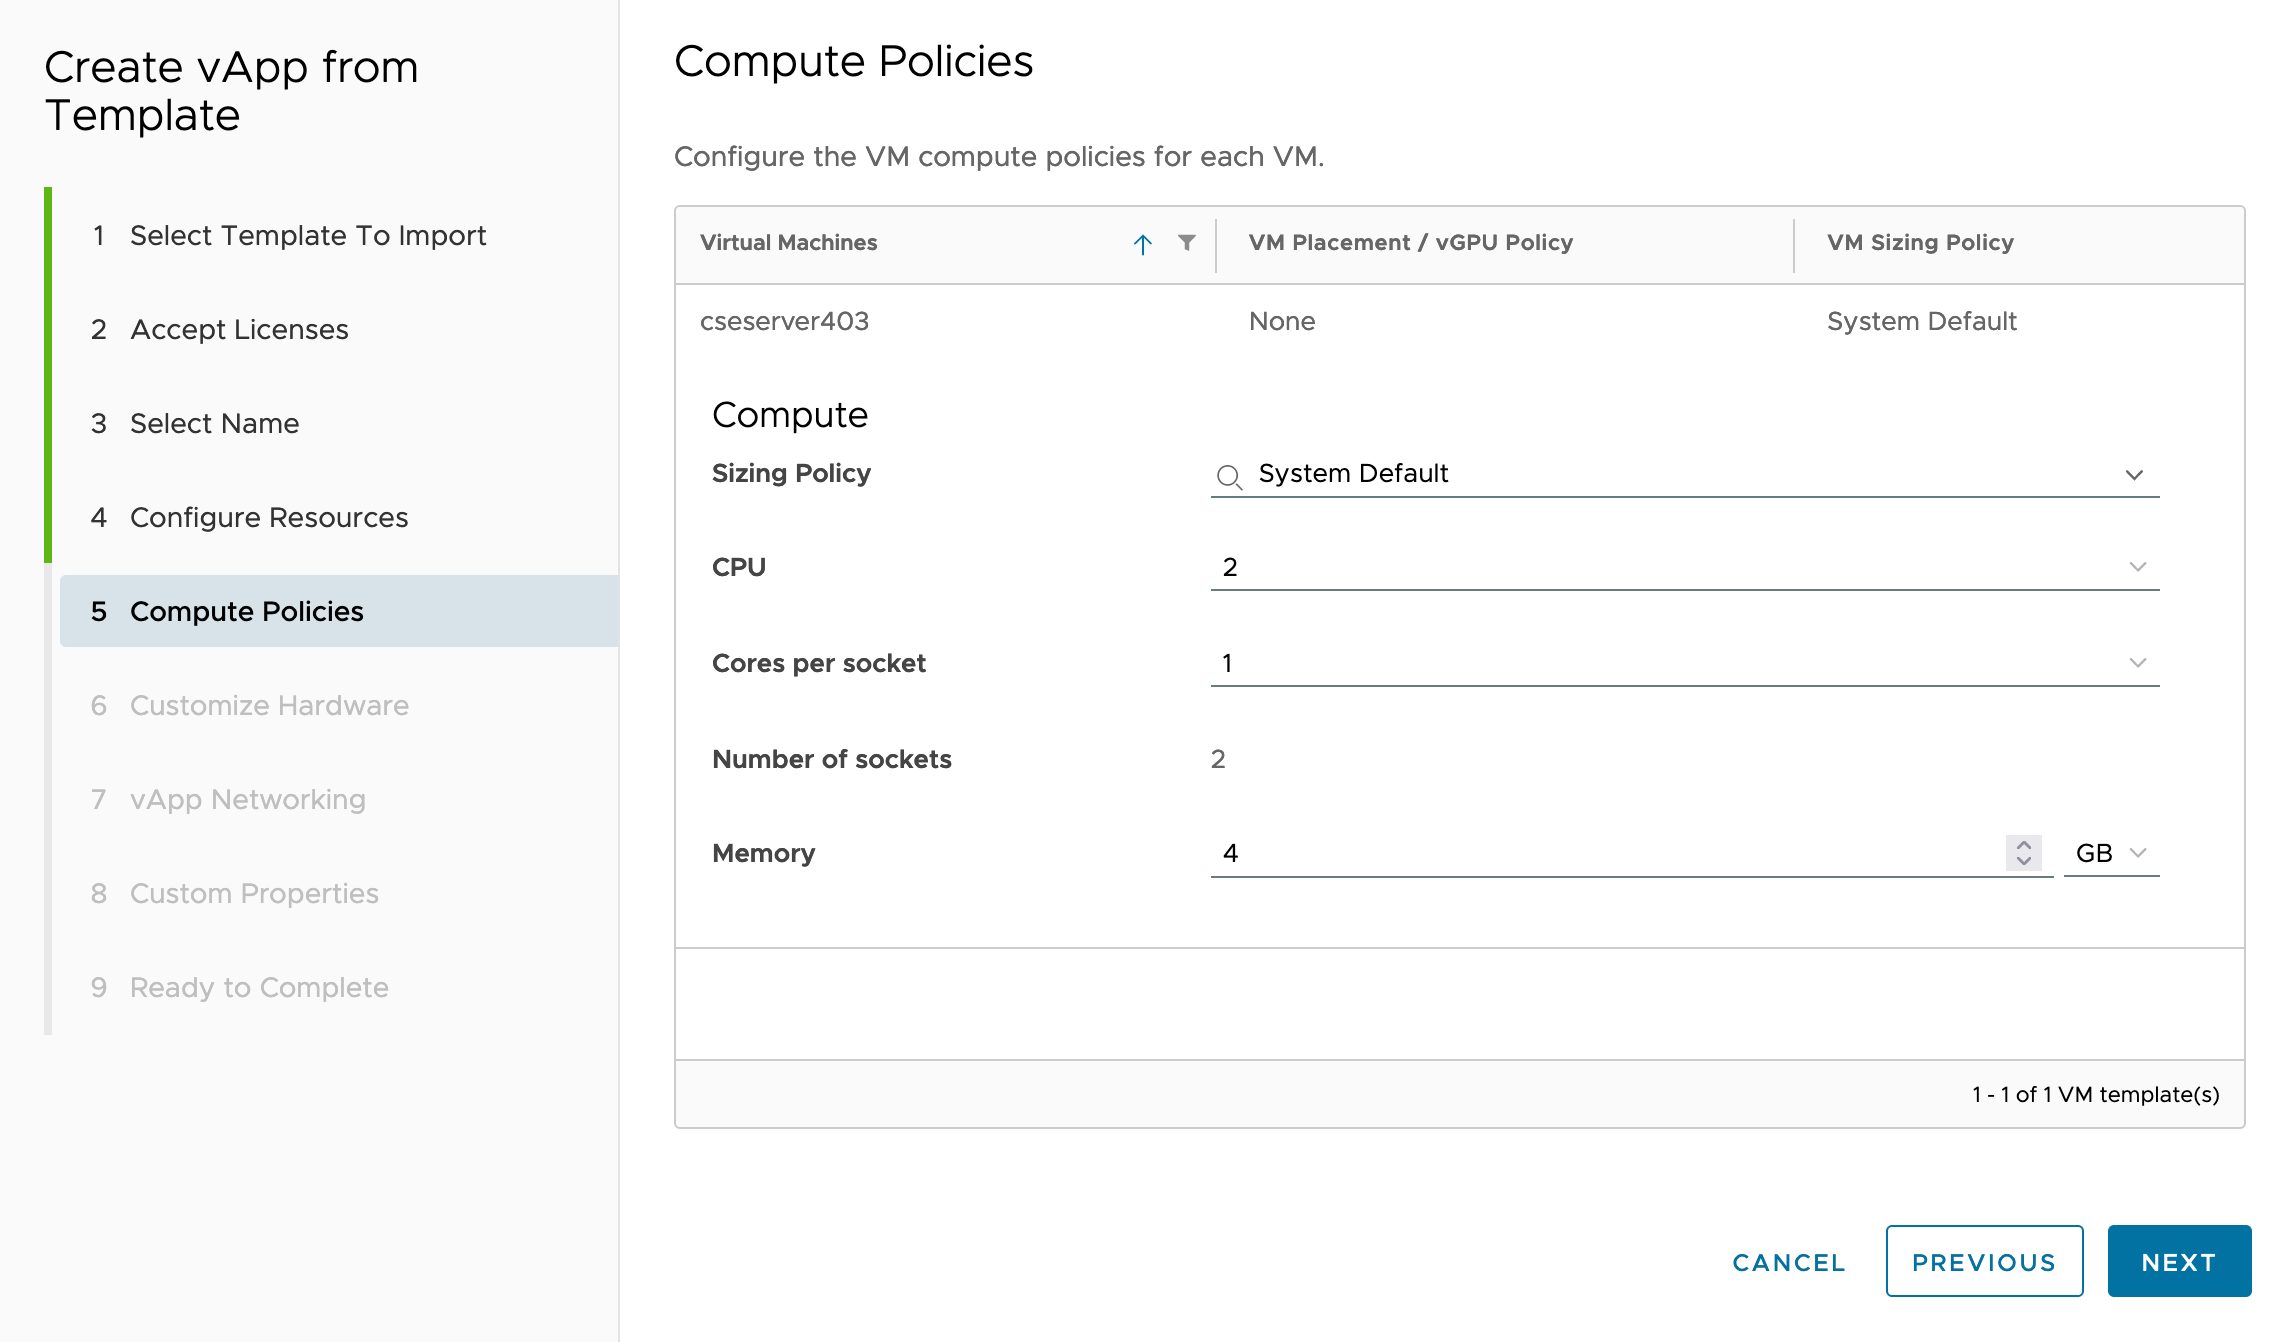
- Configure the compute settings of the VM and click NEXT
- Leave the storage configuration alone, and click NEXT.
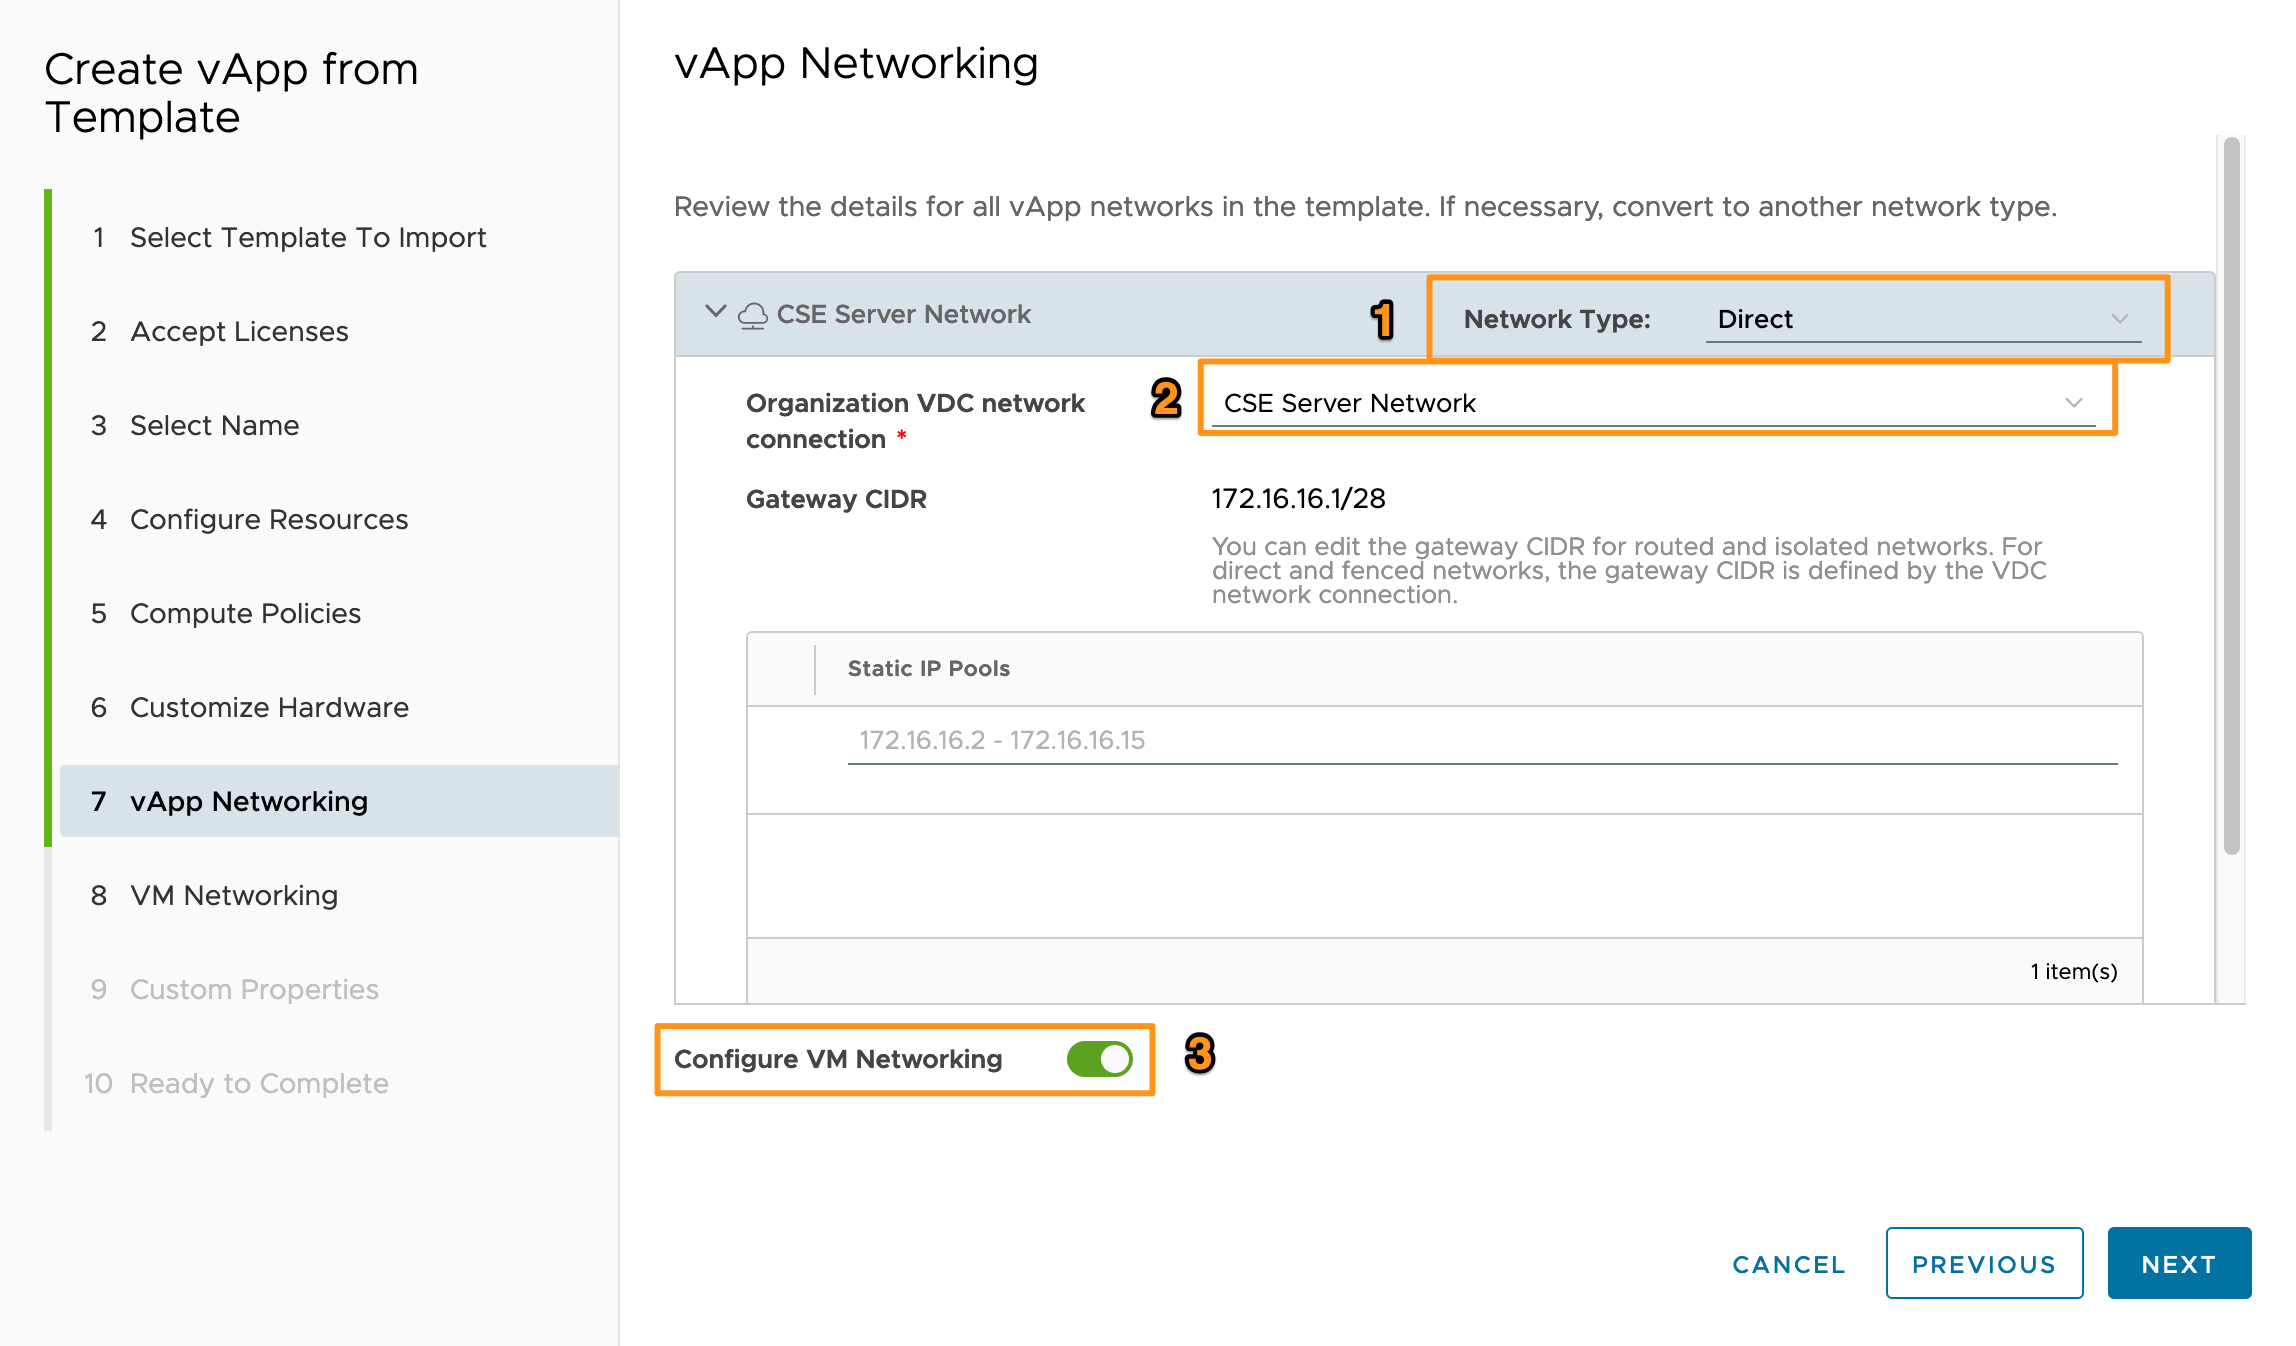
- For the vApp Networking, this’ll depend on your environment. But most commonly, you’ll need to set Network Type to Direct (1), select the Org vDC Network (2), and set Configure VM Networking to Enabled. Click NEXT.
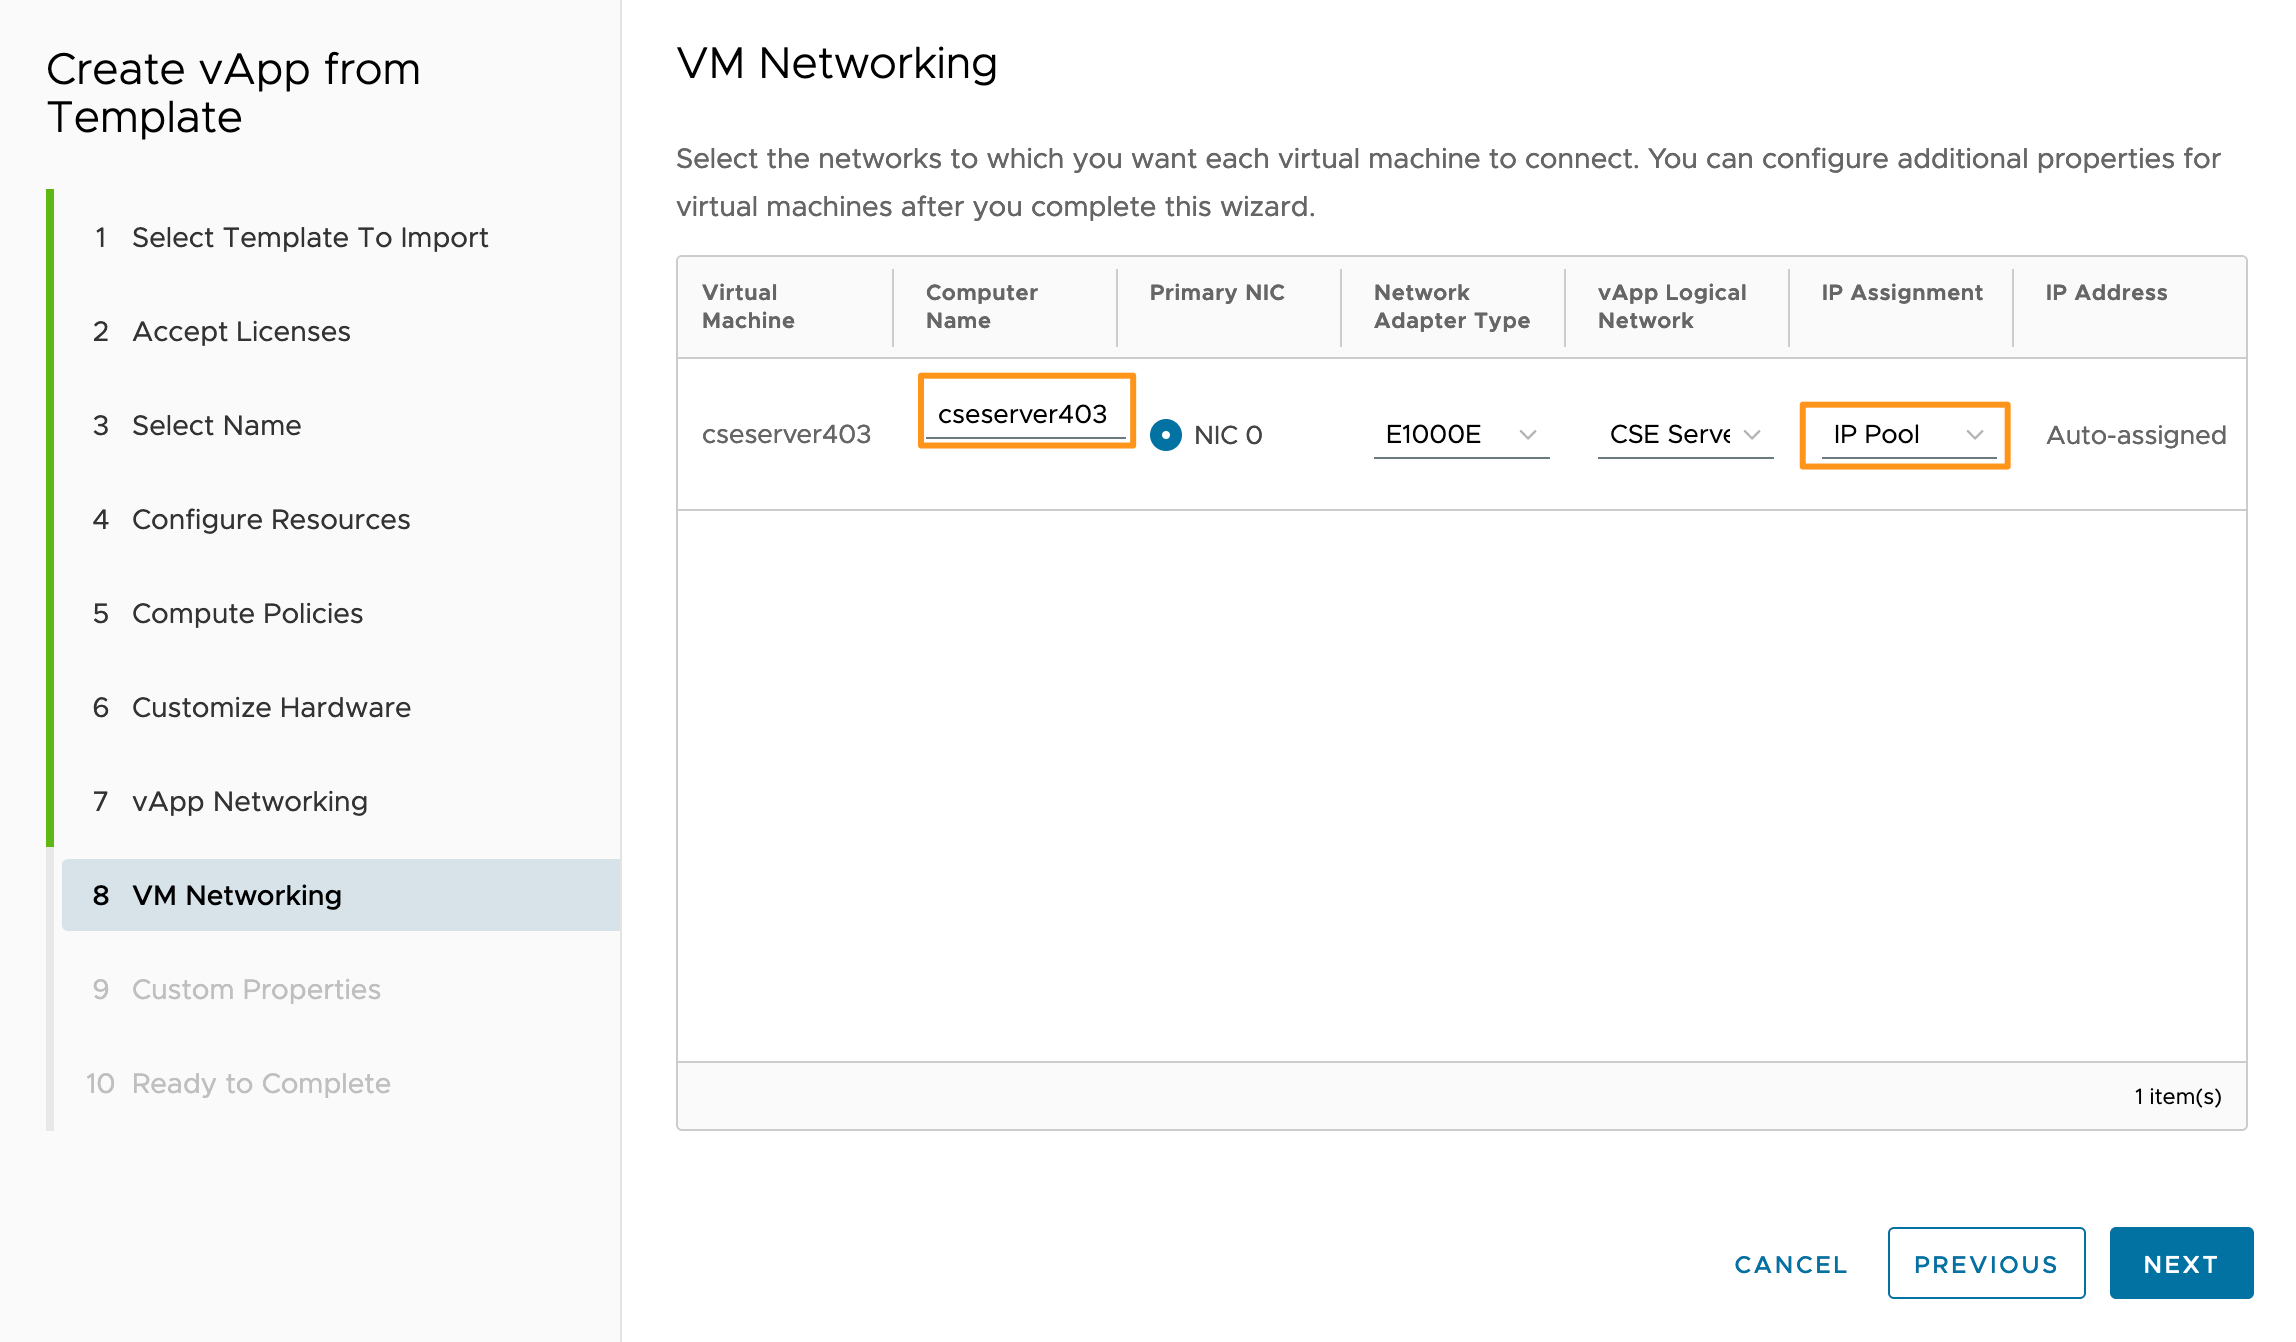
- Again, the specifics of your VM network configuration will depend on your environment. You’ll need to set the Computer Name which will be the guest hostname. If your attached Org VDC network has DHCP, leave the default setting. For my environment, I’m using IP Pools, so I needed to change the IP Assignment to IP Pool. Click NEXT.
- On the Custom Properties page, fill out the:
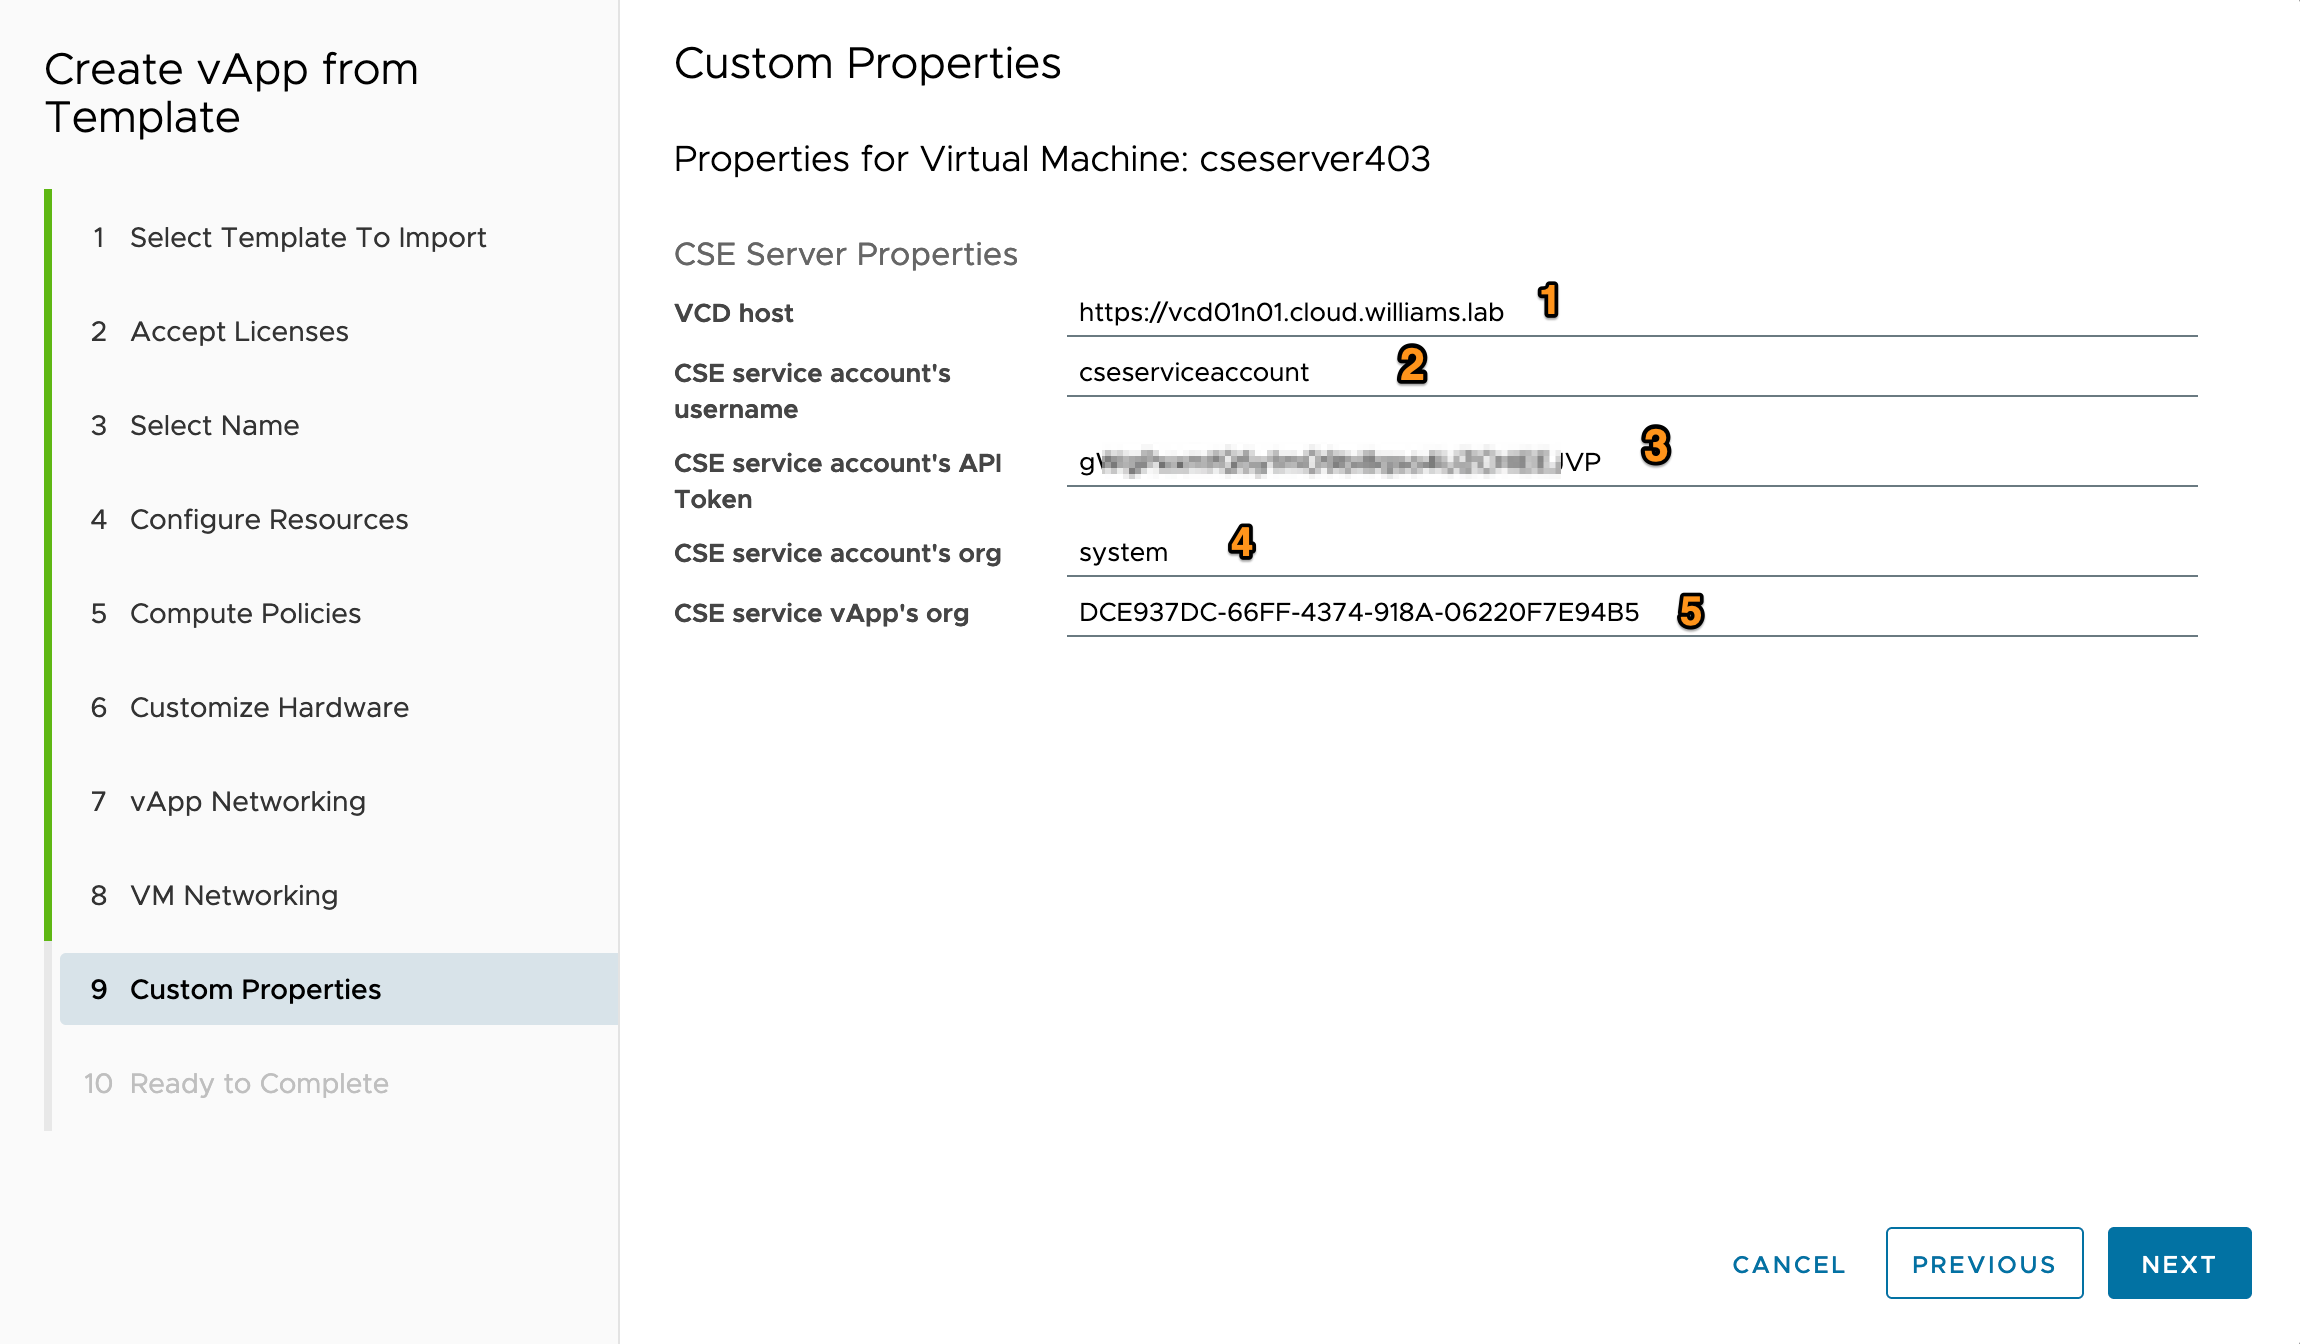
- VCD FQDN for your VCD deployment
- The CSE Service Account username.
- CSE Service Account API Token created for the CSE Service Account.
- The CSE Service Account organisation. As the documentation states the CSE Service Account needs to exist in the System org, leave the org at the default of
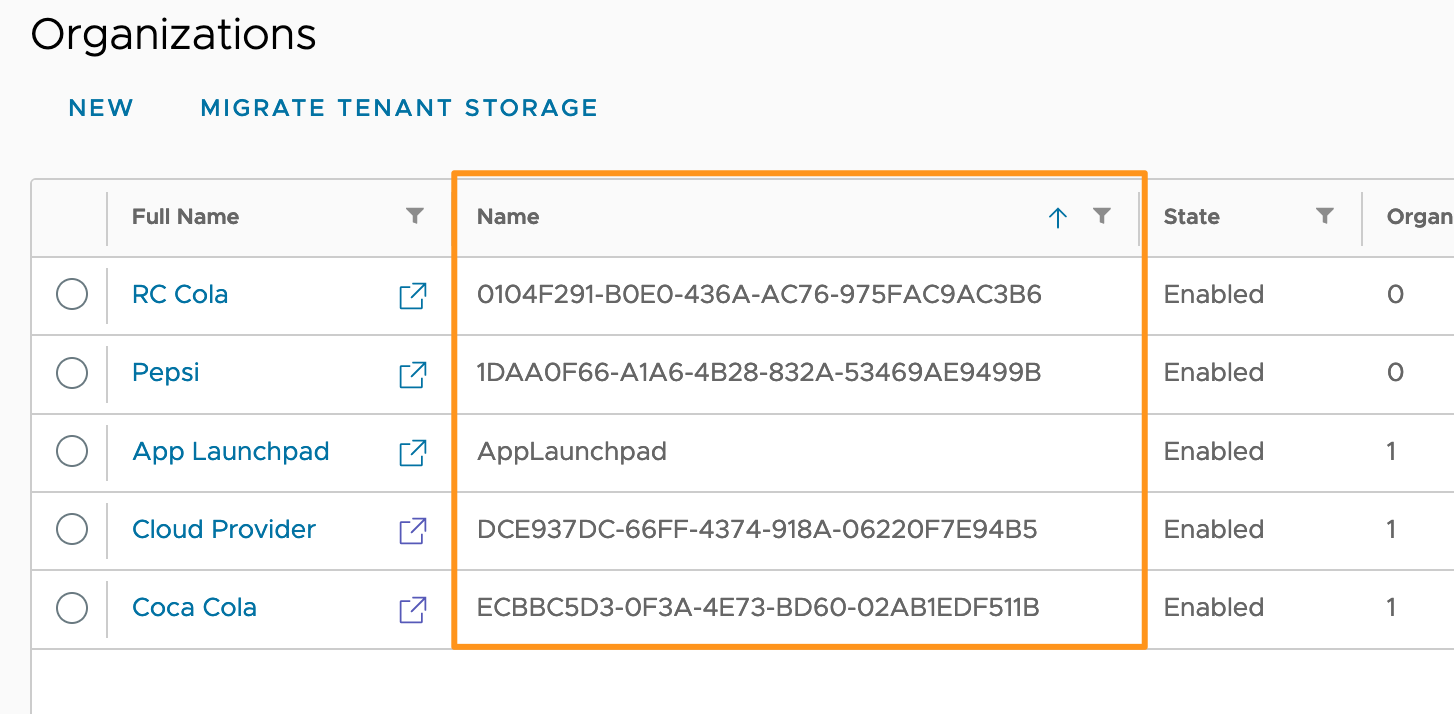
system. - CSE Service vApp’s Org - I use UUID’s for the Org “Name” (not the full name). Looks cooler. The Org name required is the Org your CSE vApp is being deployed into. It’s this value in the Organisation list:
- Click NEXT and FINISH when you’re happy with the values.
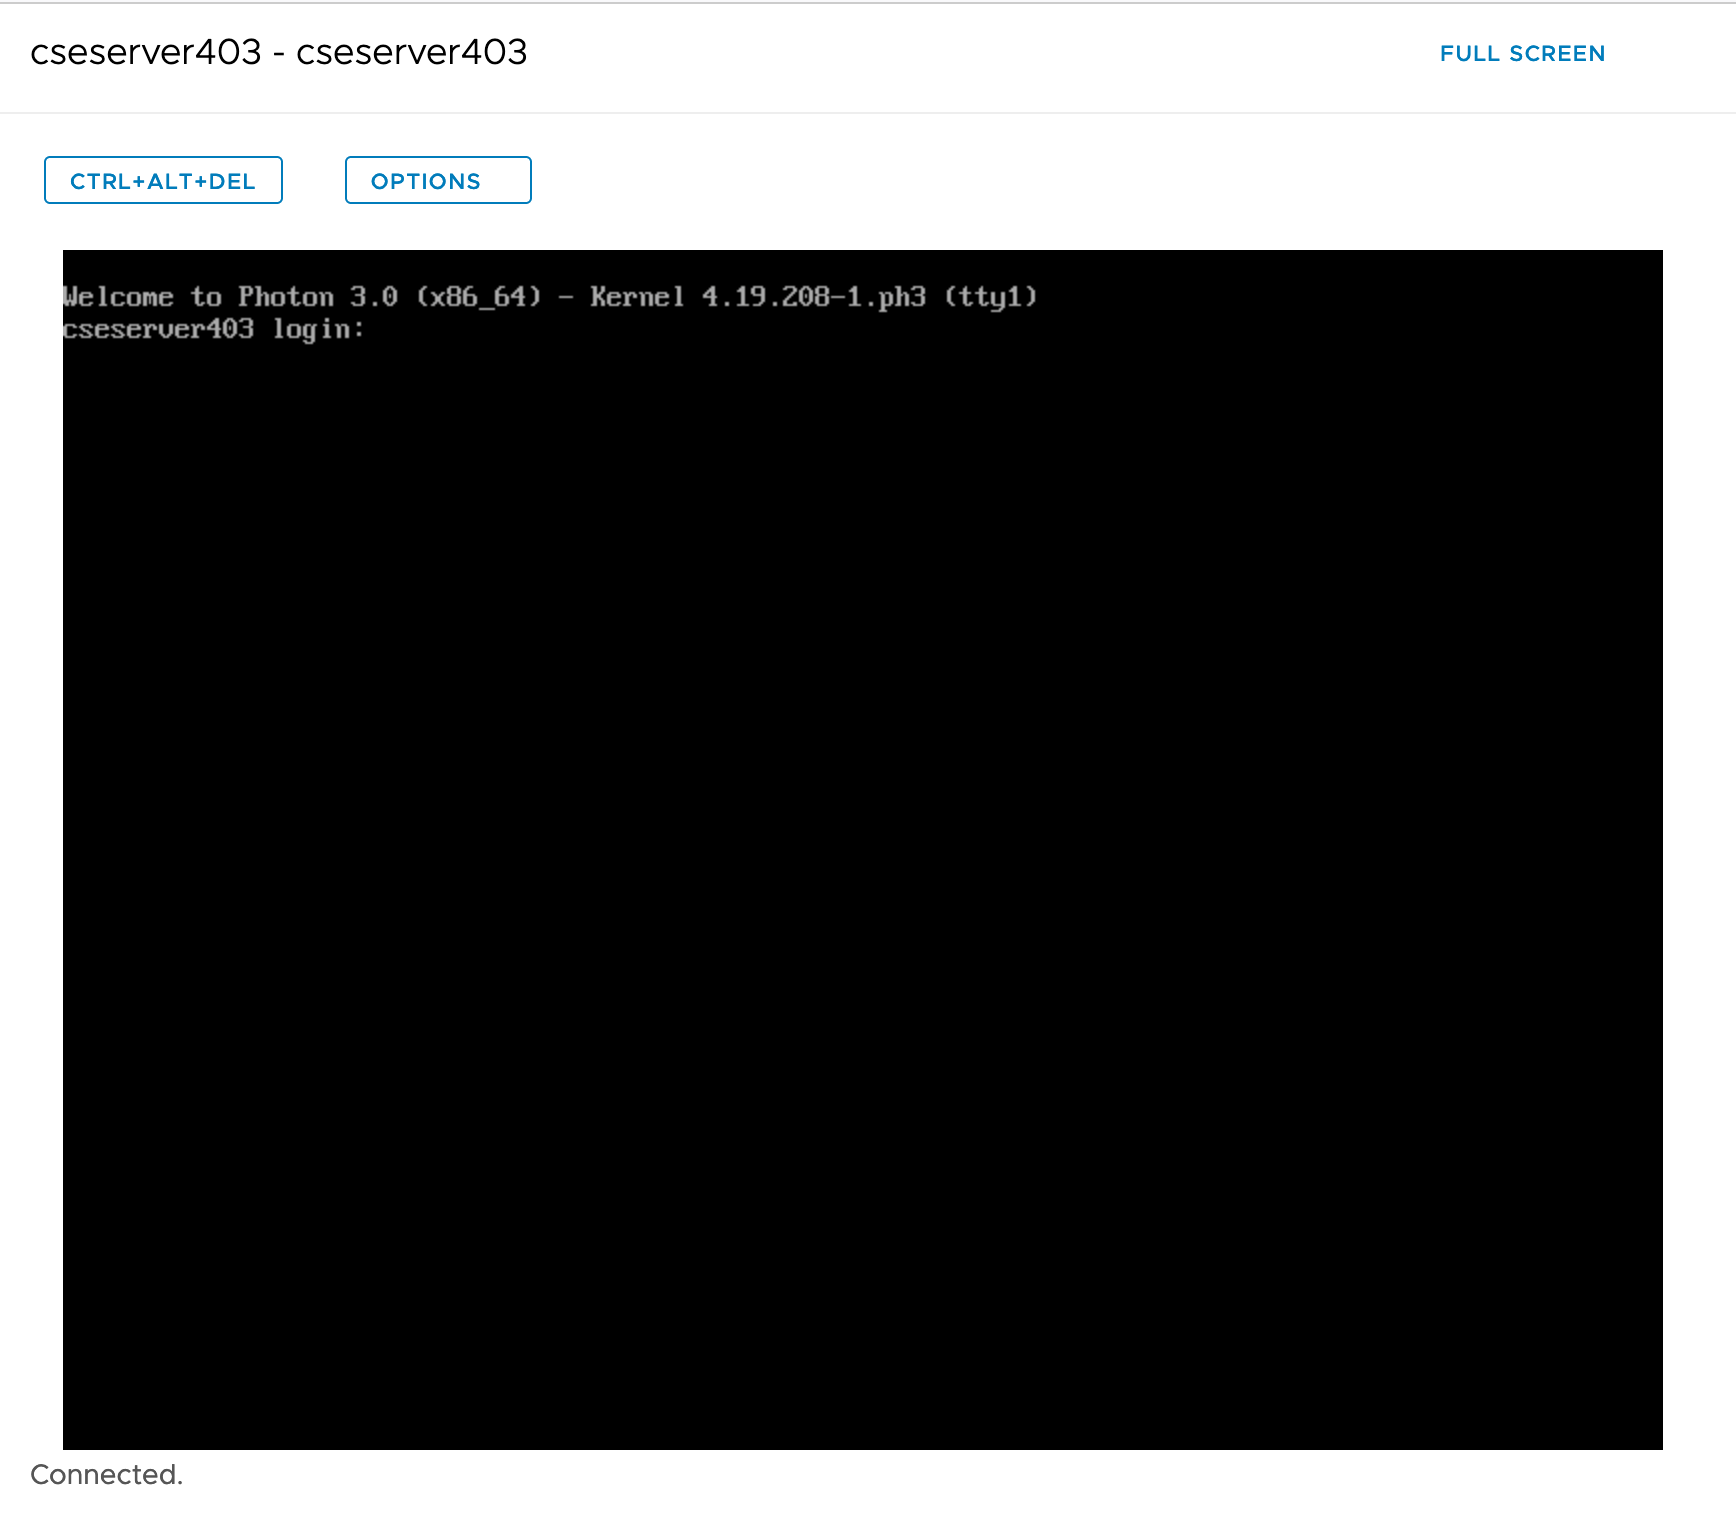
Wait for the appliance to deploy then power it on. Wait for the guest OS customization to complete. Feel free to pop the VM console and watch the progress. Here’s the finished product:
Note: the default username is root and the default password is vmware. It’s strongly suggested you reset it.
Testing
So we’ve upgraded the UI plugin, upgraded the appliance, and made the new TKG images available. Let’s see if it works. I have a demo tenancy for Kubernetes clusters deployed by CSE.
- Login as your test tenancy and navigate to the Kubernetes Container Clusters plugin (More > Kubernetes Container Clusters). Click NEW.
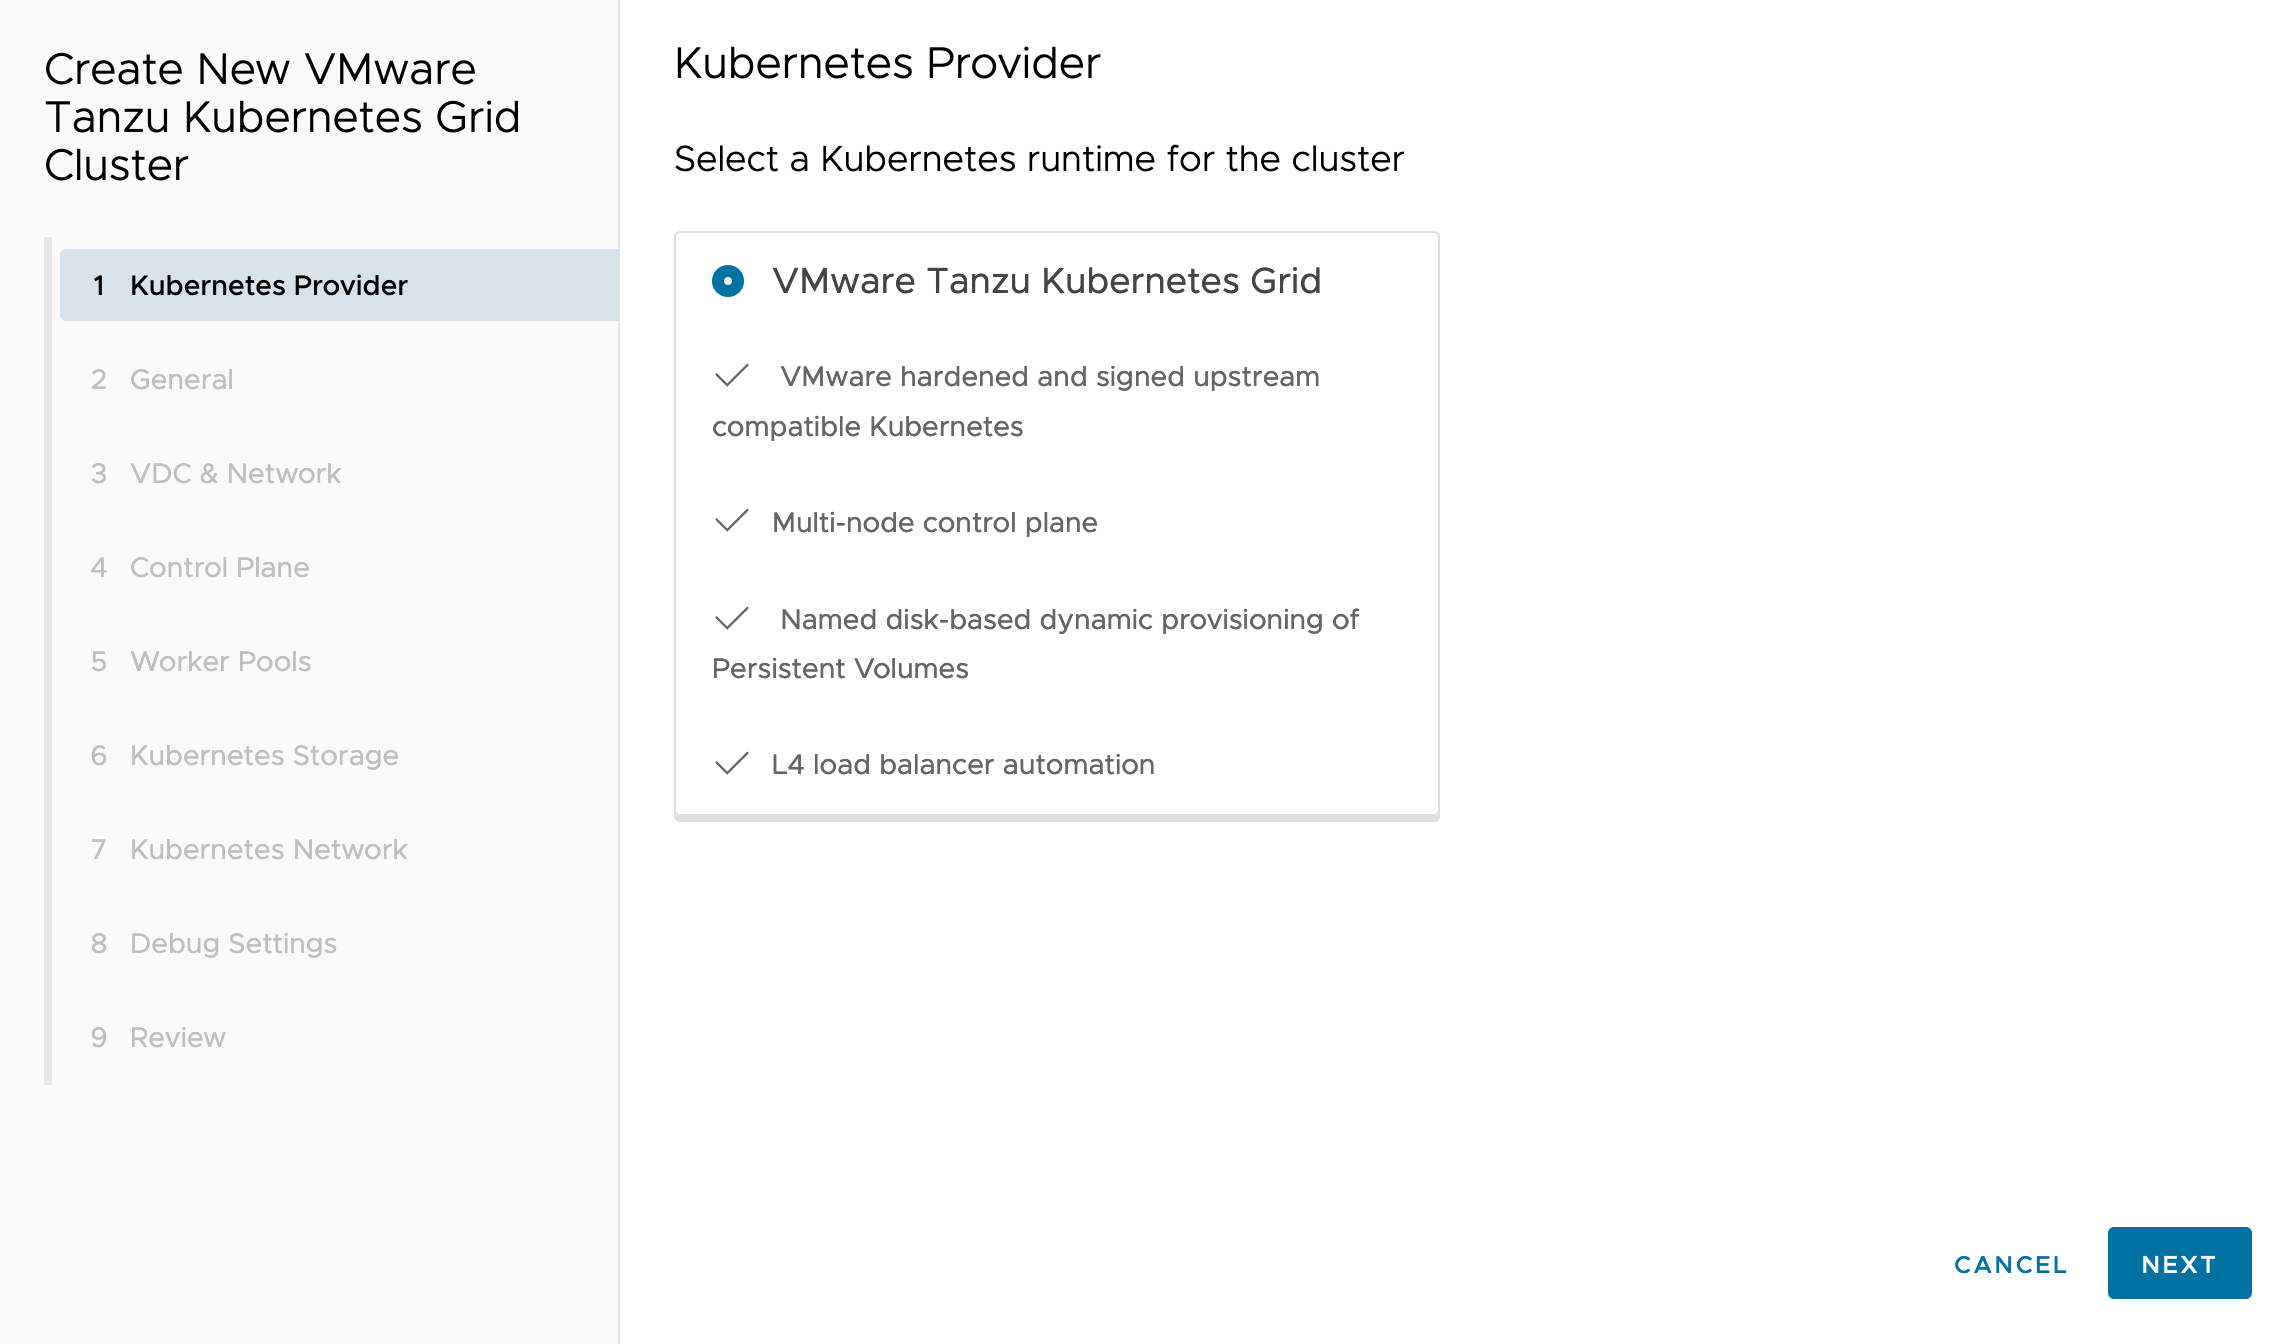
- If you are not using TKGs in your cloud platform, that is, you’re not integrated VCD with the vSphere with Tanzu solution you will only see TKG as an option. If you are integrated with vSphere with Tanzu, you’ll see a second option. On the new cluster wizard, select VMware Tanzu Kubernetes Grid and click NEXT.
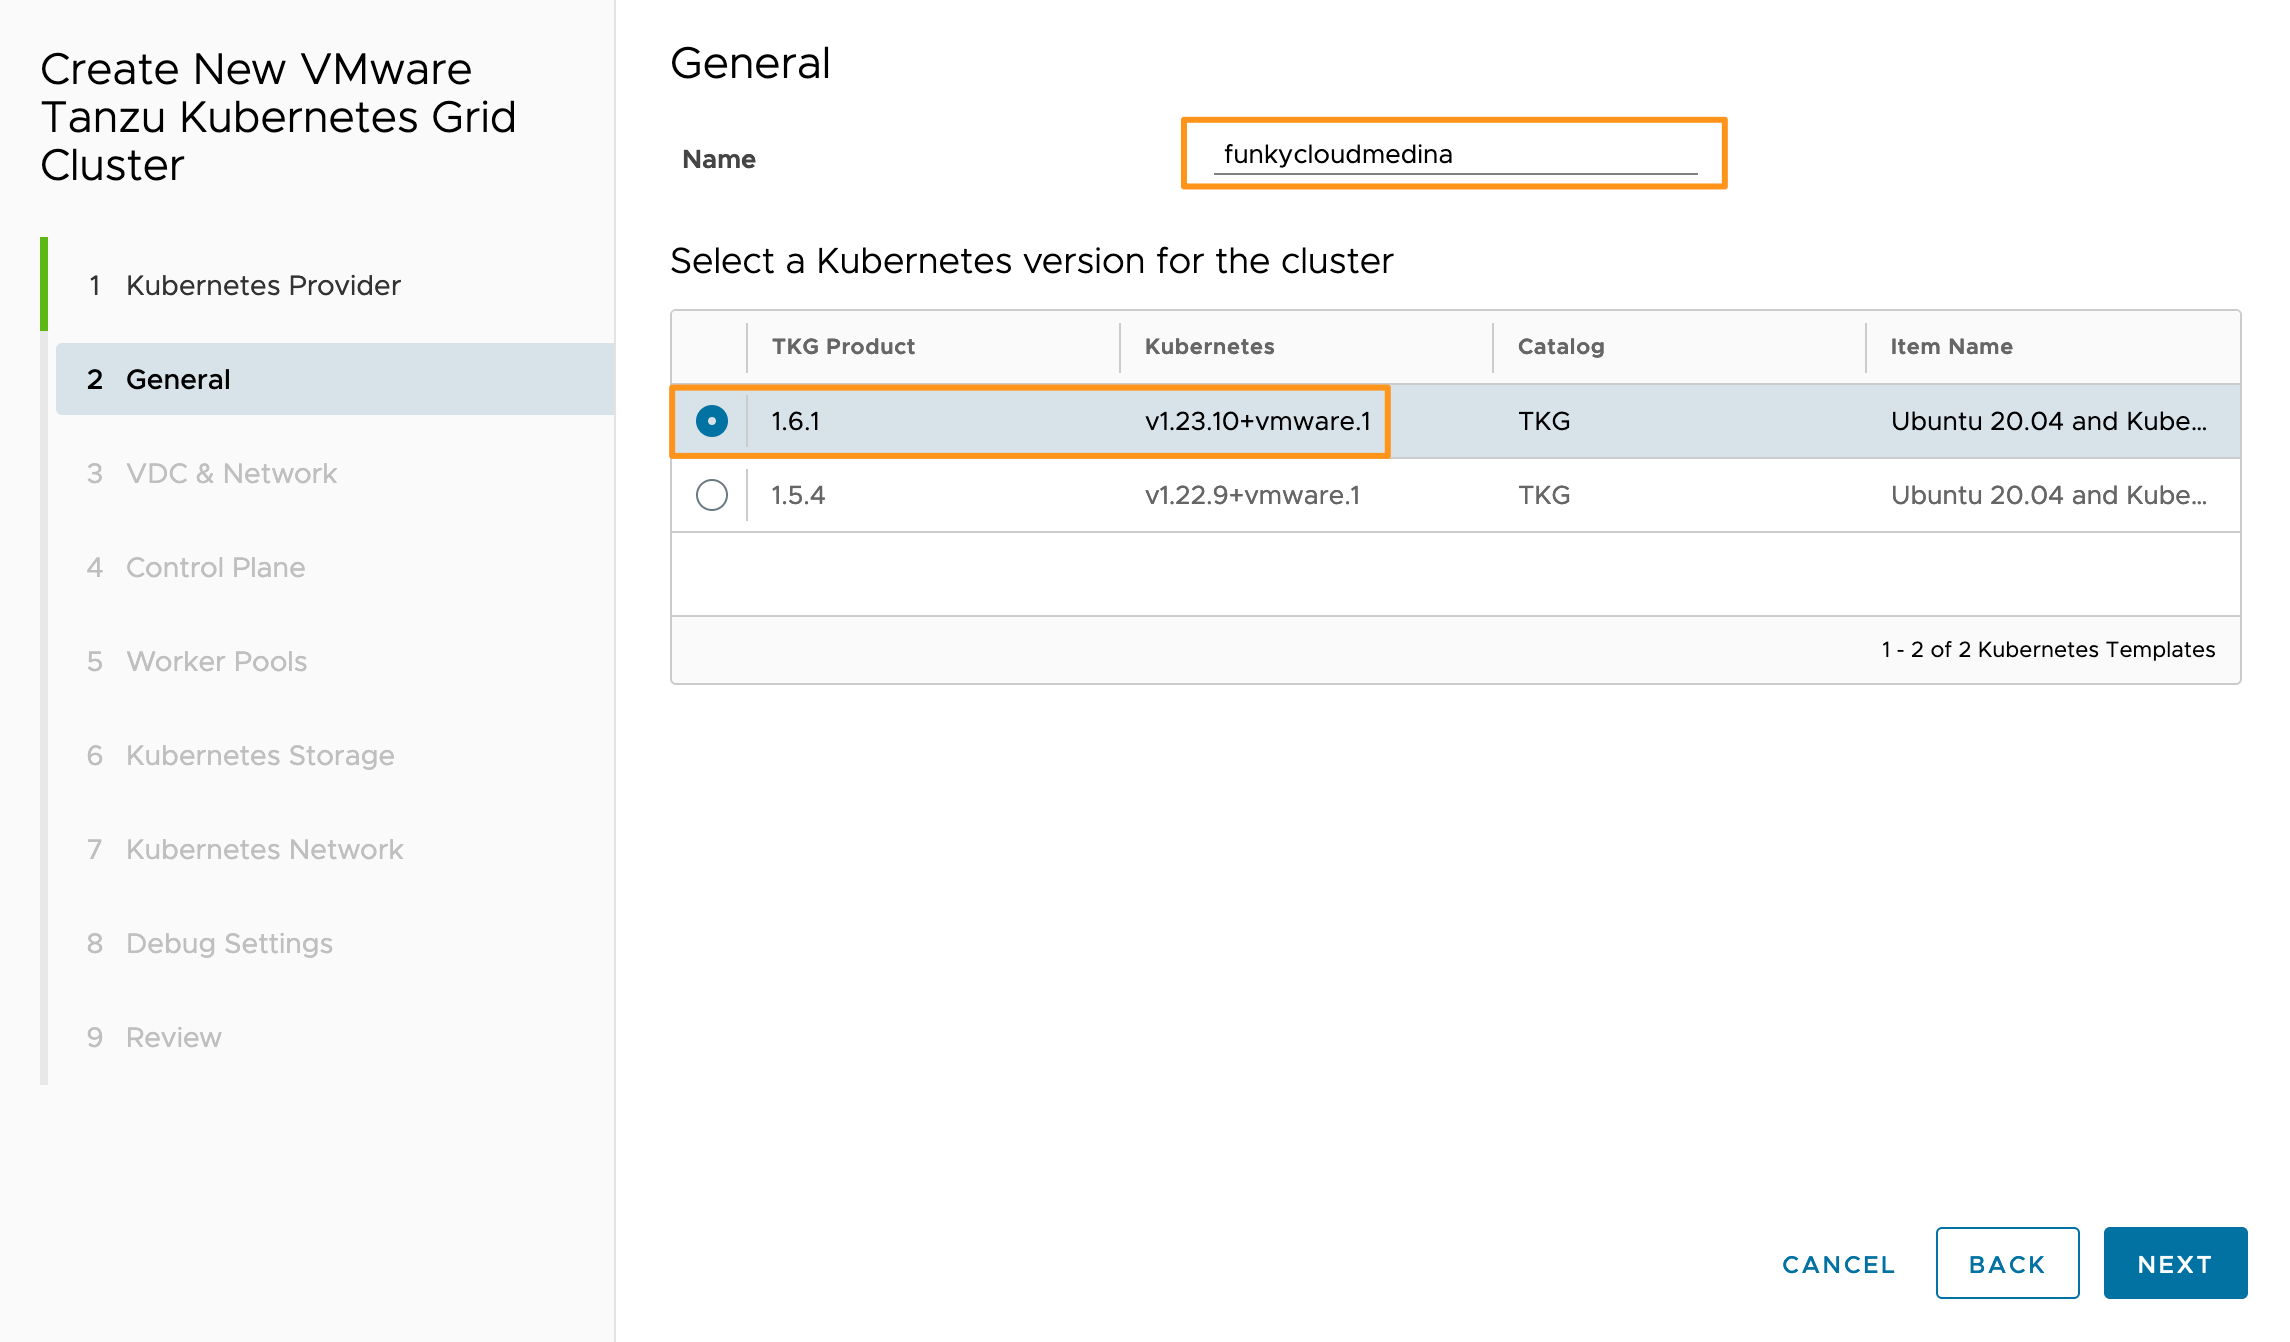
- Provide a name and select the TKG image version for your new cluster.
- Select the Org VDC and Network for your new cluster and click NEXT.

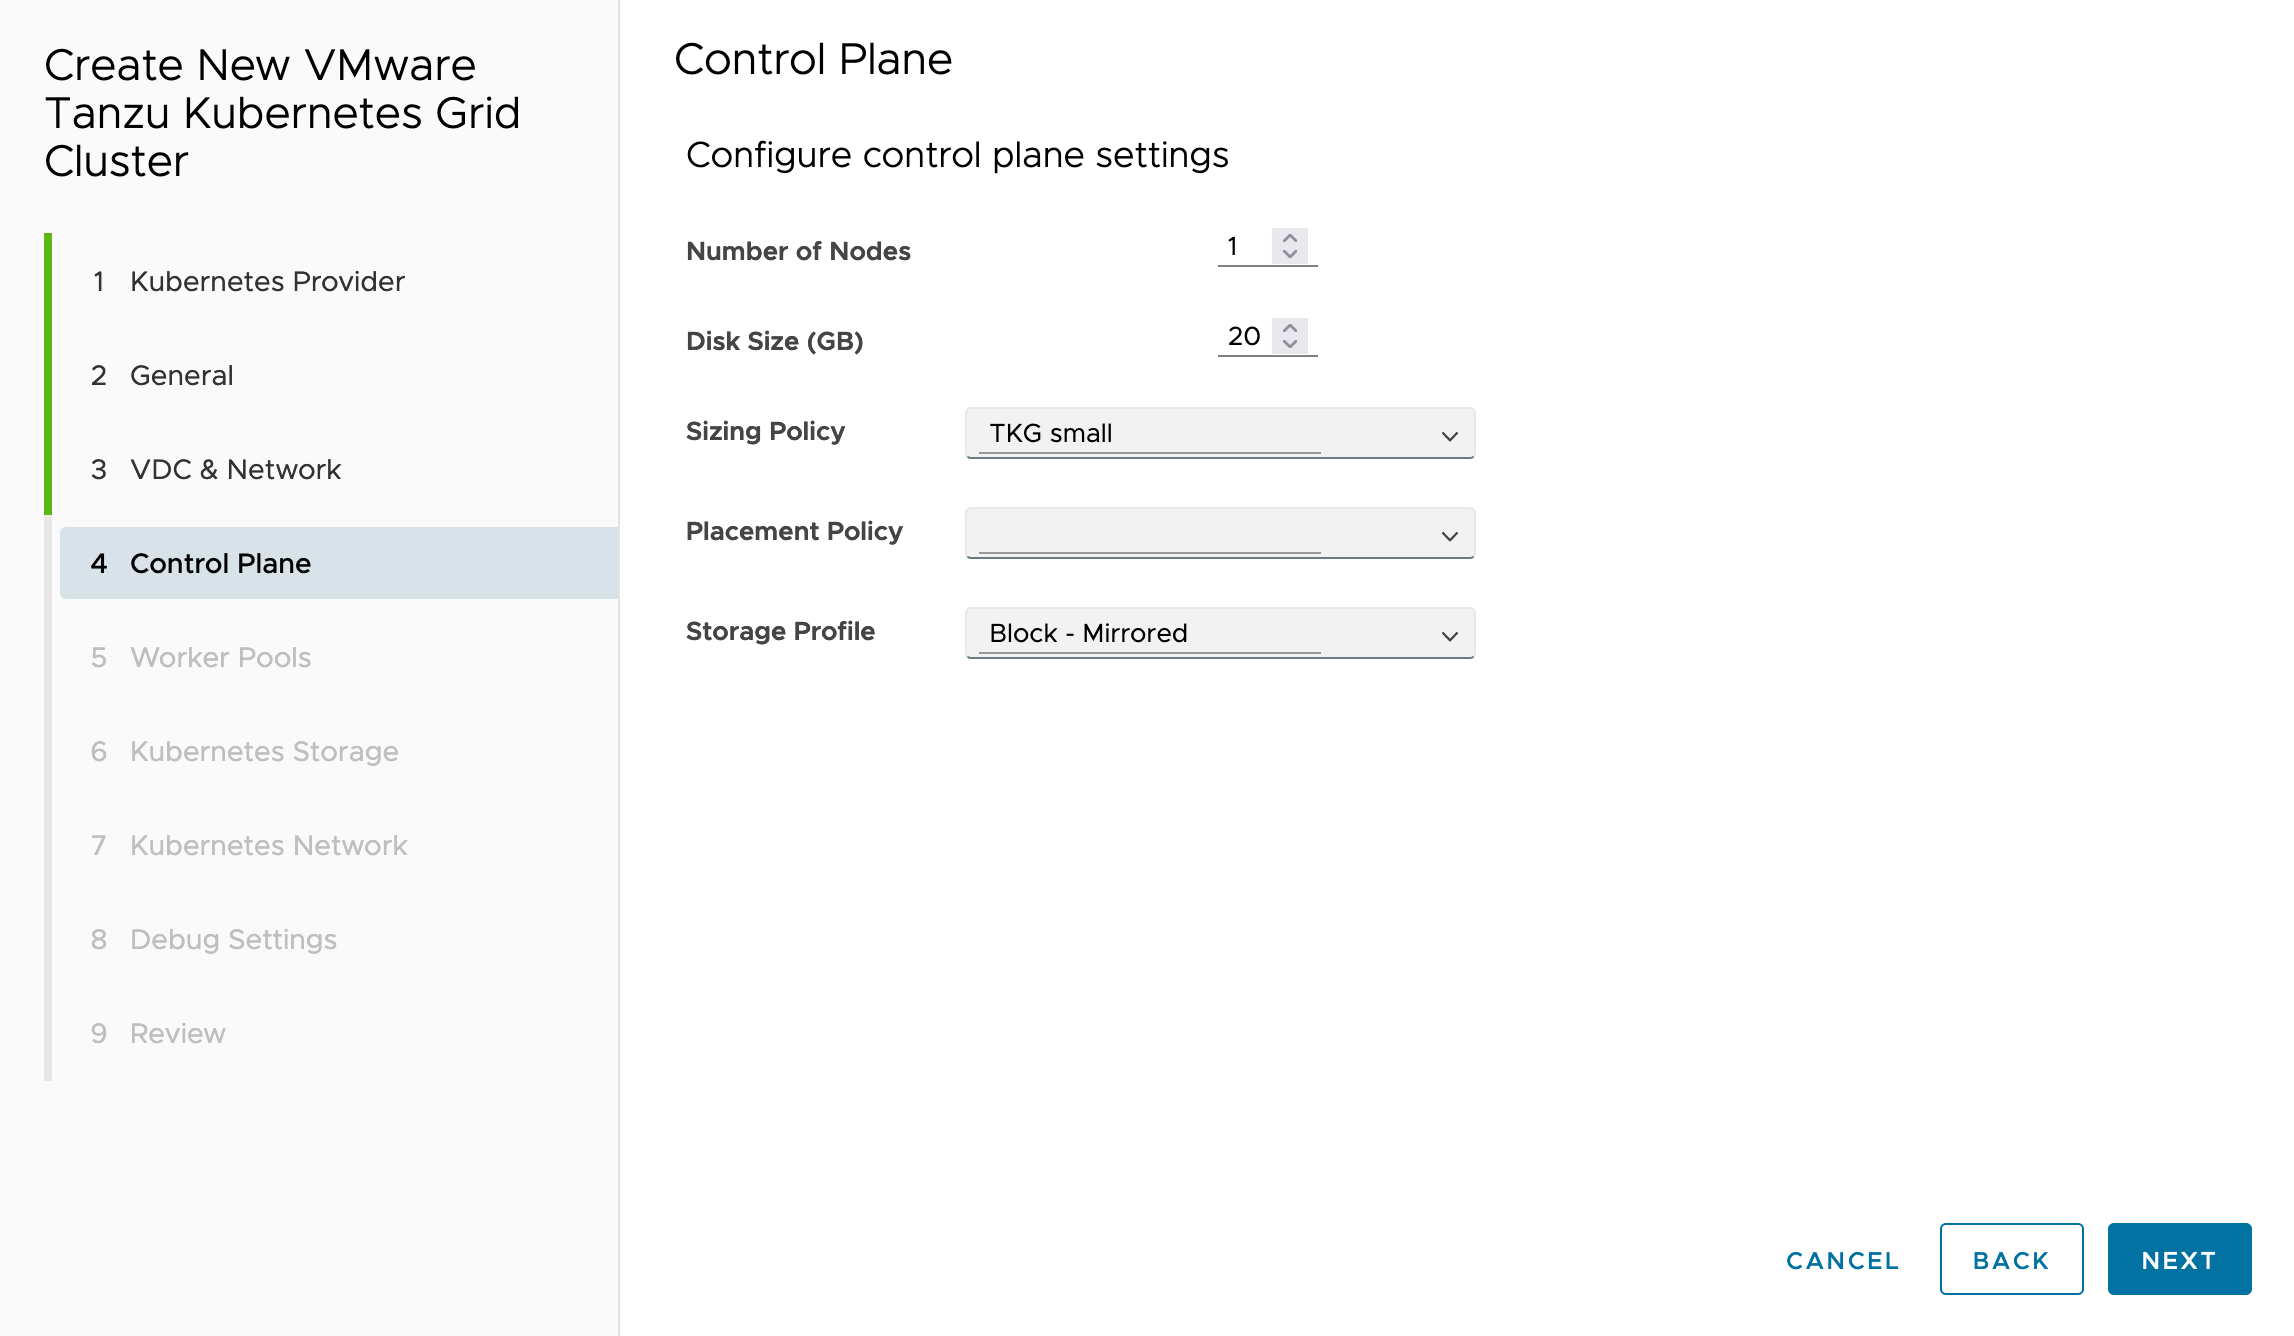
- Set your Control Plane sizing and click NEXT. I’m using a single Control Plane node as I have limited resources in my lab at present.
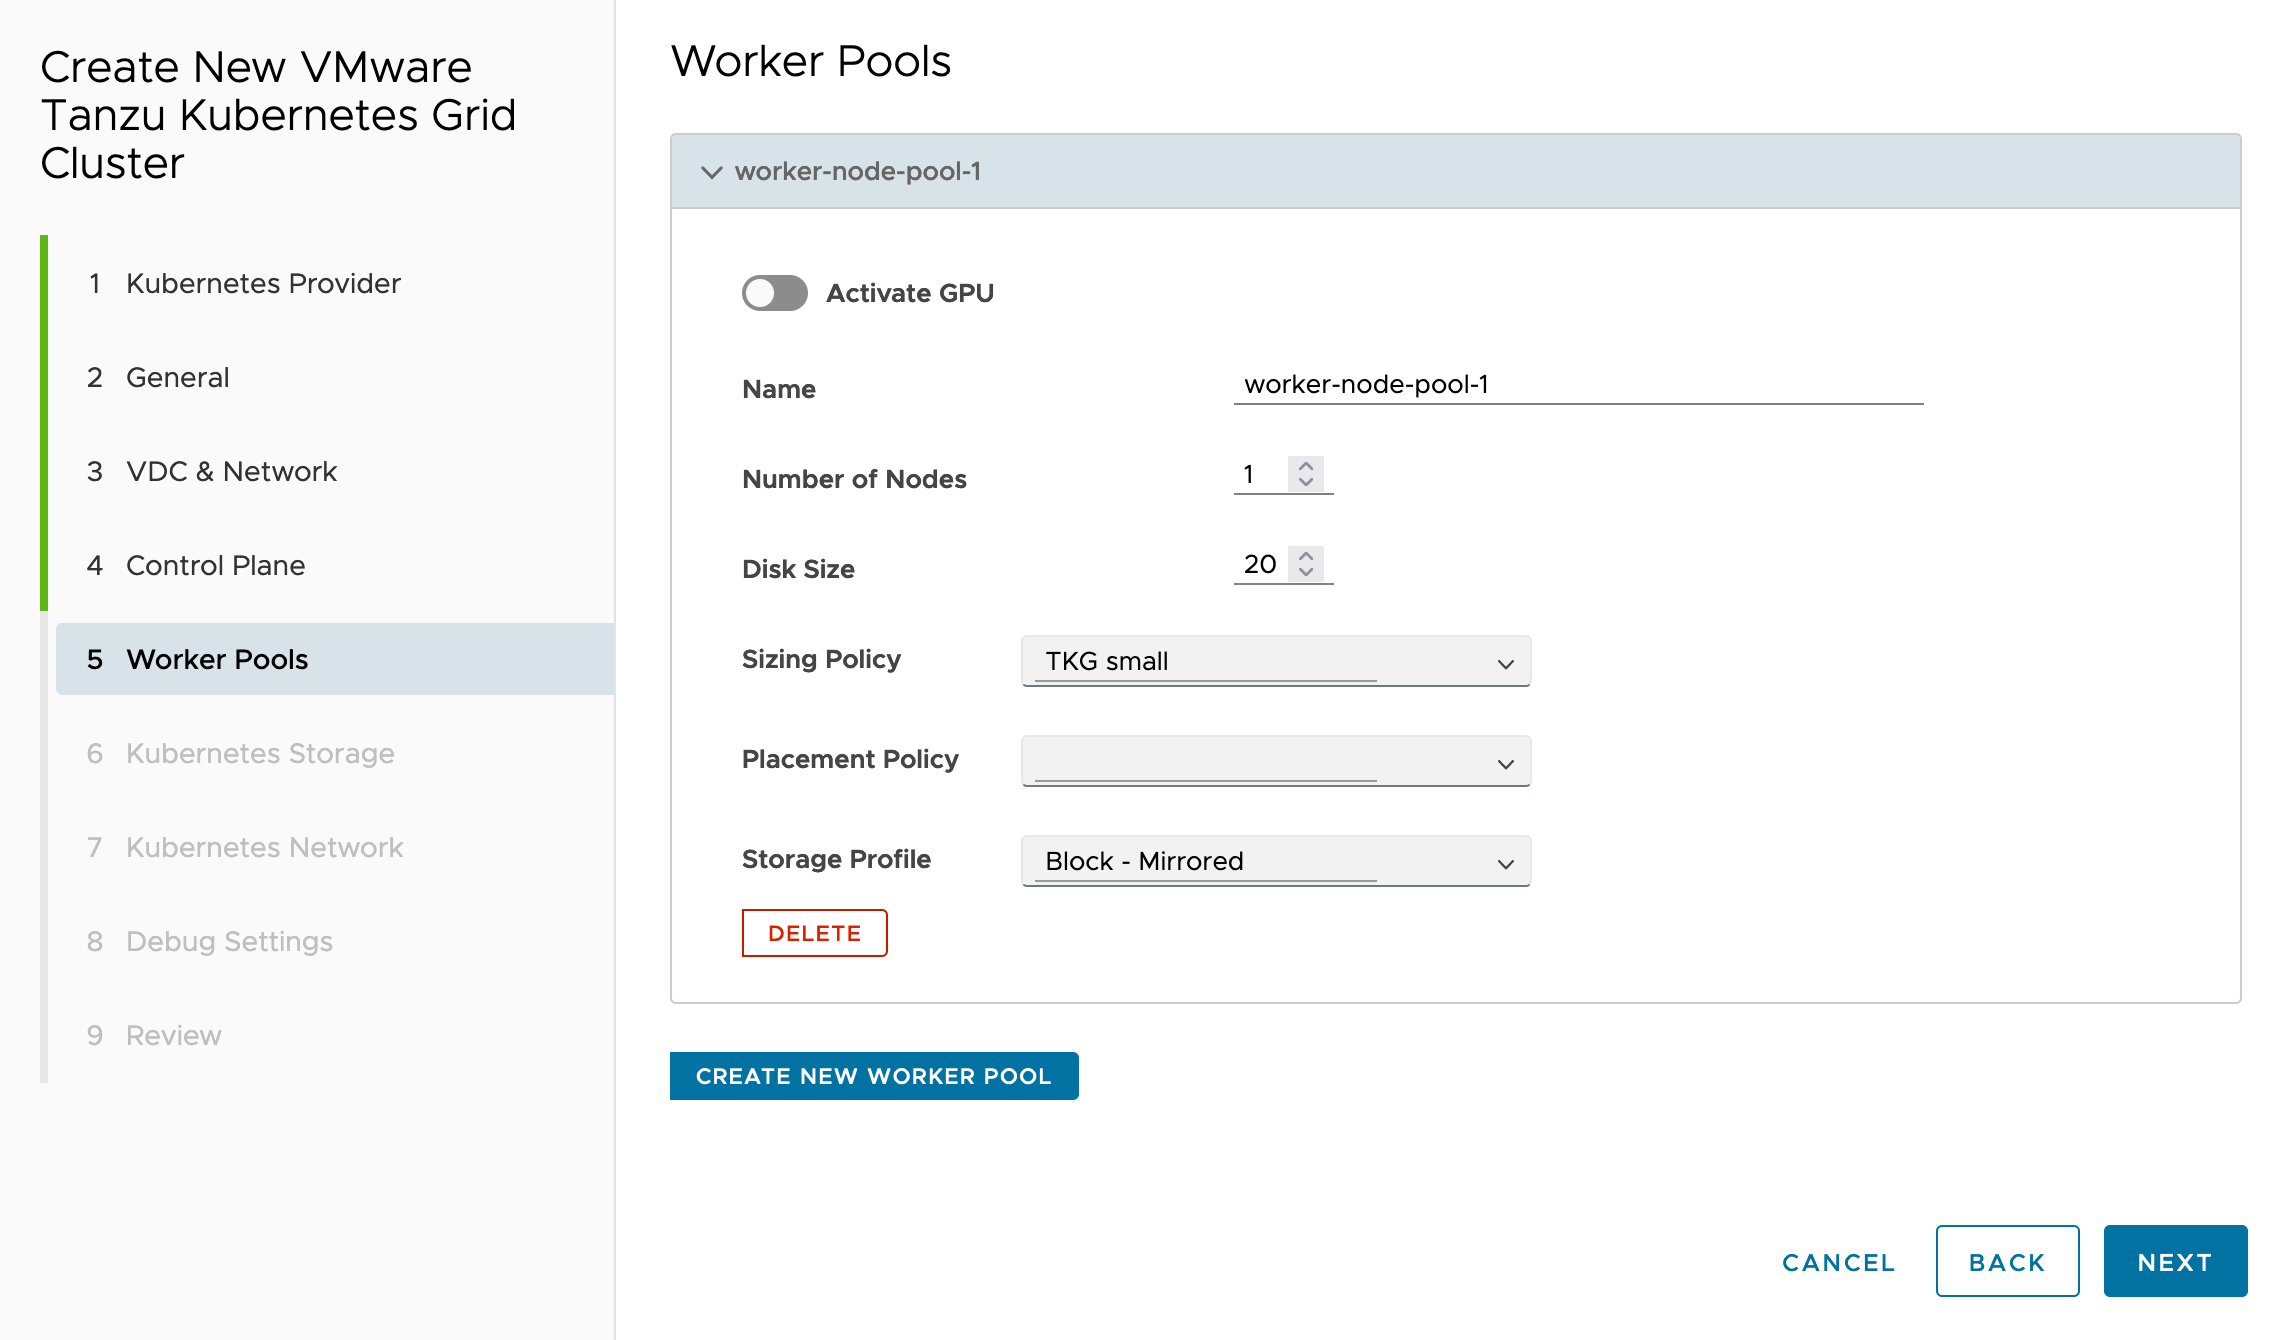
- Define the size of your worker groups and nodes and click NEXT.
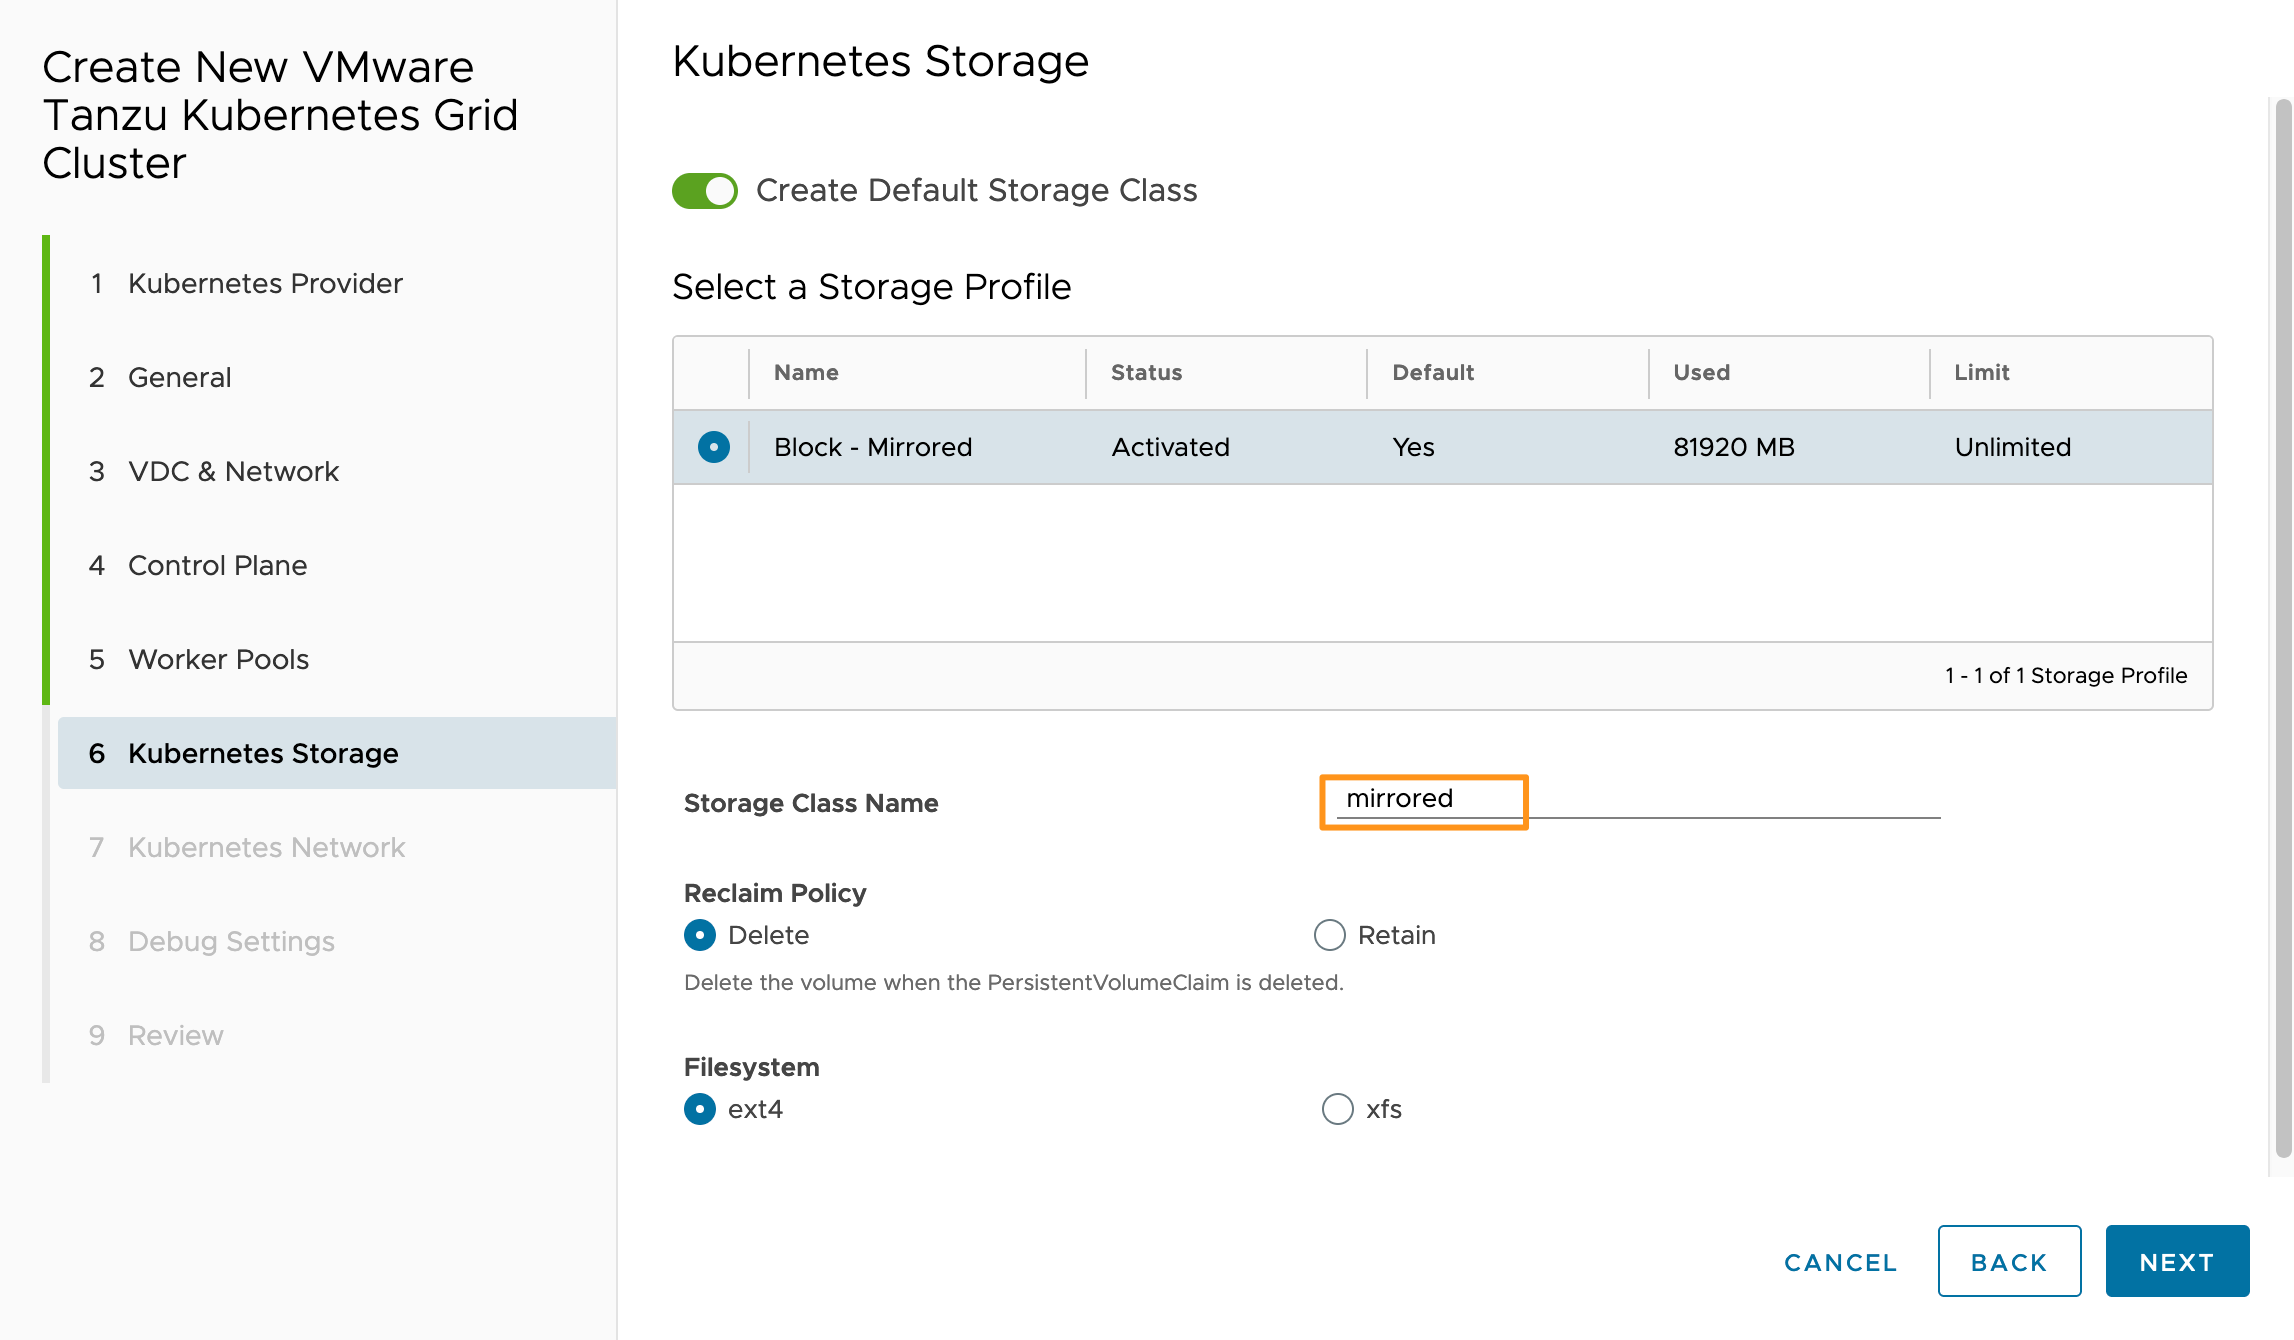
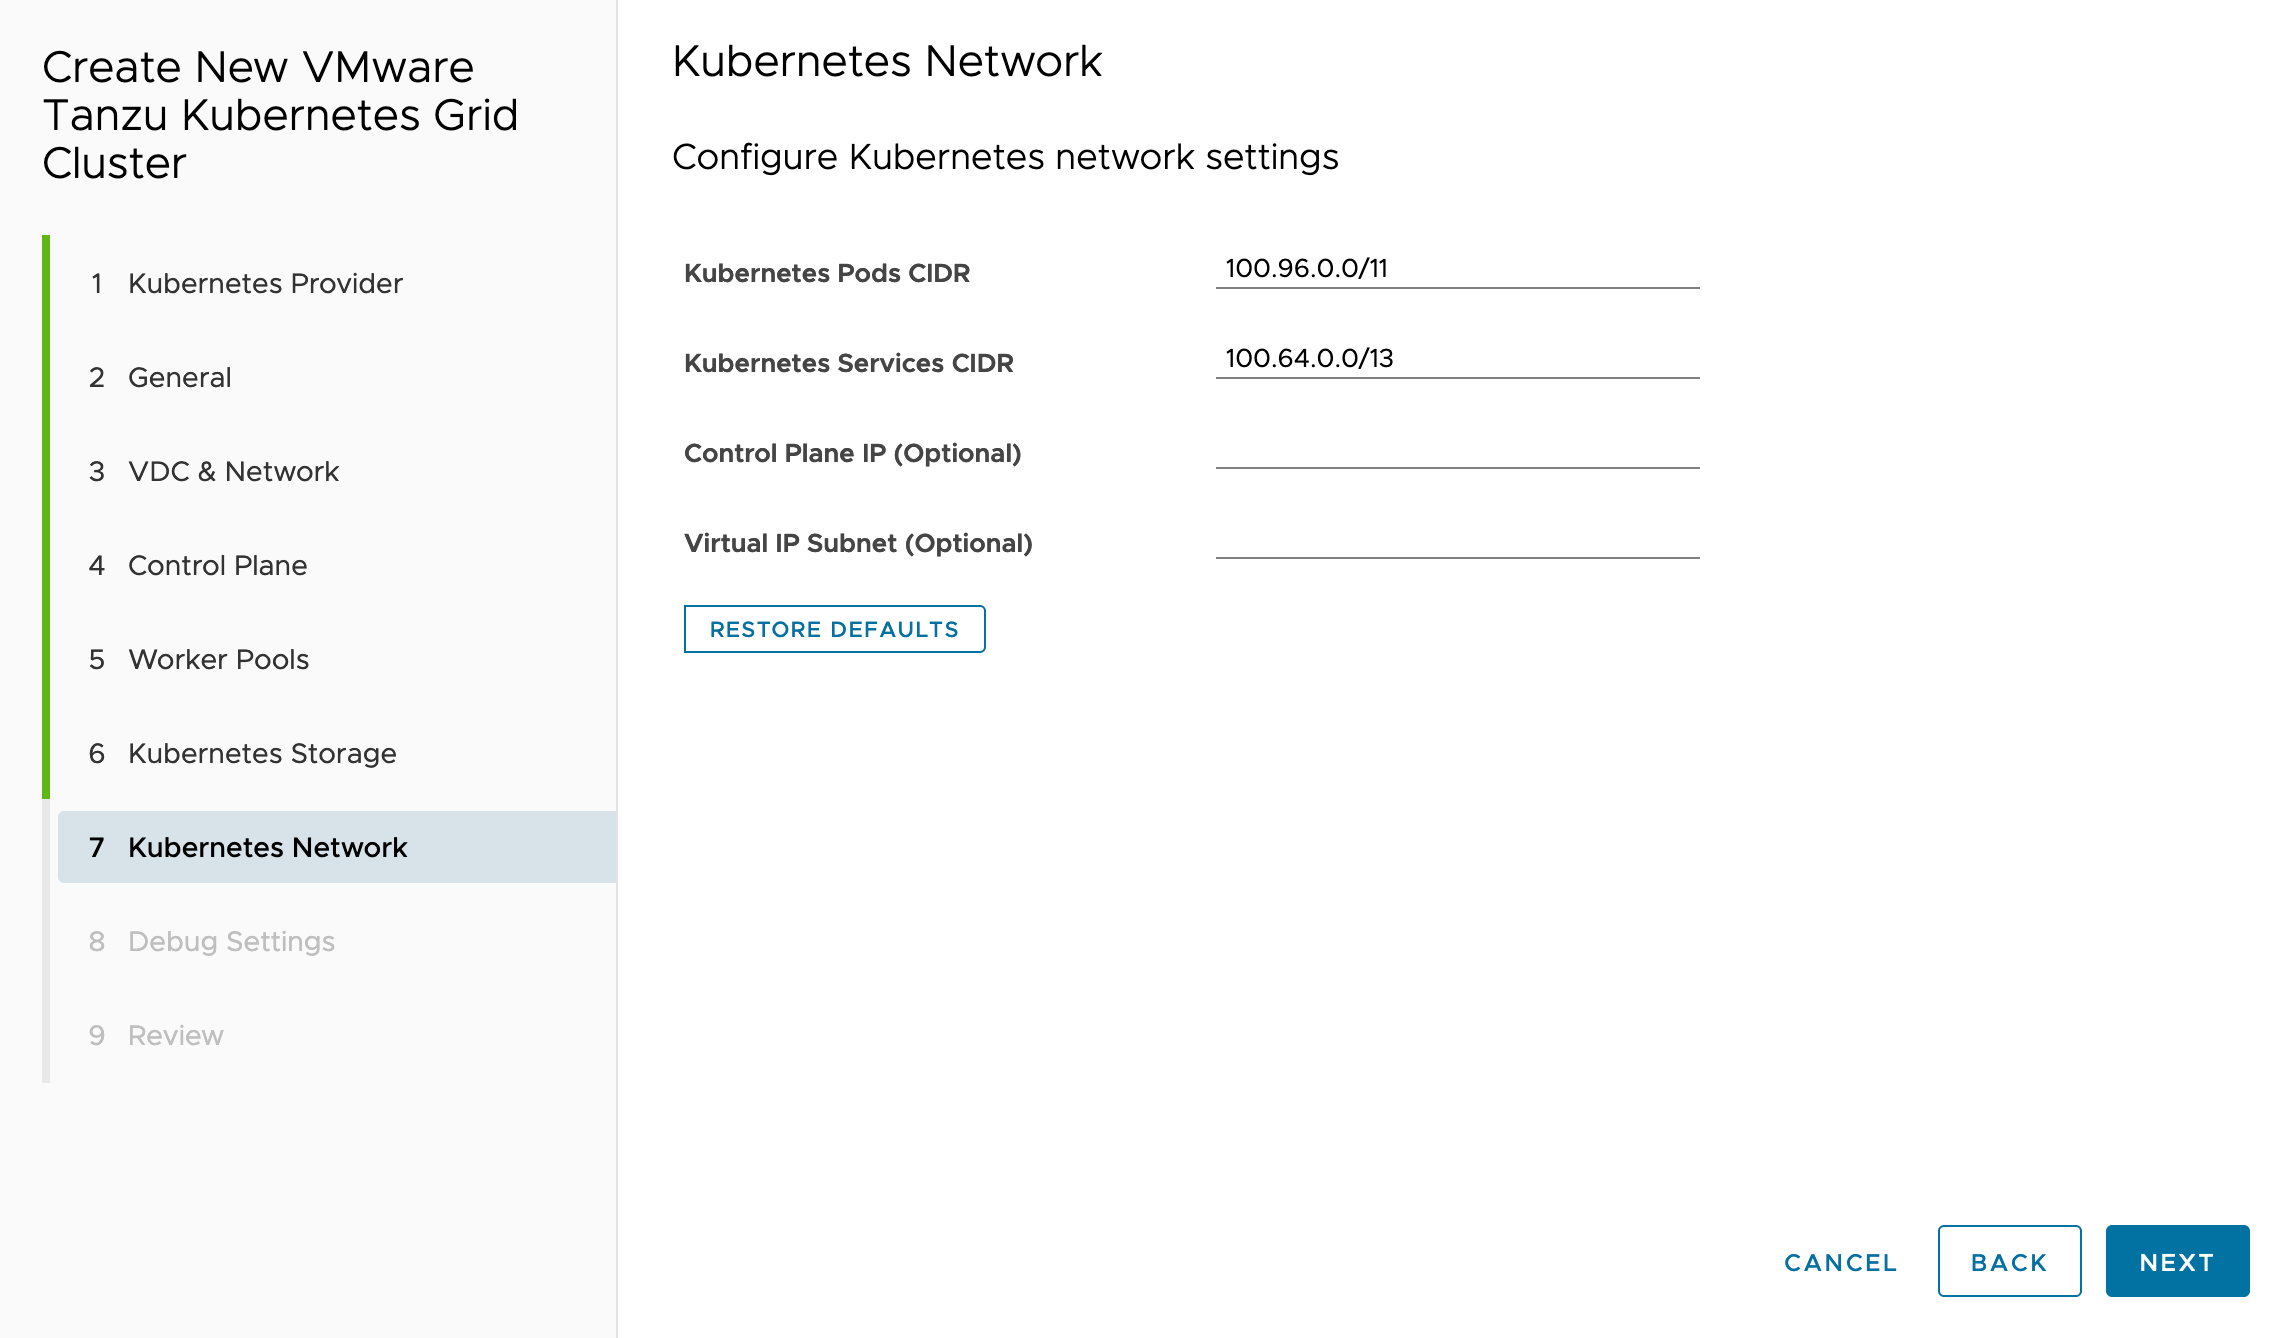
- Specify your storage configuration for the Kubernetes cluster, like the default storage class name. Click NEXT.
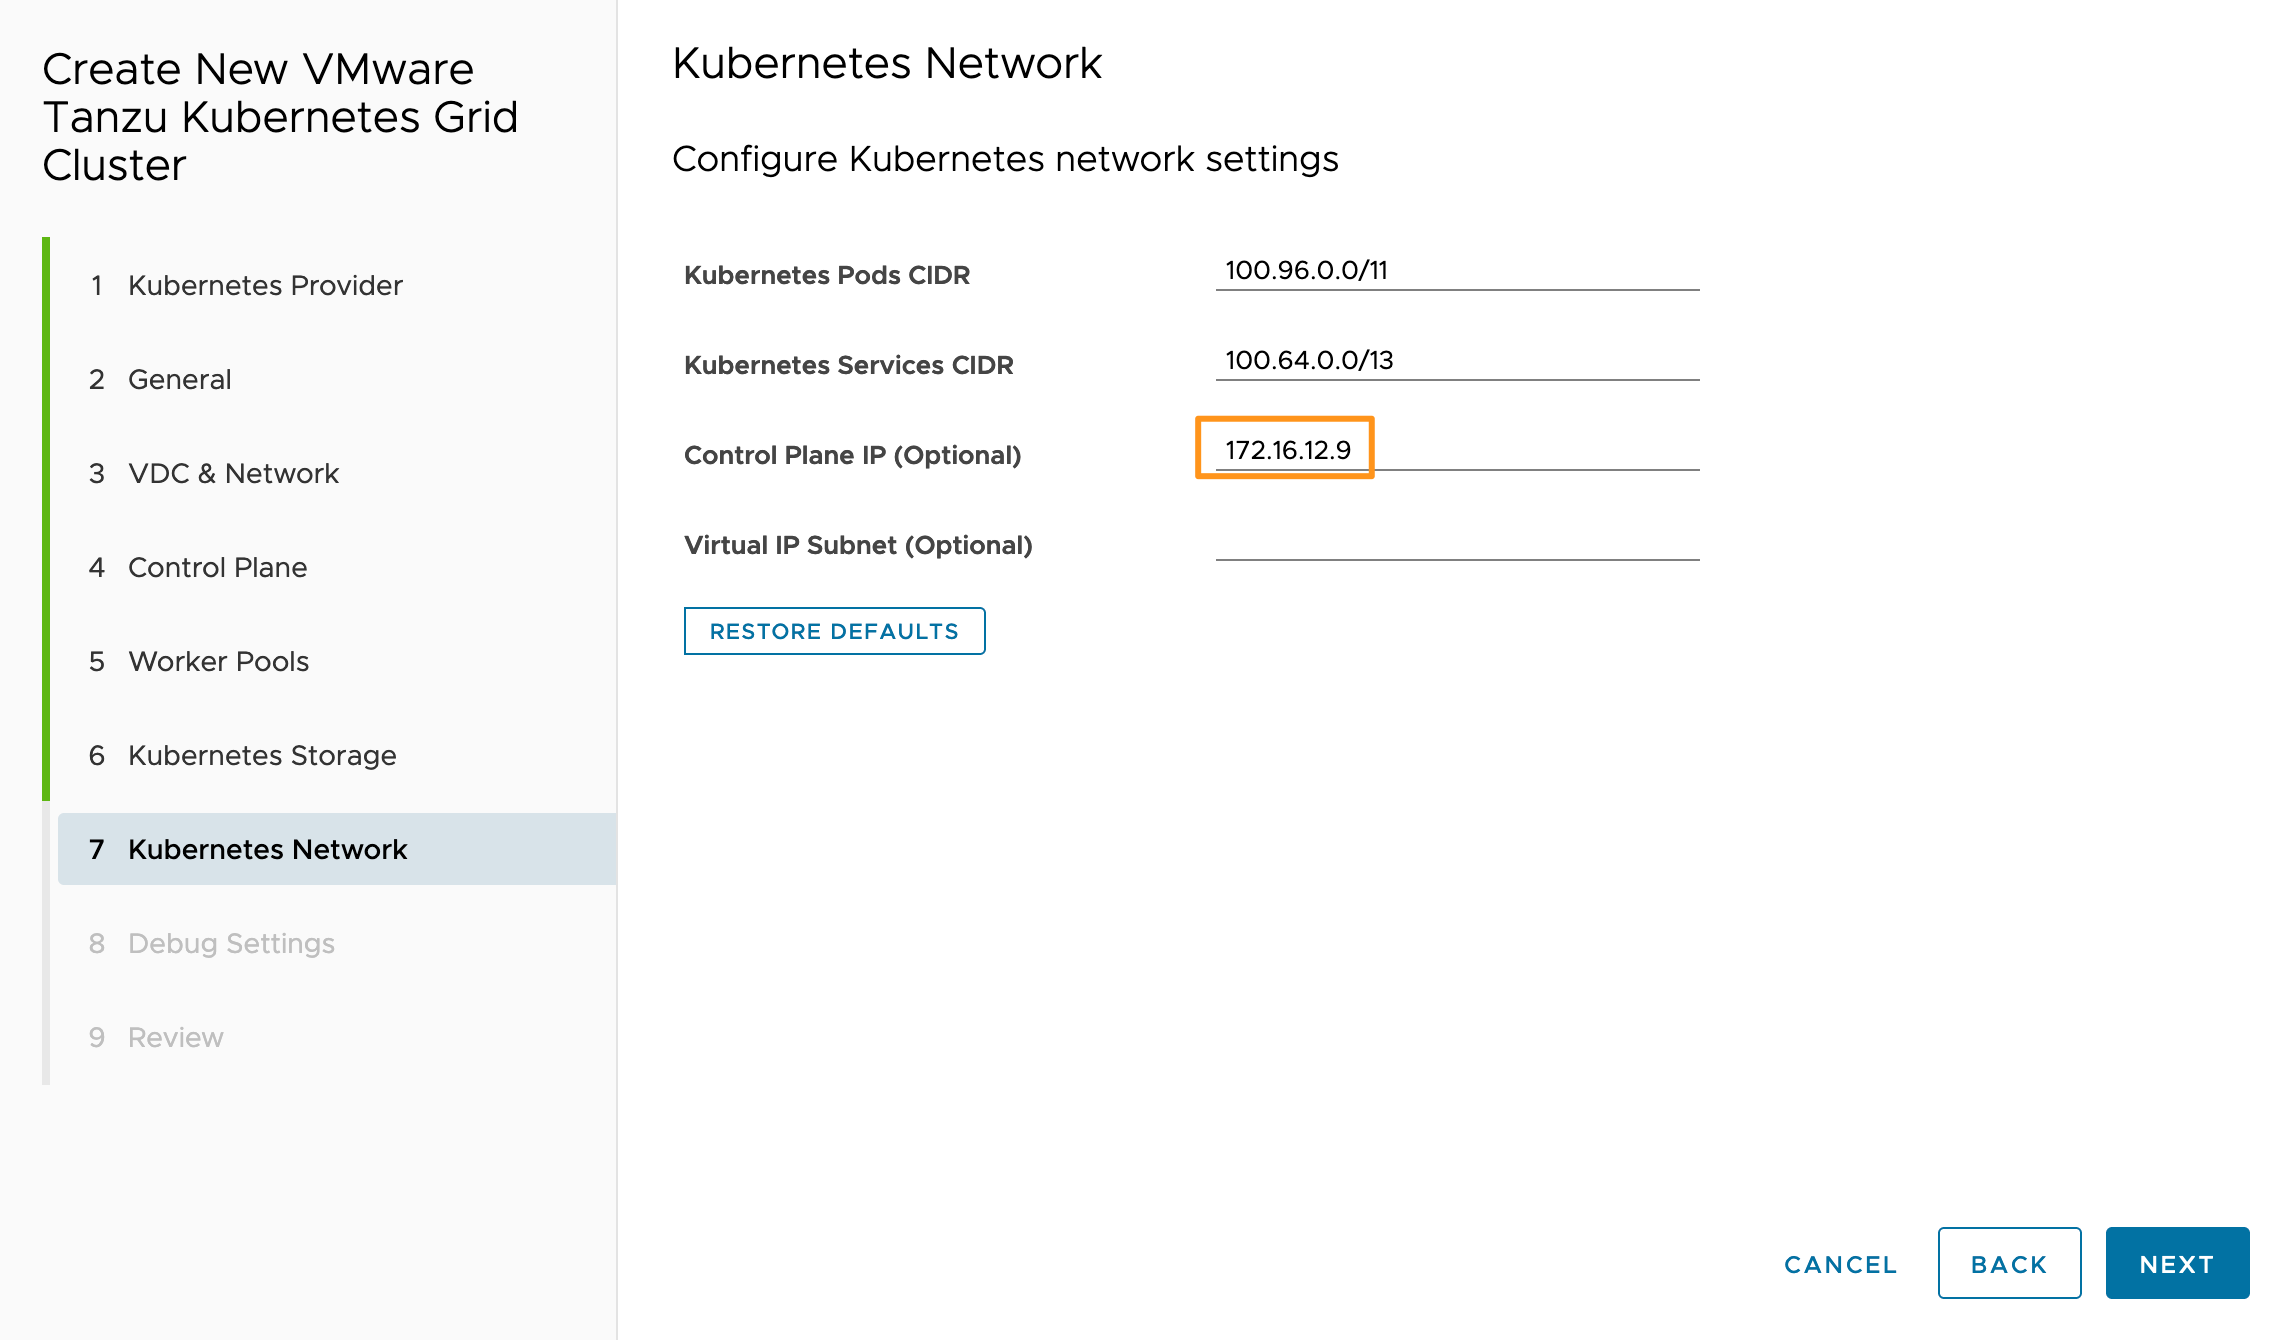
- In VCD 10.4.1 deployments that are not using IP Spaces, you can leave the Control Plane IP blank. CSE will fetch a new IP for you automatically from the External IP range of the NSX Edge. If you are using IP Spaces like I am, you will need to request a new IP first and use that value in the Control Plane LB IP field below.
- On the Debug screen, select if you want CSE to re-attempt the cluster deployment if it hits an issue. Optionally, you can also add an SSH key. Click NEXT.
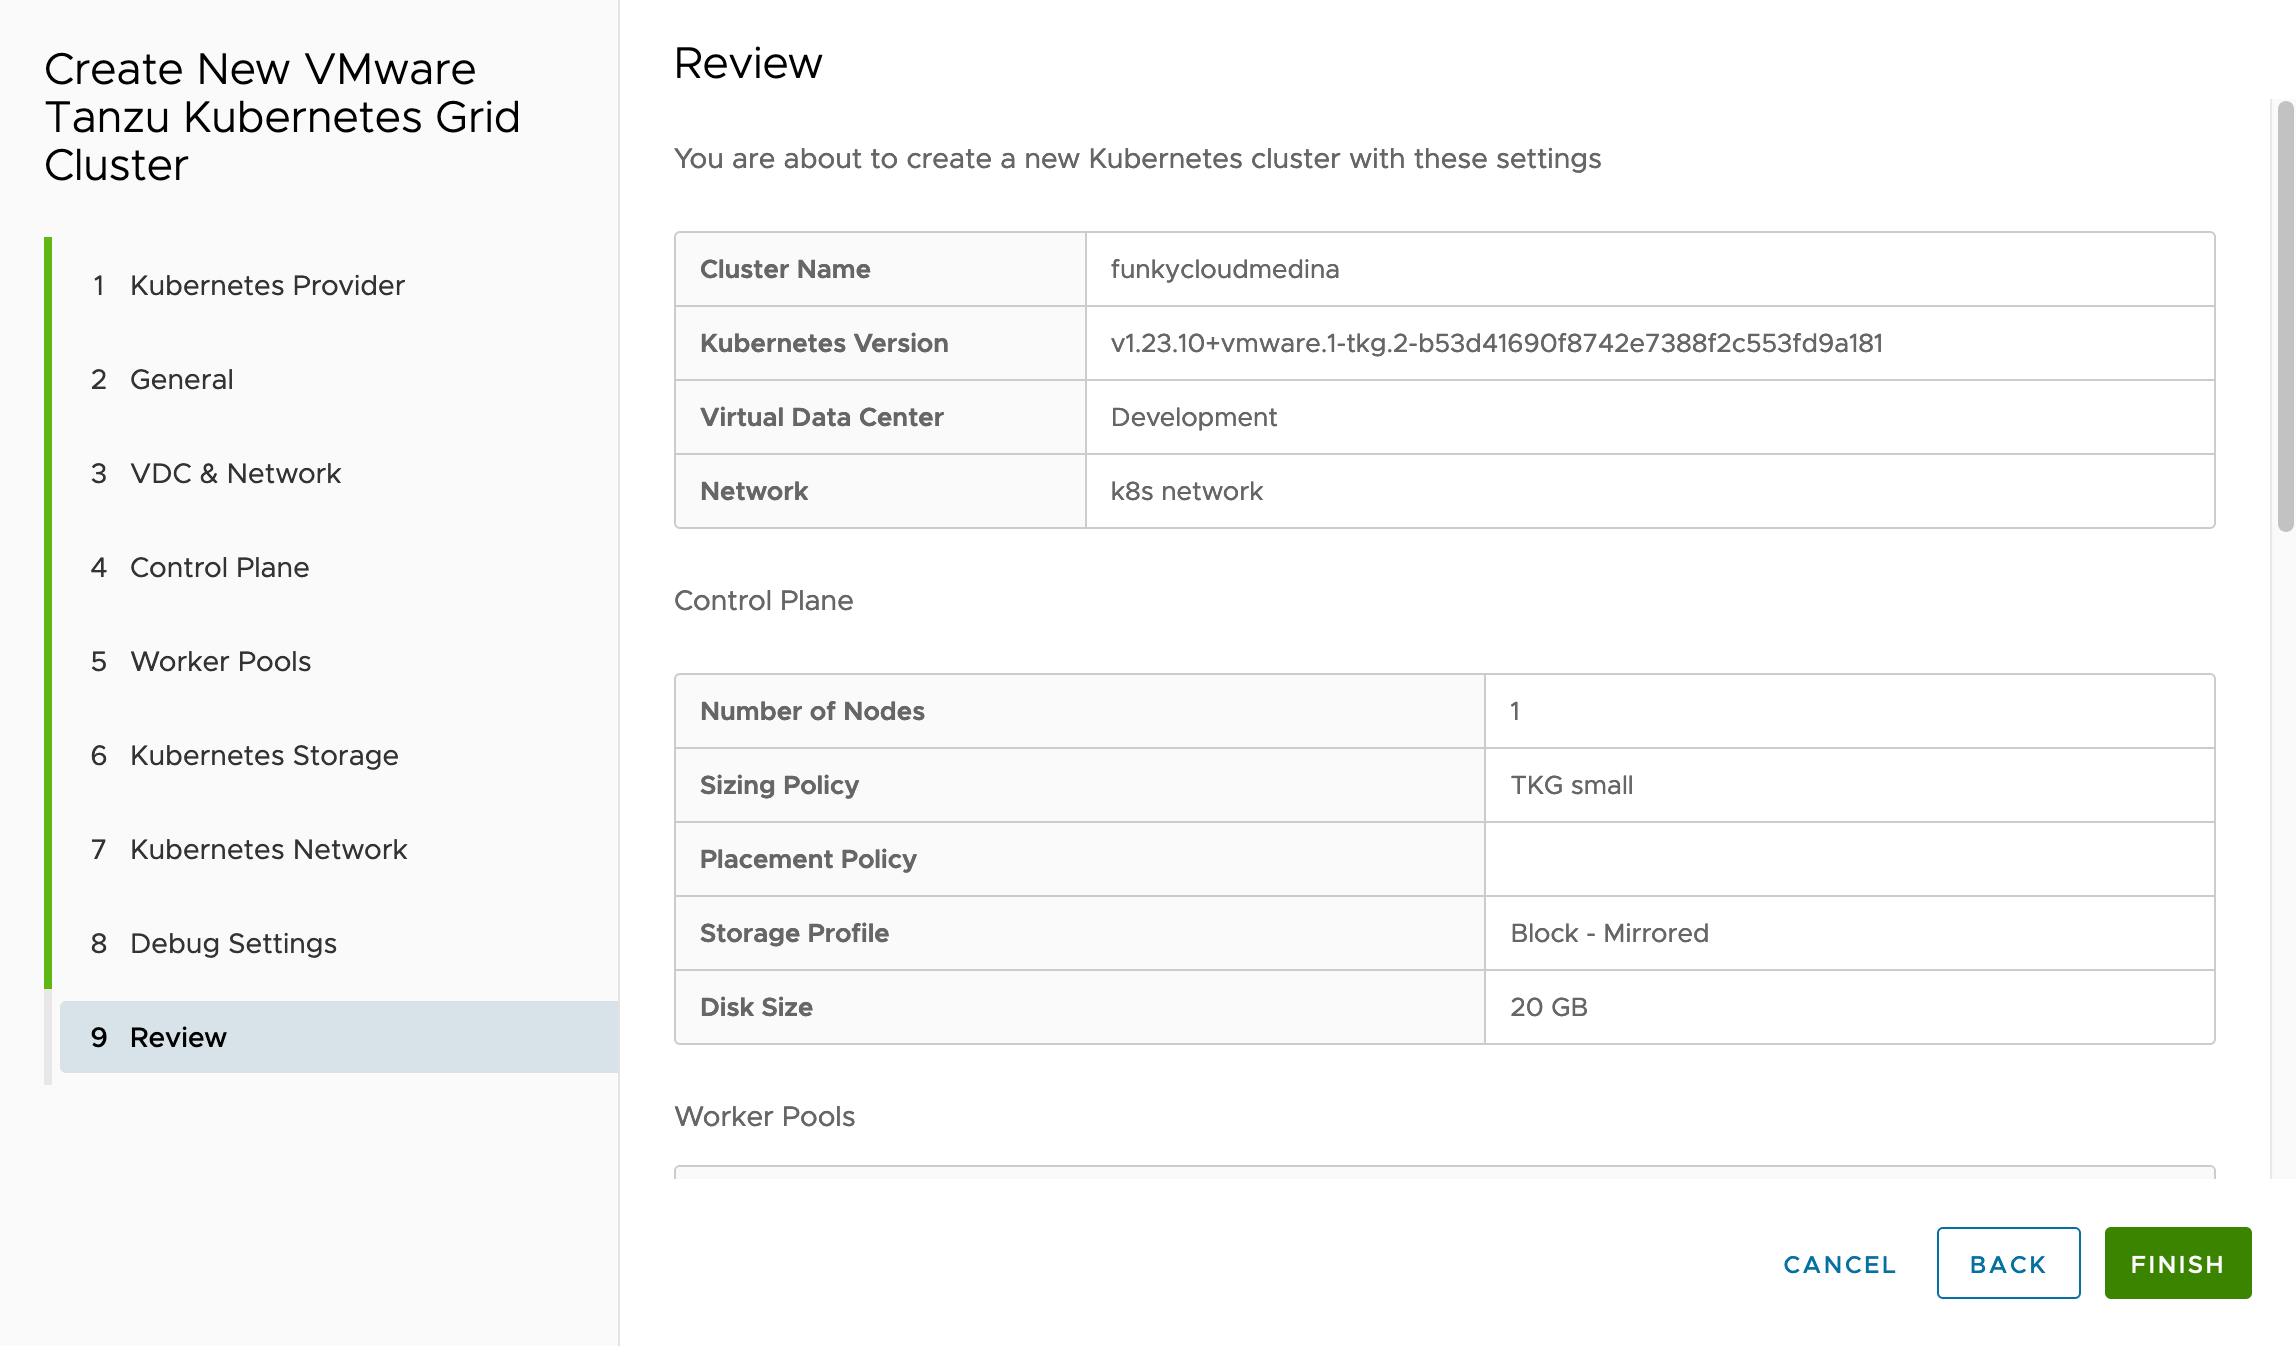
- Review your selections and click FINISH.
- Sit tight!
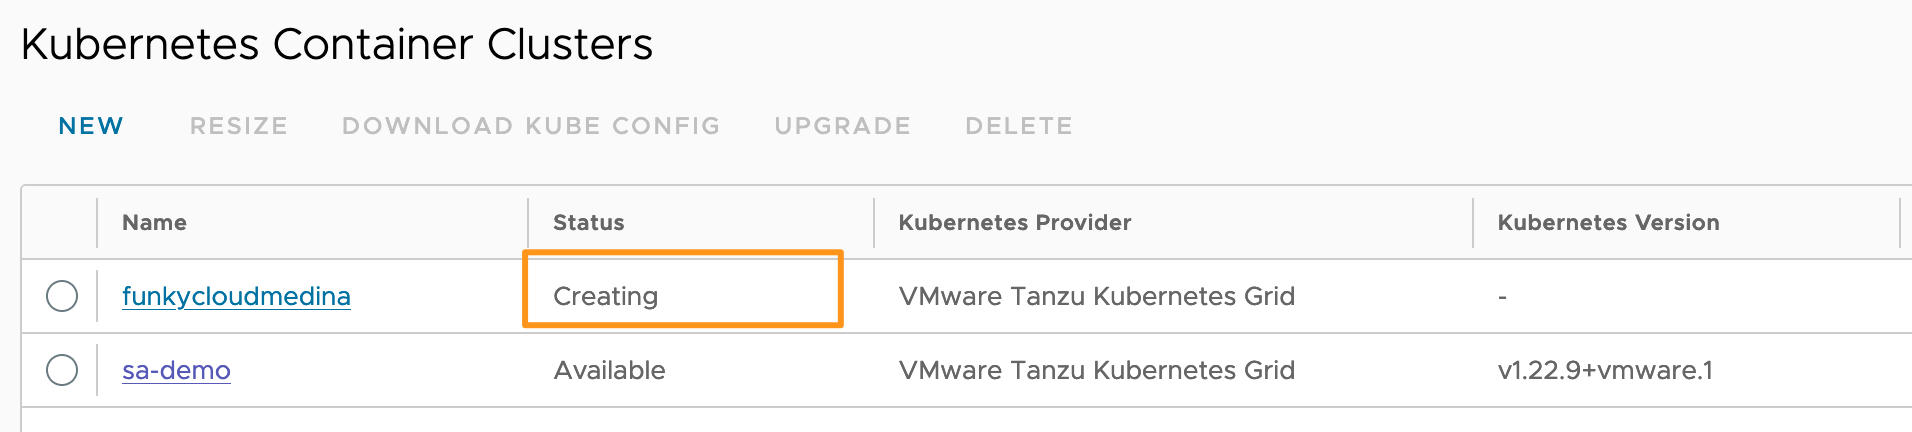
The Status will enter the Pending state until the CSE appliance has detected your request. Once CSE picks it up and begins processing the status will change to Creating.
The deployment can take anywhere from 10-45 minutes depending on your infrastructure and internet speeds (as many packages are being pulled from the internet). Mine takes a while as this is a nested cloud deployment.
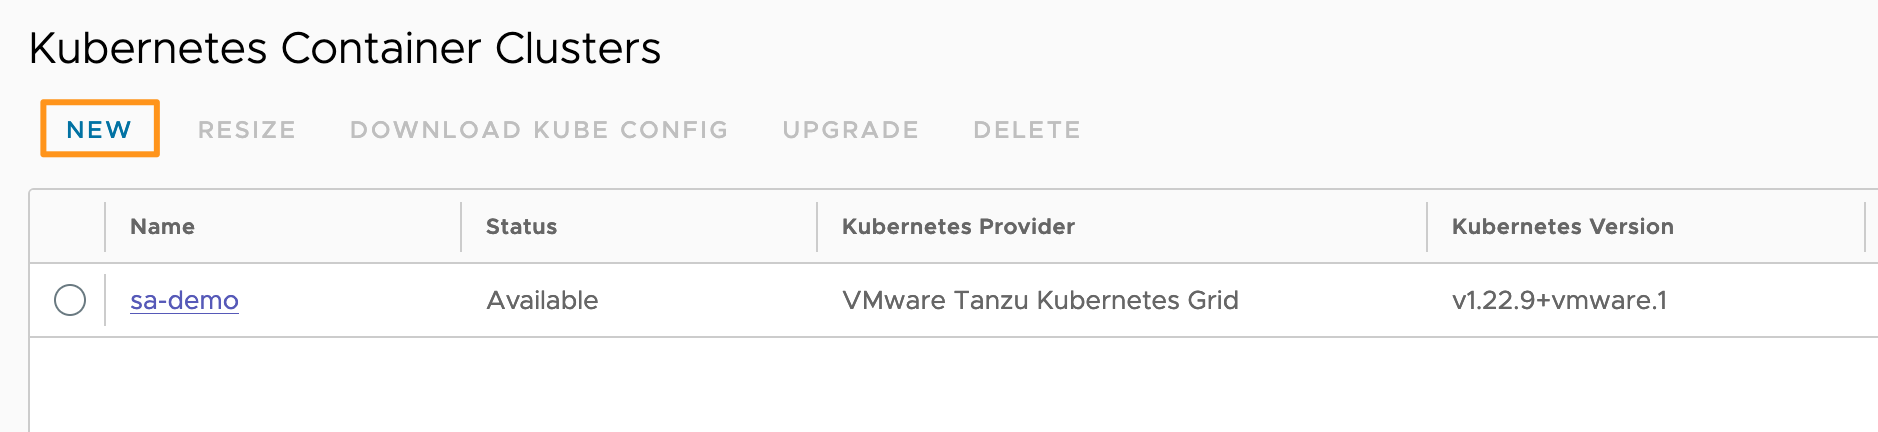
Here’s a successful CSE Kubernetes Cluster deployment running TKG 1.6.1 with Tanzu Kubernetes Runtime (TKr) v1.23.10 alongside my TKG 1.5.4 cluster running TKr v1.22.9.

Troubleshooting
CSE Logs
The CSE appliance logs will contain information about any new clusters requested using the Kubernetes Container Cluster plugin (or the API). It also details the process CSE follows to deploy the bootstrap machine as well as the state of the bootstrap and subsequent cluster deployment.
The CSE logs are found on the CSE appliance under /root. The default username is root and the default password is vmware. Once you’re in you can dig around in the cse.log file and see if there are any errors that stand out as to why your cluster may have failed. Fair warning, it gets a bit messy in there.
I suggest configuring the CSE Server syslog settings under More > Kubernetes Container Clusters > CSE Management > Server Details and click Update Server. Restart the CSE appliance and logs will begin forwarding to your defined syslog endpoint. I’ve got mine going straight to vRealize Log Insight.
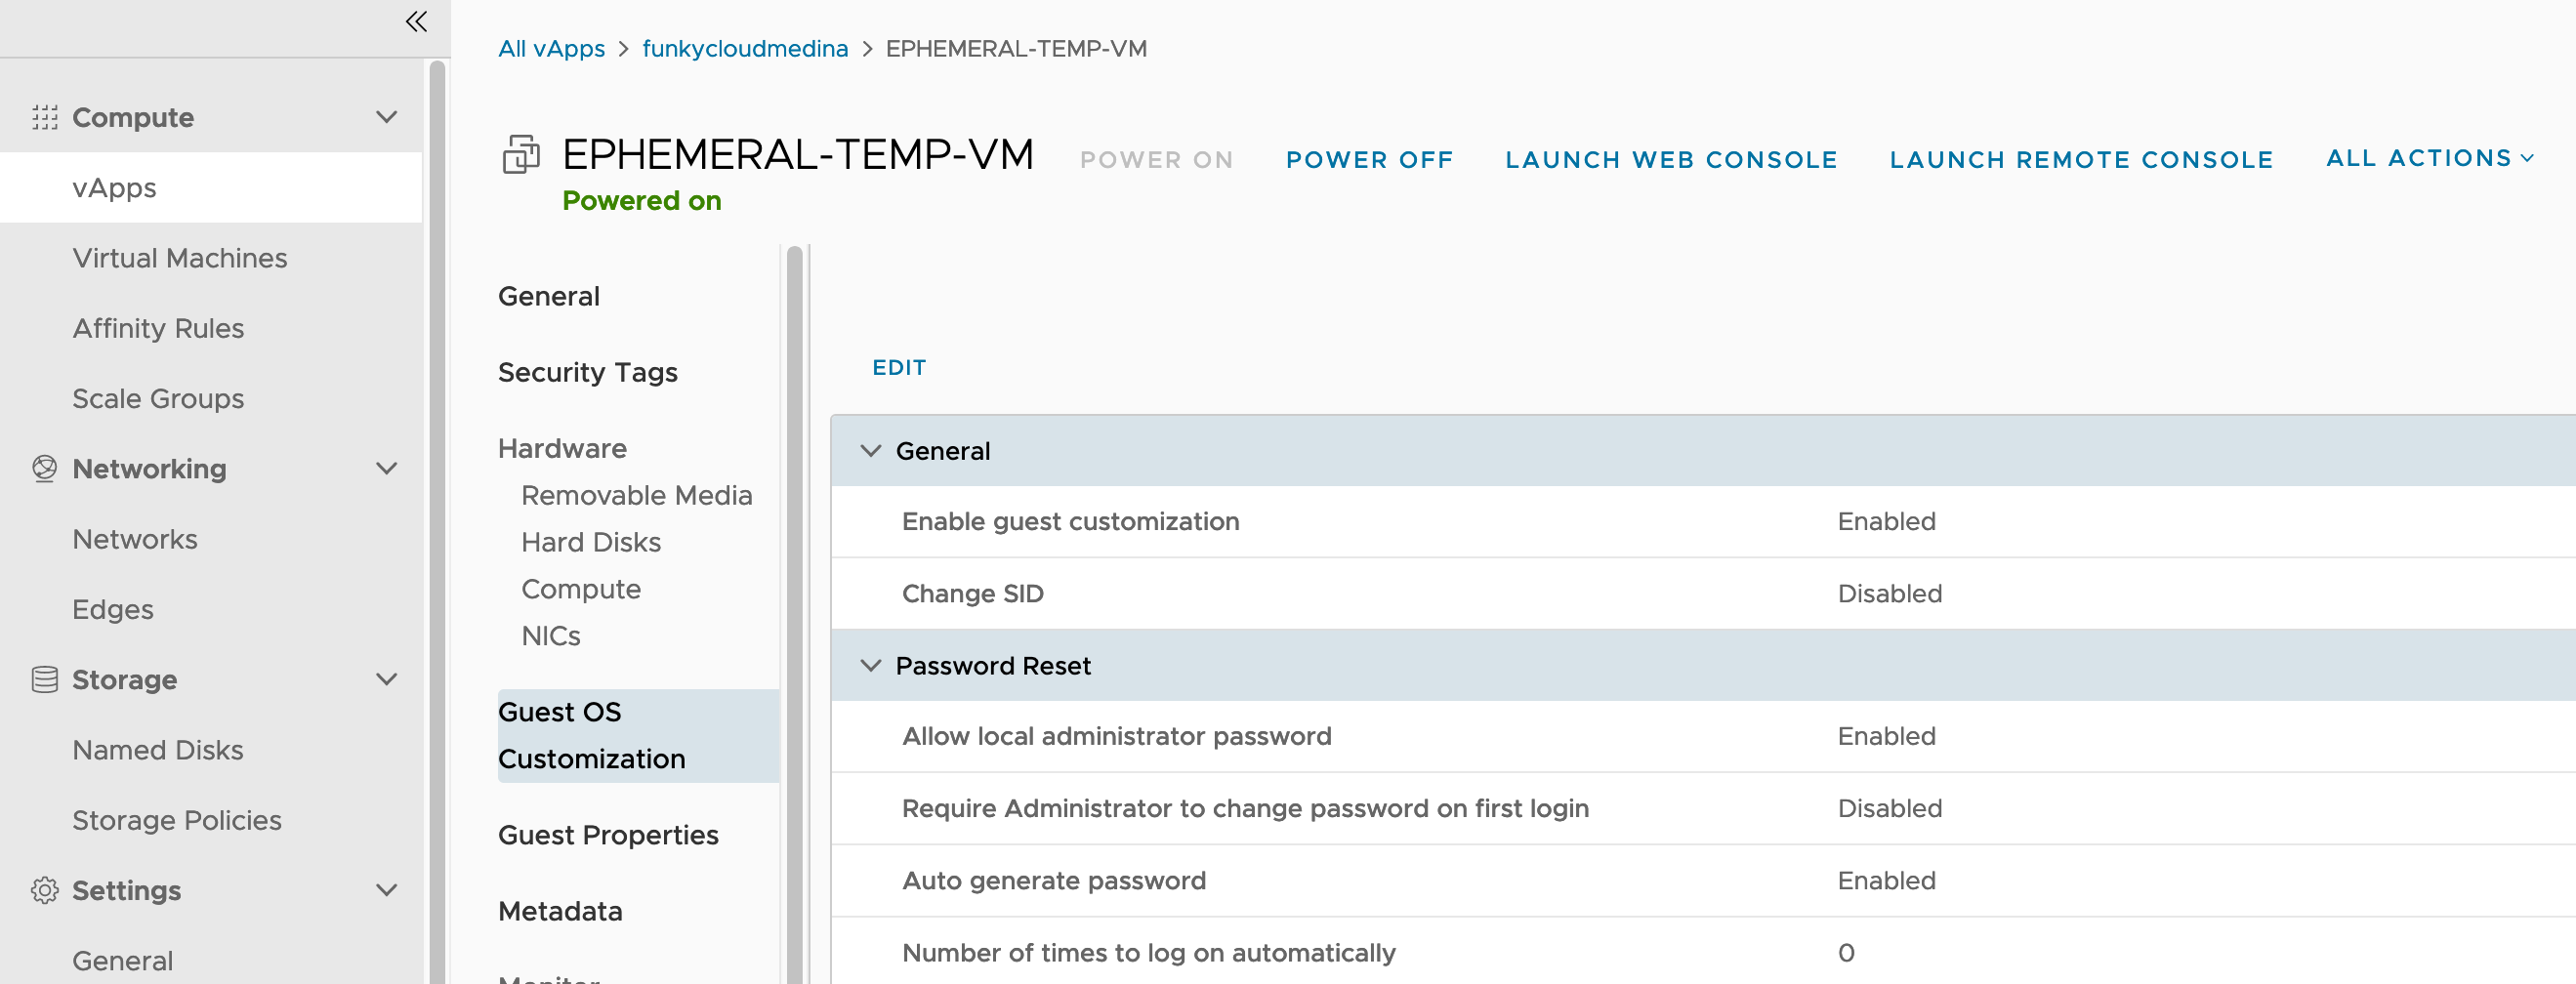
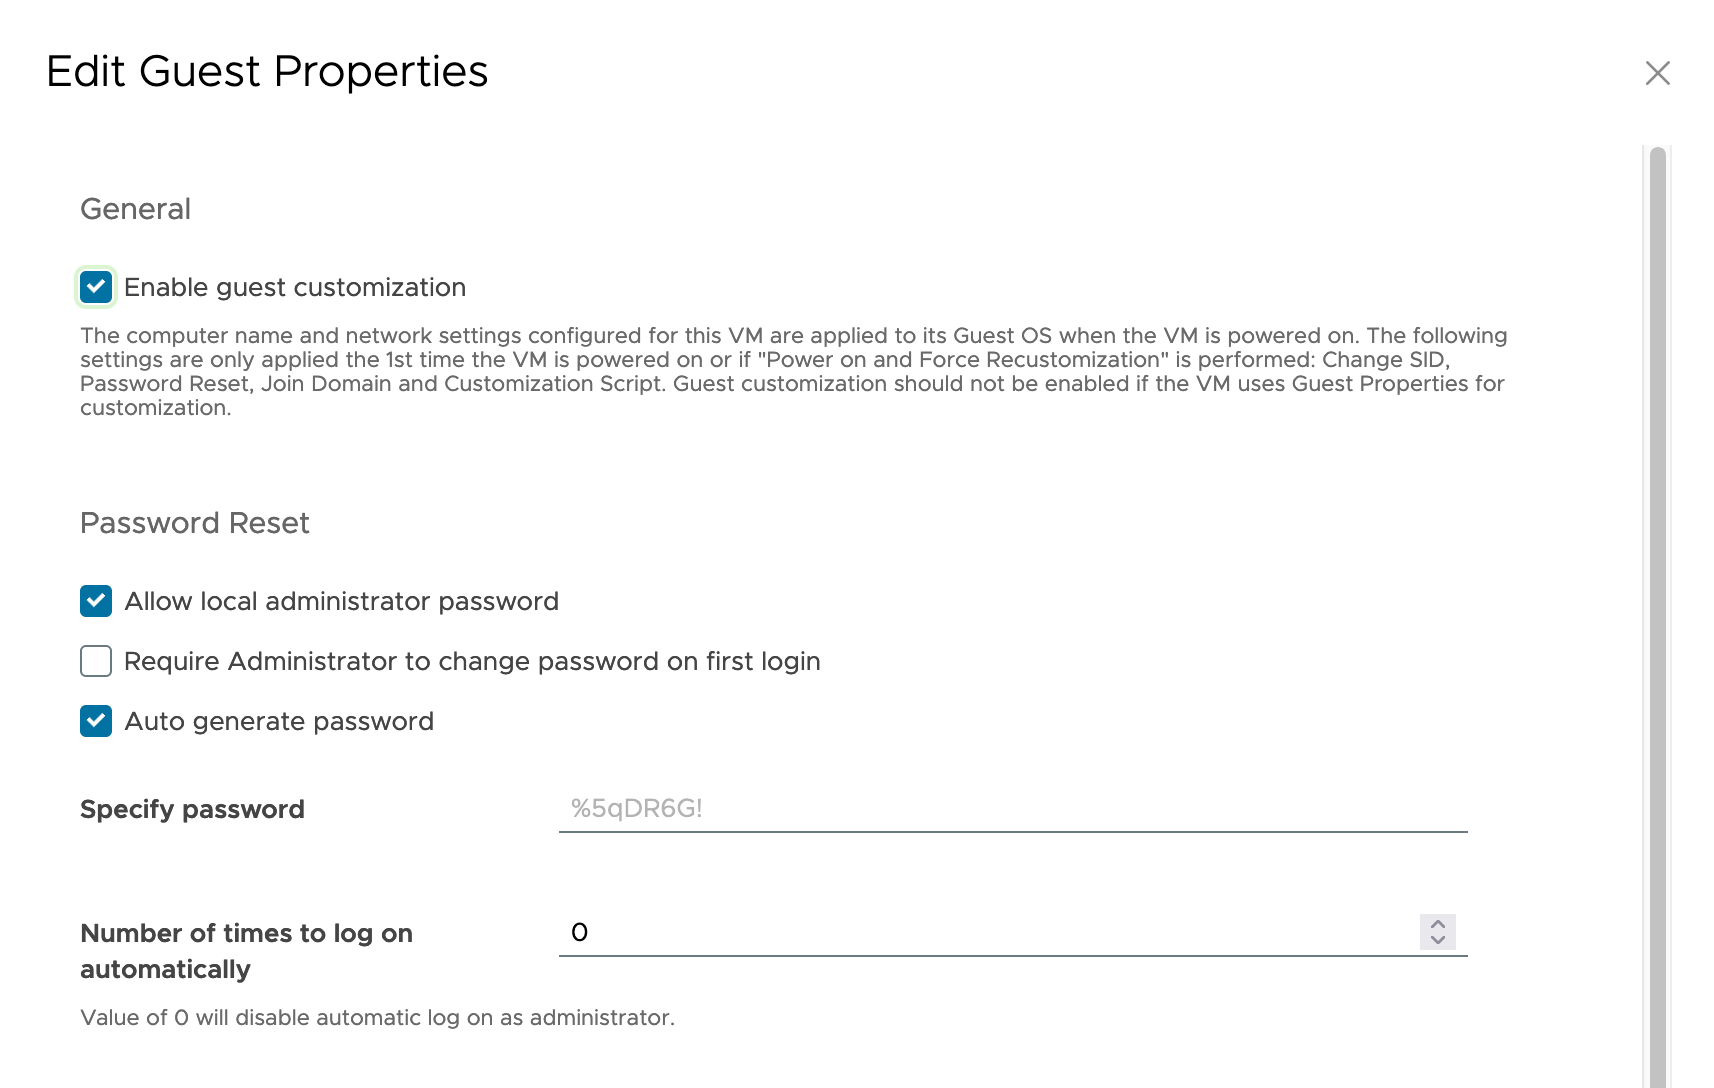
Bootstrap VM
In case you haven’t seen it, CSE clusters are deployed by a bootstrap VM deployed into the tenant Org VDC. This bootstrap machine is called “EPHEMERAL-TEMP-VM” and is short lived, assuming all goes well.
The bootstrap machine has additional logs that can be of immense value if your cluster build is timing out or just not working. However, if you have auto-repair enabled when you request the cluster the bootstrap machine will be deleted. You’ll need to disable the auto-repair option to keep the boostrap VM around.
The bootstrap machine will have a password auto-generated by VCD under the Guest OS Customisation properties that you can use to login as root:
The bootstrap machine will have logs of the bootstrap cluster build and any issues encountered provisioning VMs against VCD.
That’s the end of the post, I think I’ve covered everything. If you have any questions feel free to leave a comment!