While exploring vRealize Automation and SaltStack Config, I had the bright idea to expand the integrations across the vRealize Suite by automatically installing the vROPs Telegraf agent during a vRA Deployment. This would provide immediate guest OS monitoring and (optional) application monitoring to every machine deployed from vRA.
What you’ll need:
- vRealize Automation 8.8
- vRealize SaltStack Config 8.8
- Integrated with vRealize Automation through either vRealize Suite Lifecycle Manager or as a standalone SaltStack instance. This article was written using the integrated method via vRSLCM, not a standalone deployment.
- vRealize Operations 8.6.x
- Cloud Proxy deployed and integrated with vRealize Operations.
- The
CTRL,CandVkeys on your keyboard
Before you start, review the prerequisites for the Telegraf agent here.
For this demo, we’ll be installing the Linux Telegraf agent on Ubuntu. Scripted installation instructions can be found here. These instructions were used to create the Salt State File.
Creating the Salt State file and dependencies
Referencing the Telegraf installation documentation, the process to install the vROPs Telegraf agent requires us to fetch a download.sh file from the Cloud Proxy registered with vROPs. Based on my testing, the script requires root equivalent access to install the agent. In my Ubuntu image, the default ubuntu account has sudo access but was still not able to install directly from the download.sh script. This necessitated a “wrapper” script that would wrap a sudo elevated execution of the download.sh file. I’ll provide the state file and the wrapper script in this post.
Create the installation wrapper script
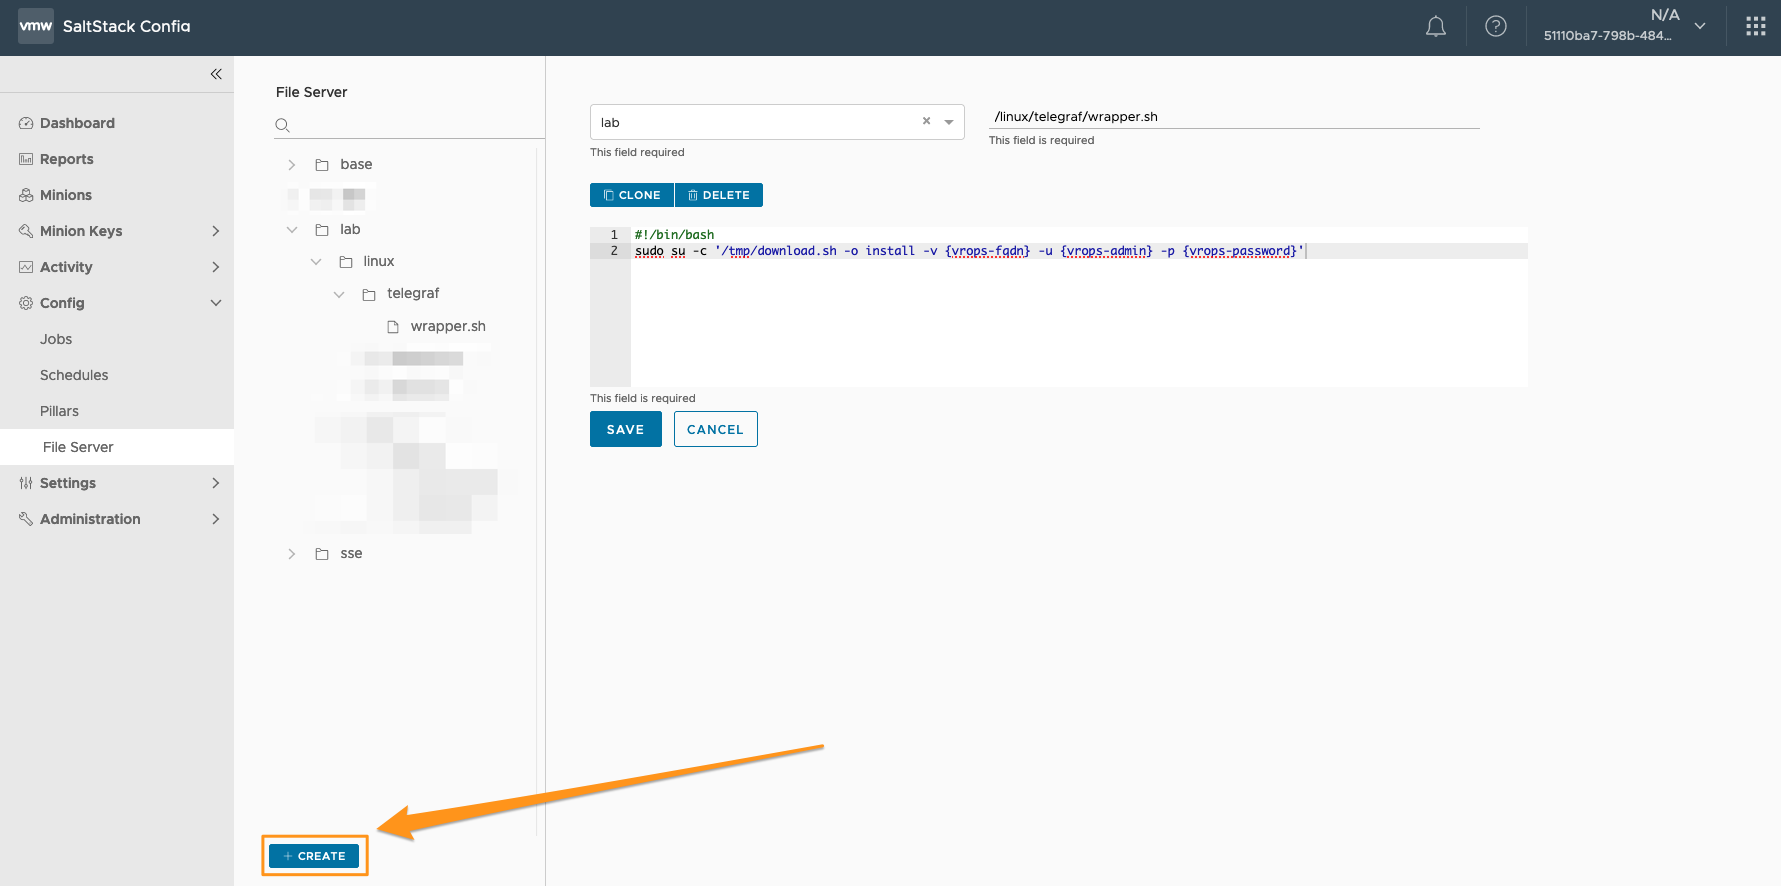
- Start by logging in to your vRealize SaltStack Config console and navigate to Config > File Server.
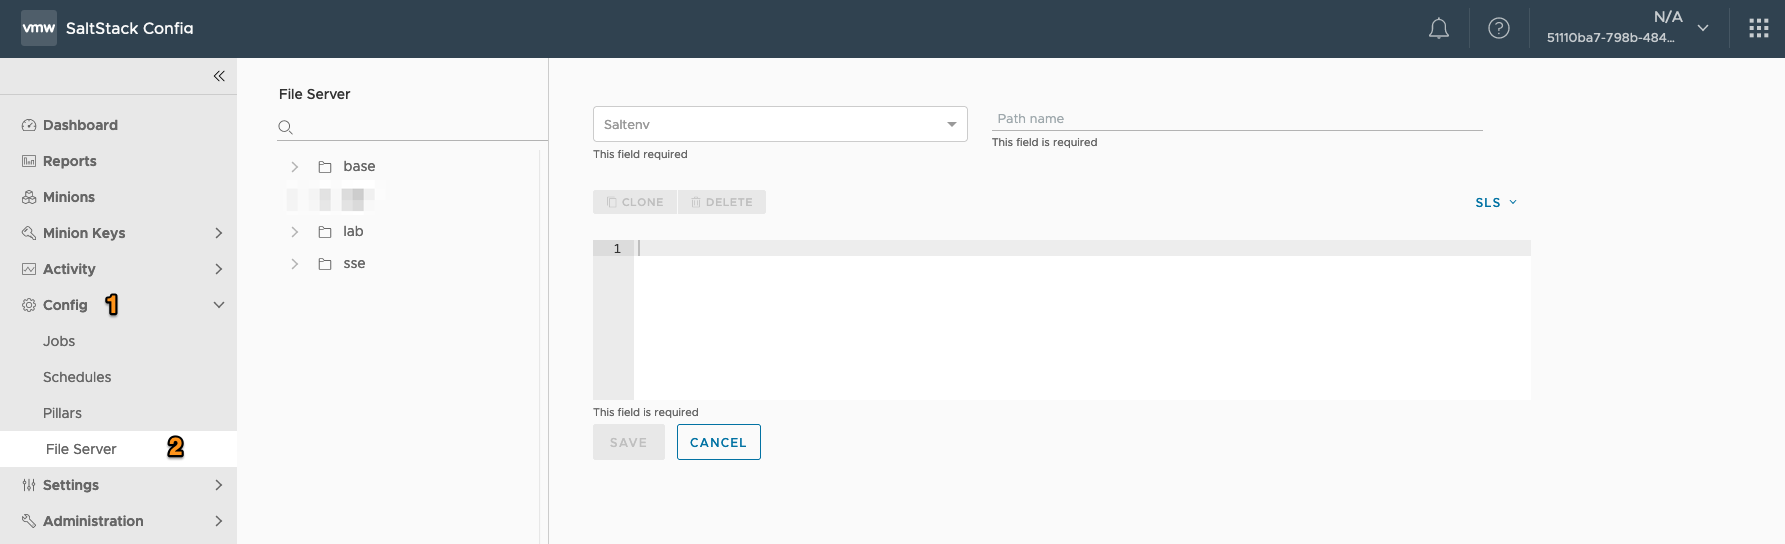
- In the right hand pane, select a Salt Environment and your preferred path for a new SLS file. For this example, I used the Salt Environment
laband the file path/linux/telegraf/wrapper.sh. If you want to create a new Salt Environment, type a new value in the Environment drop down.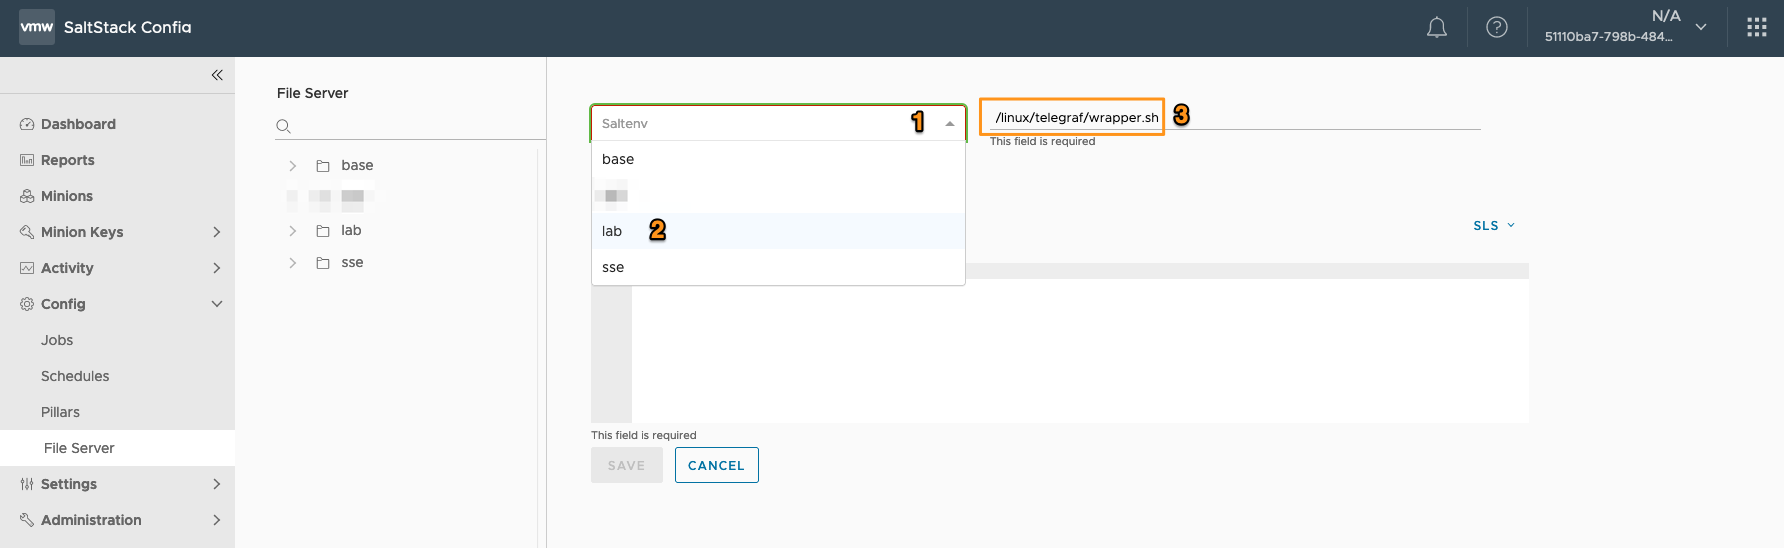
- In the large text box, paste the following replacing the
{vrops-fqdn},{vrops-admin}and{vrops-password}options with your own. Then click Save.1 2#!/bin/bash sudo su -c '/tmp/download.sh -o install -v {vrops-fqdn} -u {vrops-admin} -p {vrops-password}'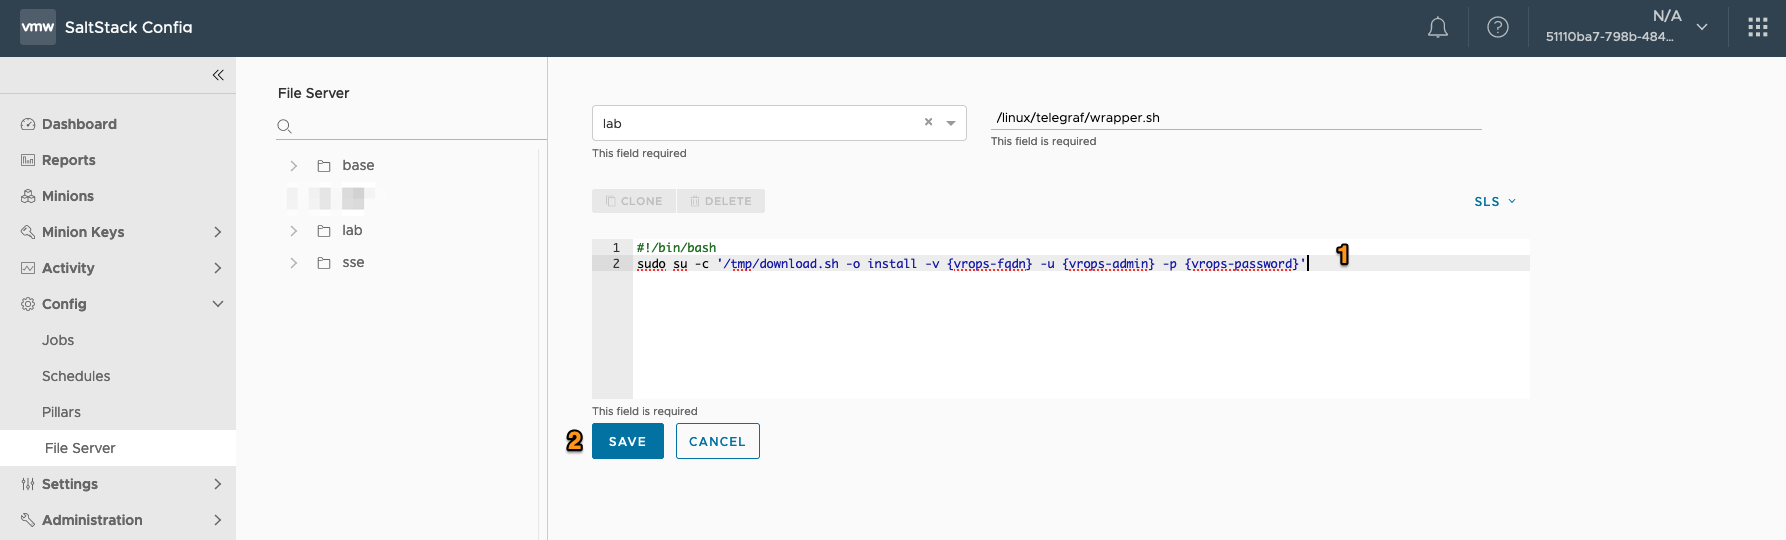
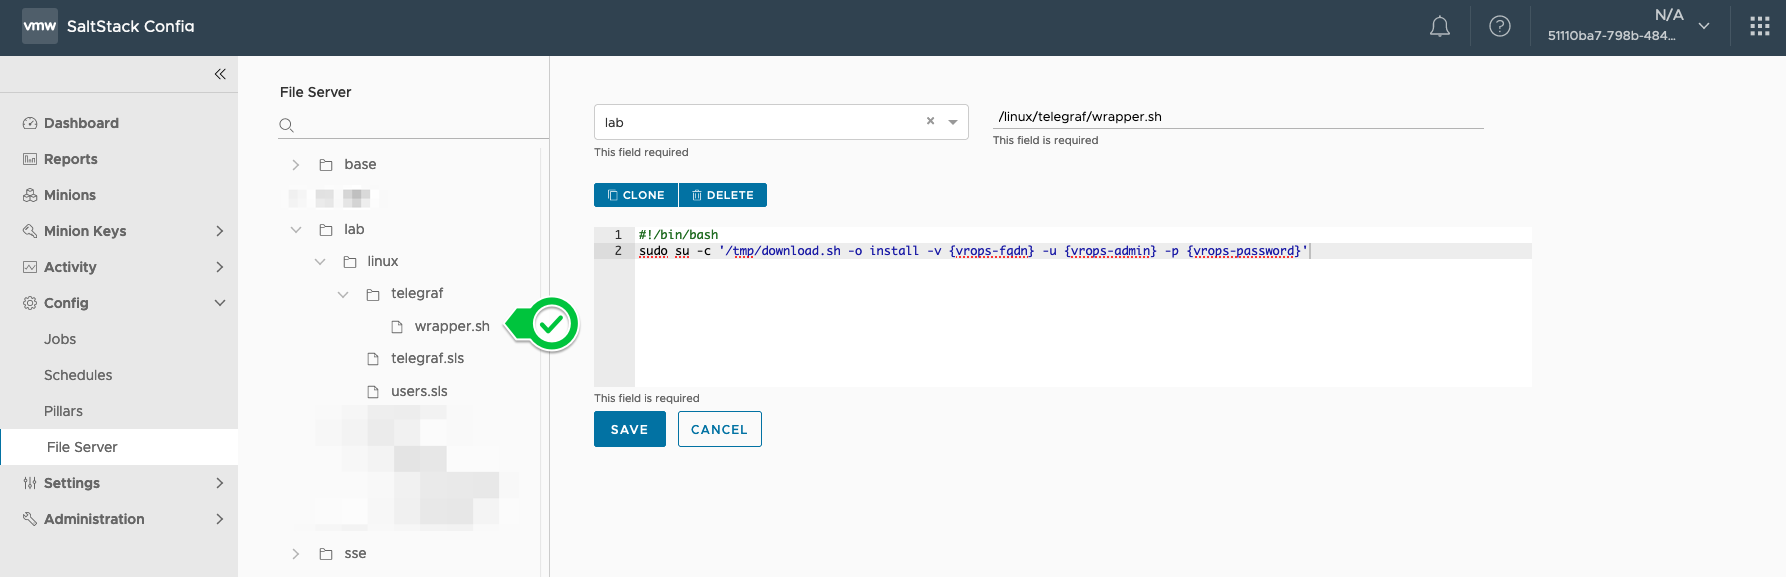
- Once saved, you can browse the Salt File Server directory tree and you’ll see the new file in the path you specified:
With the installation wrapper ready, we can create the Telegraf installation Salt State File.
Create the Telegraf Installation State File
- With the File Server page still open, click the Create button.
- In the right hand pane, similar to the installation wrapper, select a Salt Environment and your preferred path for a new SLS file. For this example, I used the Salt Environment
laband the file path/linux/telegraf/init.sls. If you want to create a new Salt Environment, type a new value in the Environment drop down.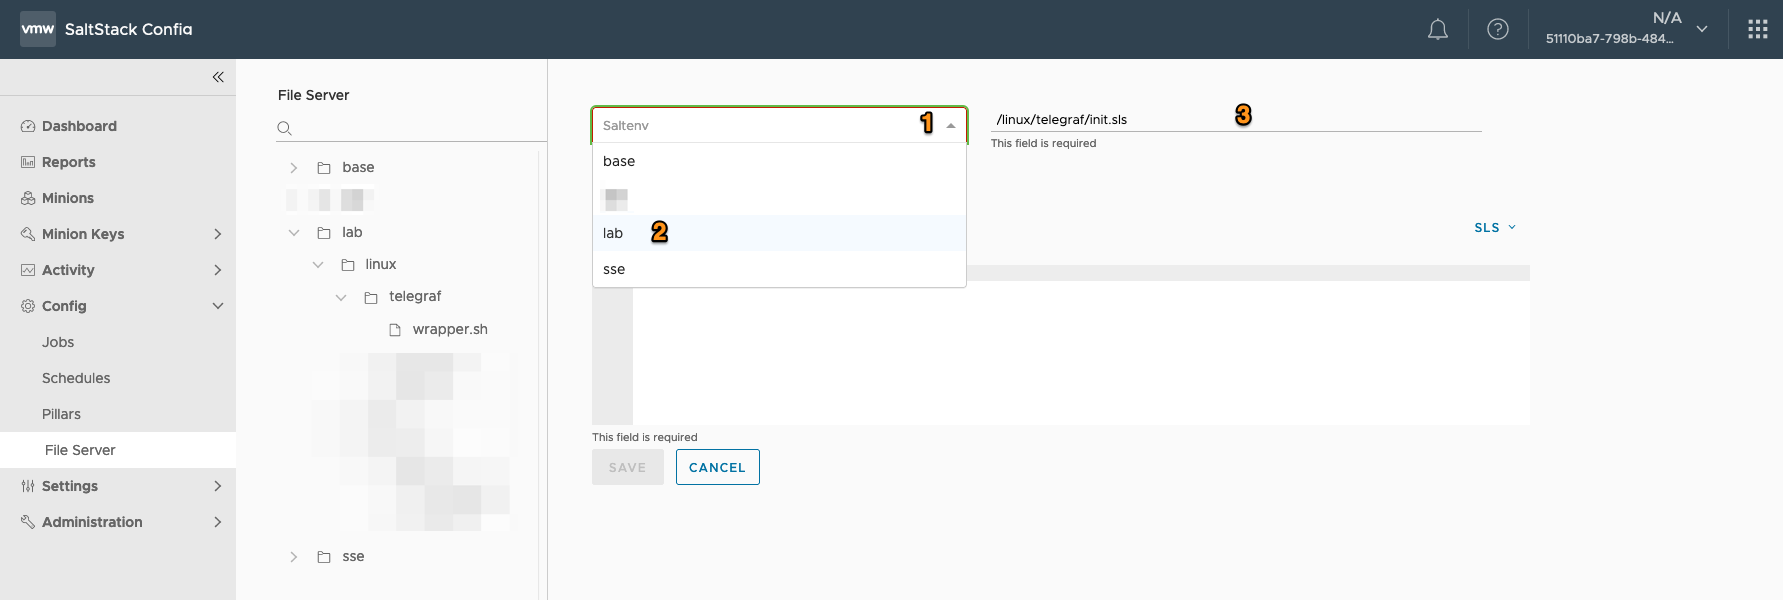
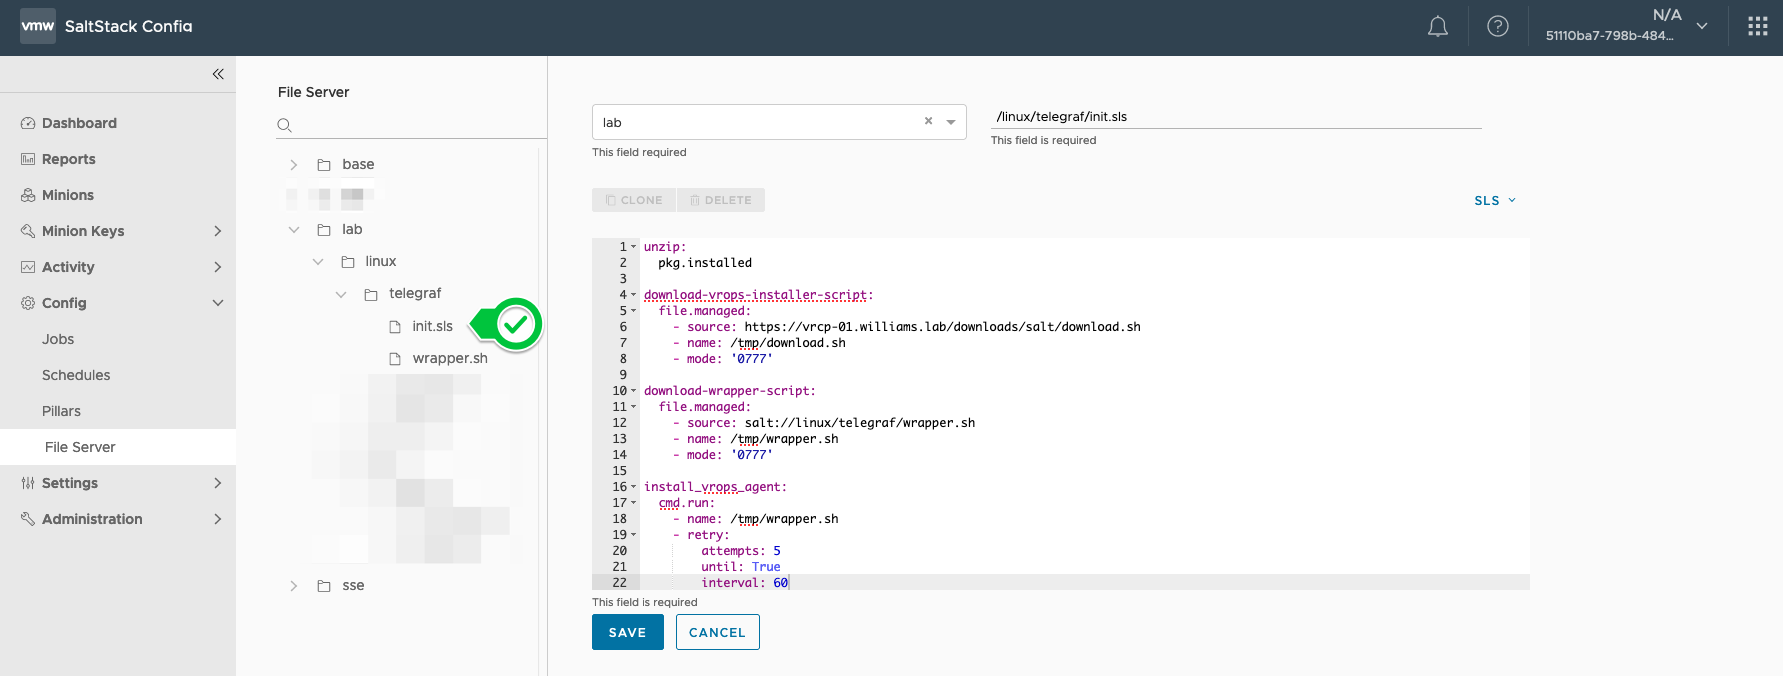
- In the large text box, paste the following and click Save
| |
- Once saved, you can browse the directory tree and you’ll see the new file in the path you specified:
Let’s breakdown each block.
Ensure the “unzip” package is installed on the OS:
| |
Ensure the Telegraf installation script from the vROPs Cloud Proxy is available on the local file system at /tmp/download.sh. We’re also skipping checksum validation and SSL vertification for the HTTPS endpoint.
| |
Ensure the installation wrapper script located on the Salt Master (under /linux/telegraf) is available on the local file system at /tmp/wrapper.sh:
| |
Run the installation wrapper script:
| |
With the Salt state file created, we can move onto creating the vRA Cloud Template.
Using the new Salt state in vRealize Automation
Update your Cloud Template
- Open your vRA instance in a new tab and launch Cloud Assembly.
- Open an existing template or create a new one. I’m using my
Ubuntu 20.04 - Vanillatemplate. - Drag-and-drop the SaltStack Config object to the canvas.
- In the template yaml, locate the new SaltStack Config object.
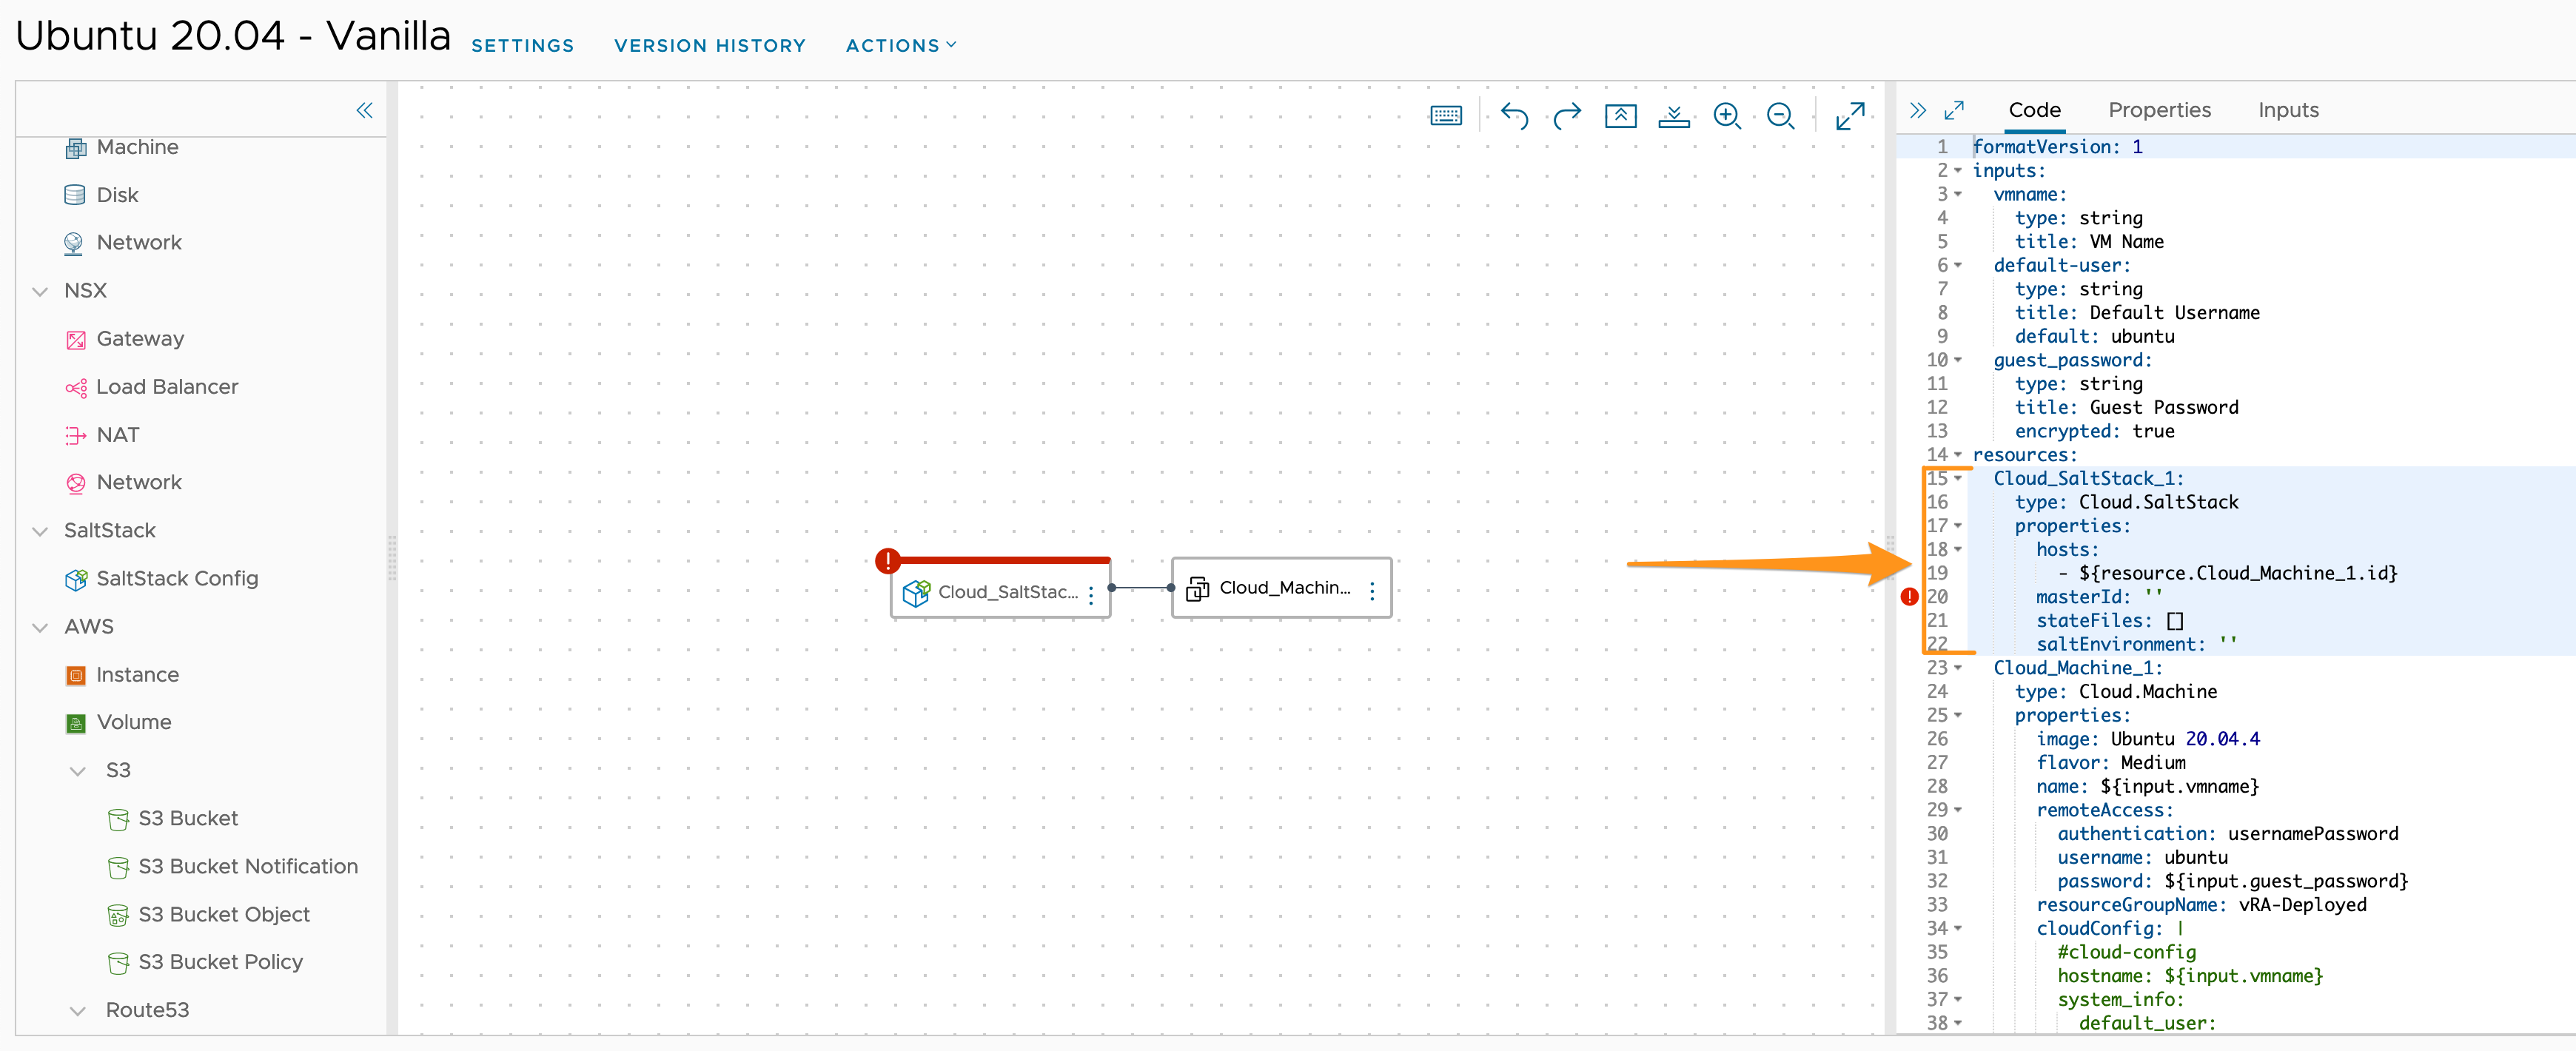
- Populate the SaltStack object with your environments SaltStack variables, along with the State file created earlier.
 Note: vRA will attempt to provide you a dropdown to select values imported from SaltStack.
Deploying a test VM
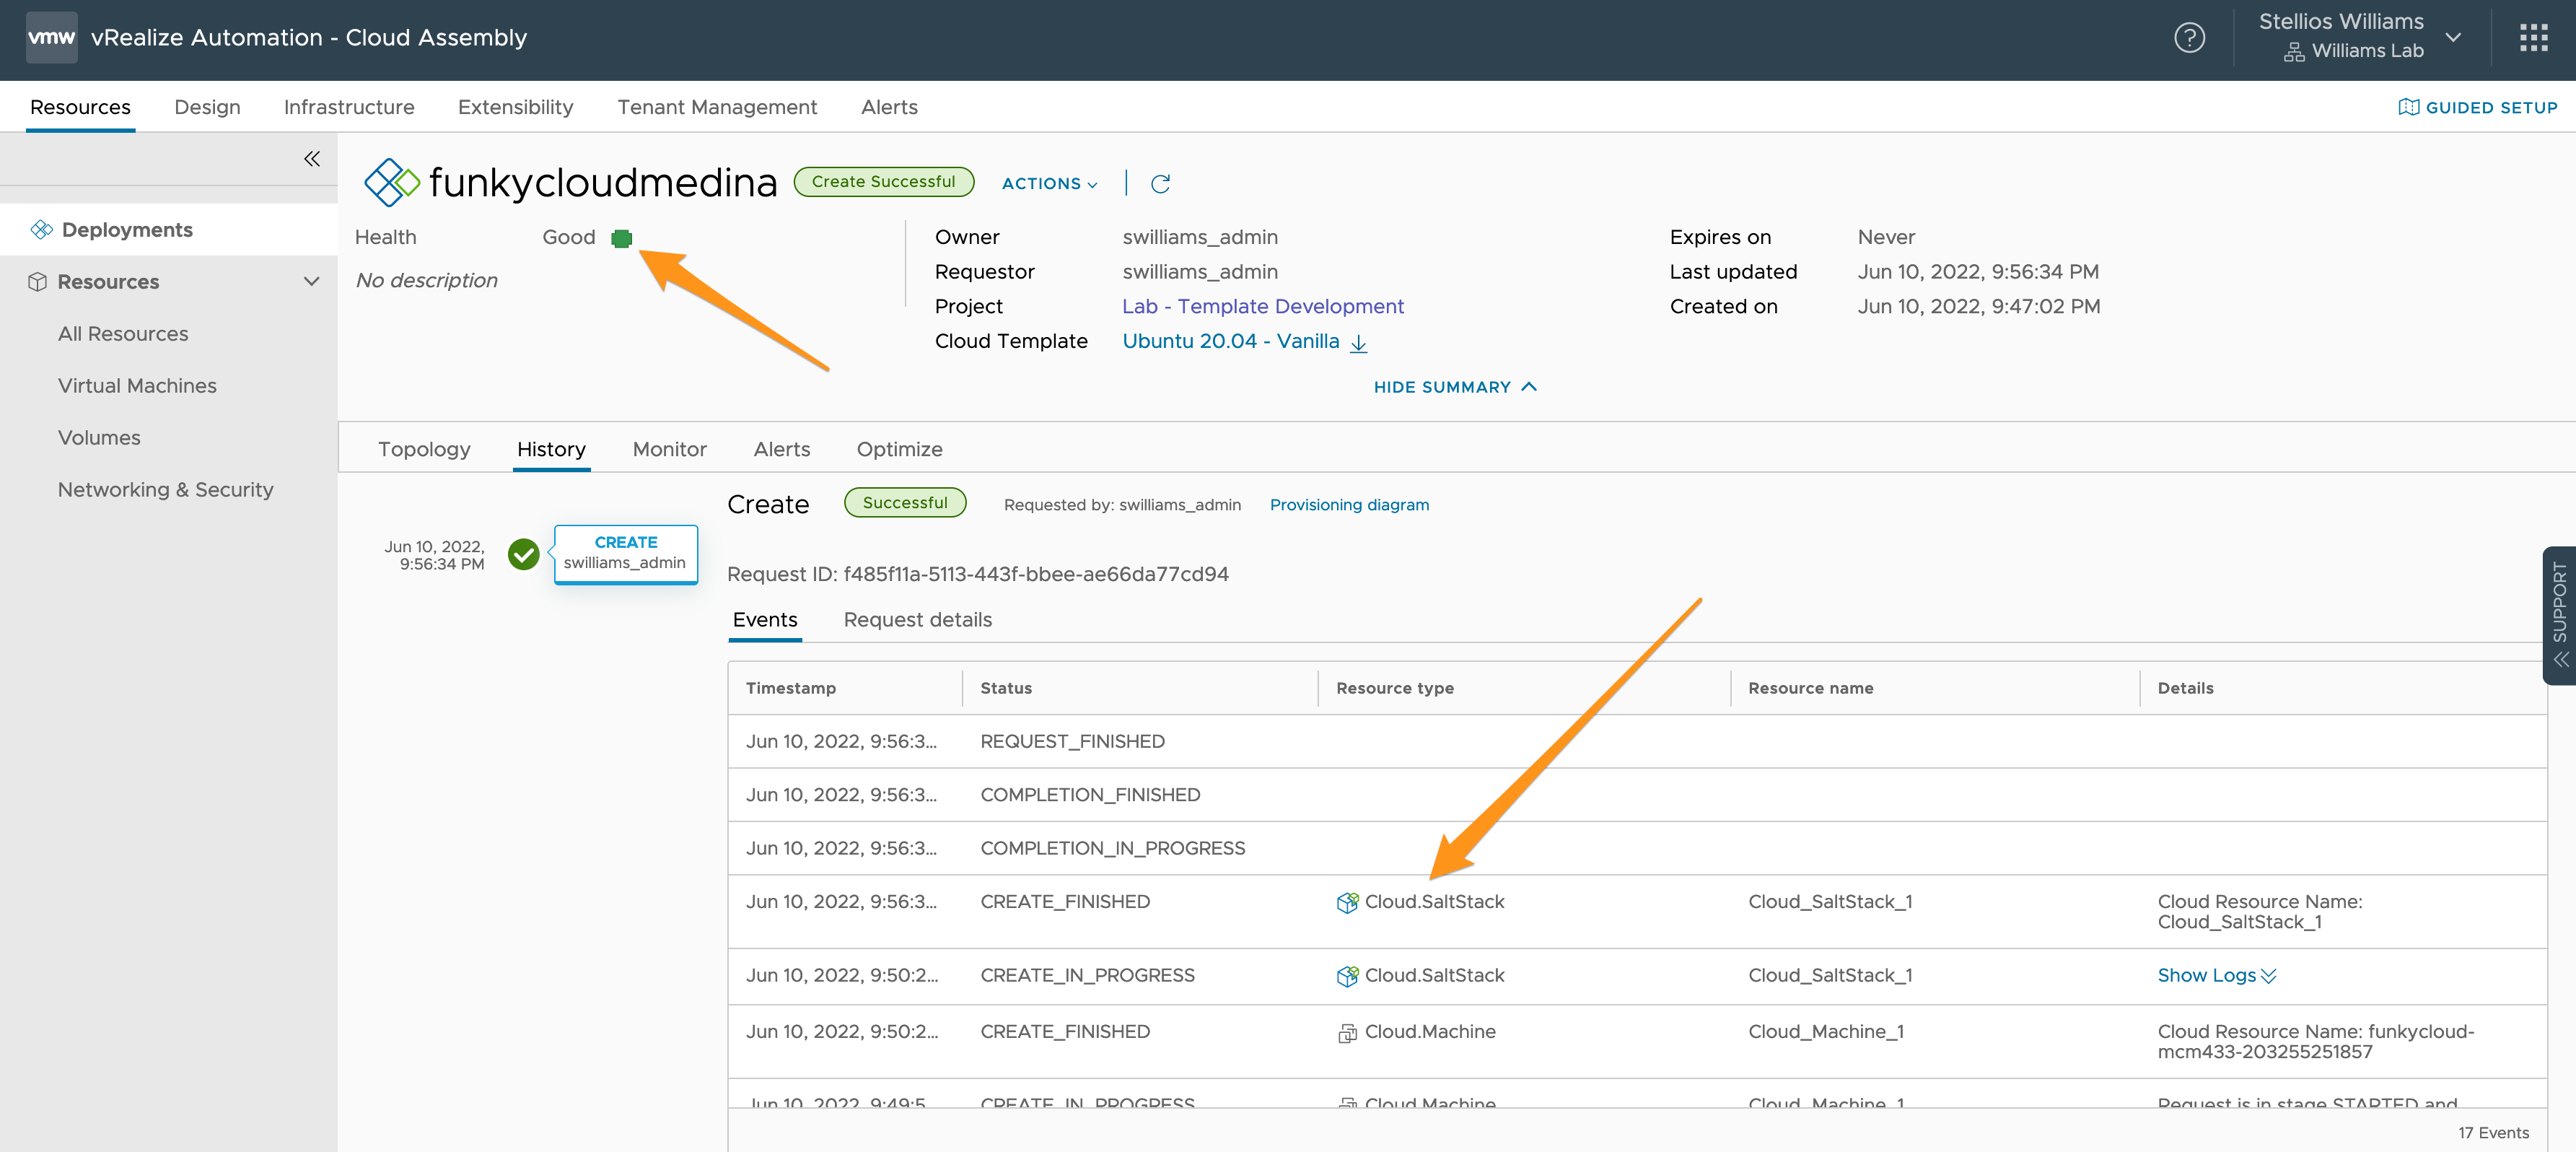
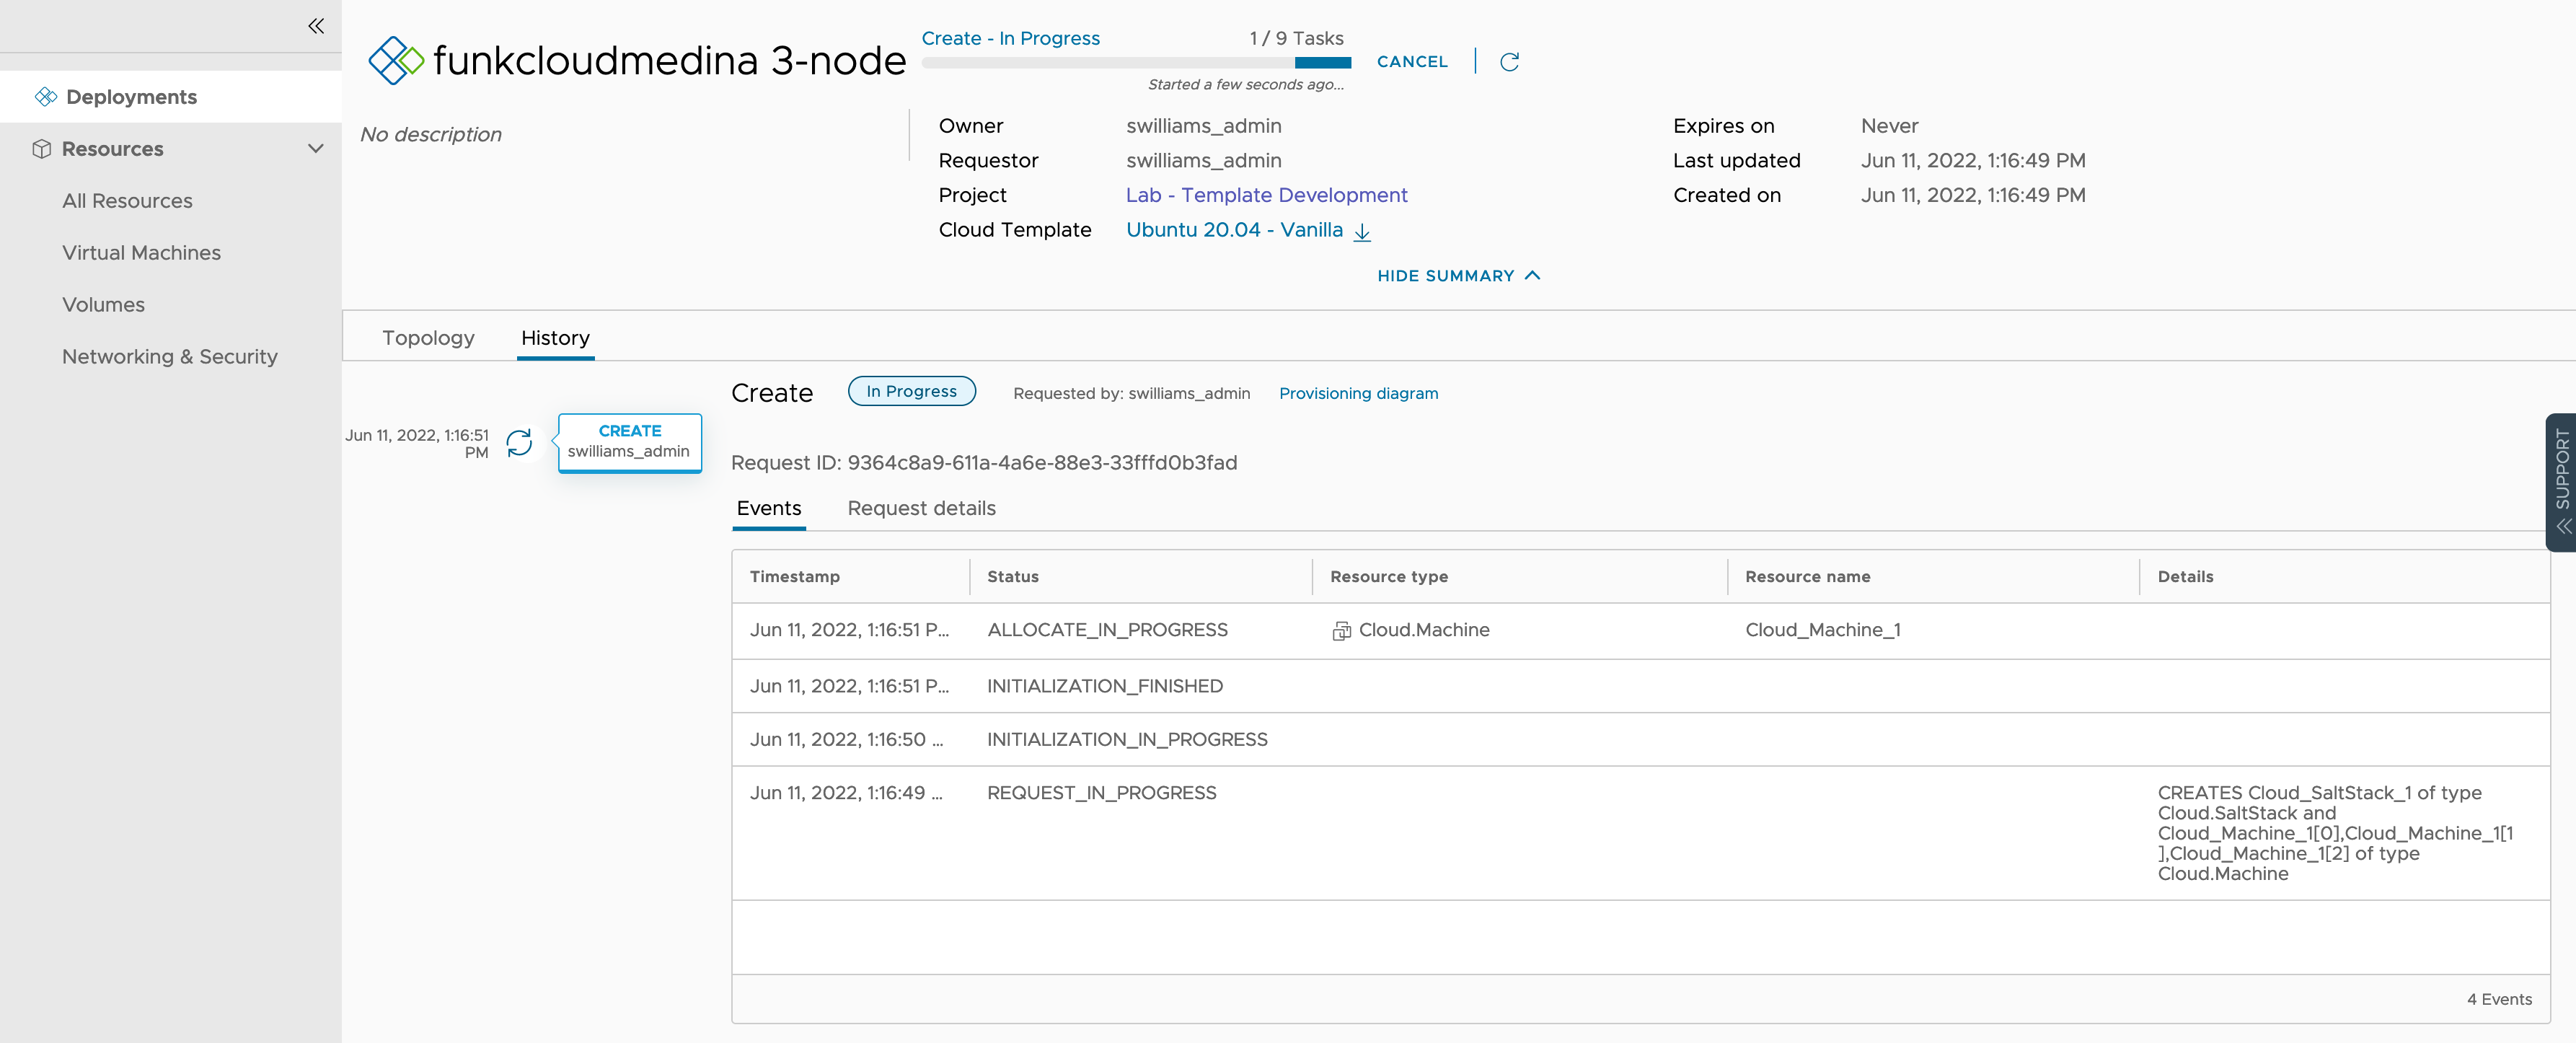
- Deploy your your template with your expected inputs, and navigate to the History tab. We can monitor the status of the request.
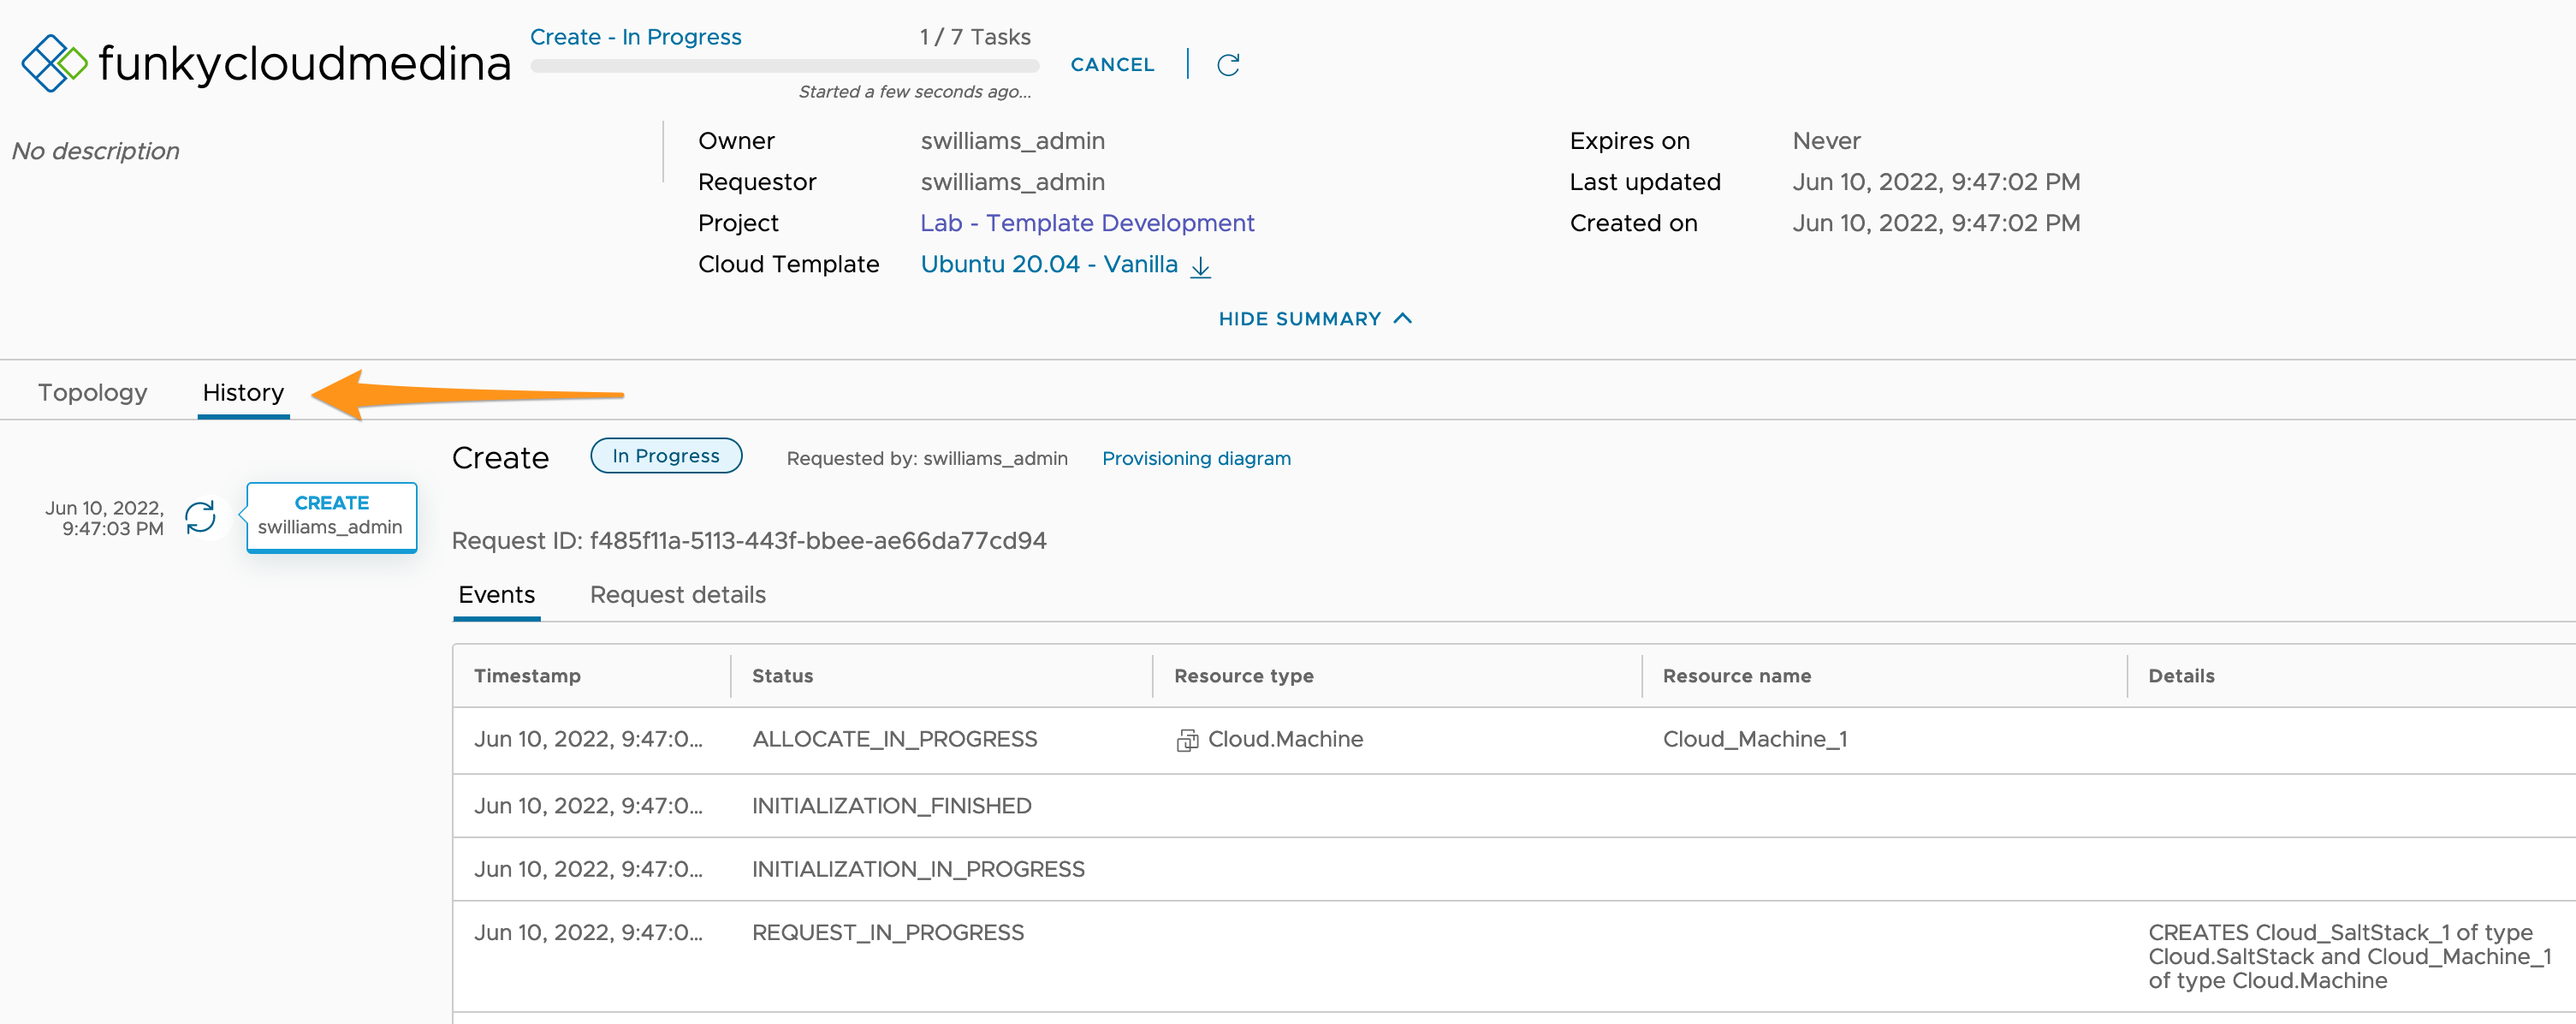
- Once the VM resource creation has completed, you’ll see the
Cloud.SaltStackresource creation start.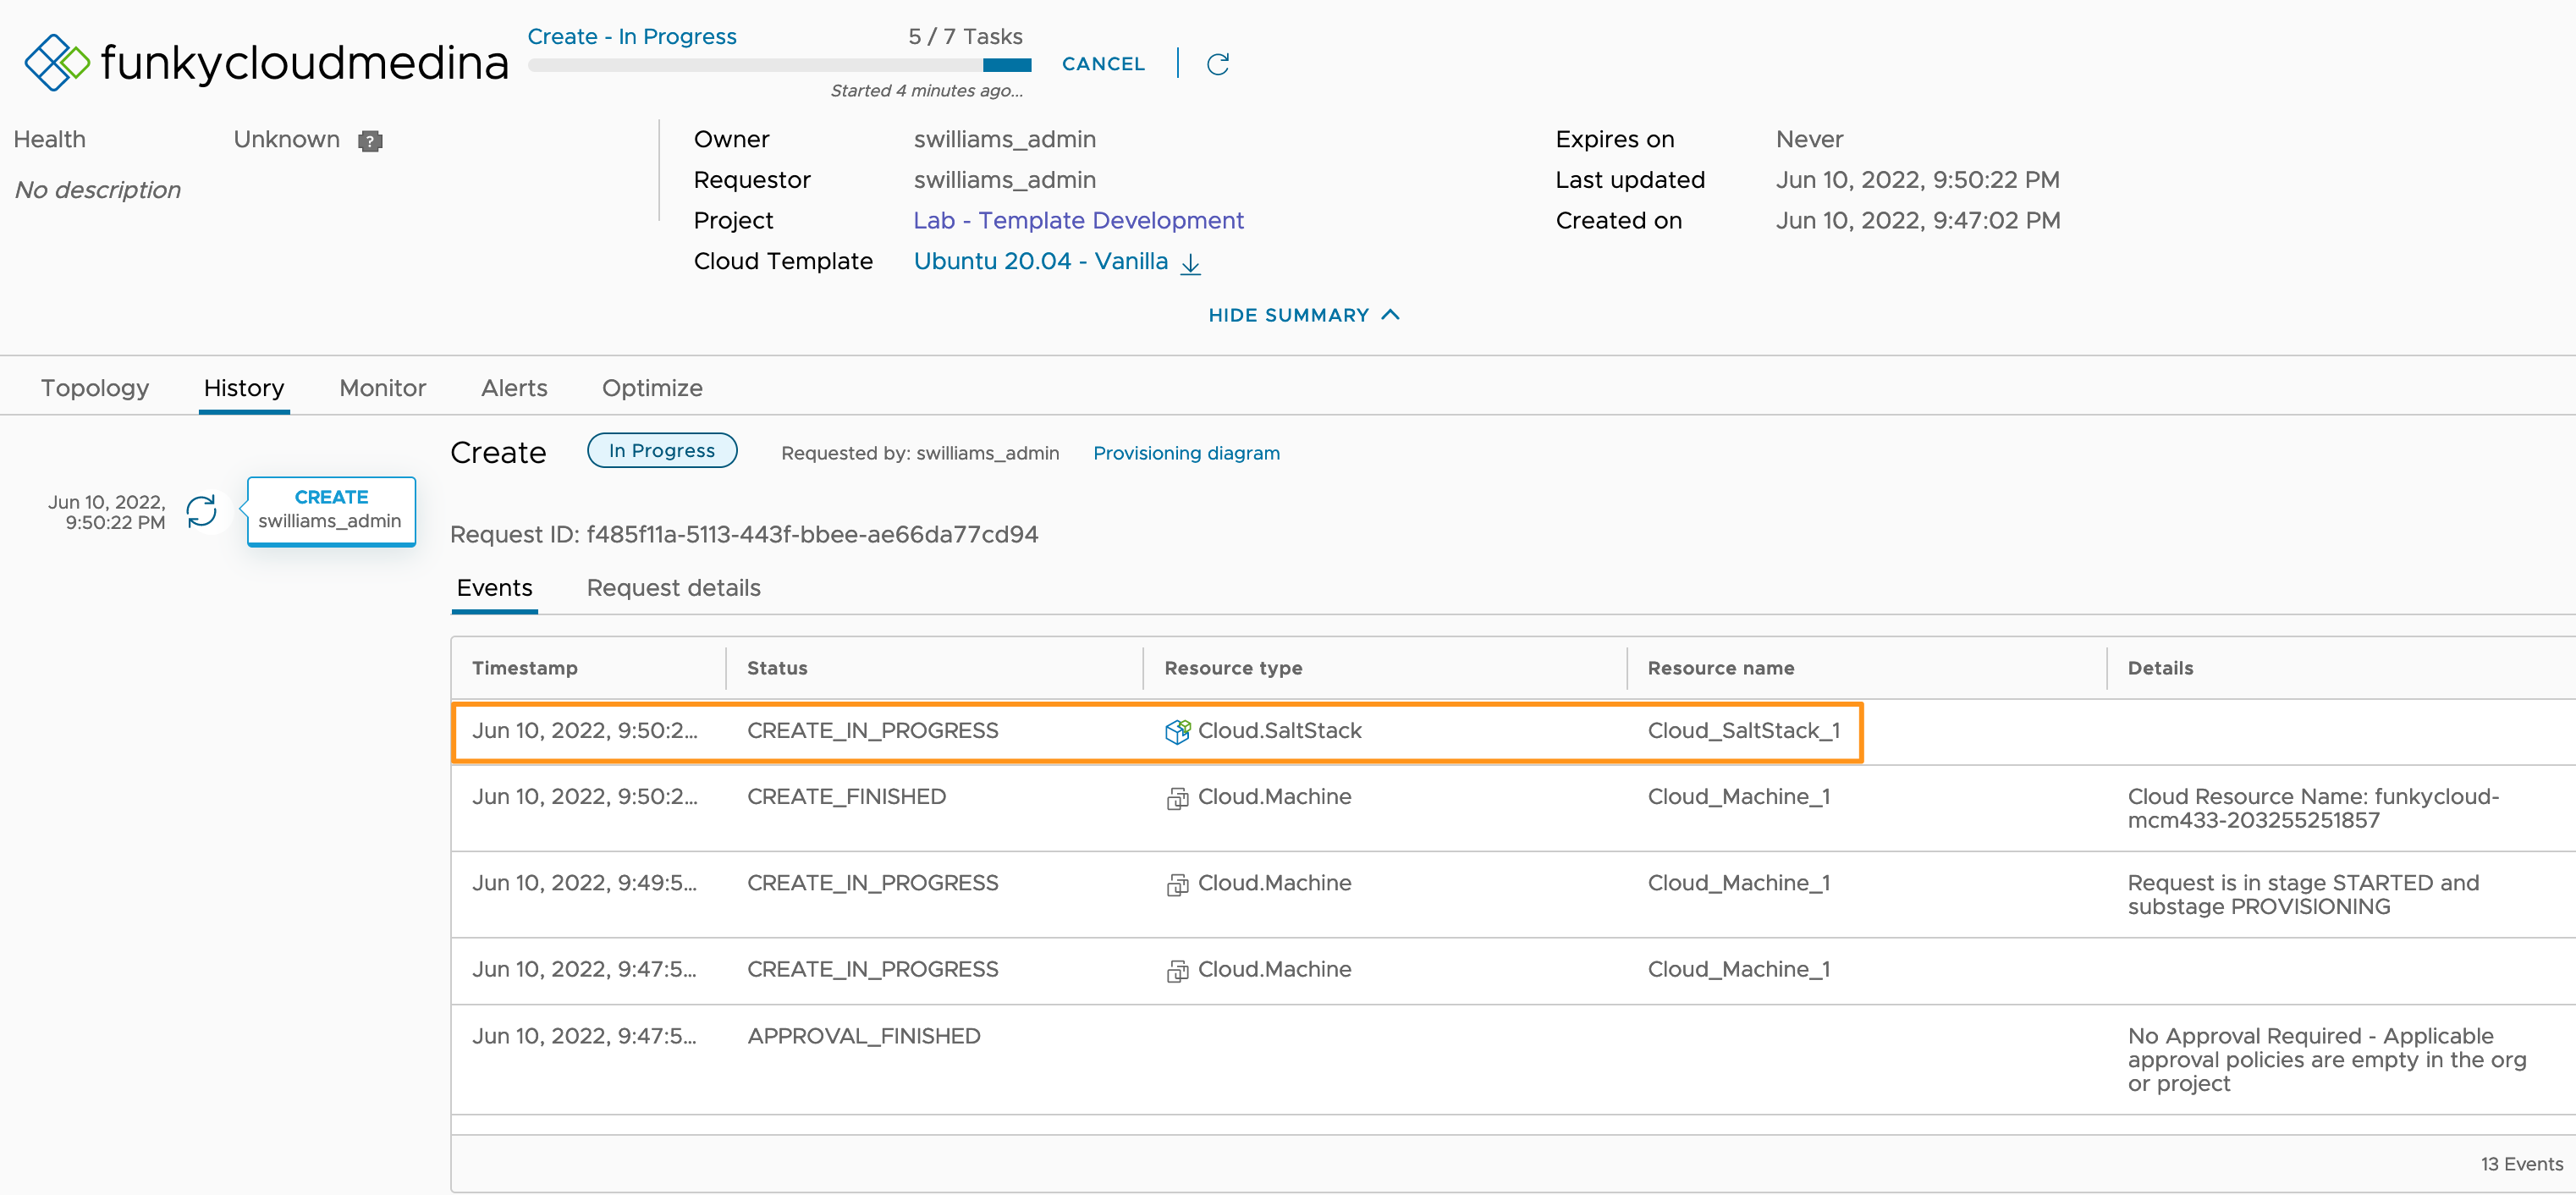
- Switch back to your SaltStack Config tab and navigate to Activity > In Progress.
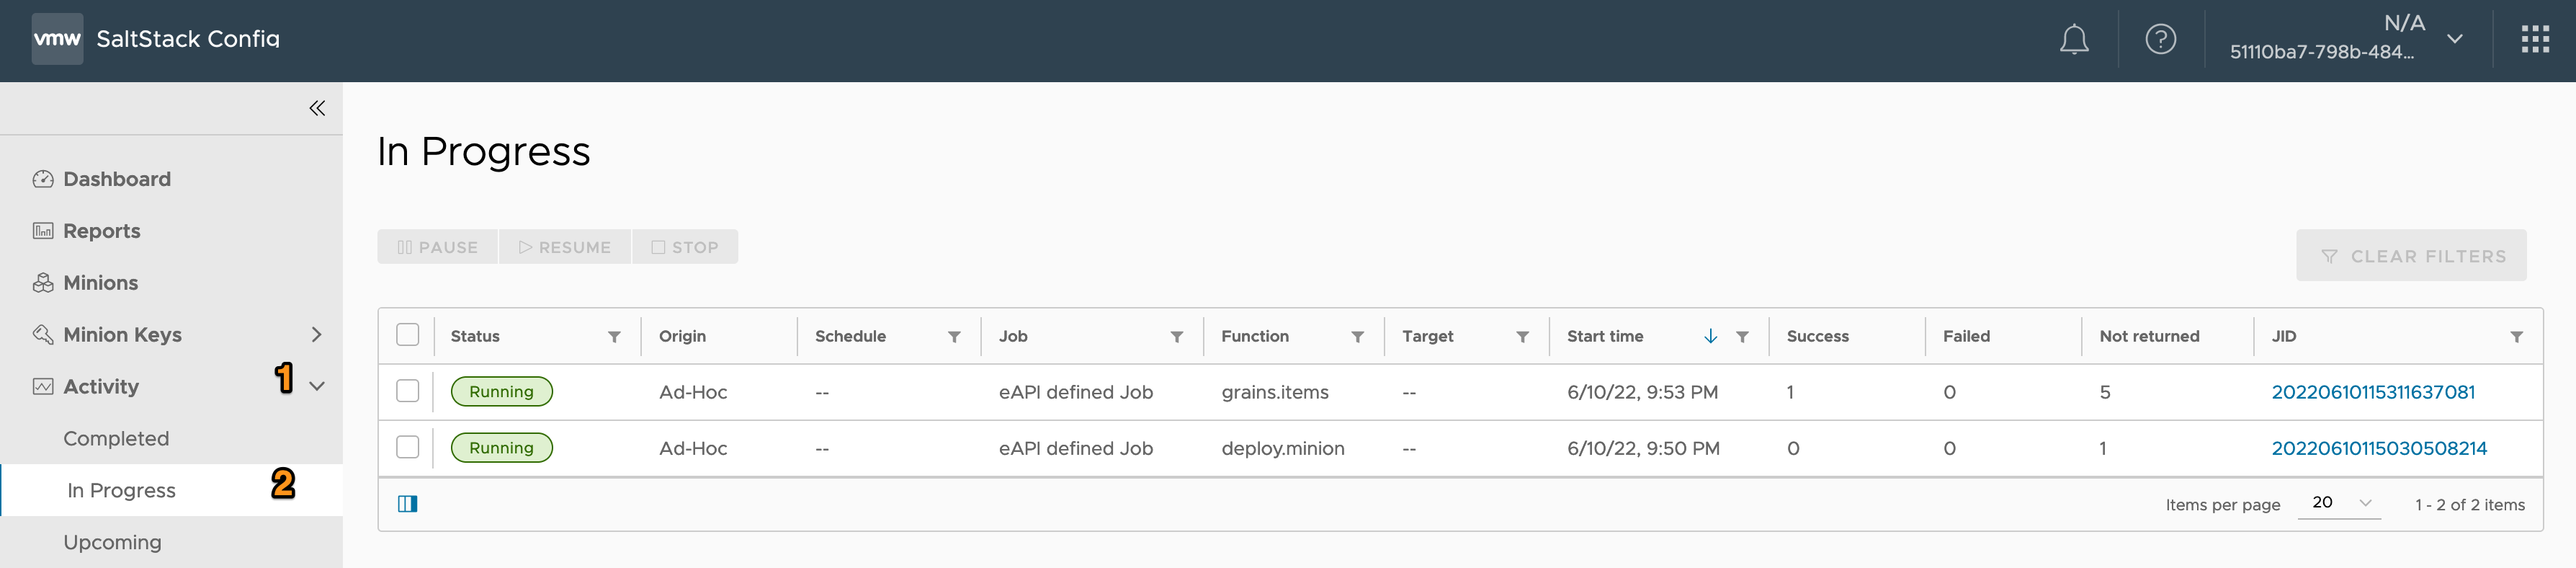
- You’ll see one or two jobs related to your new machine. Look for the
deploy.minionfunction.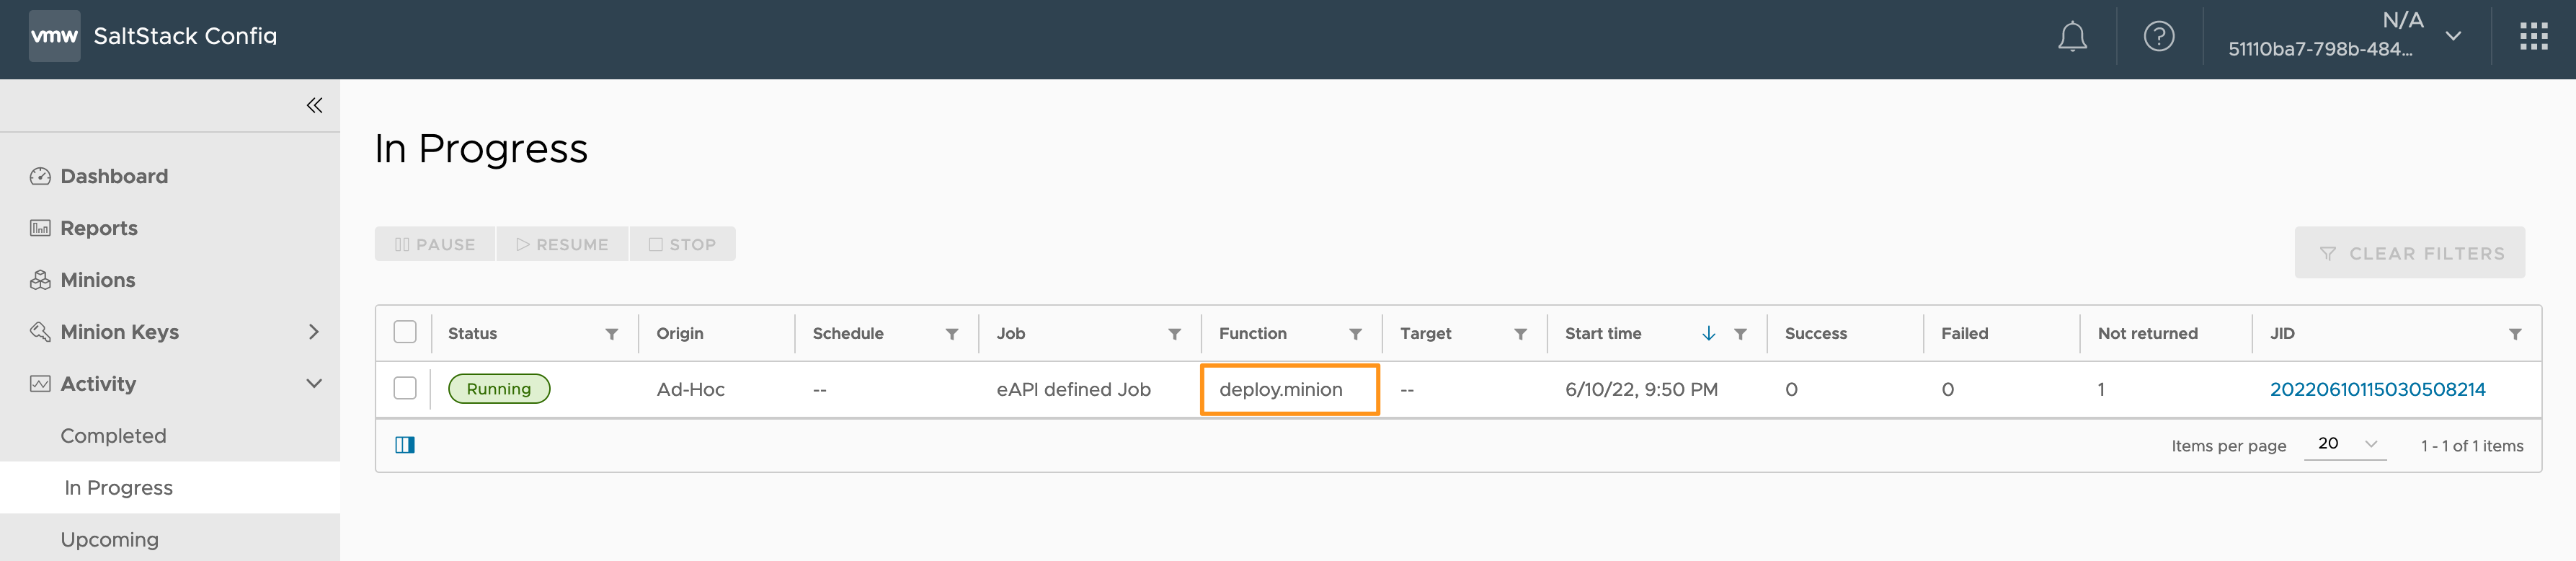
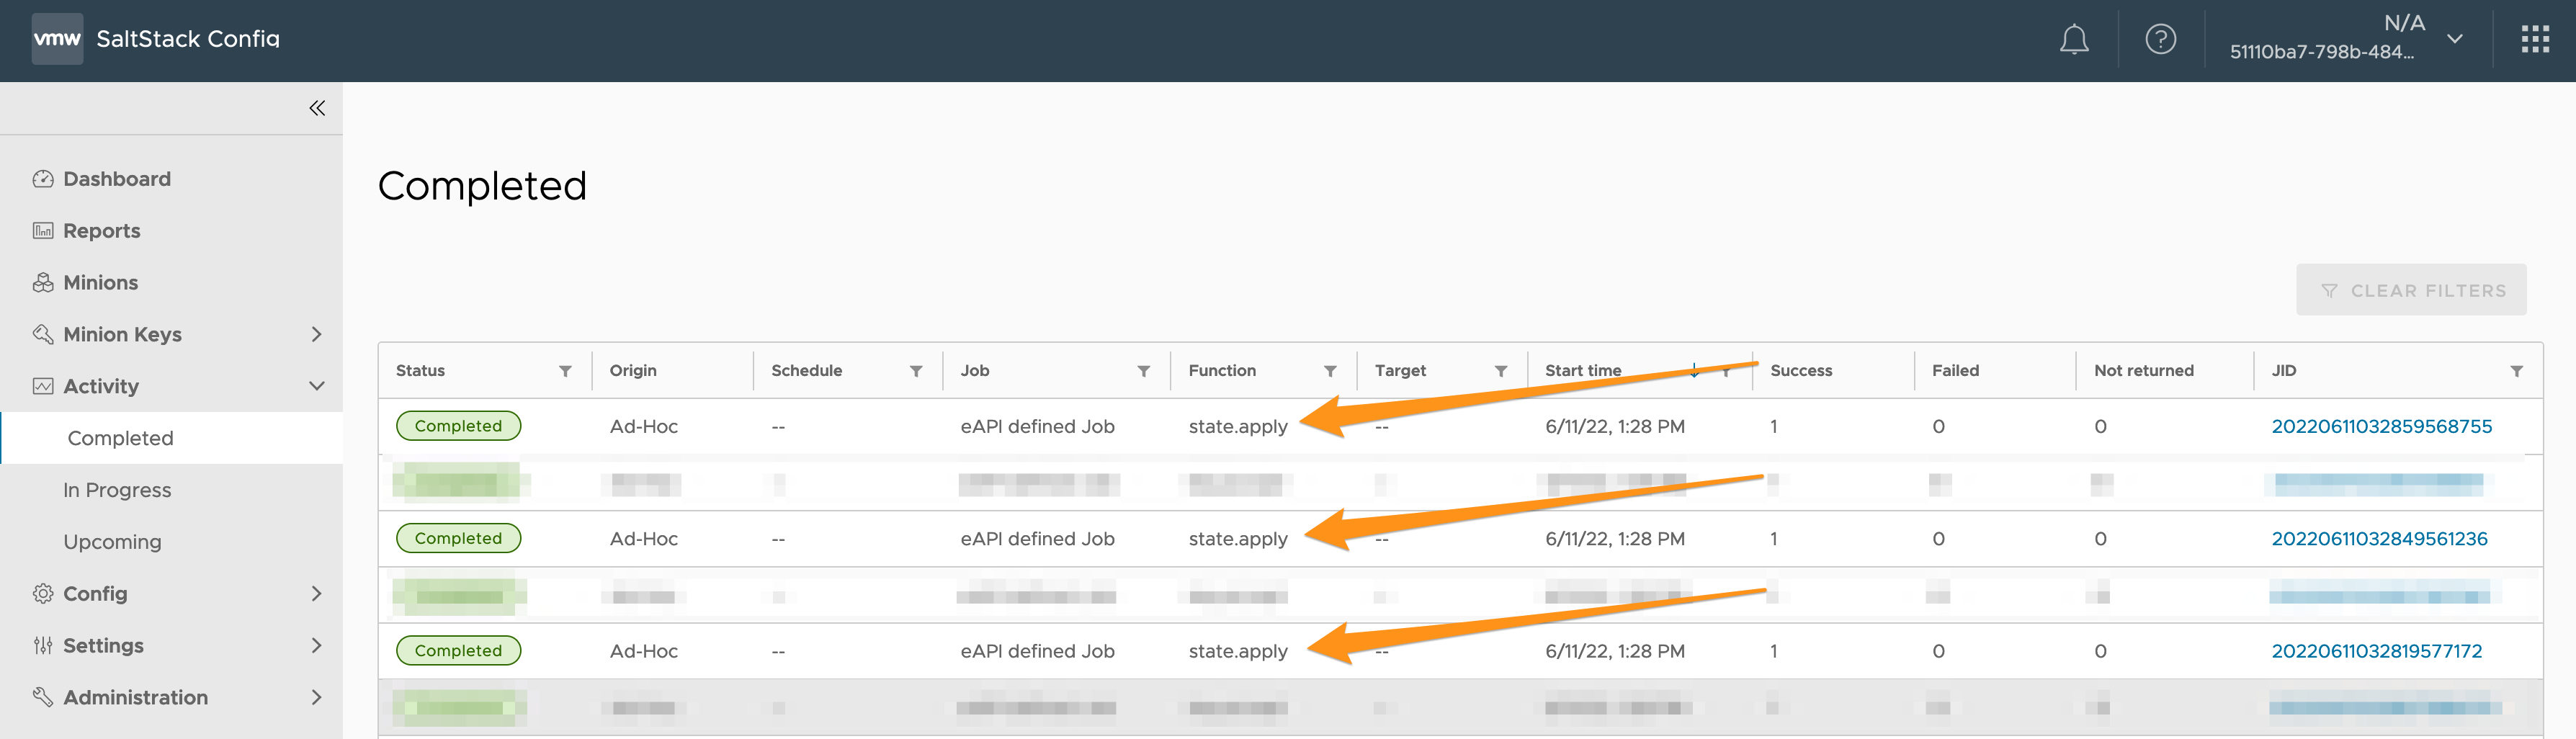
- It’ll take a few minutes, but SaltStack will install the minion and the
deploy.miniontask will move to the Completed jobs section.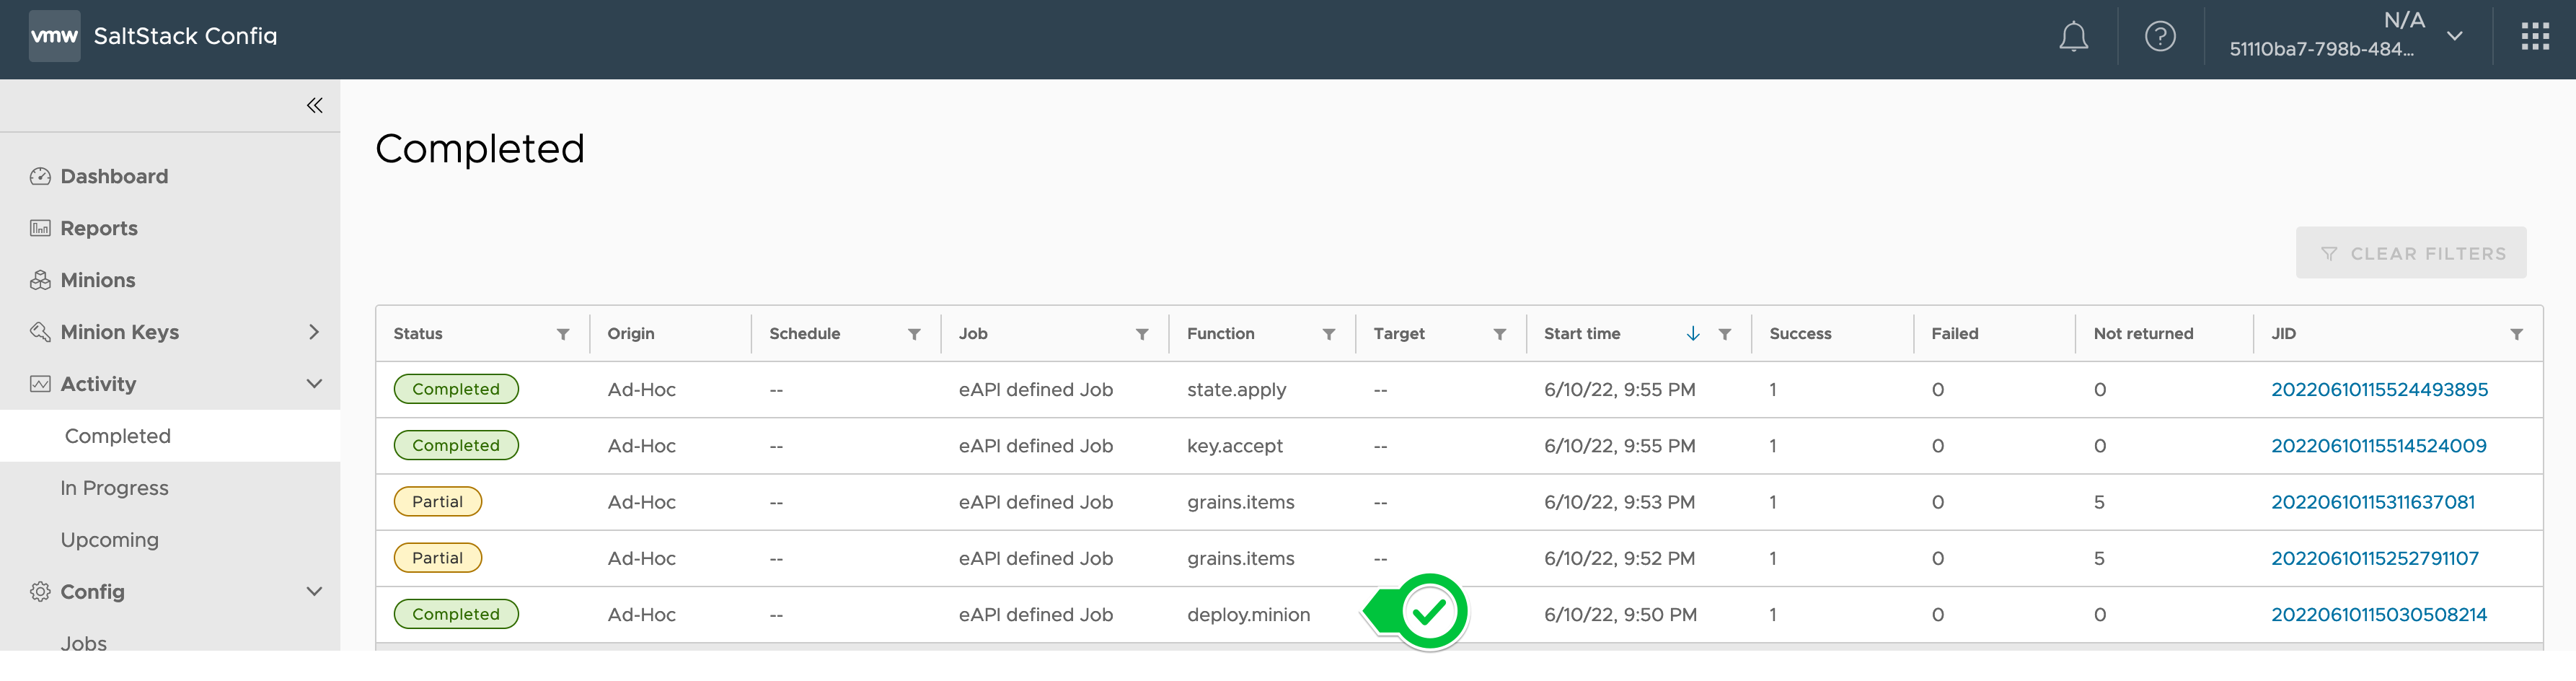
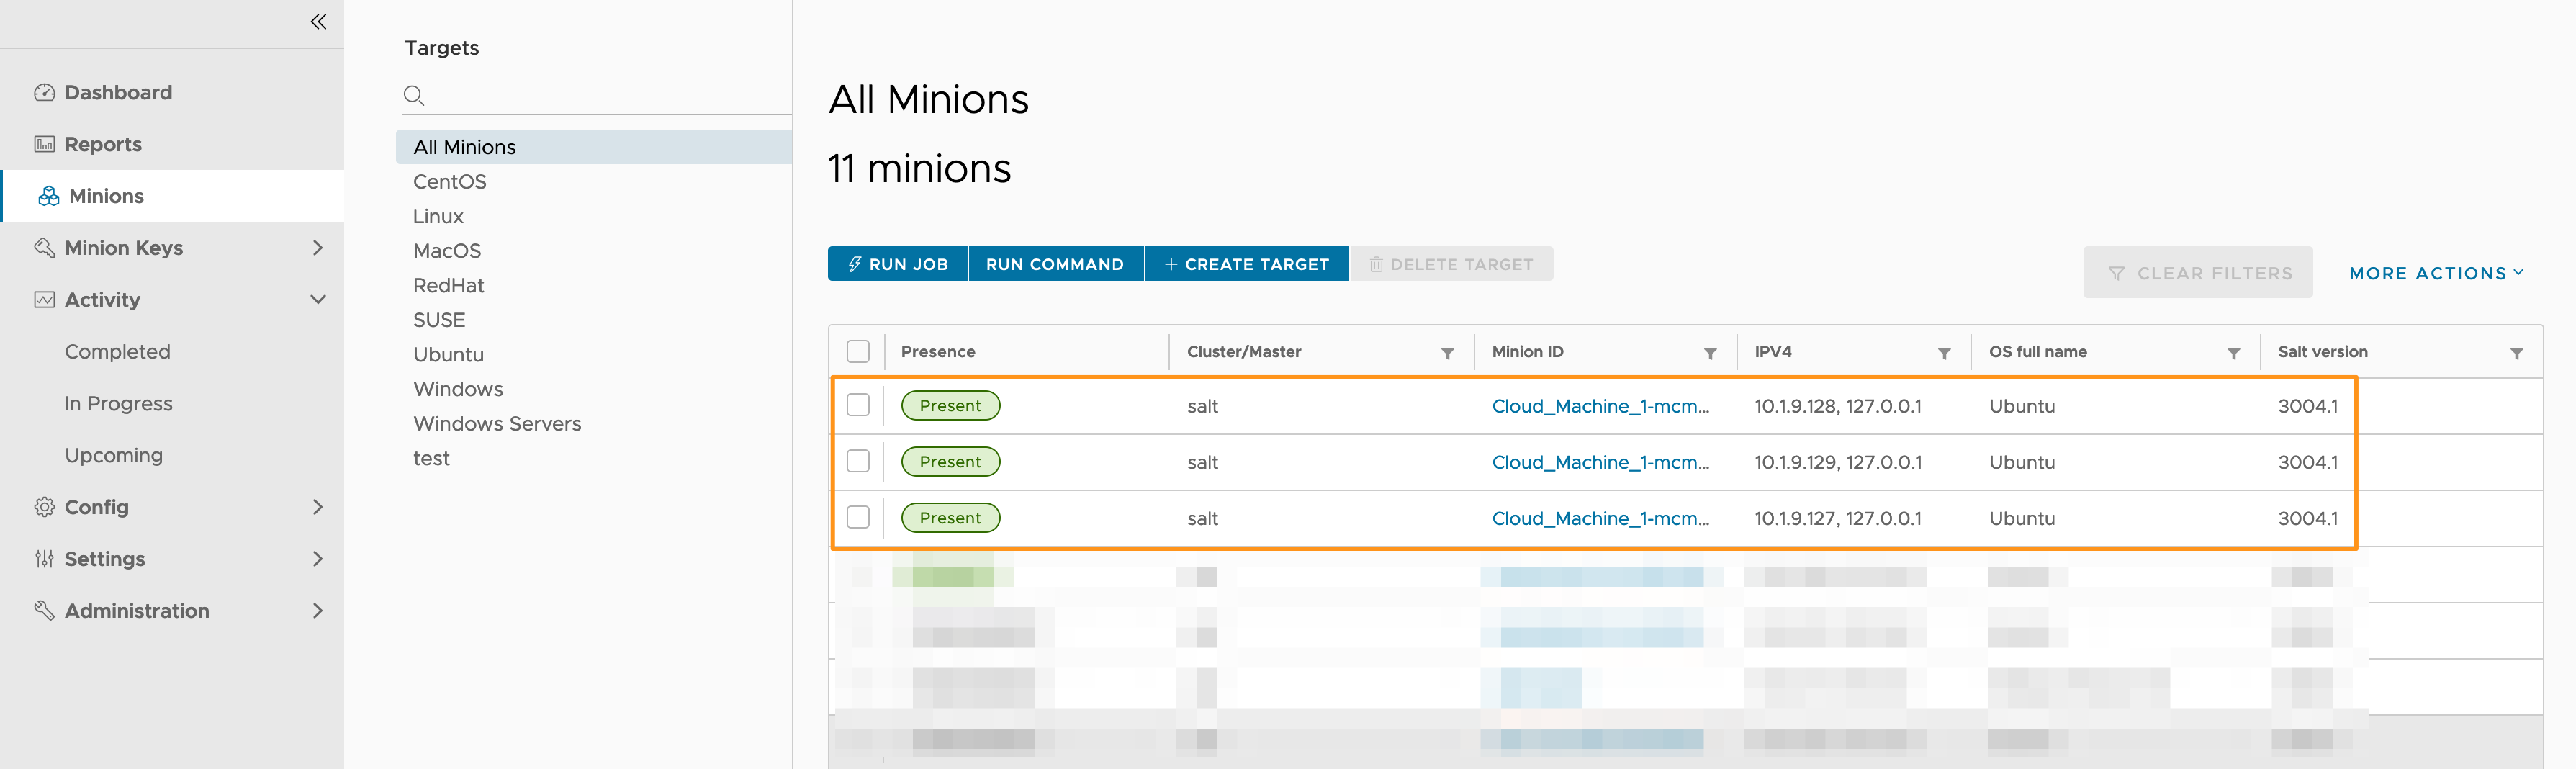
- A short while later, you’ll see the minion key accepted, followed by the
state.applyfunction run. This is our vROPs Agent installation state being applied.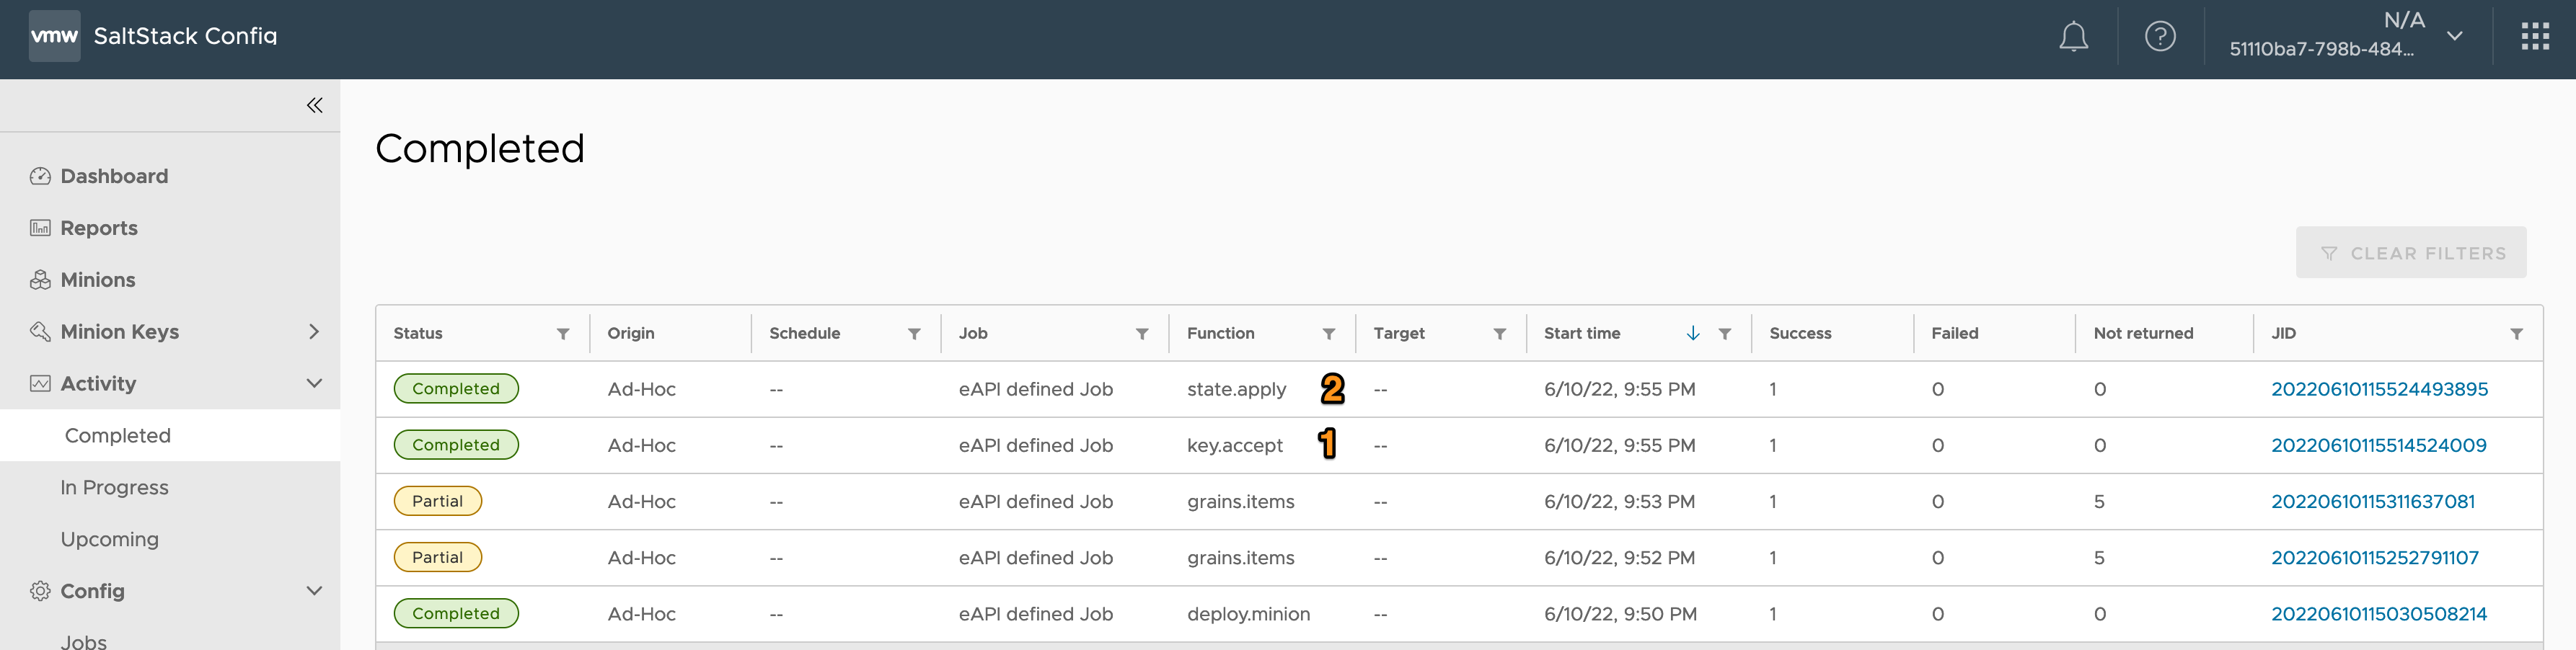
- Go back to vRA and look at your deployment. You’ll see the deployment was successful and the SaltStack resource was also successful. Note that our Health badge is visible, thanks to the vRA and vROPs integration.
- Open a new tab and login to your vROPs instance.
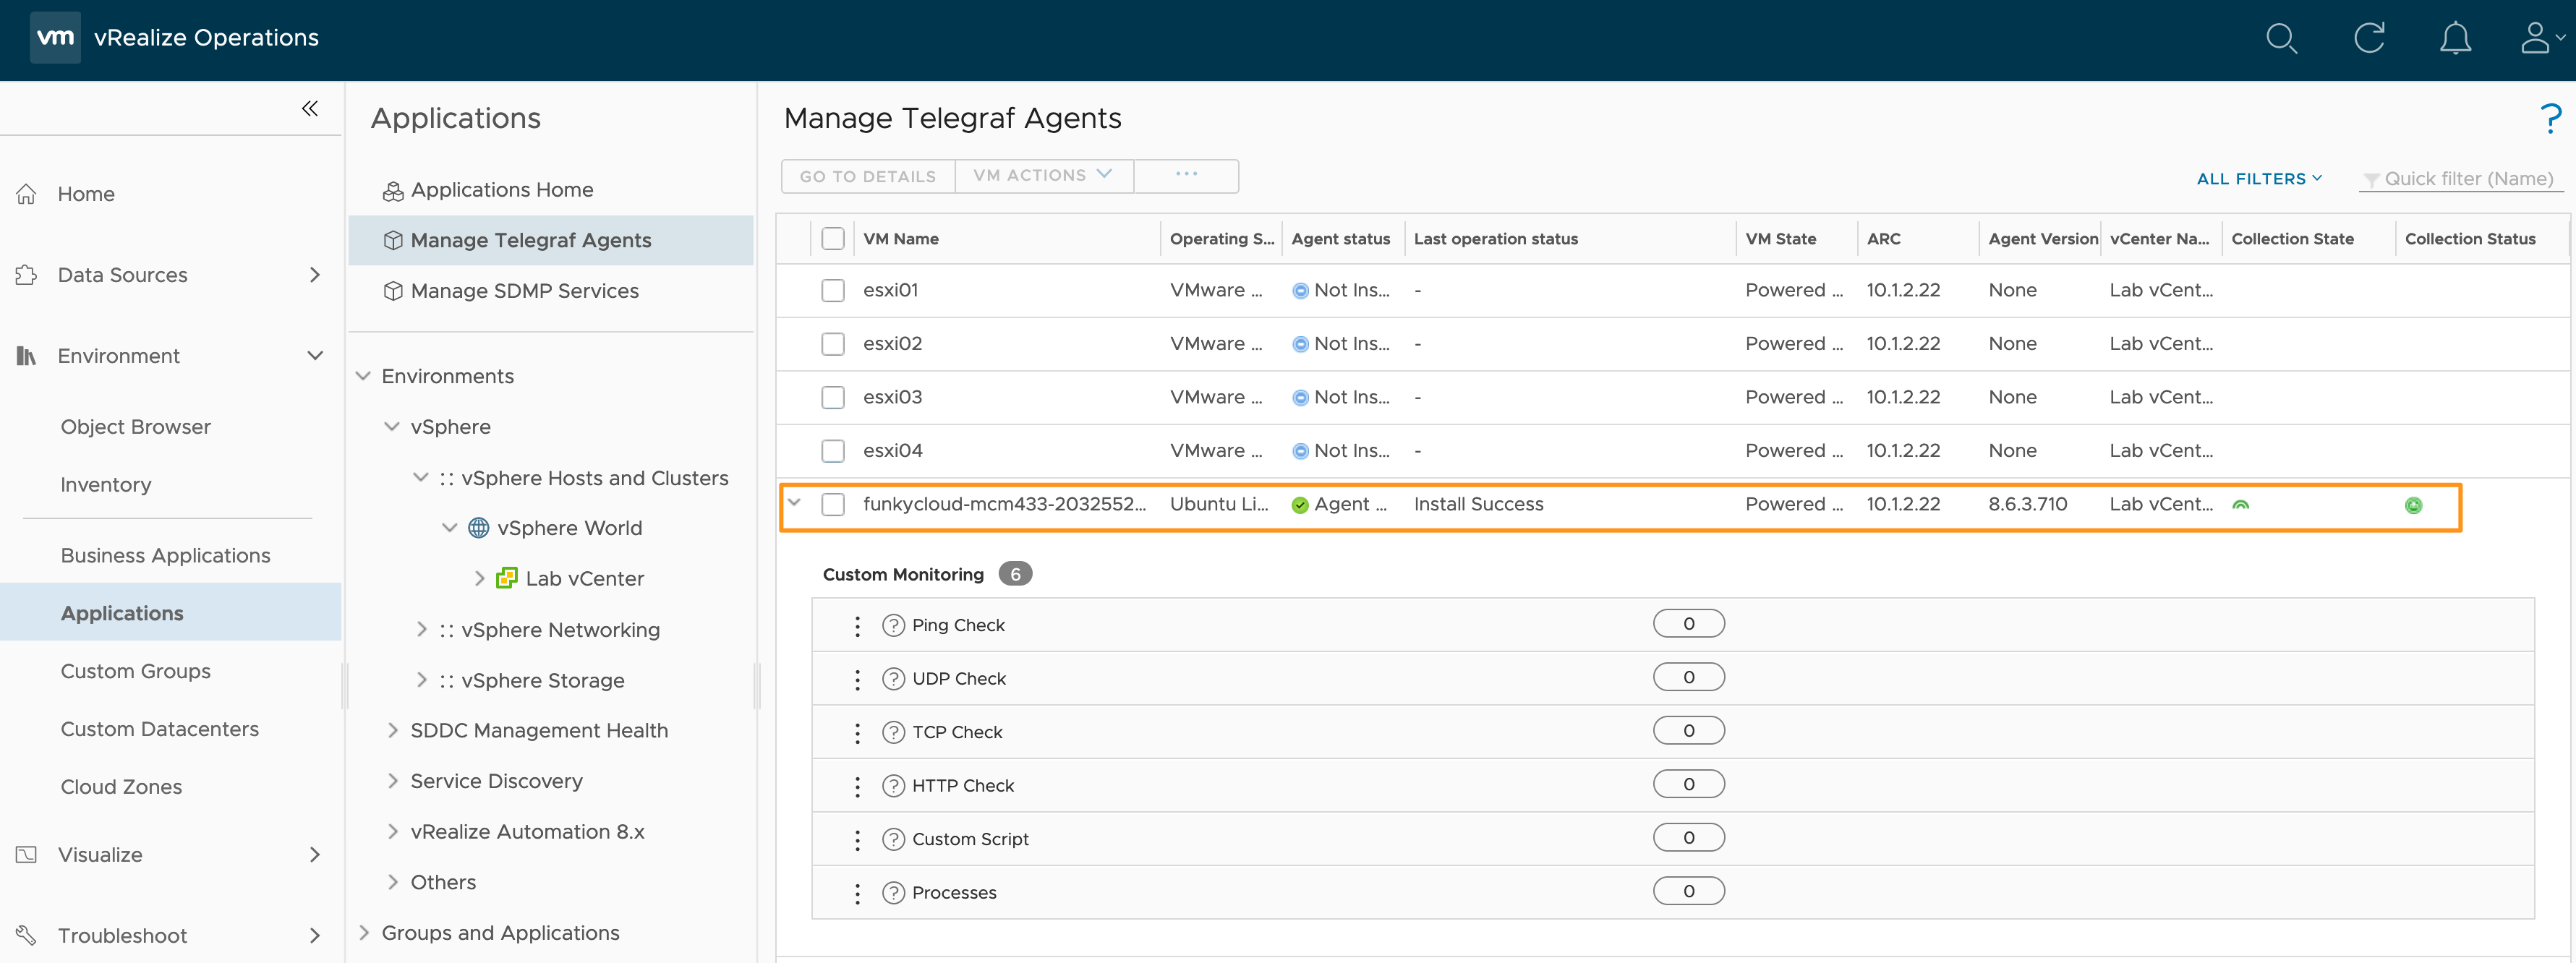
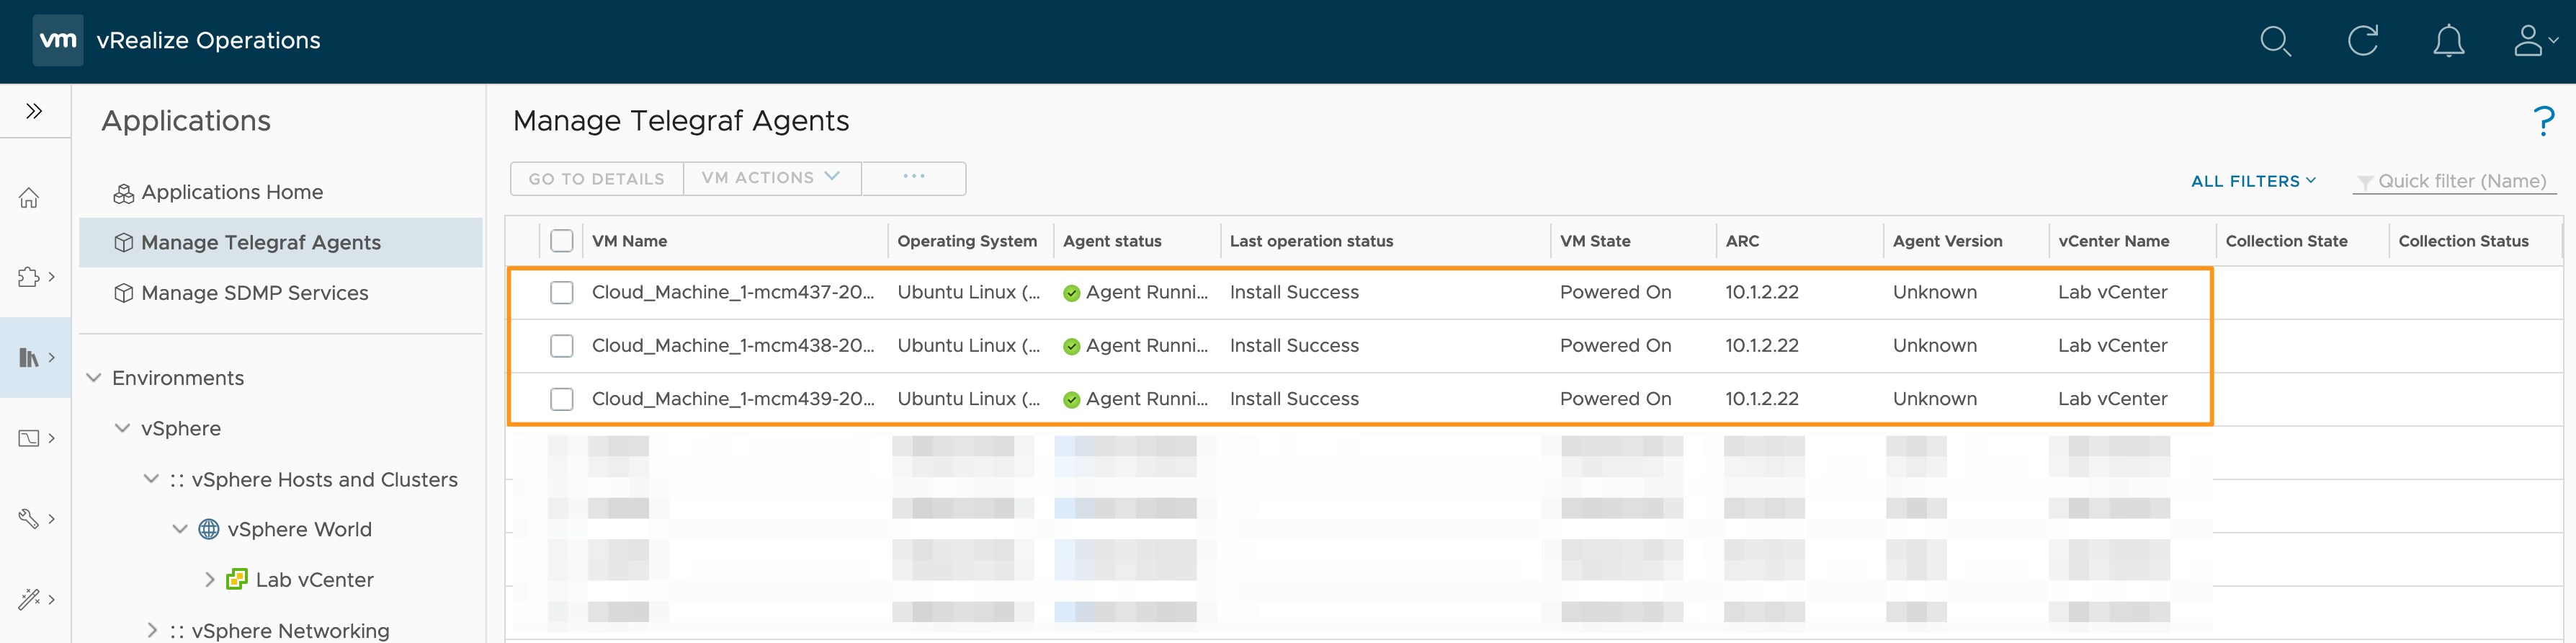
- Navigate to Environment > Applications > Manage Telegraf Agents.
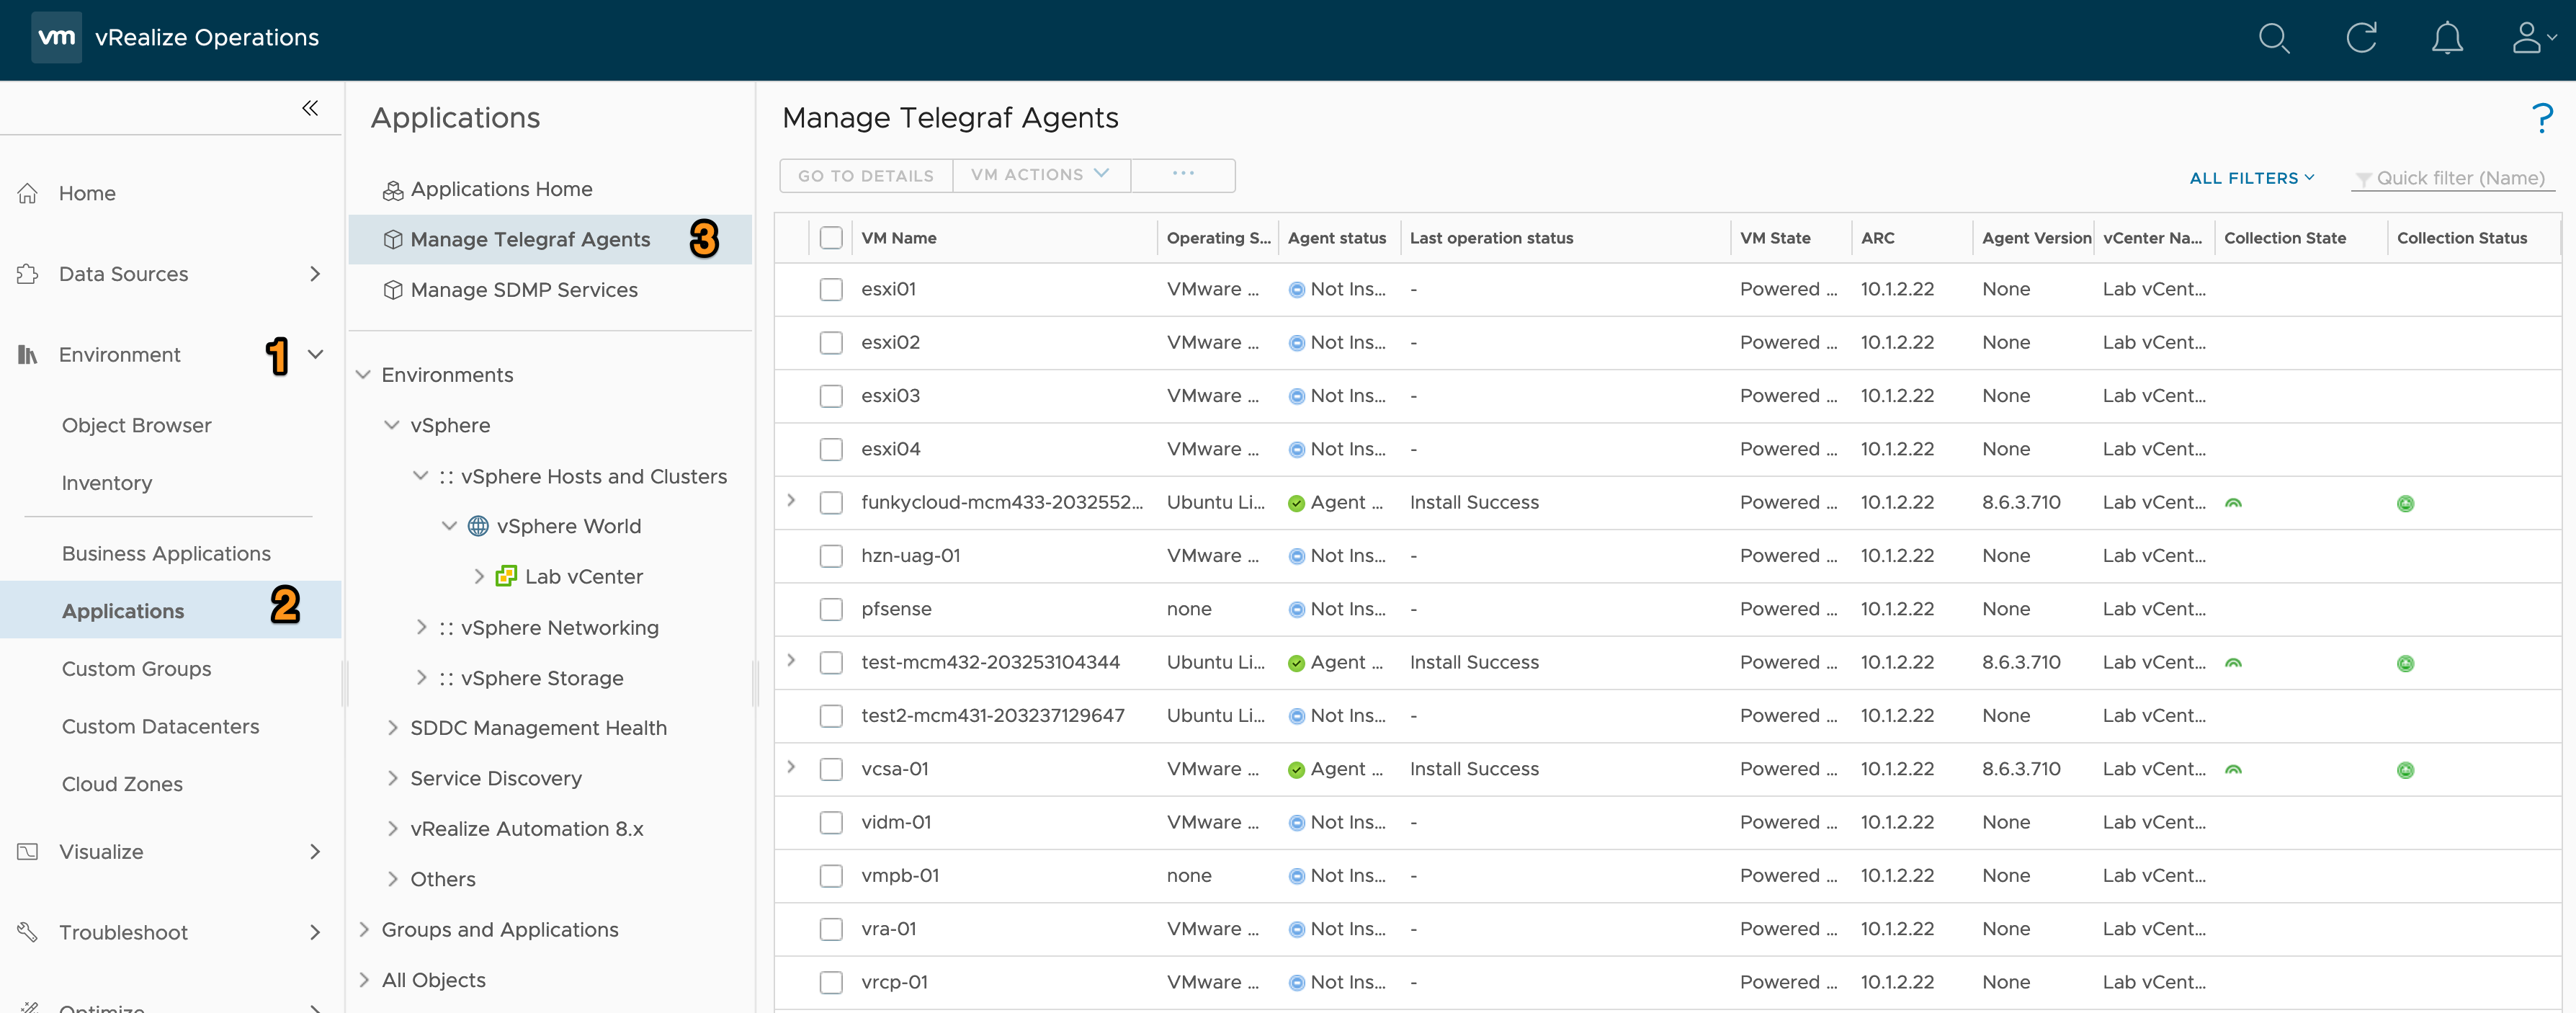
- Notice anything? Yup! Our newly deployed VM is available in vROPs ready for applications to be monitored.
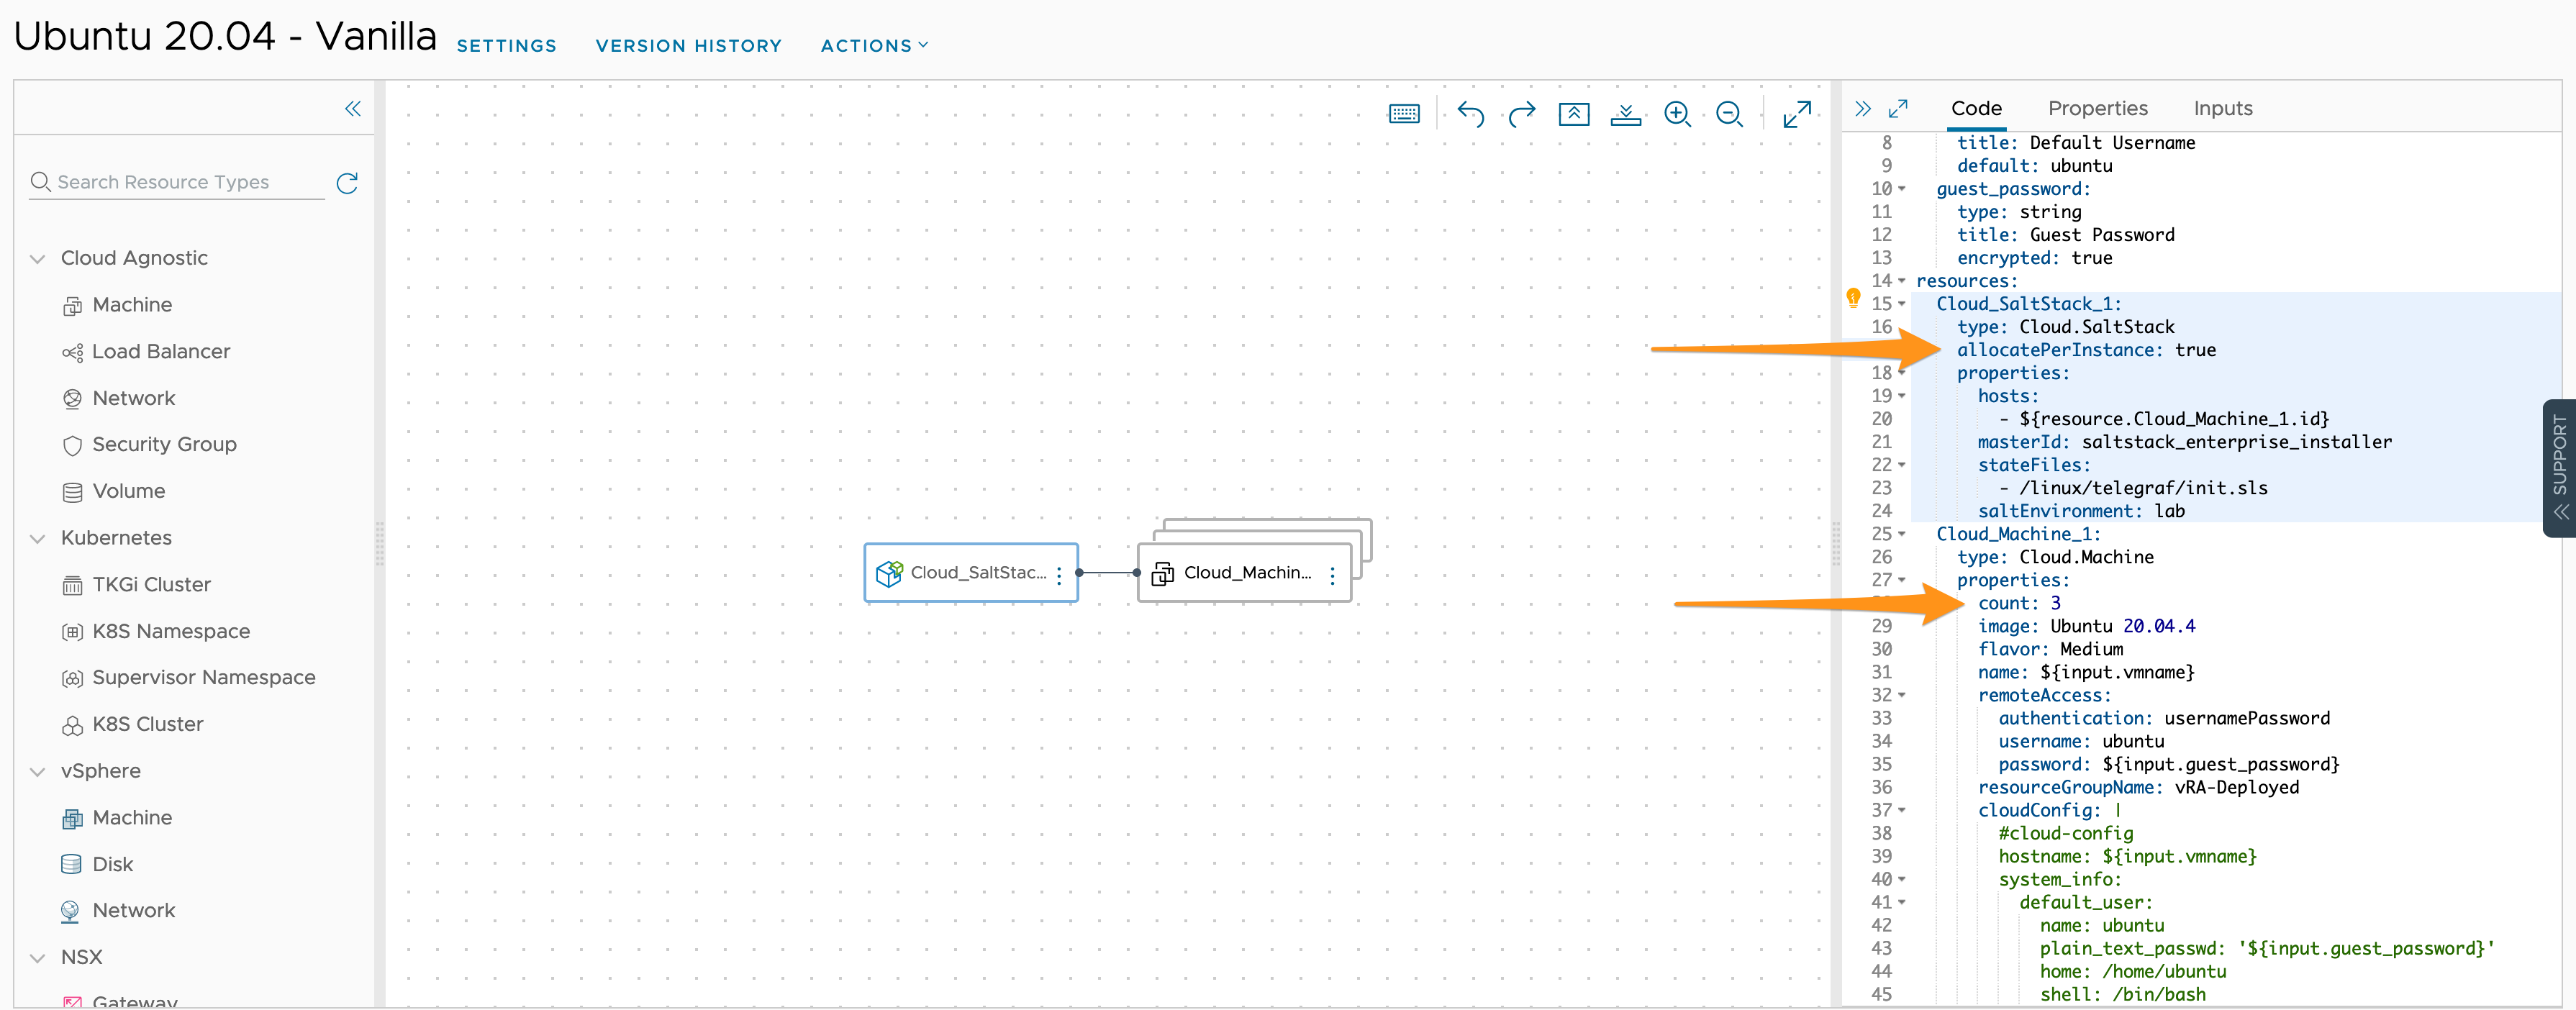
Bonus Content
One thing I noticed was that the SaltStack Config object in the template supports the use of allocatePerInstance. This means we can scale out the number of Cloud.Machine objects with a count property, and just add allocatePerInstance: true to the SaltStack object:
There we have it, installing the vROPs Telegraf agent with SaltStack Config and a vRA Template. If you have any questions drop them in the comments.