Over the years I’ve had many people ask me how I manage networking on my single host lab environment. “How do you do VLANs and manage routing/firewalling without a physical device providing that upstream?” they would ask. Well, I use a PFSense VM. Which would usually be followed up by “Yea but how?”
VLAN trunking on my dvSwitch and sub-interfaces within PFSense. Easy stuff!
Let’s review requirements first:
- Be able to define multiple VLANs and subnets.
- Control network flow with firewall rules both in and out of the lab and between the subnets.
- A single trunk vNIC on the PFSense VM to avoid adding a new vNIC every time I want a new network.
- Value-add functions like DHCP Servers, DNS forwarding, OpenVPN/WireGuard, BGP.
PFsense nails all of that in a homelab.
Here’s what the “physical” deployment looks like in vSphere:

First thing you’ll see is that vNIC0 on the PFSense VM is connected to a “PFSense WAN” port group. This port group has no VLAN and is available outside ESXi. In other words, it’s the native VLAN of the ESXi vmnic interface, similar to the default “VM Network” port group that is created on a fresh deployment. This provides me with outbound access from any internal lab network and also remote access over the internet (using a VPN) to the lab environment.
You’ll also see the Lab Trunk distributed port group. This port group is marked for “VLAN Trunking” within vSphere, allowing all VLAN frames to be passed to and from vNIC1 of the PFsense VM. The VLANs that are passed to it are the VLANs being switched by the distributed switch. In my case, that’s any port group on the distributed switch with a configured VLAN.
With VLAN frames heading to PFsense, we can create sub-interfaces hanging off vNIC1 within PFsense.
After creating a new port group on your dvSwitch, and tagging it with any old VLAN ID, you can jump into PFsense and define the new VLAN within PFsense and create sub-interface on that VLAN.
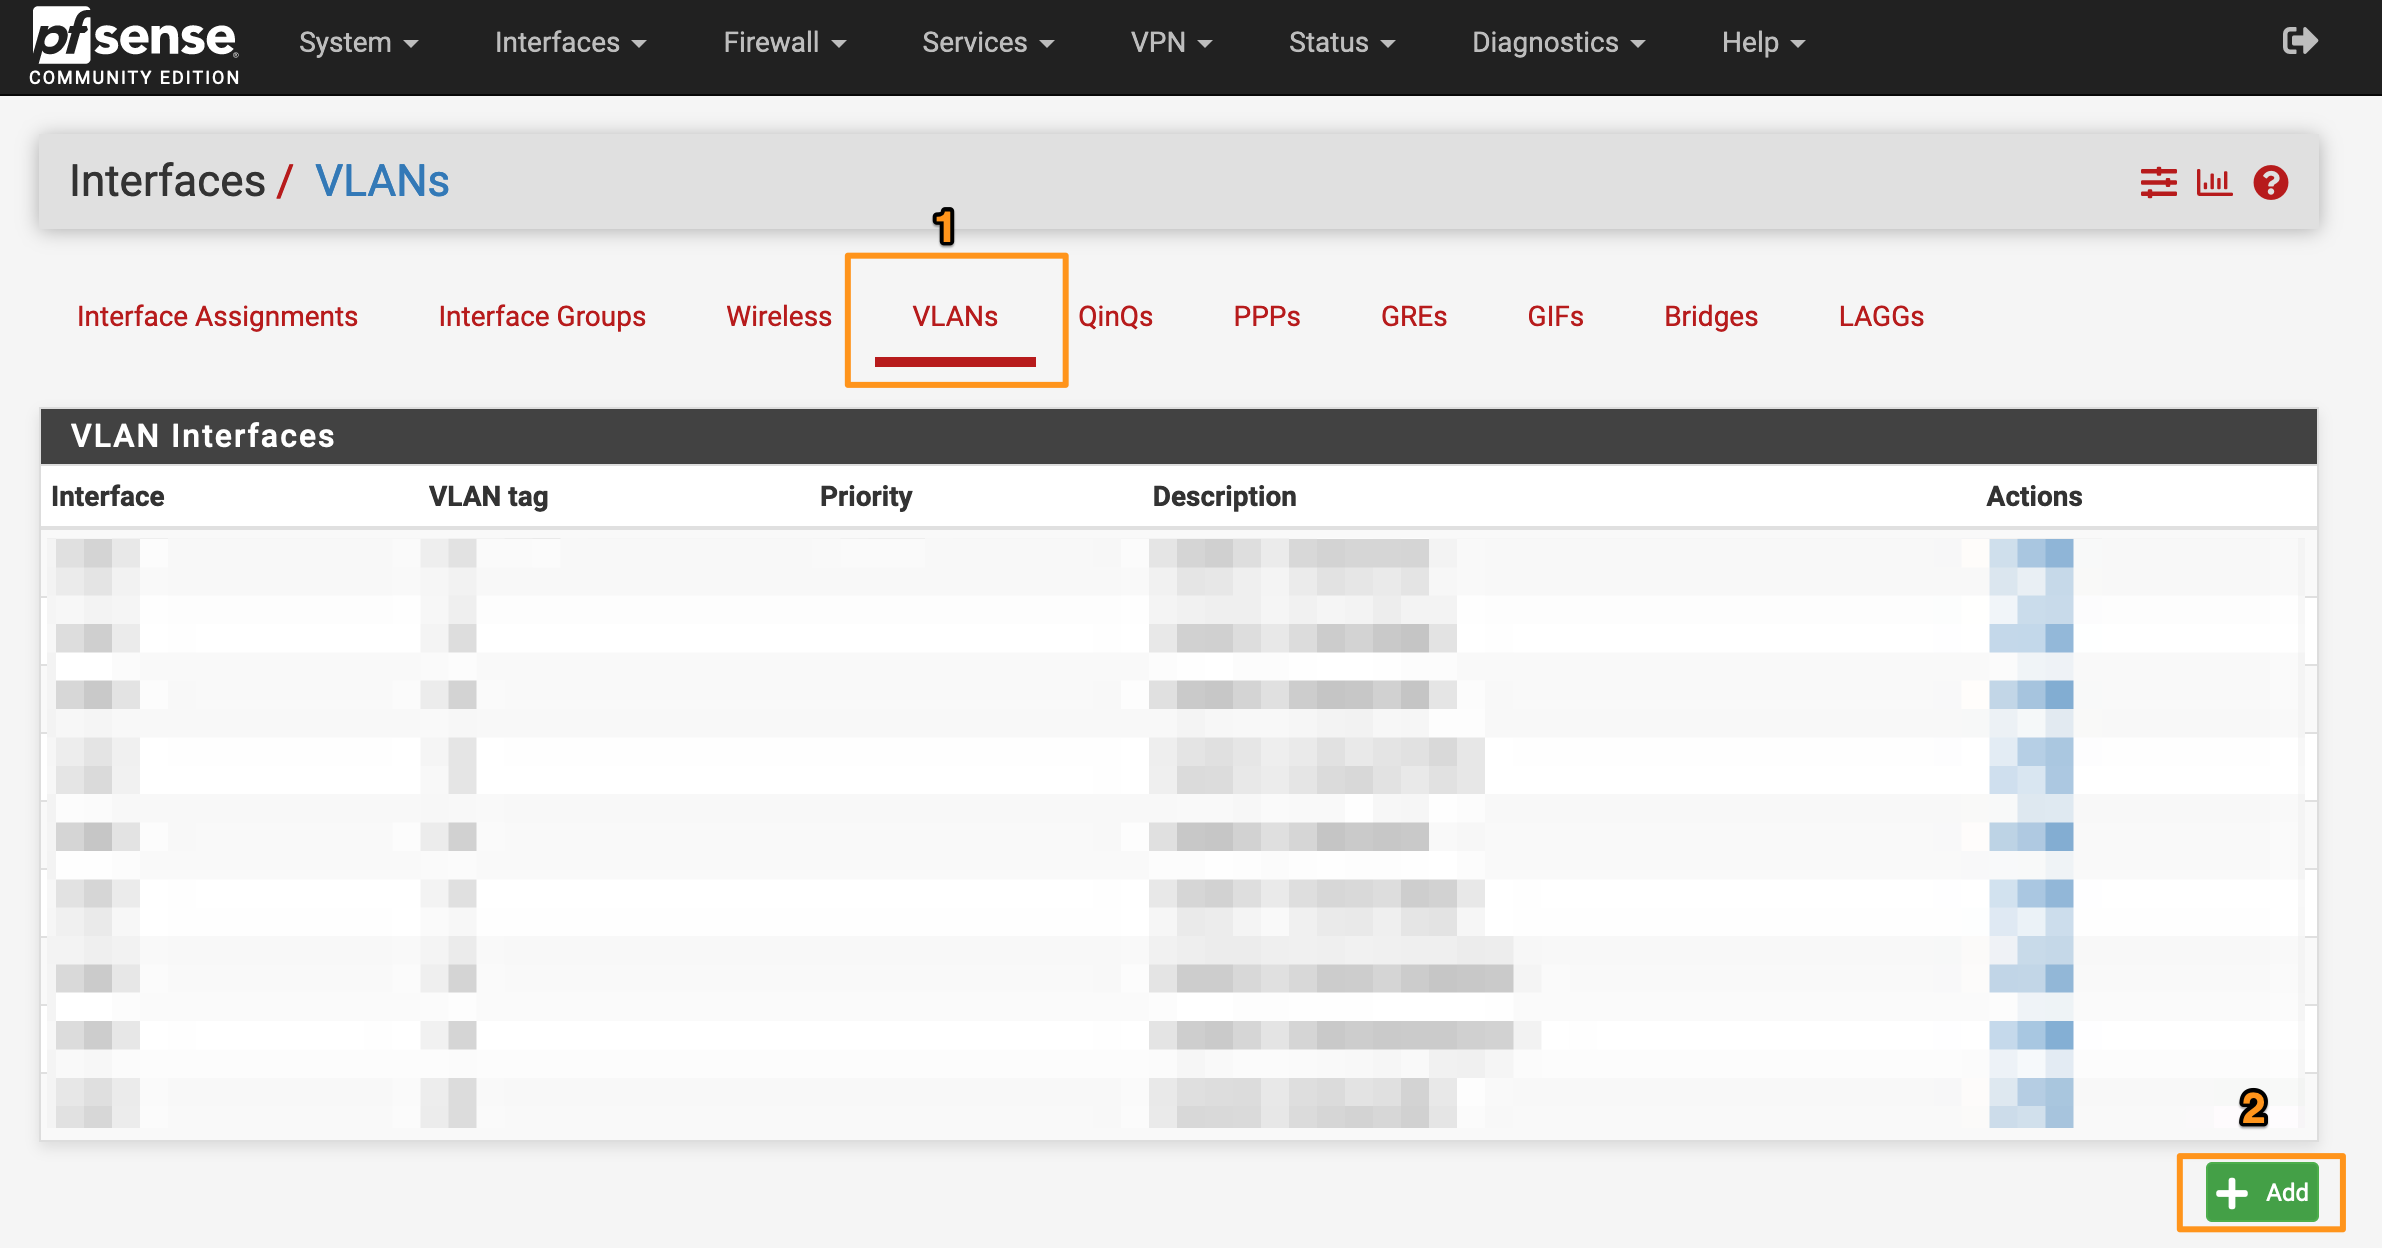
- Login to PFsense.
- Go to Interfaces > Assignments

- Go to the VLANs tab and click Add
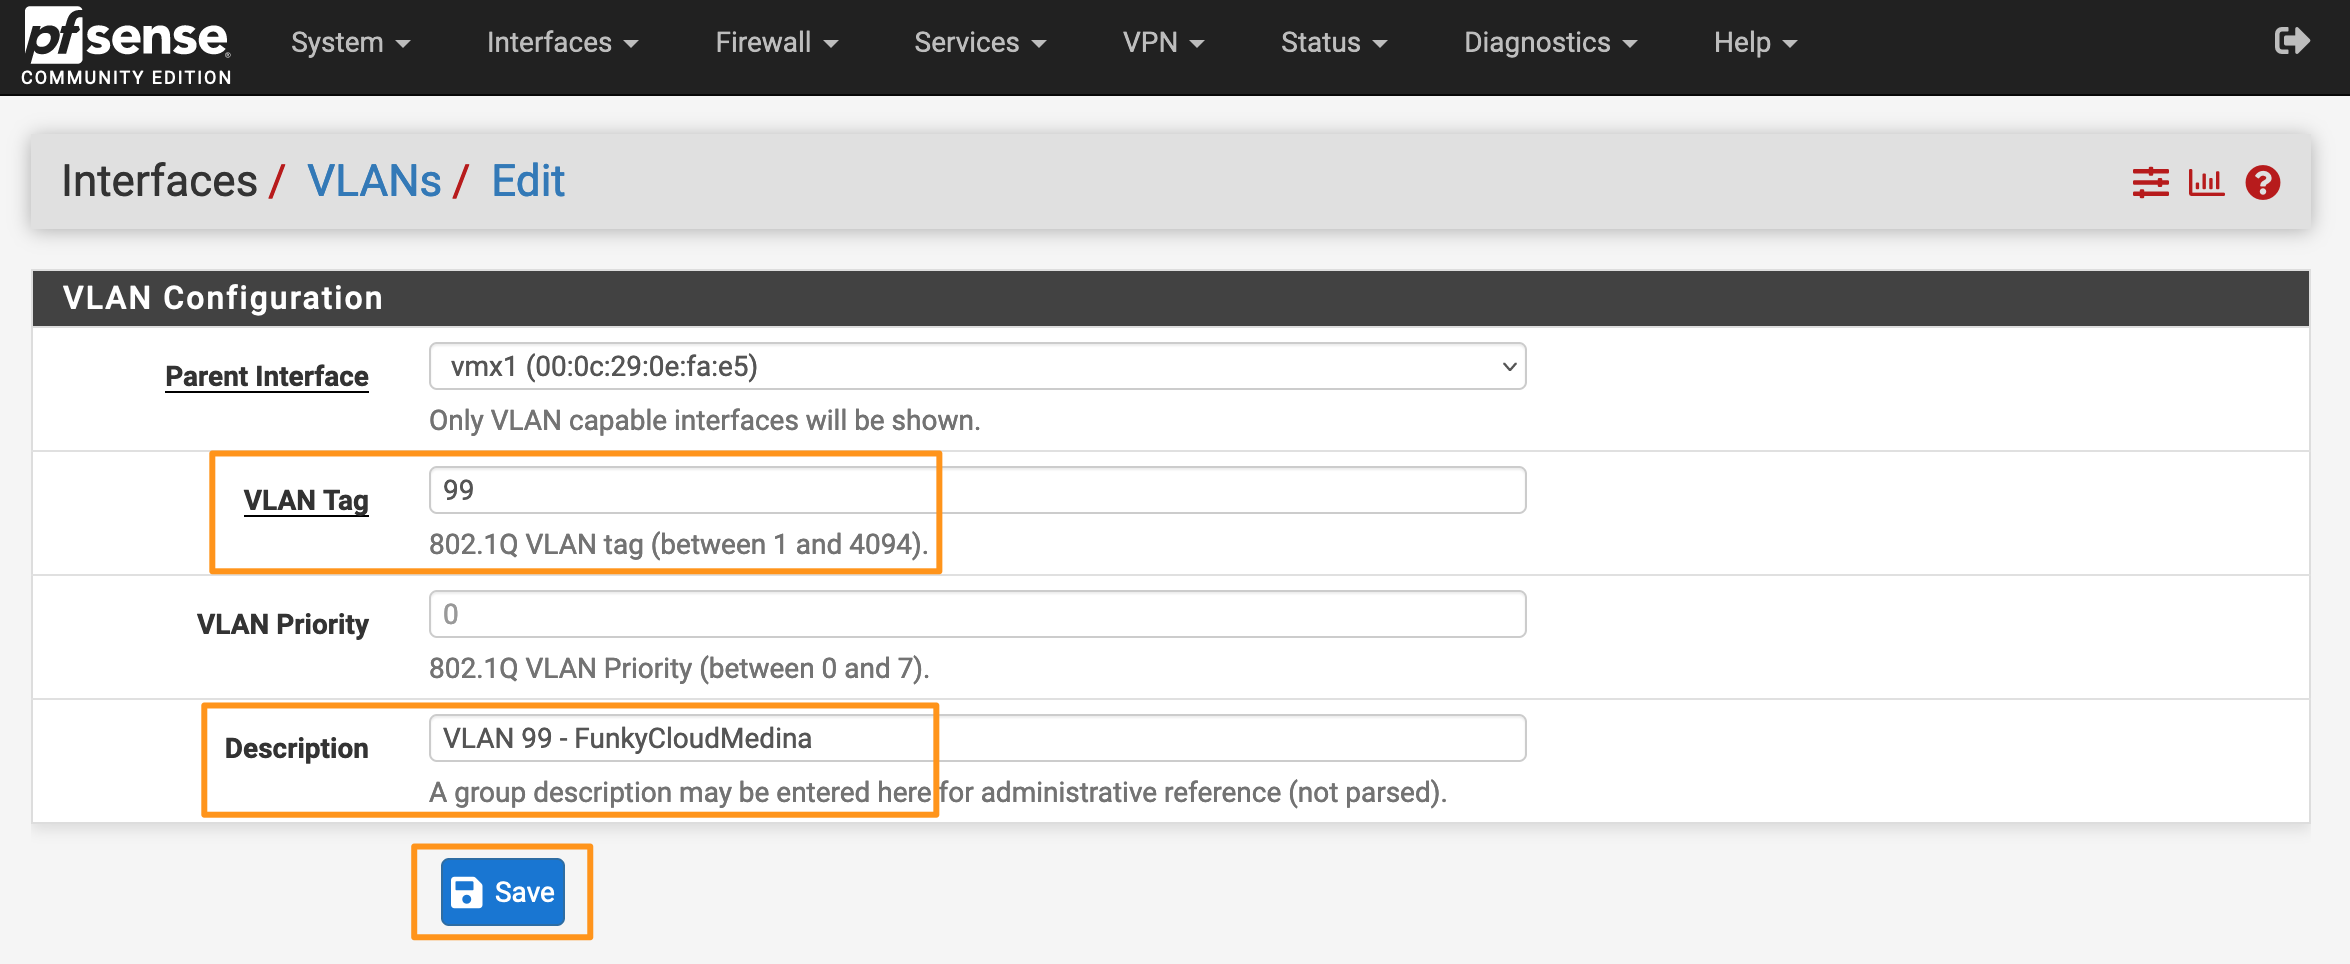
- Under Parent Interface select the interface corresponding with vNIC1. In my case, that’s pretty easy. It’s the interface that is not marked as “wan”.
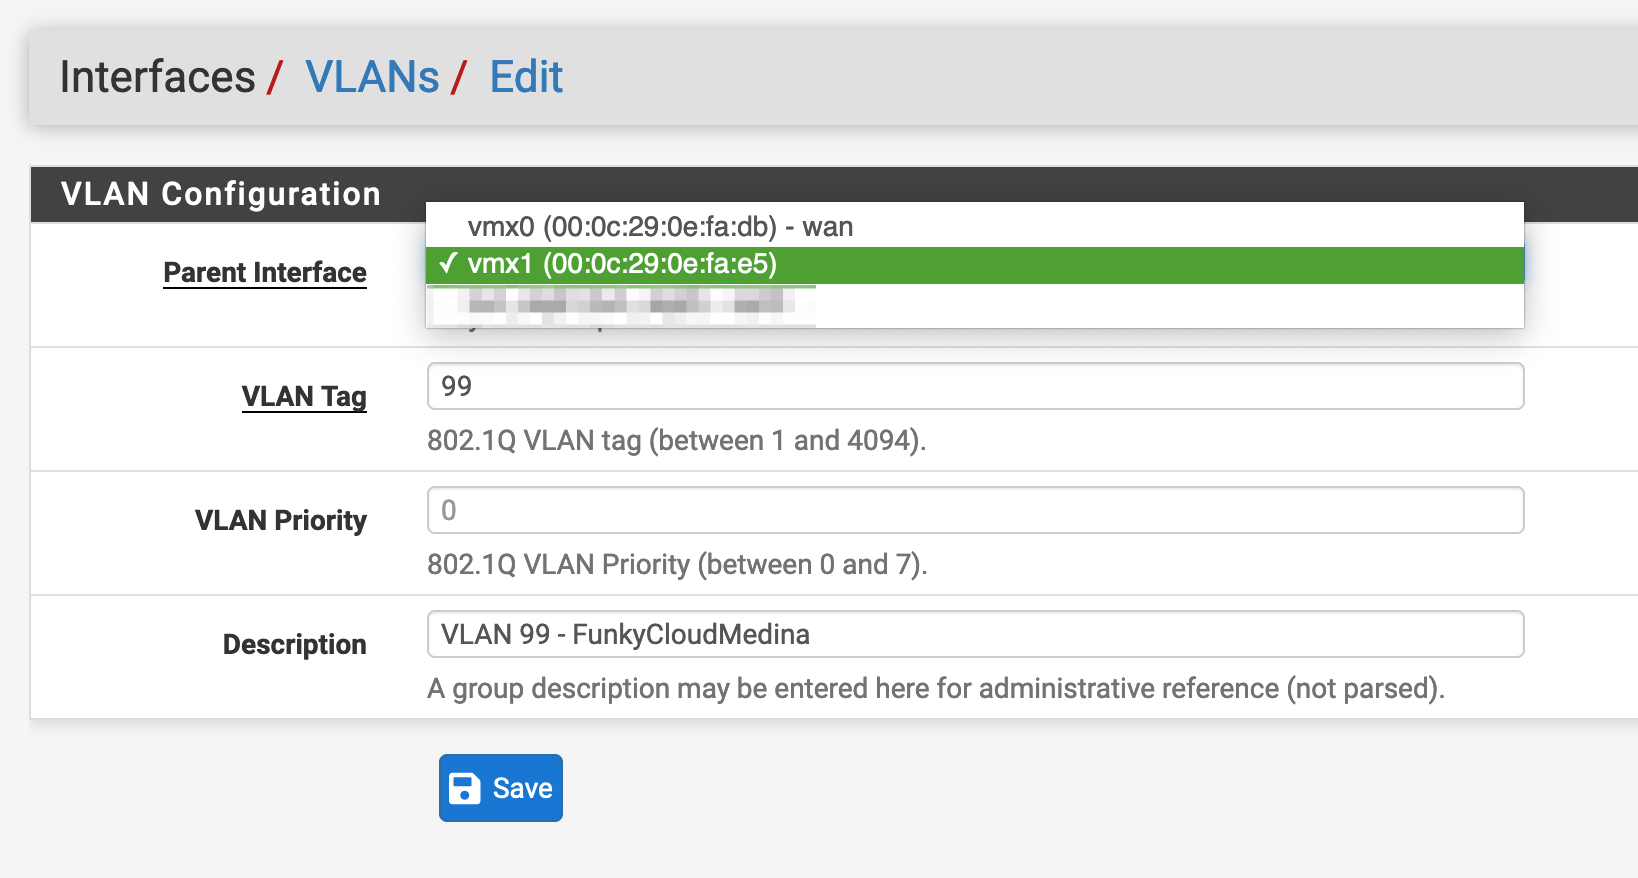
- Enter a VLAN Tag and Description (the Priority is optional) and click Save.
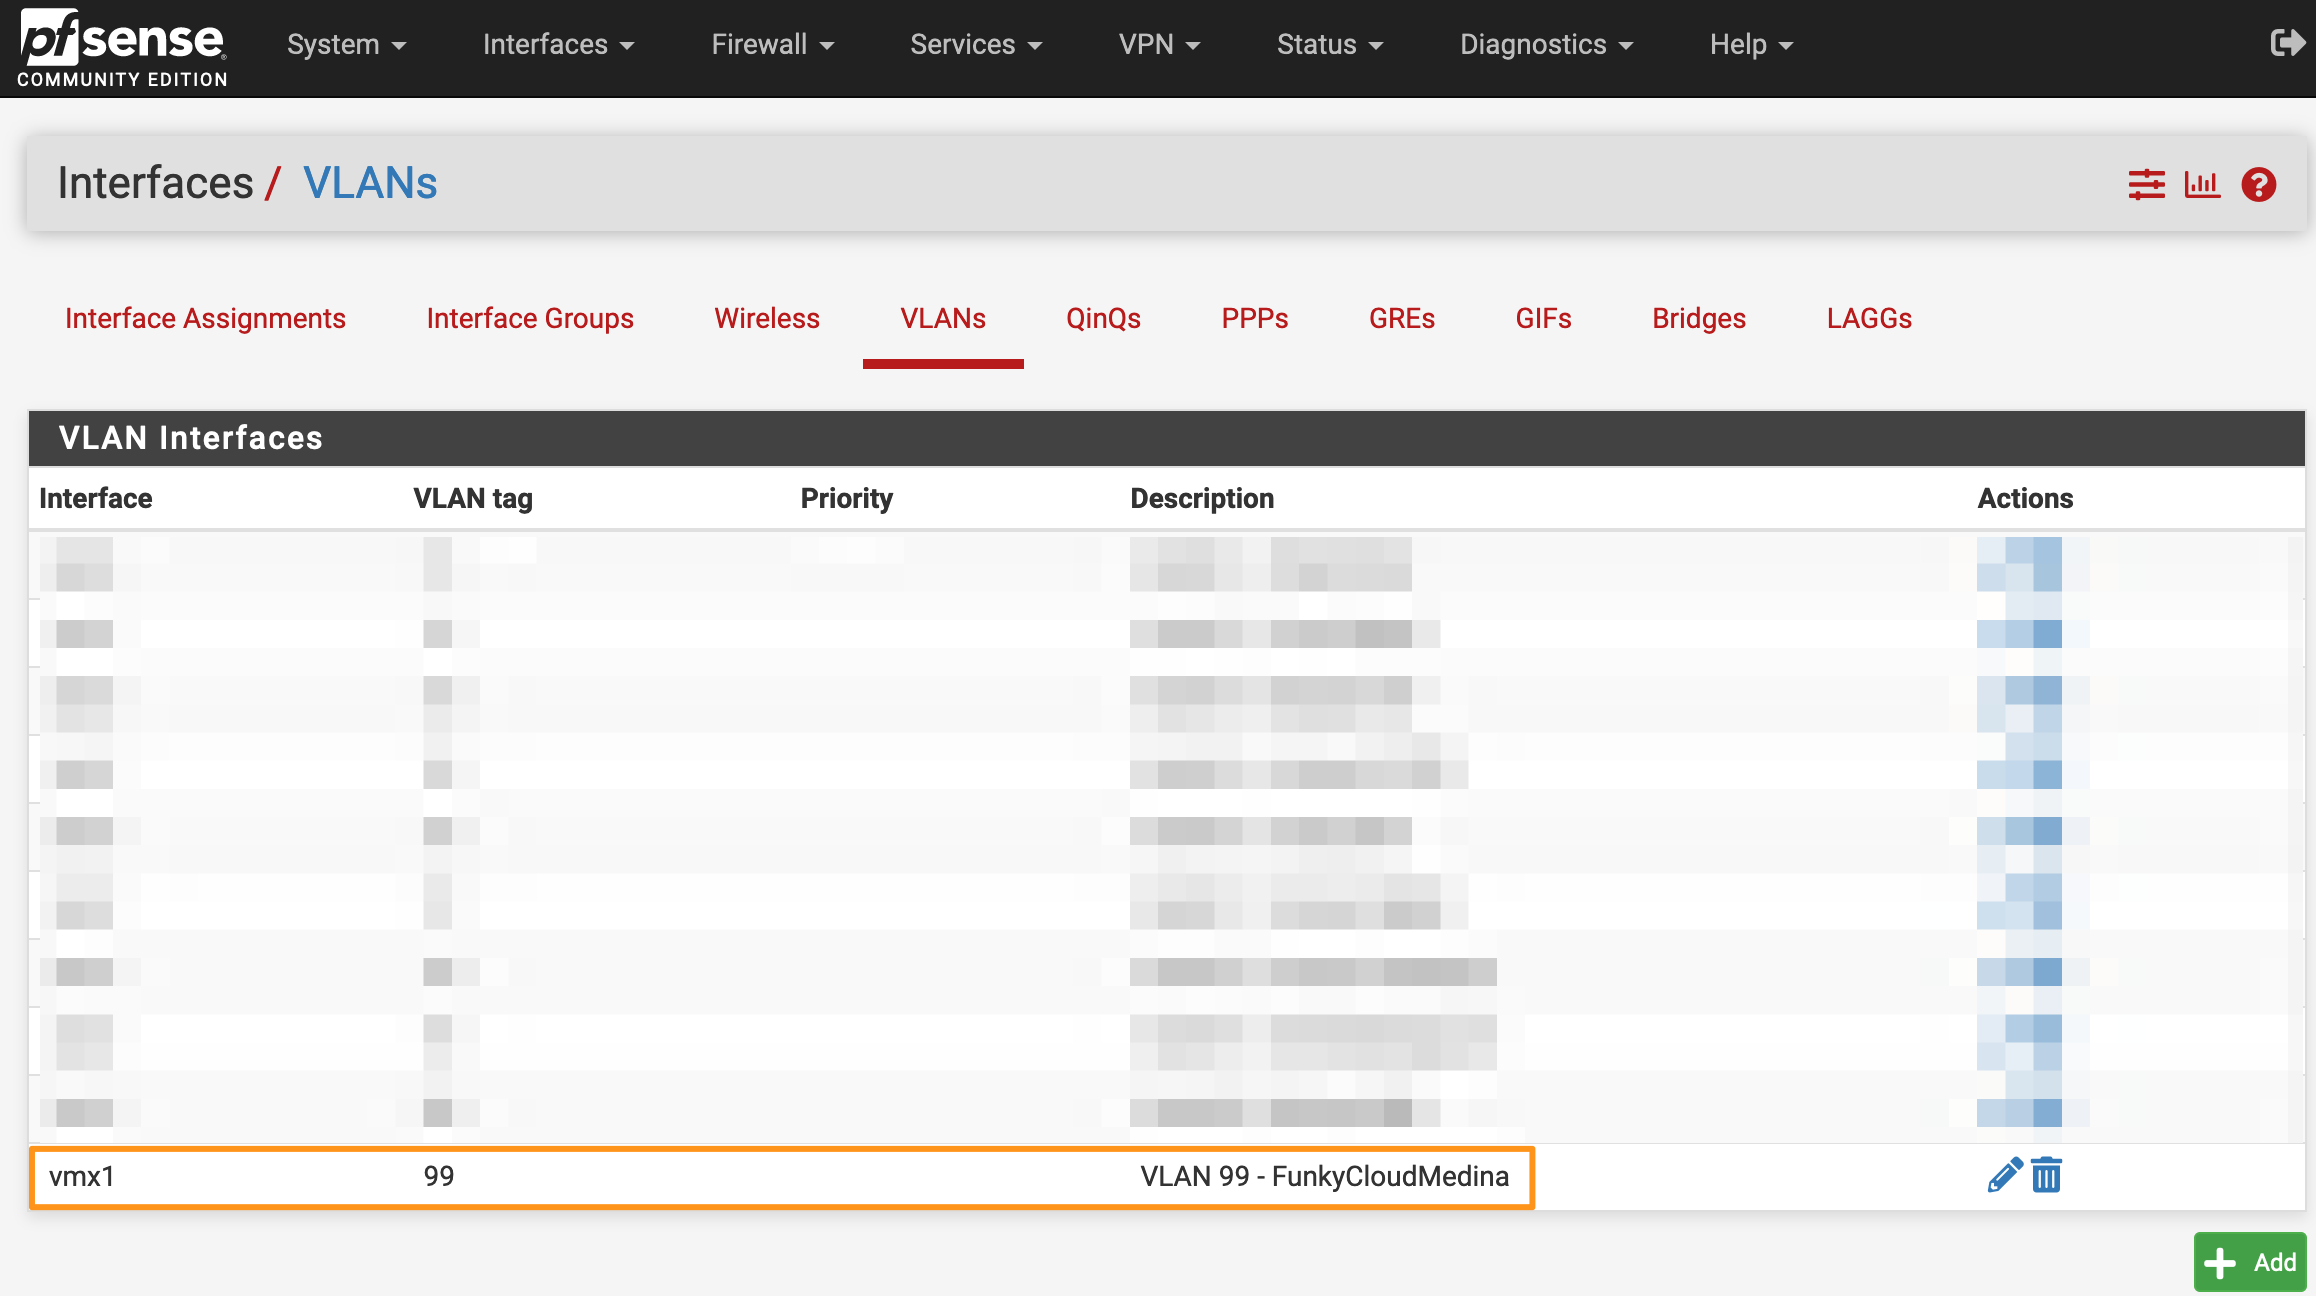
- You’ll see your new VLAN in the list.
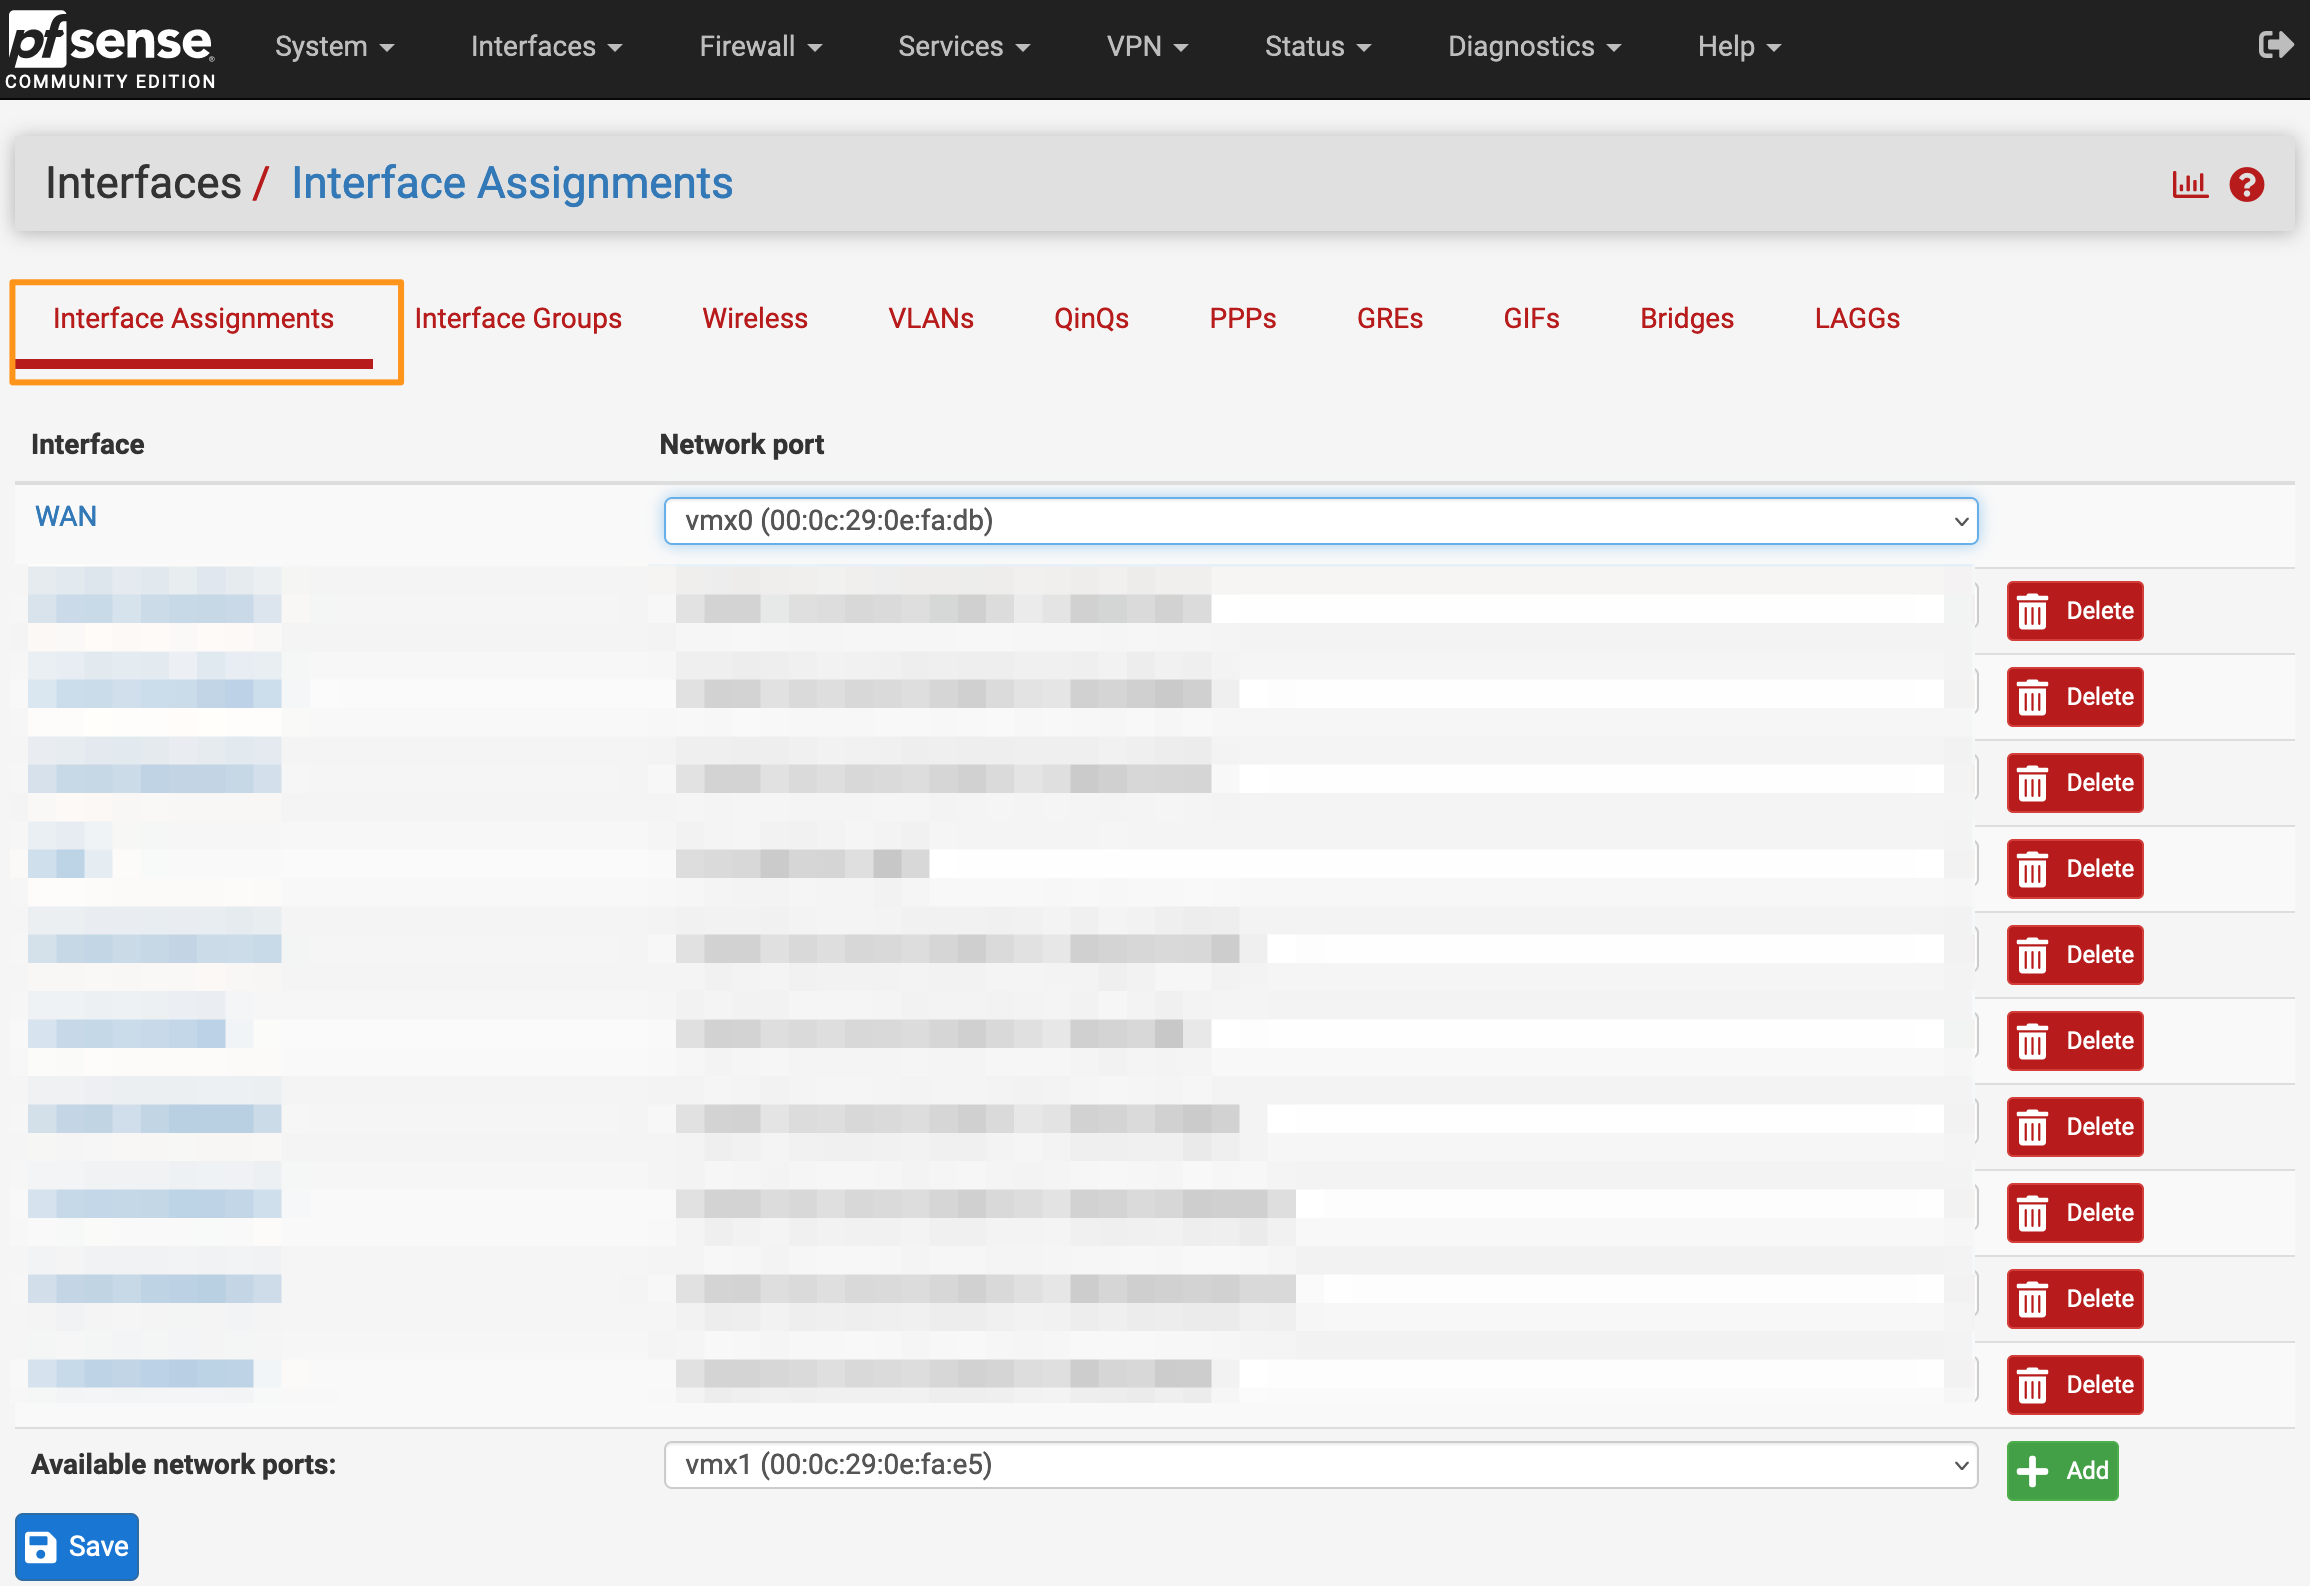
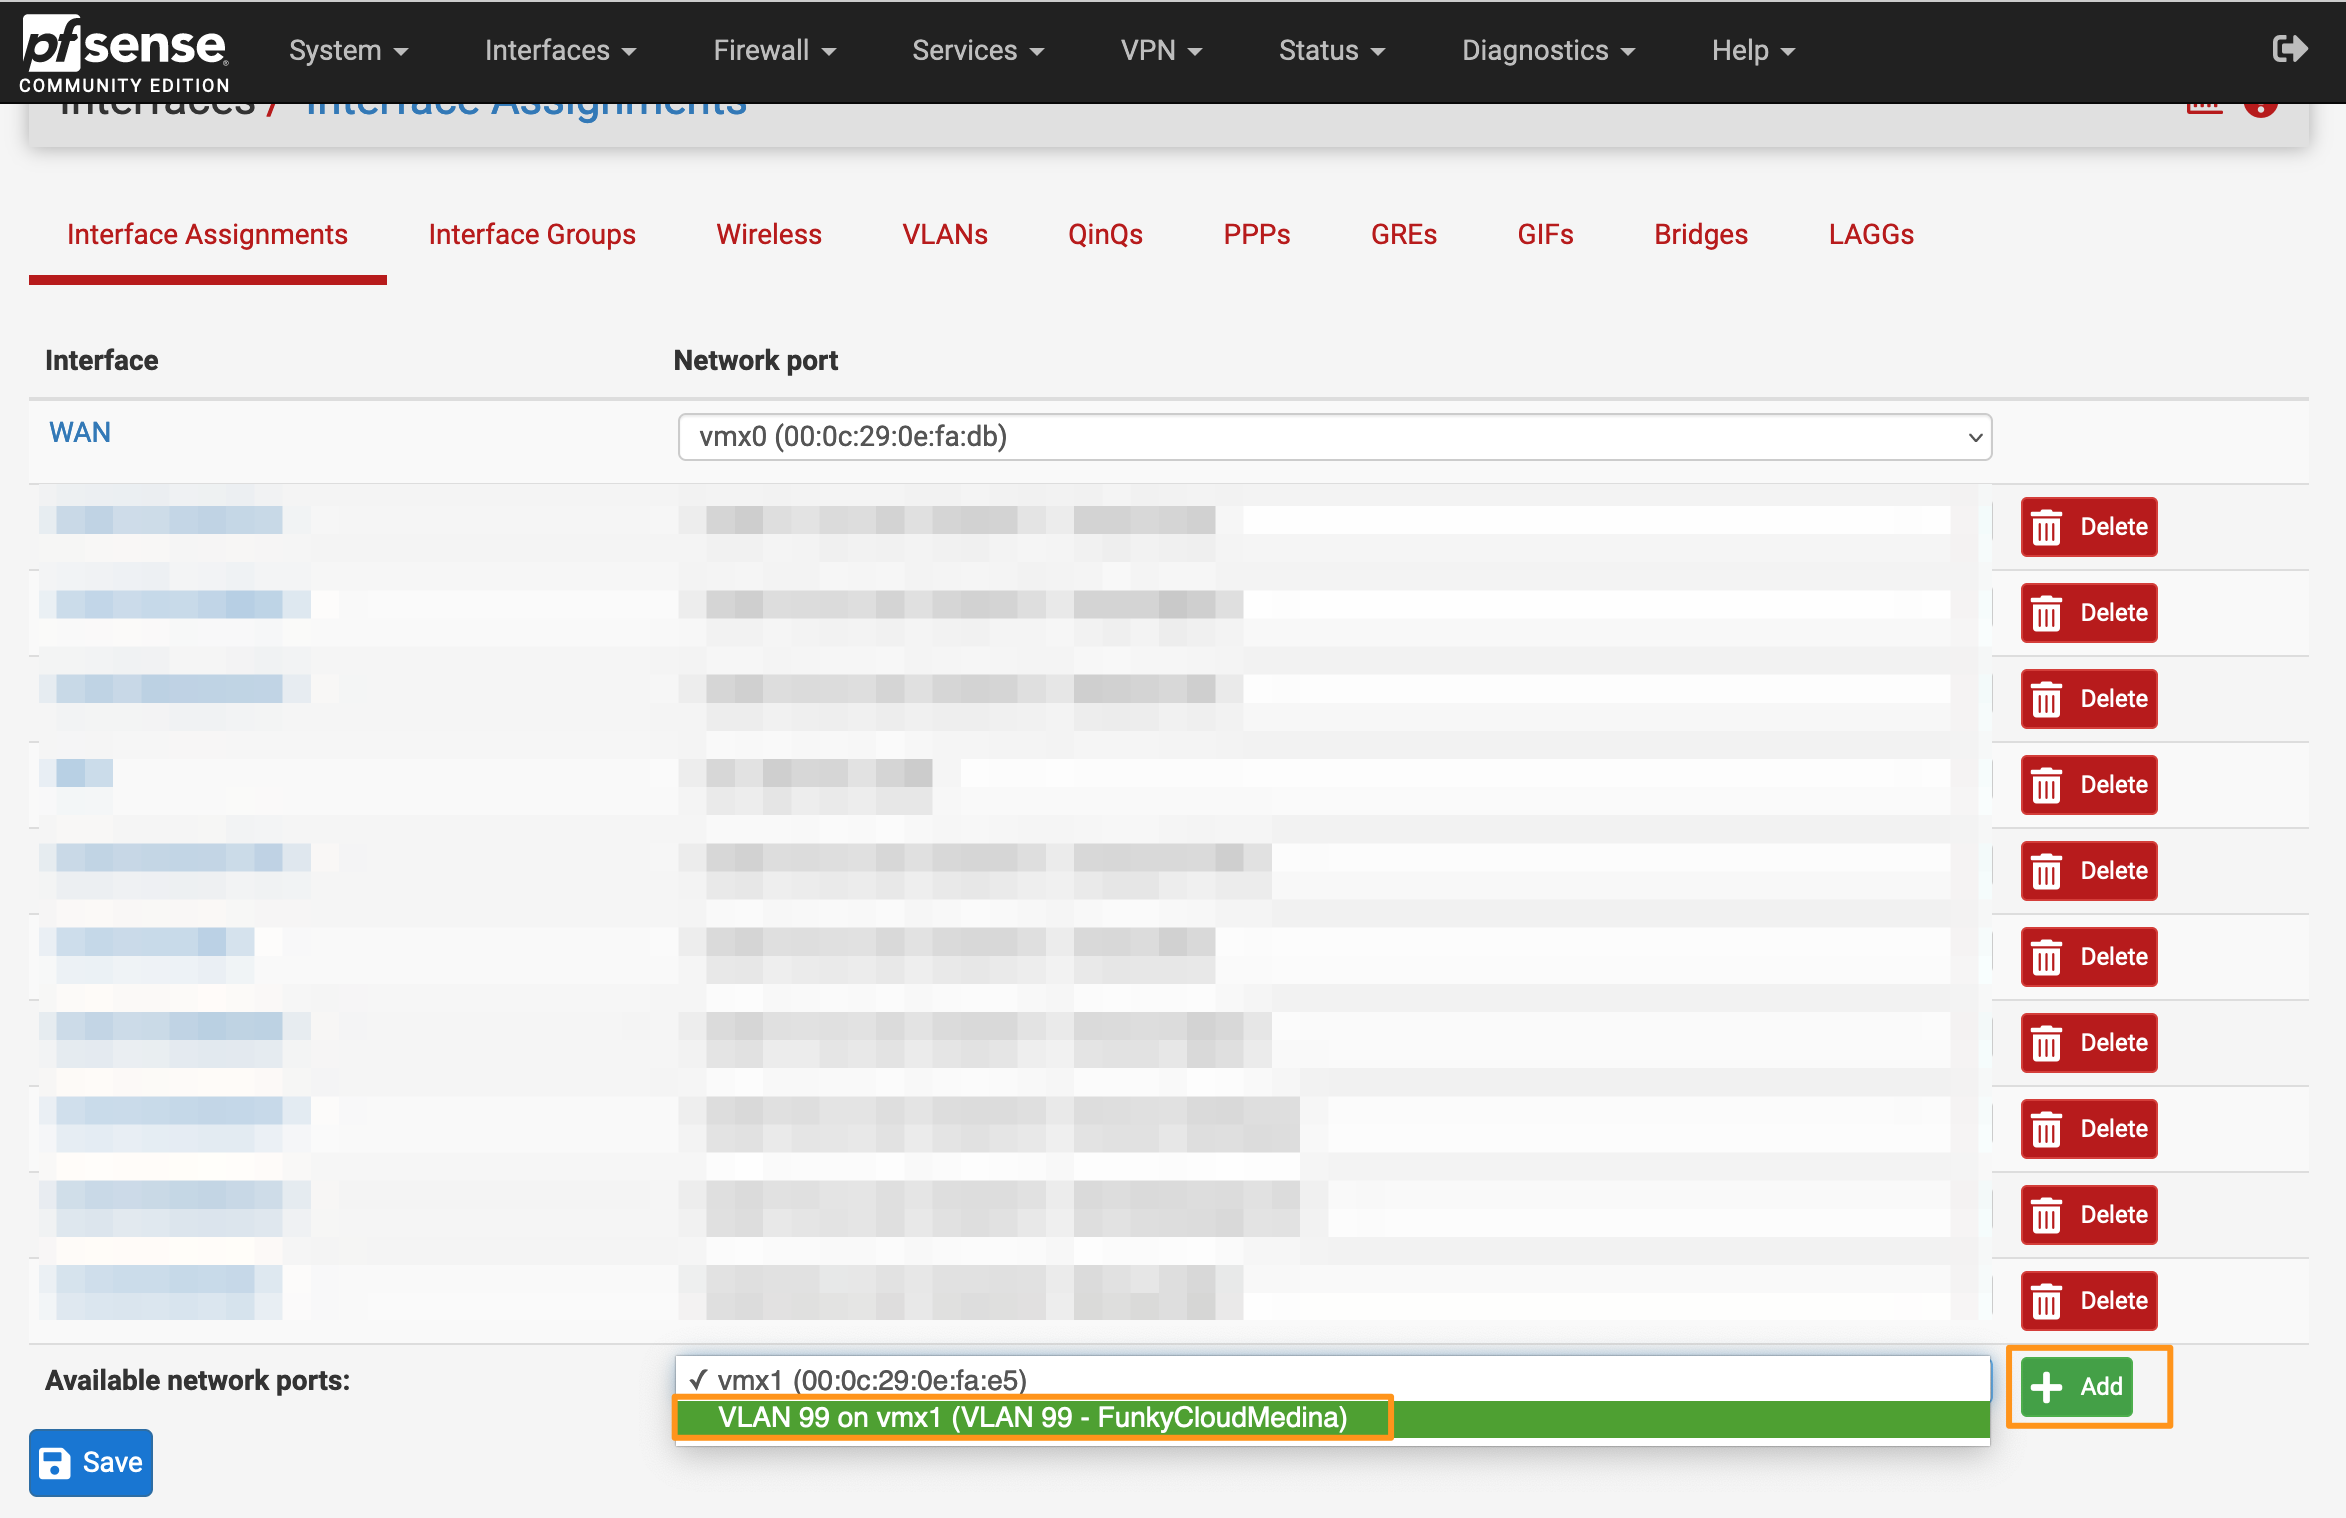
- From the same Interfaces section, go to Interface Assignments tab. You’ll see a list of currently assigned interfaces. A clean install will show the first interface (typically WAN) attached to the first vNIC (vmx0).
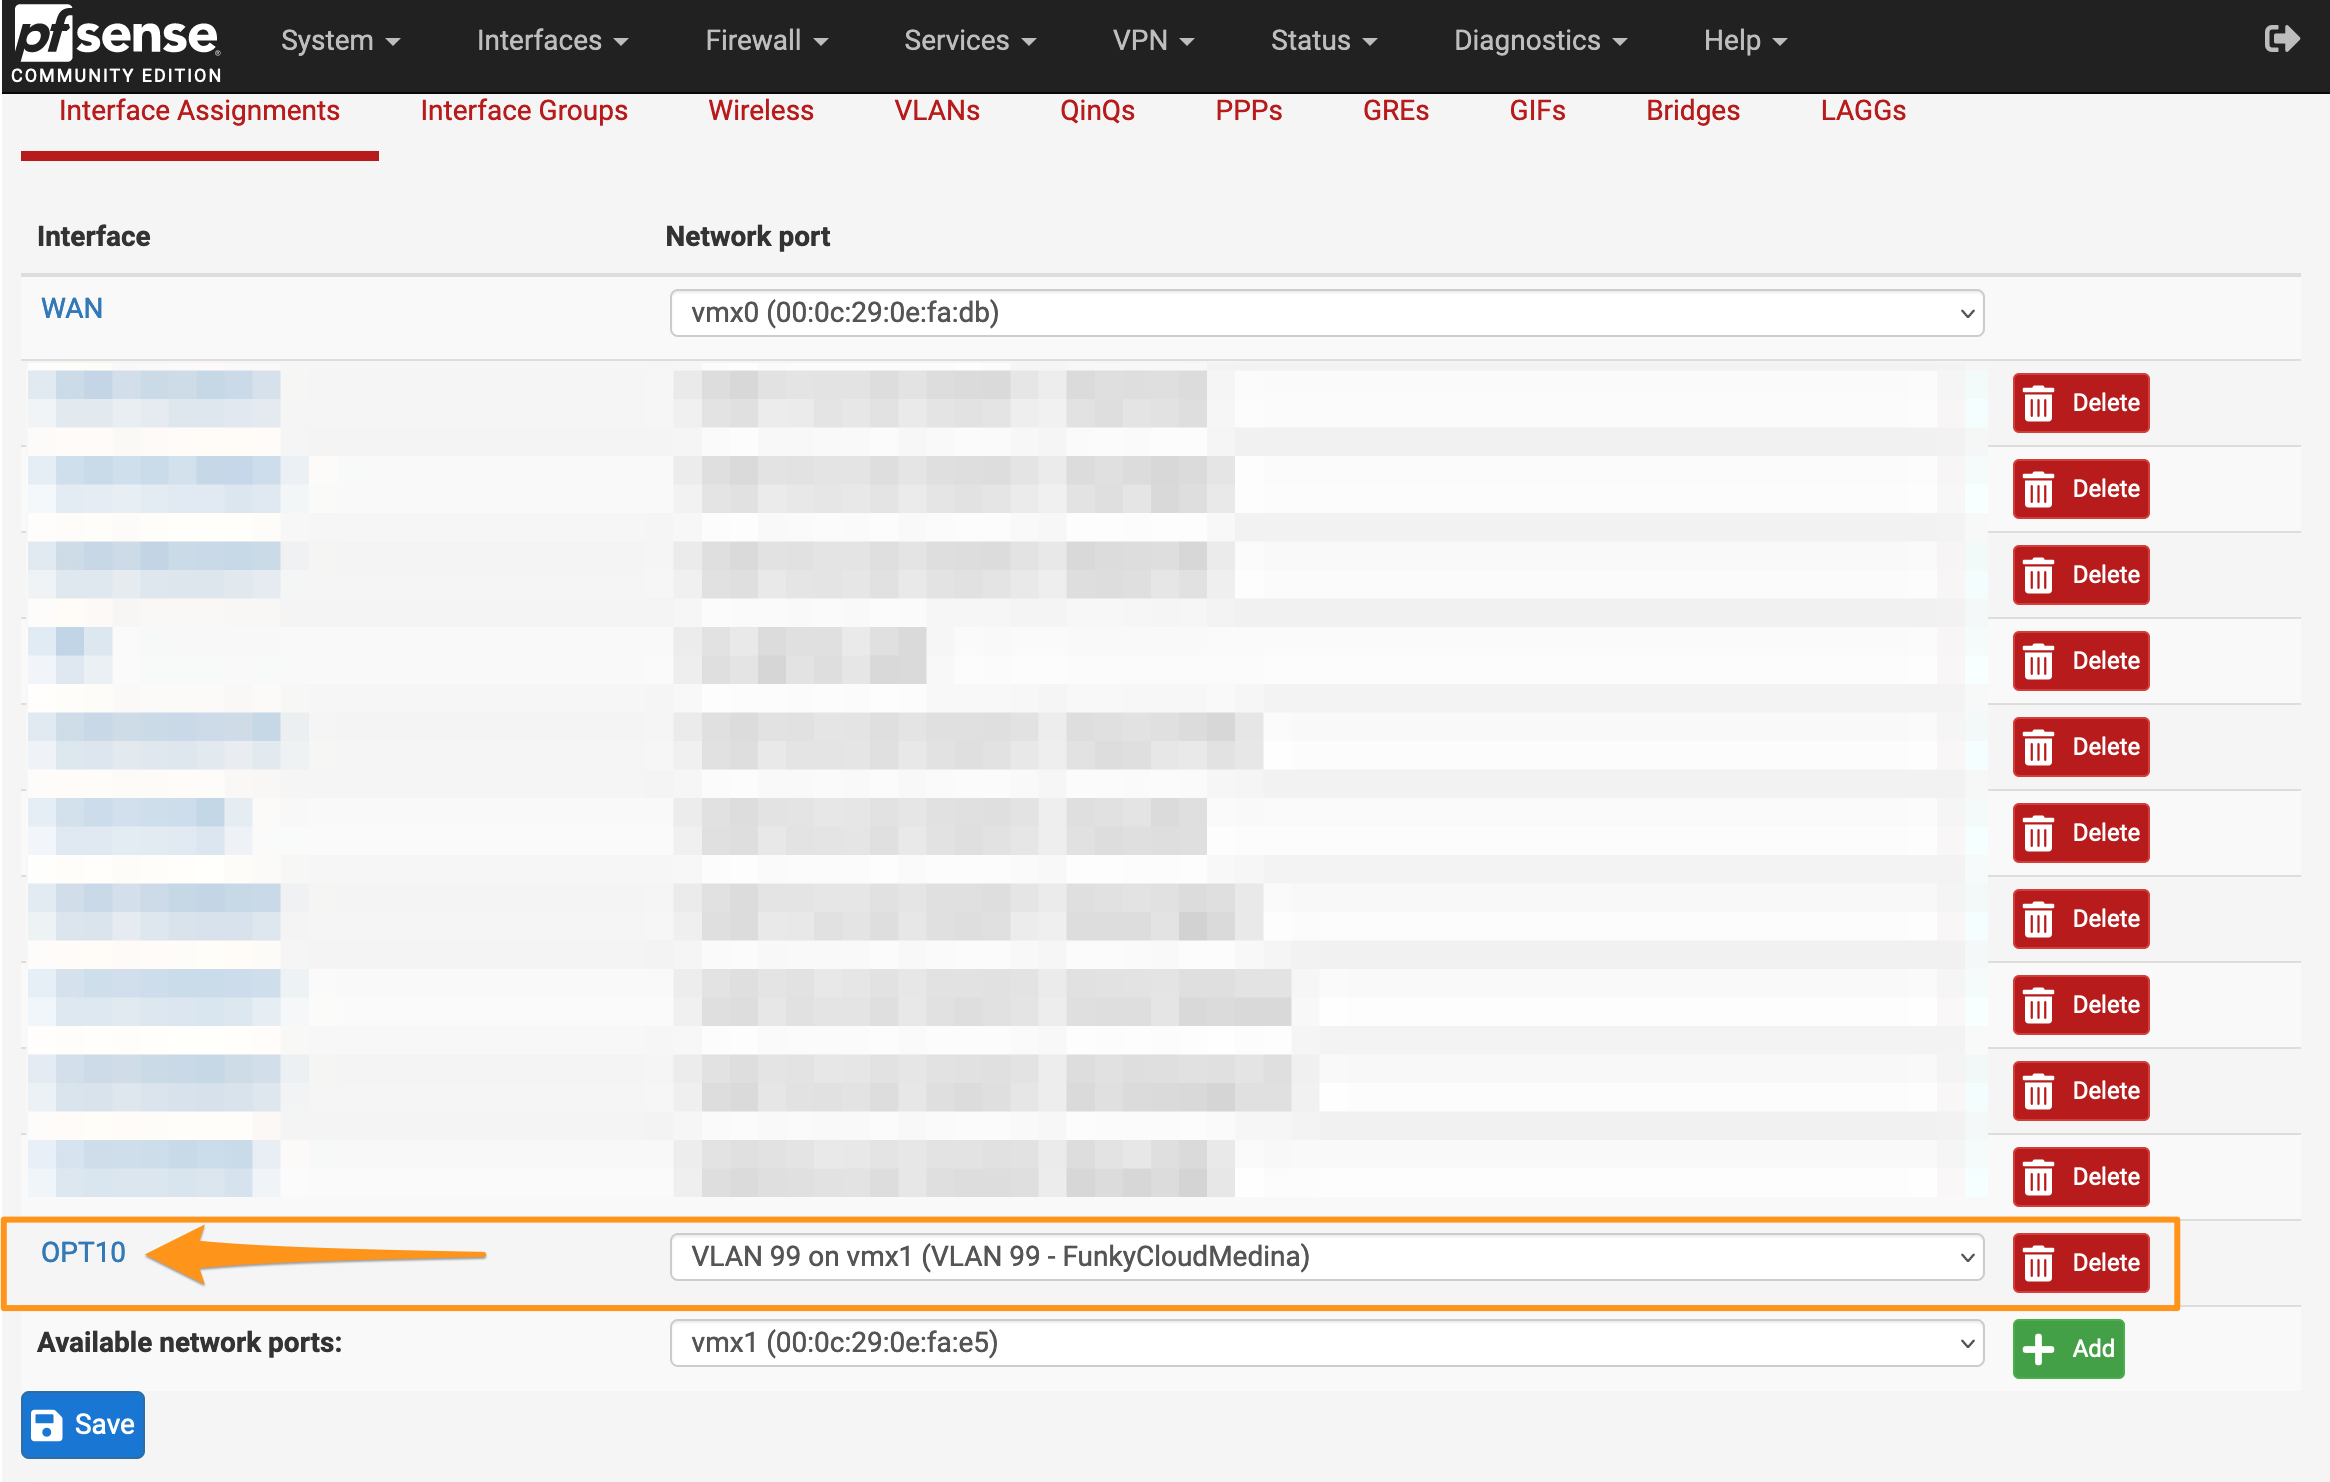
- In the Available network ports drop-down at the bottom of the list, find your newly created VLAN and click Add.
- A new interface will appear in the list. This is your new sub-interface for the new VLAN. Click the Interface name.
- You’ll be presented with a few options for the new interface. You will want to focus on the IPv4 or IPv6 settings for your new interface. Remember: The IP address of the new sub-interface will act as the L3 gateway for your new VLAN, so configure it accordingly.
- Here’s my example configuration for a new subnet (10.1.99.0/24) with the gateway at
.1.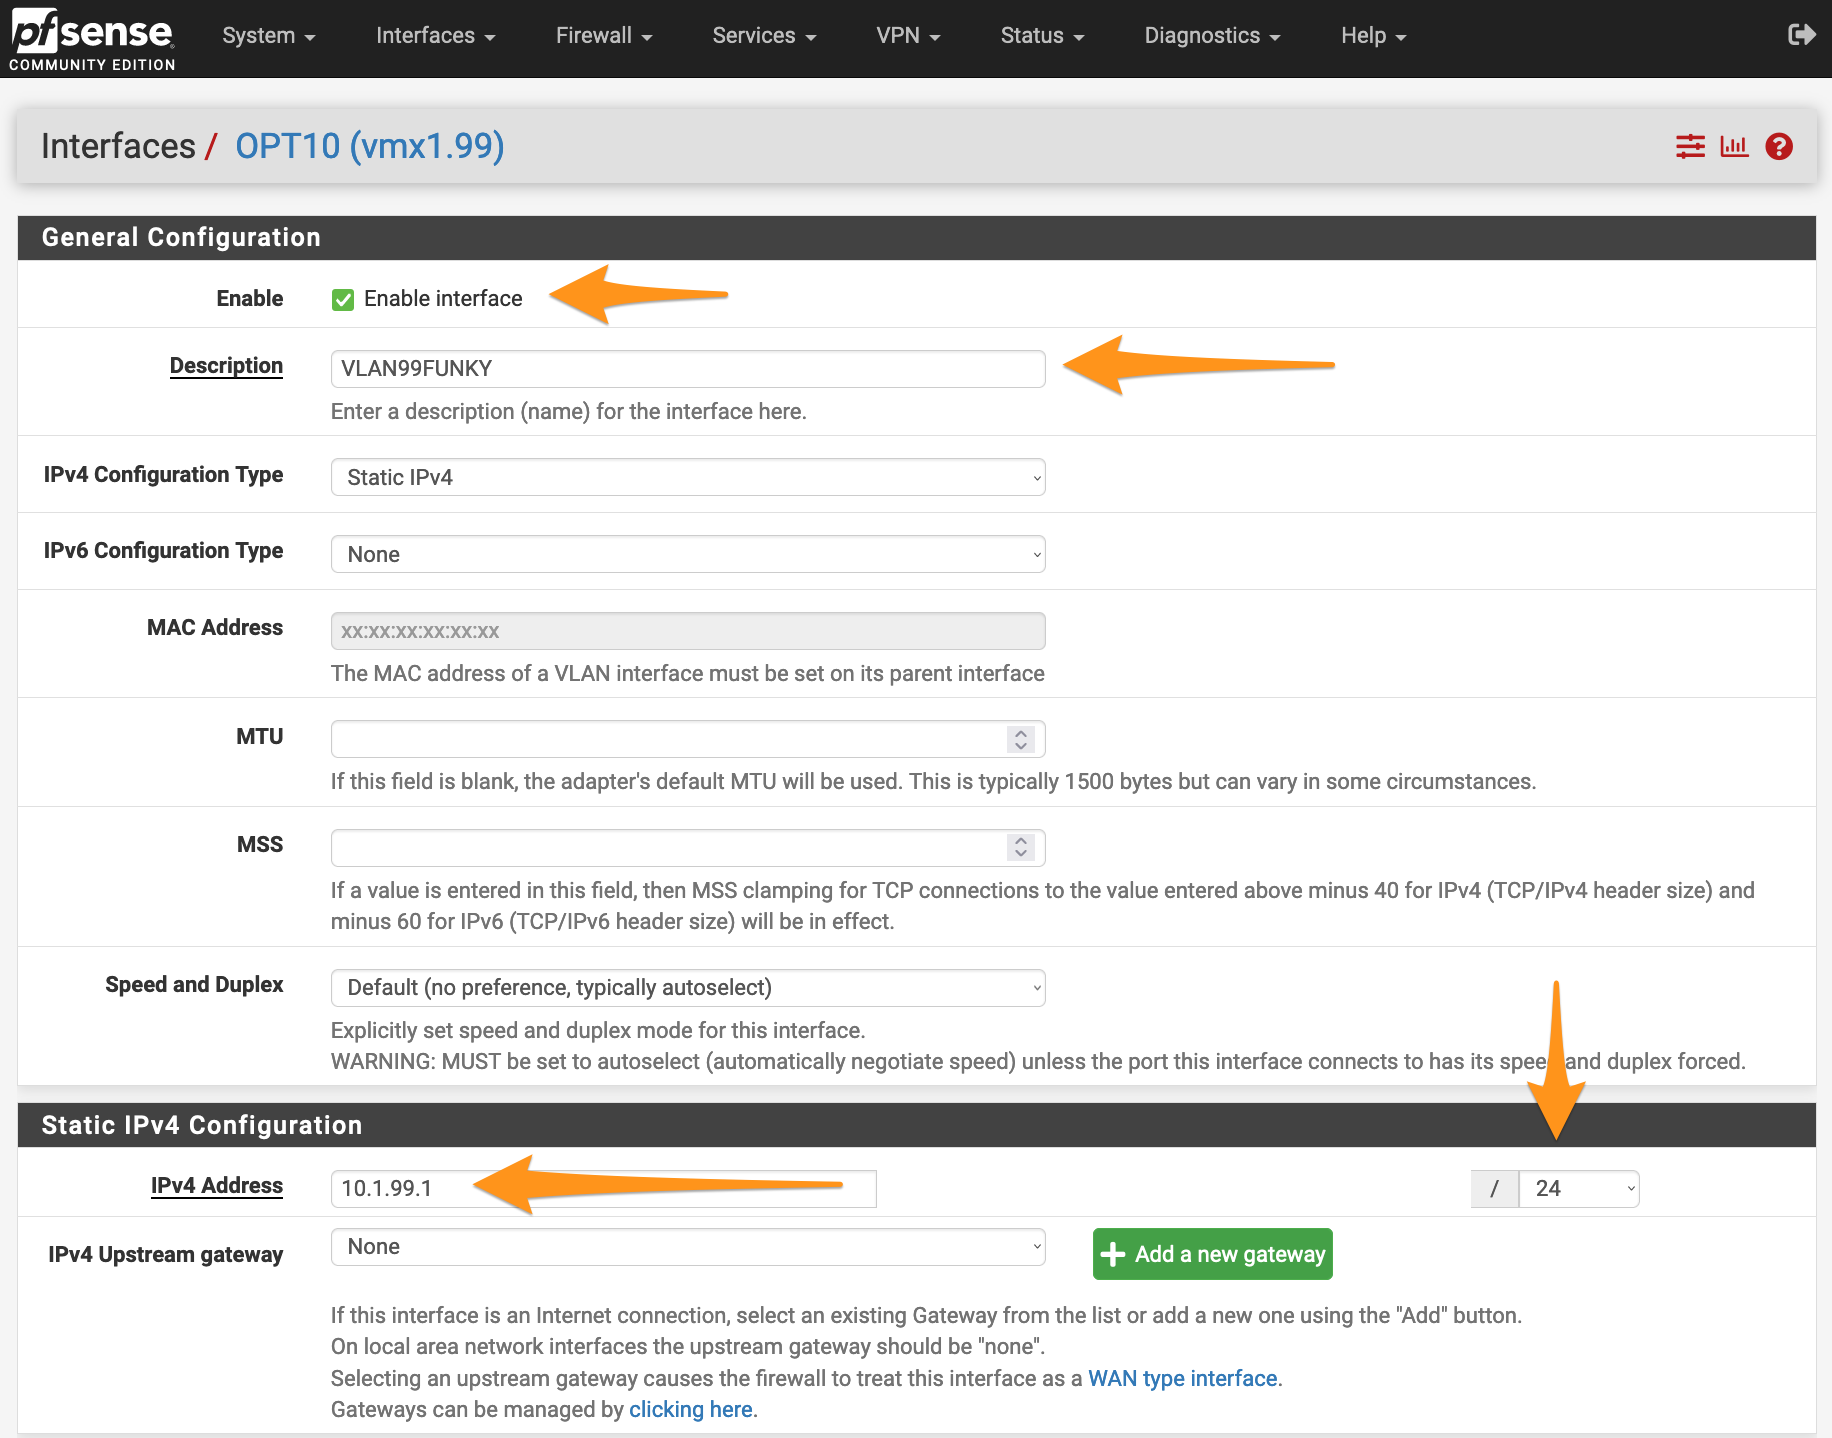
- When finished, click Save followed by Apply Changes in the banner along the top.

That’s it! You’ve now got a sub-interface on your PFsense VM. Go ahead and create a new VM and attach it to your tagged portgroup on your distributed switch. Give the new machine an IP address in your new subnet and its gateway set to the IP of your new sub-interface.
You can also start creating firewall rules within PFSense with your new subnet as the source or destination.
Rinse and repeat these steps for any/all VLANs and subnets that you want to create in your lab.