My latest lab excapades required deploying some VMs into Azure using vRealize Automation. Before I did that though, I wanted to configure private network access between my Azure VNet and my lab network to support things like Domain Joining, Lab DNS lookups, SaltStack Config management, etc. My lab network is managed by a virtual PFSense appliance so this post will cover PFSense configuration too.
The IPSec tunnel only needs to exist while I’m deploying and testing things. I don’t need it running 24 hours, nor do I need the advanced configurations or sizing. The tunnel will also be established between two public IPs so I will not be covering NAT traversal.
Design
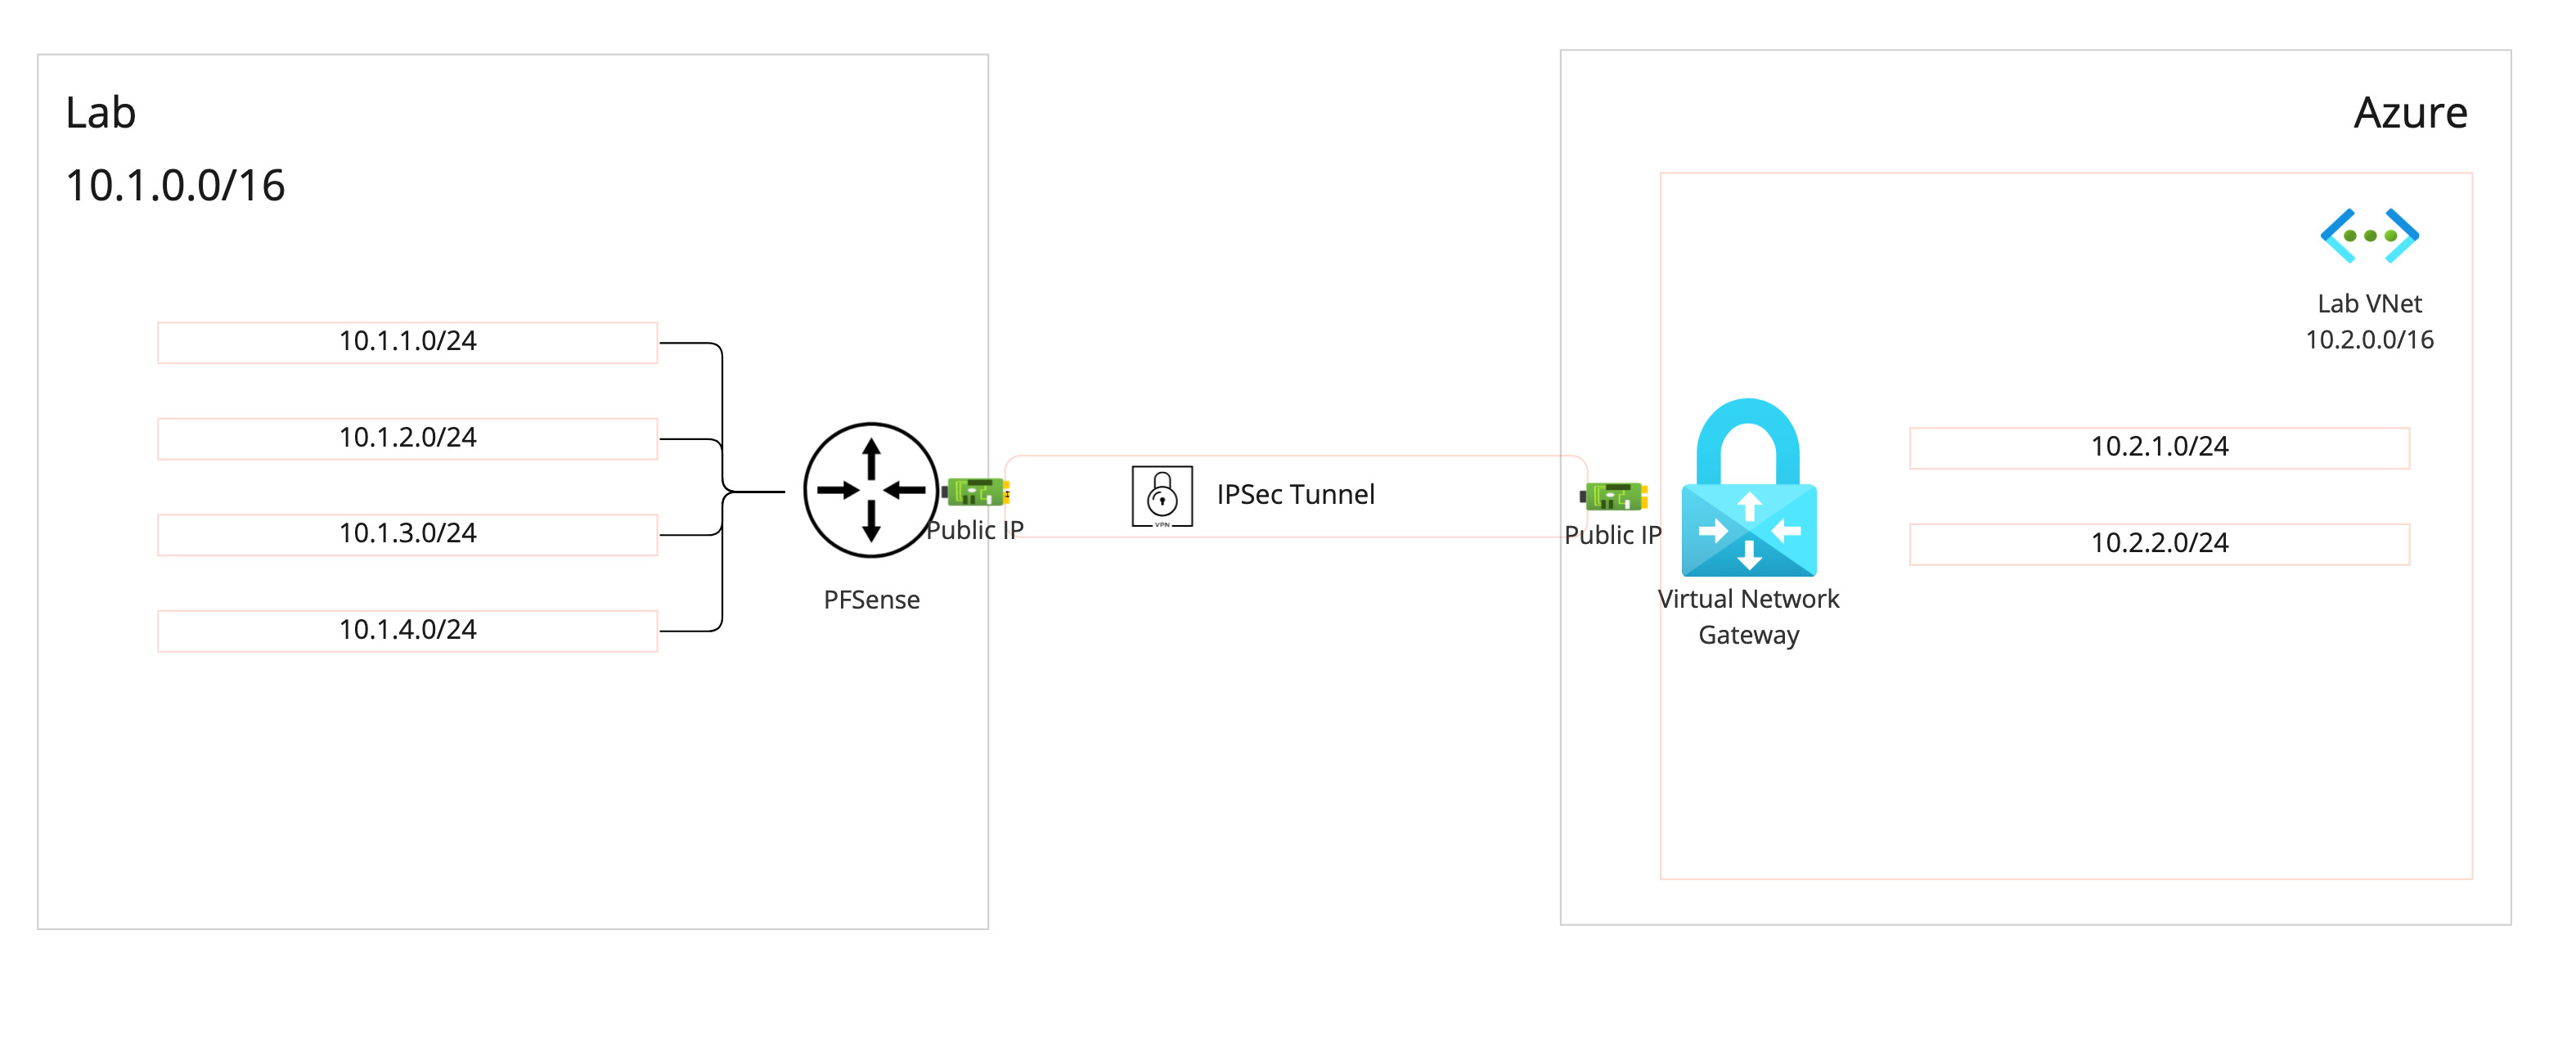
My end goal is to have bidirectional communications between subnets in Azure and all my lab subnets managed by PFSense.
What you’ll need
- Azure Subscription
- PFSense appliance (virtual or physical)
- Eyeballs or a screen reader
- Existing VNet in Azure with a gateway subnet
Azure
- Login to the Azure Portal (https://portal.azure.com).
Create the Local Network Gateway
- In the Search bar, search for “Local Network Gateways”.
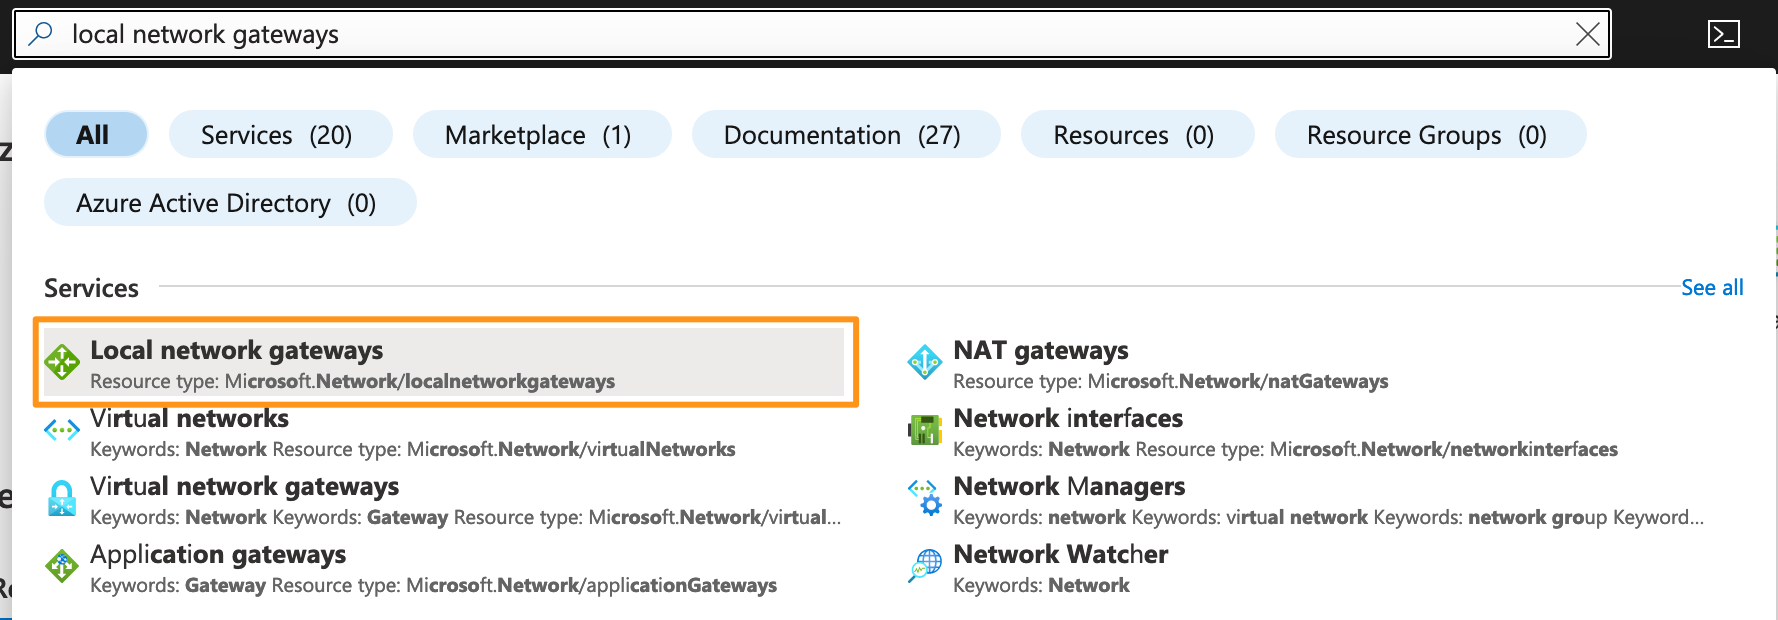 A “Local Network Gateway” is essentially an object describing your on-premises or external VPN endpoint and the networks that you will be presenting from that endpoint. In my case, it’s my PFSense gateway, and it’ll be my lab supernet 10.1.0.0/16.
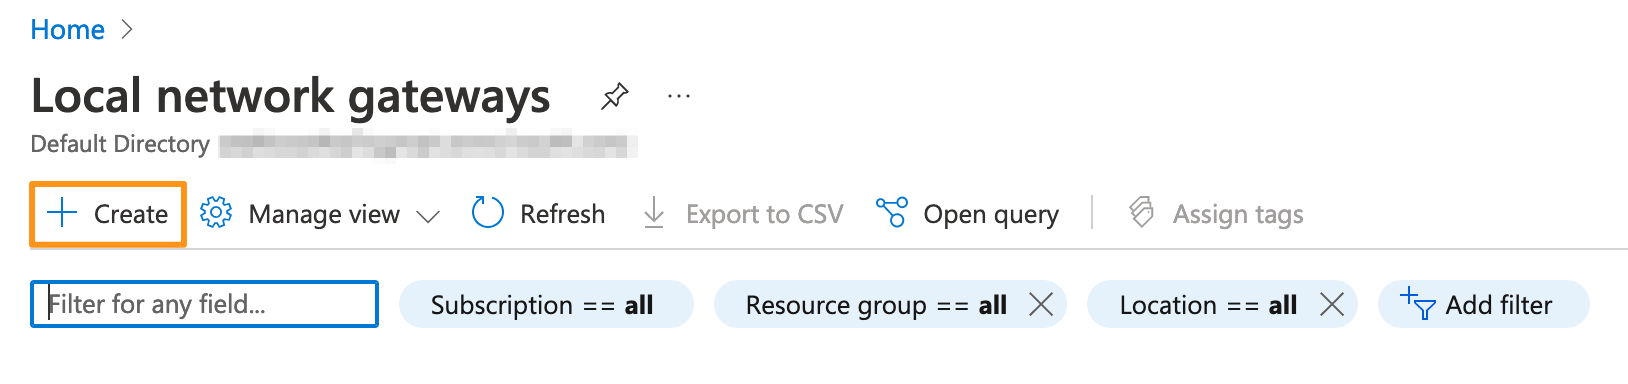
 - Click the Create button.
- In the wizard that appears, enter the details of your on-prem VPN endpoint.
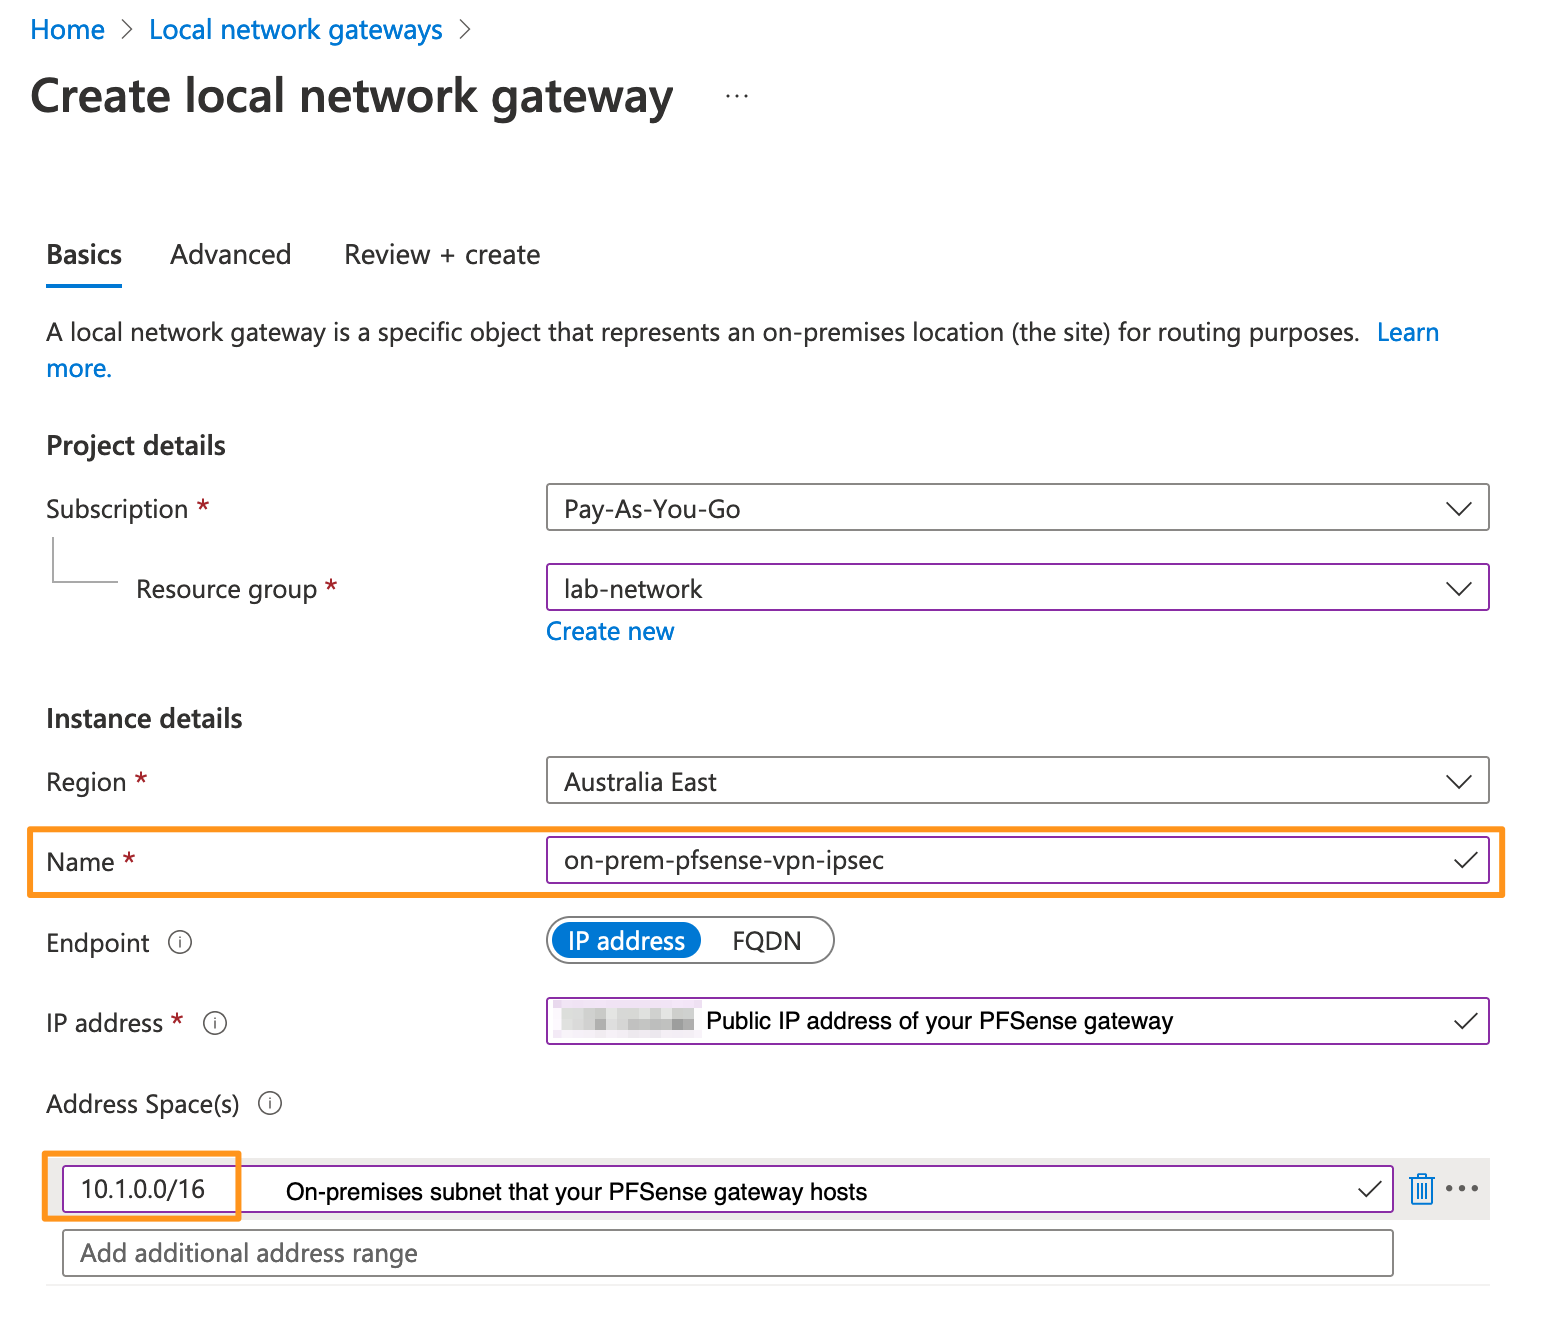
- I will not being configuring advanced settings like BGP over this tunnel so click Review + create.
- Review your settings and click Create.
Create the Virtual Network Gateway
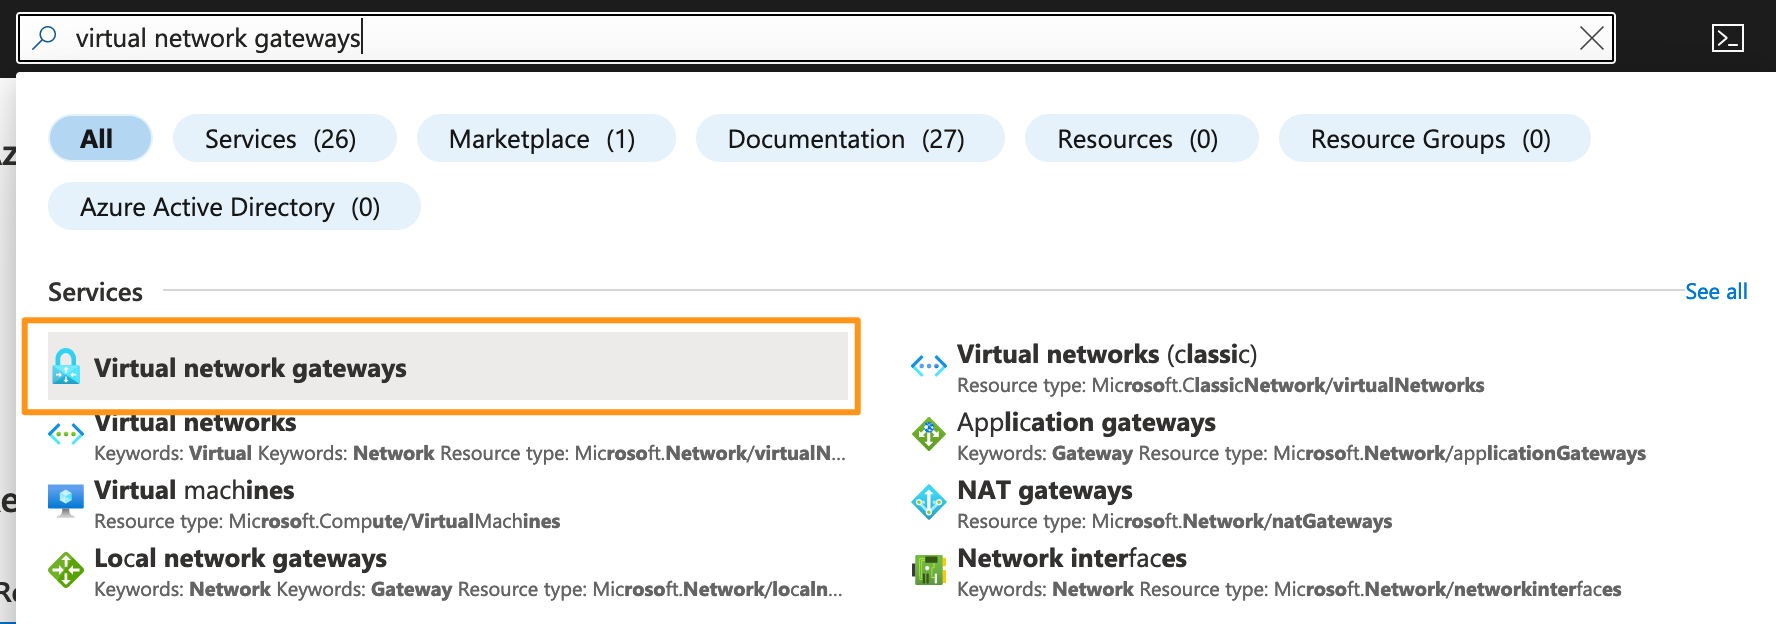
- In the Search bar, search for “Virtual Network Gateways” and click it.
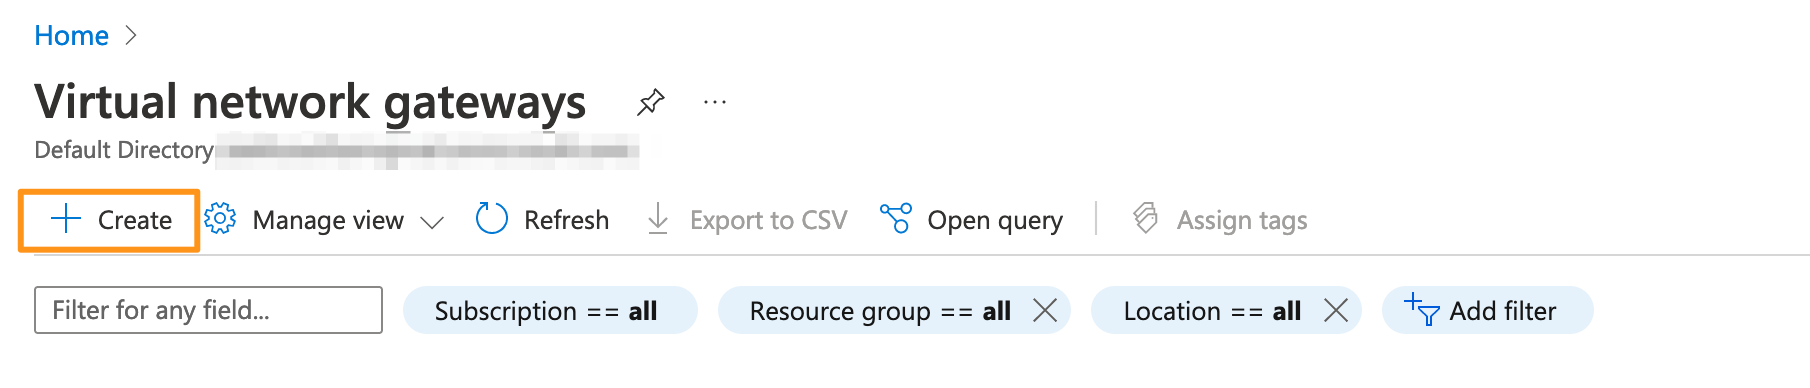
- Click the Create button.
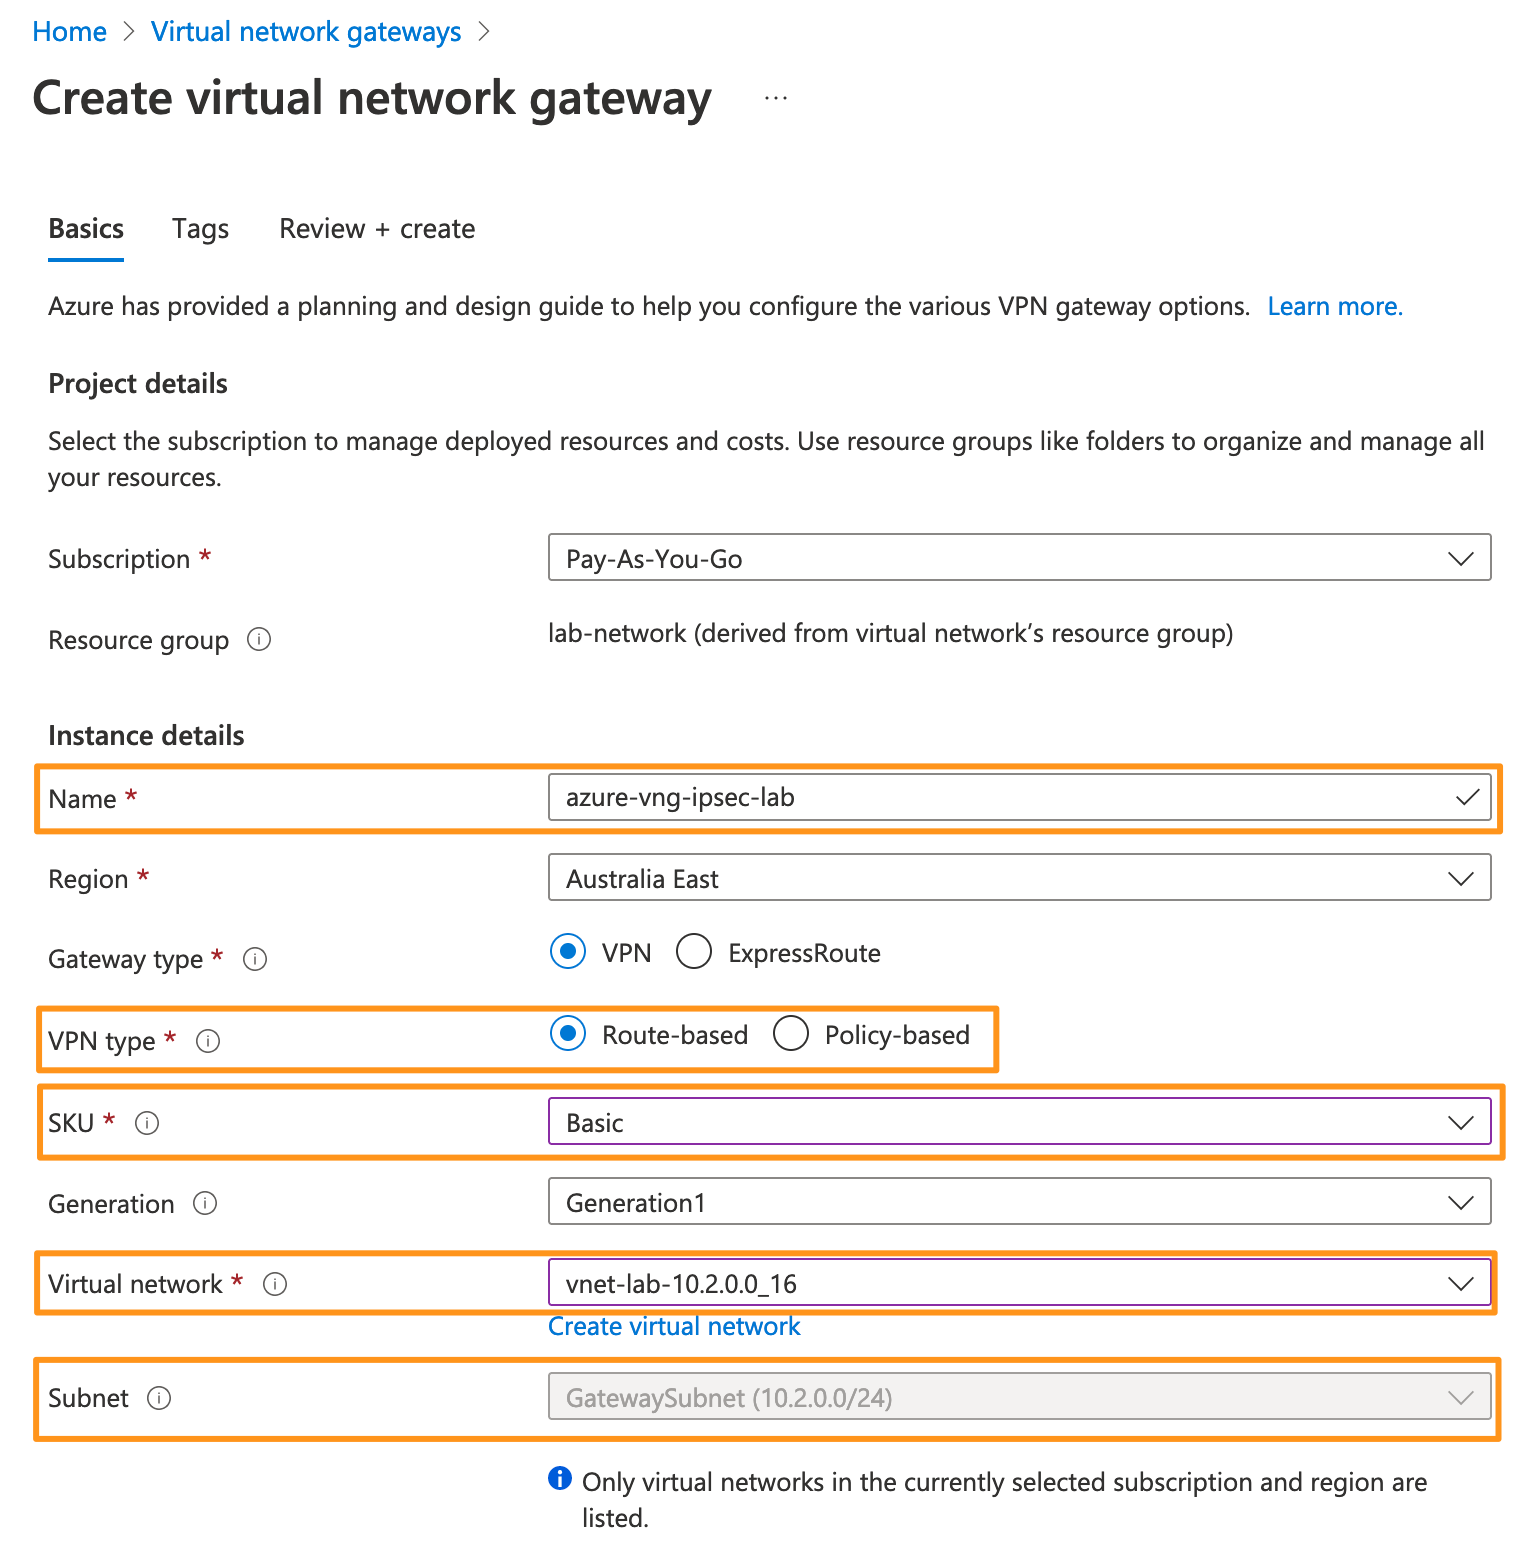
- In the Virtual Network Gateway wizard, fill out the Gateway details.
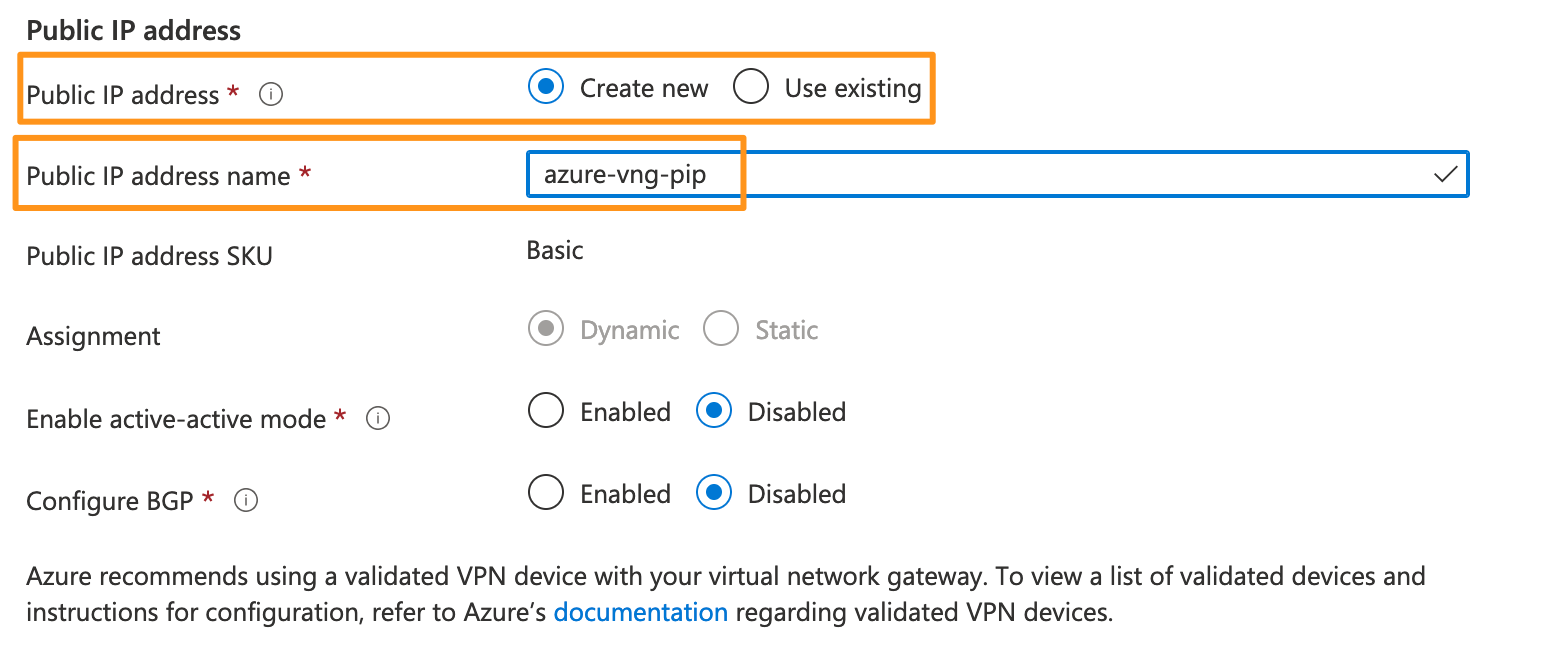
- Scroll down and configure the Public IP details. For my case, I’ll create a new one.
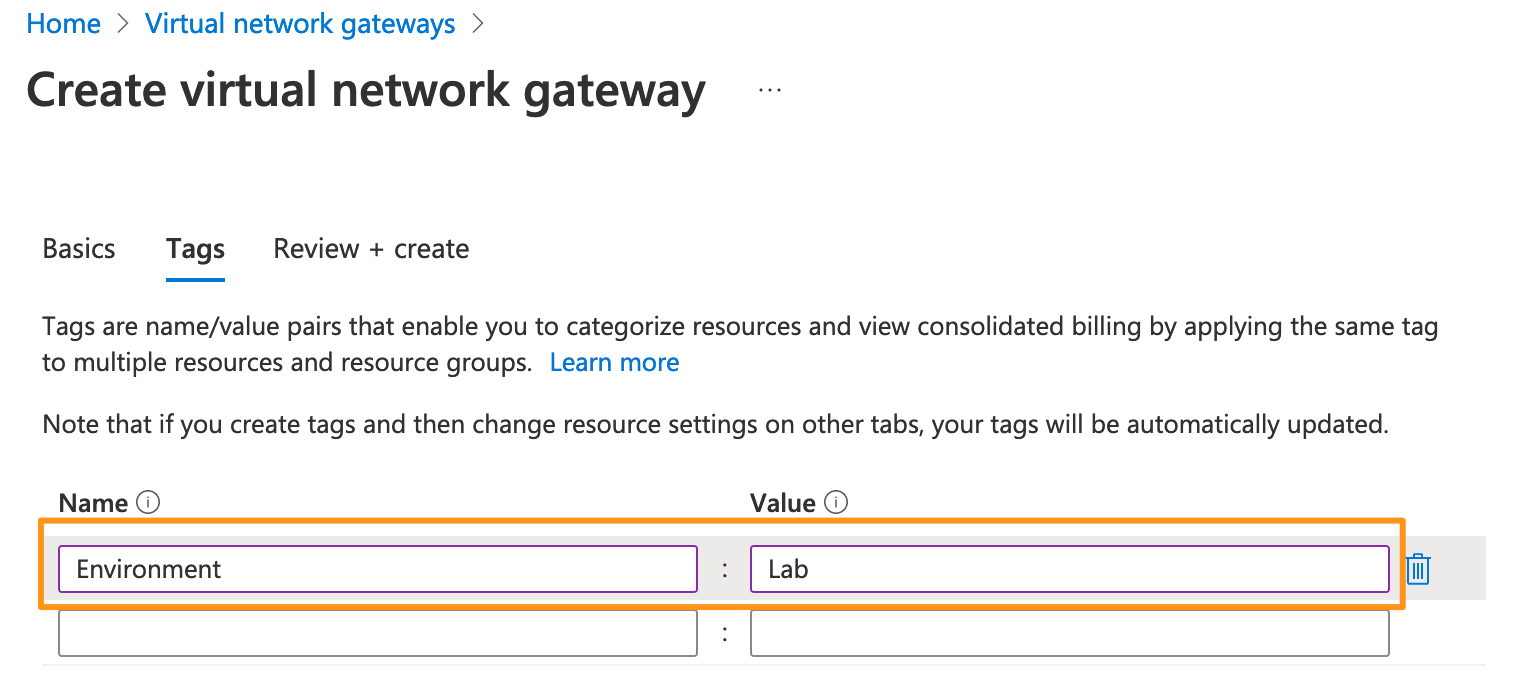
- Click Next and tag your new Virtual Network Gateway. I prefer to tag my lab related items so I can pretend I manage my costs well in Azure.
- Click Review + create. If you’re happy with your inputs click Create. The Virtual Network Gateway deployment time varies from 2-15 minutes (seriously I had one when I was testing this and it took about 15 to deploy). Go make a coffee and it should be done by then.
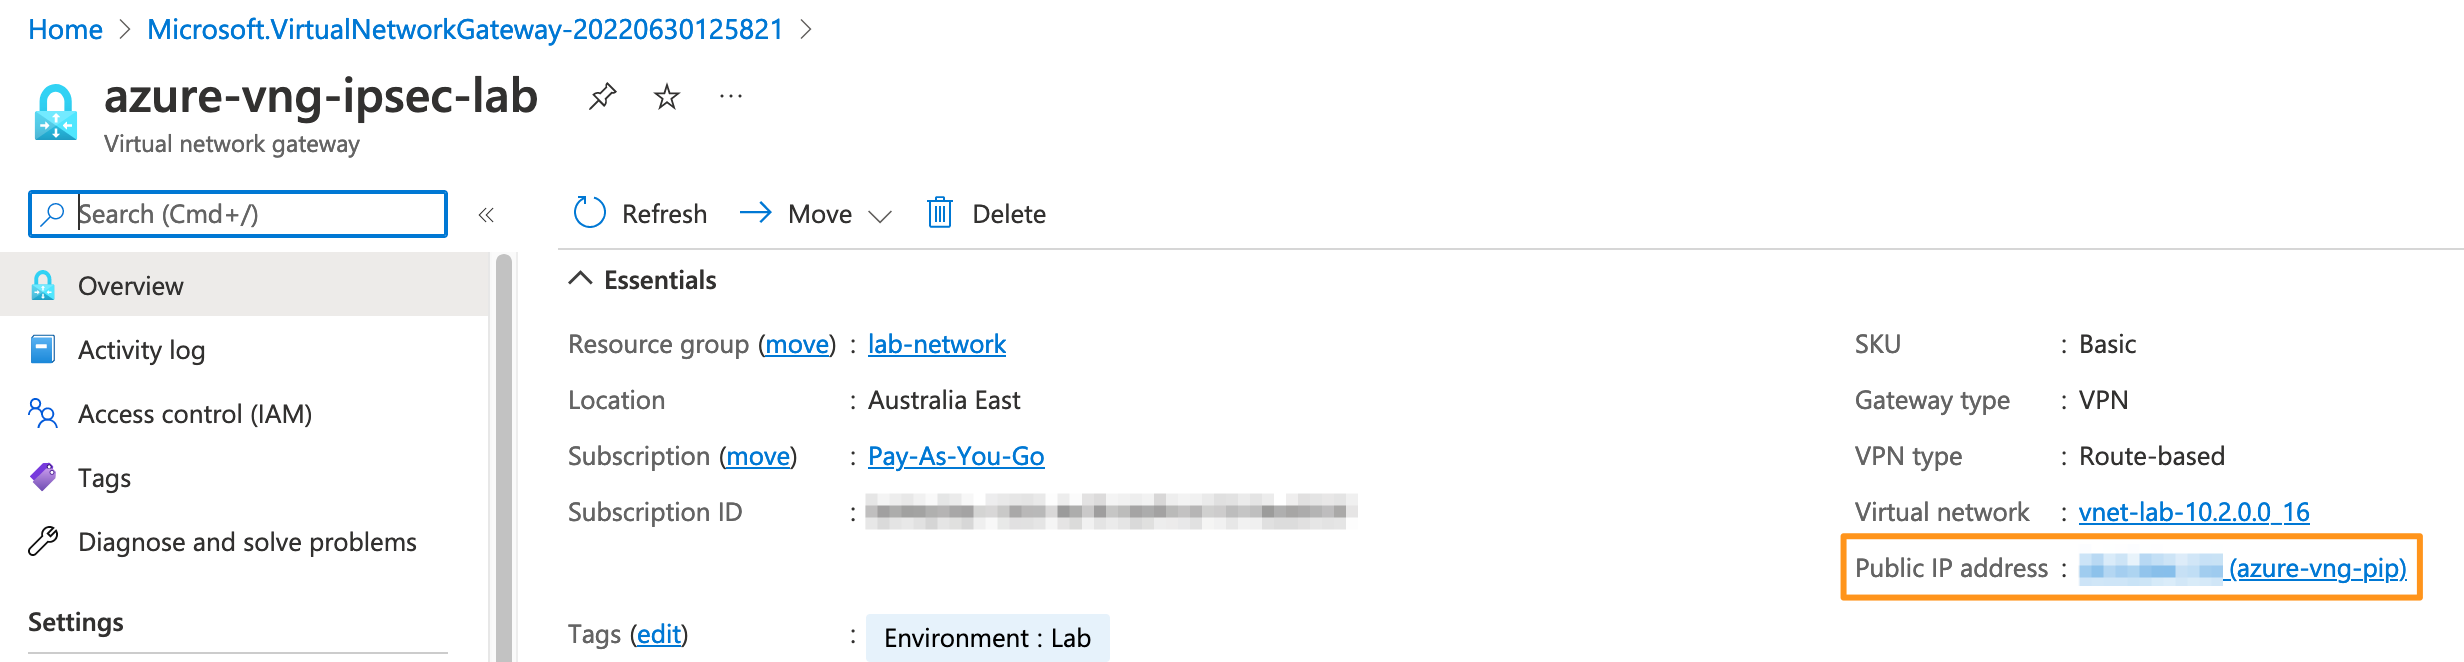
- Once the Virtual Network Gateway deployment has completed, go to the resource and locate the Public IP address (sorry I had to blur it). Copy the IP address somewhere, you’ll need it for PFSense.
Define an IPSec Connection for the Azure Virtual Network Gateway
- In the Virtual Network Gateway Resource click Connections -> Add.
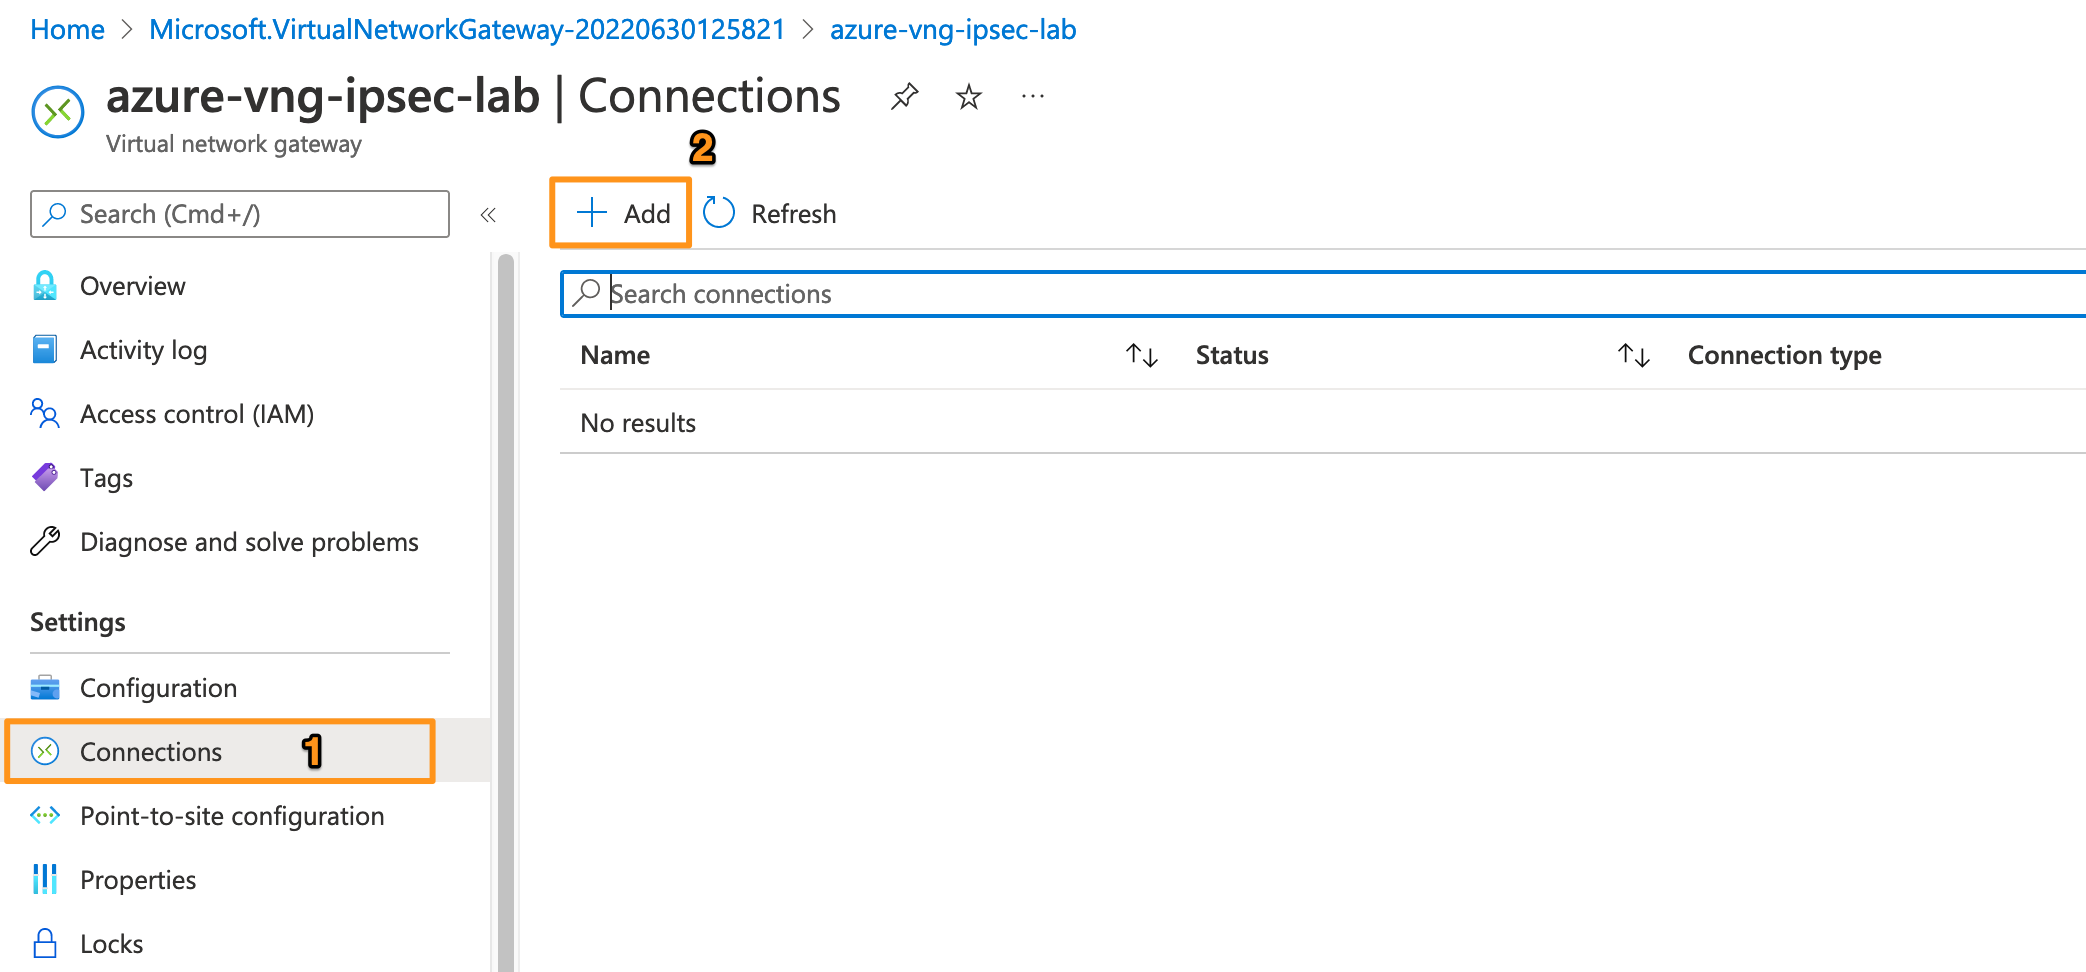 These “Connections” are definitions that you create, describing the details about a specific tunnel for the Virtual Network Gateway to consume.
 - In the Add Connection wizard, complete the details ensuring you change the “Local network gateway” value to the one you created earlier, and most importantly a pre-shared key (PSK) that you have recorded somewhere. Ideally it’s more complex than what I have here.

- When you’re happy with your settings, click OK. The new connection will be created and associated to your Virtual Network Gateway.
 Note: The Status will change from “Updating” to “Unknown” and stay that way until we’ve completed the PFSense configuration.
PFSense
The PFSense component looks more complicated than it is as all the options/nerd-knobs are on full display. I glossed right over them and had no issues.
Create IPSec Phase 1 in PFSense
- Login to your PFSense Admin portal.
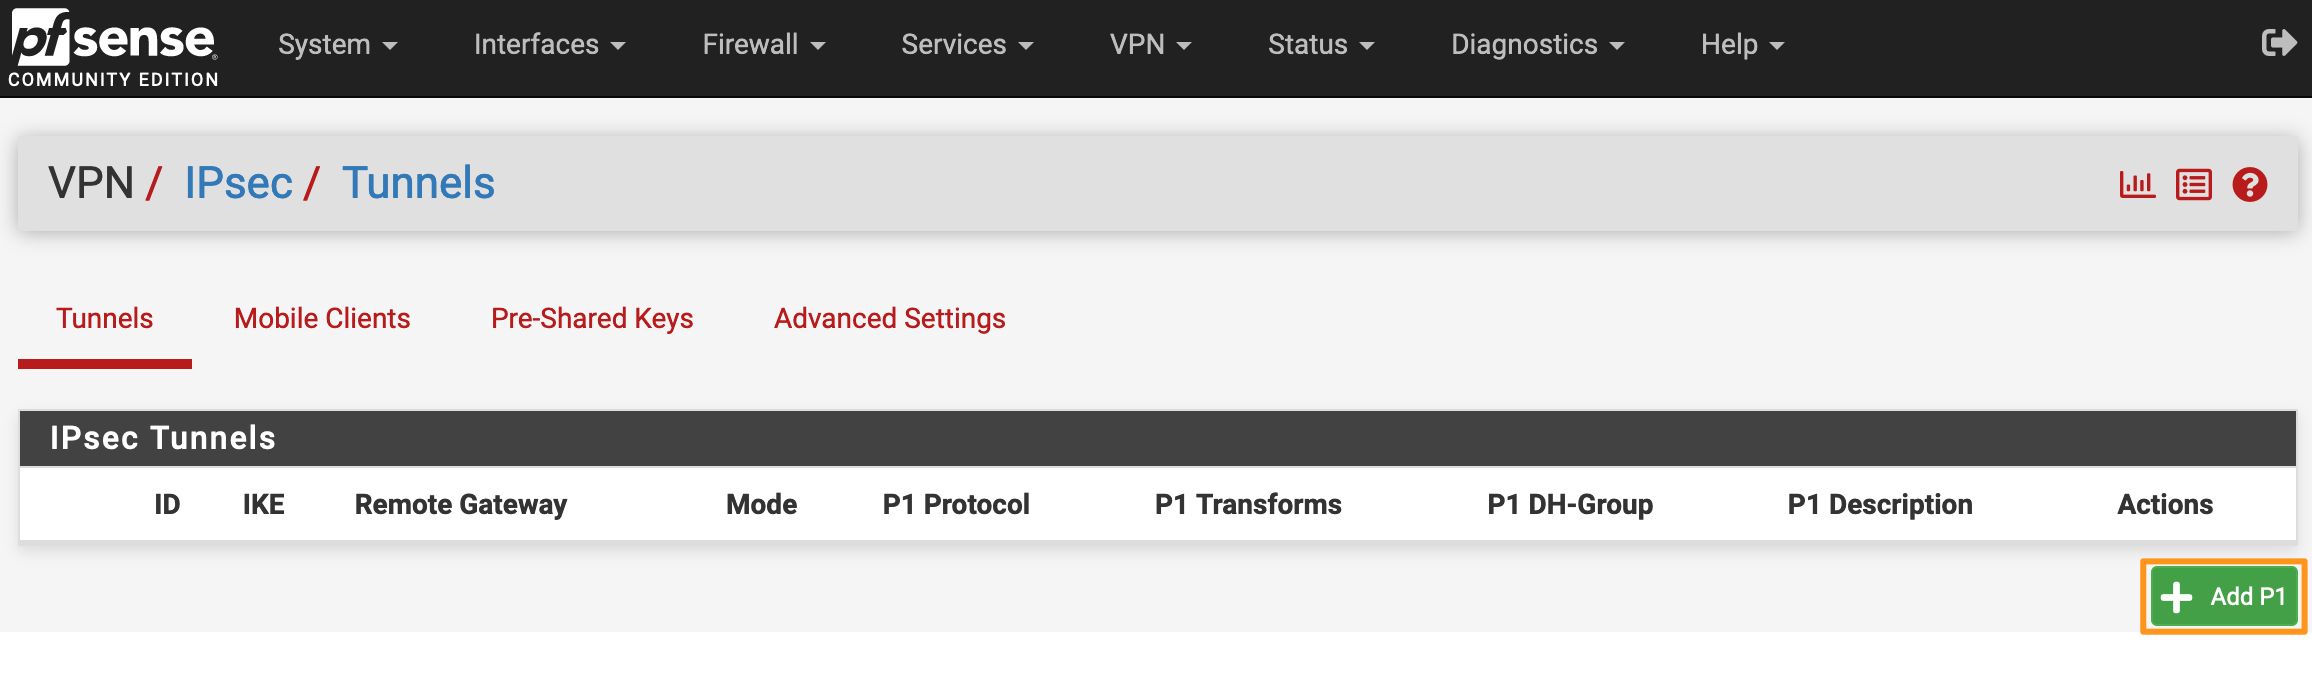
- In the top menu, click VPN > IPSec.

- Click the Add P1 button.
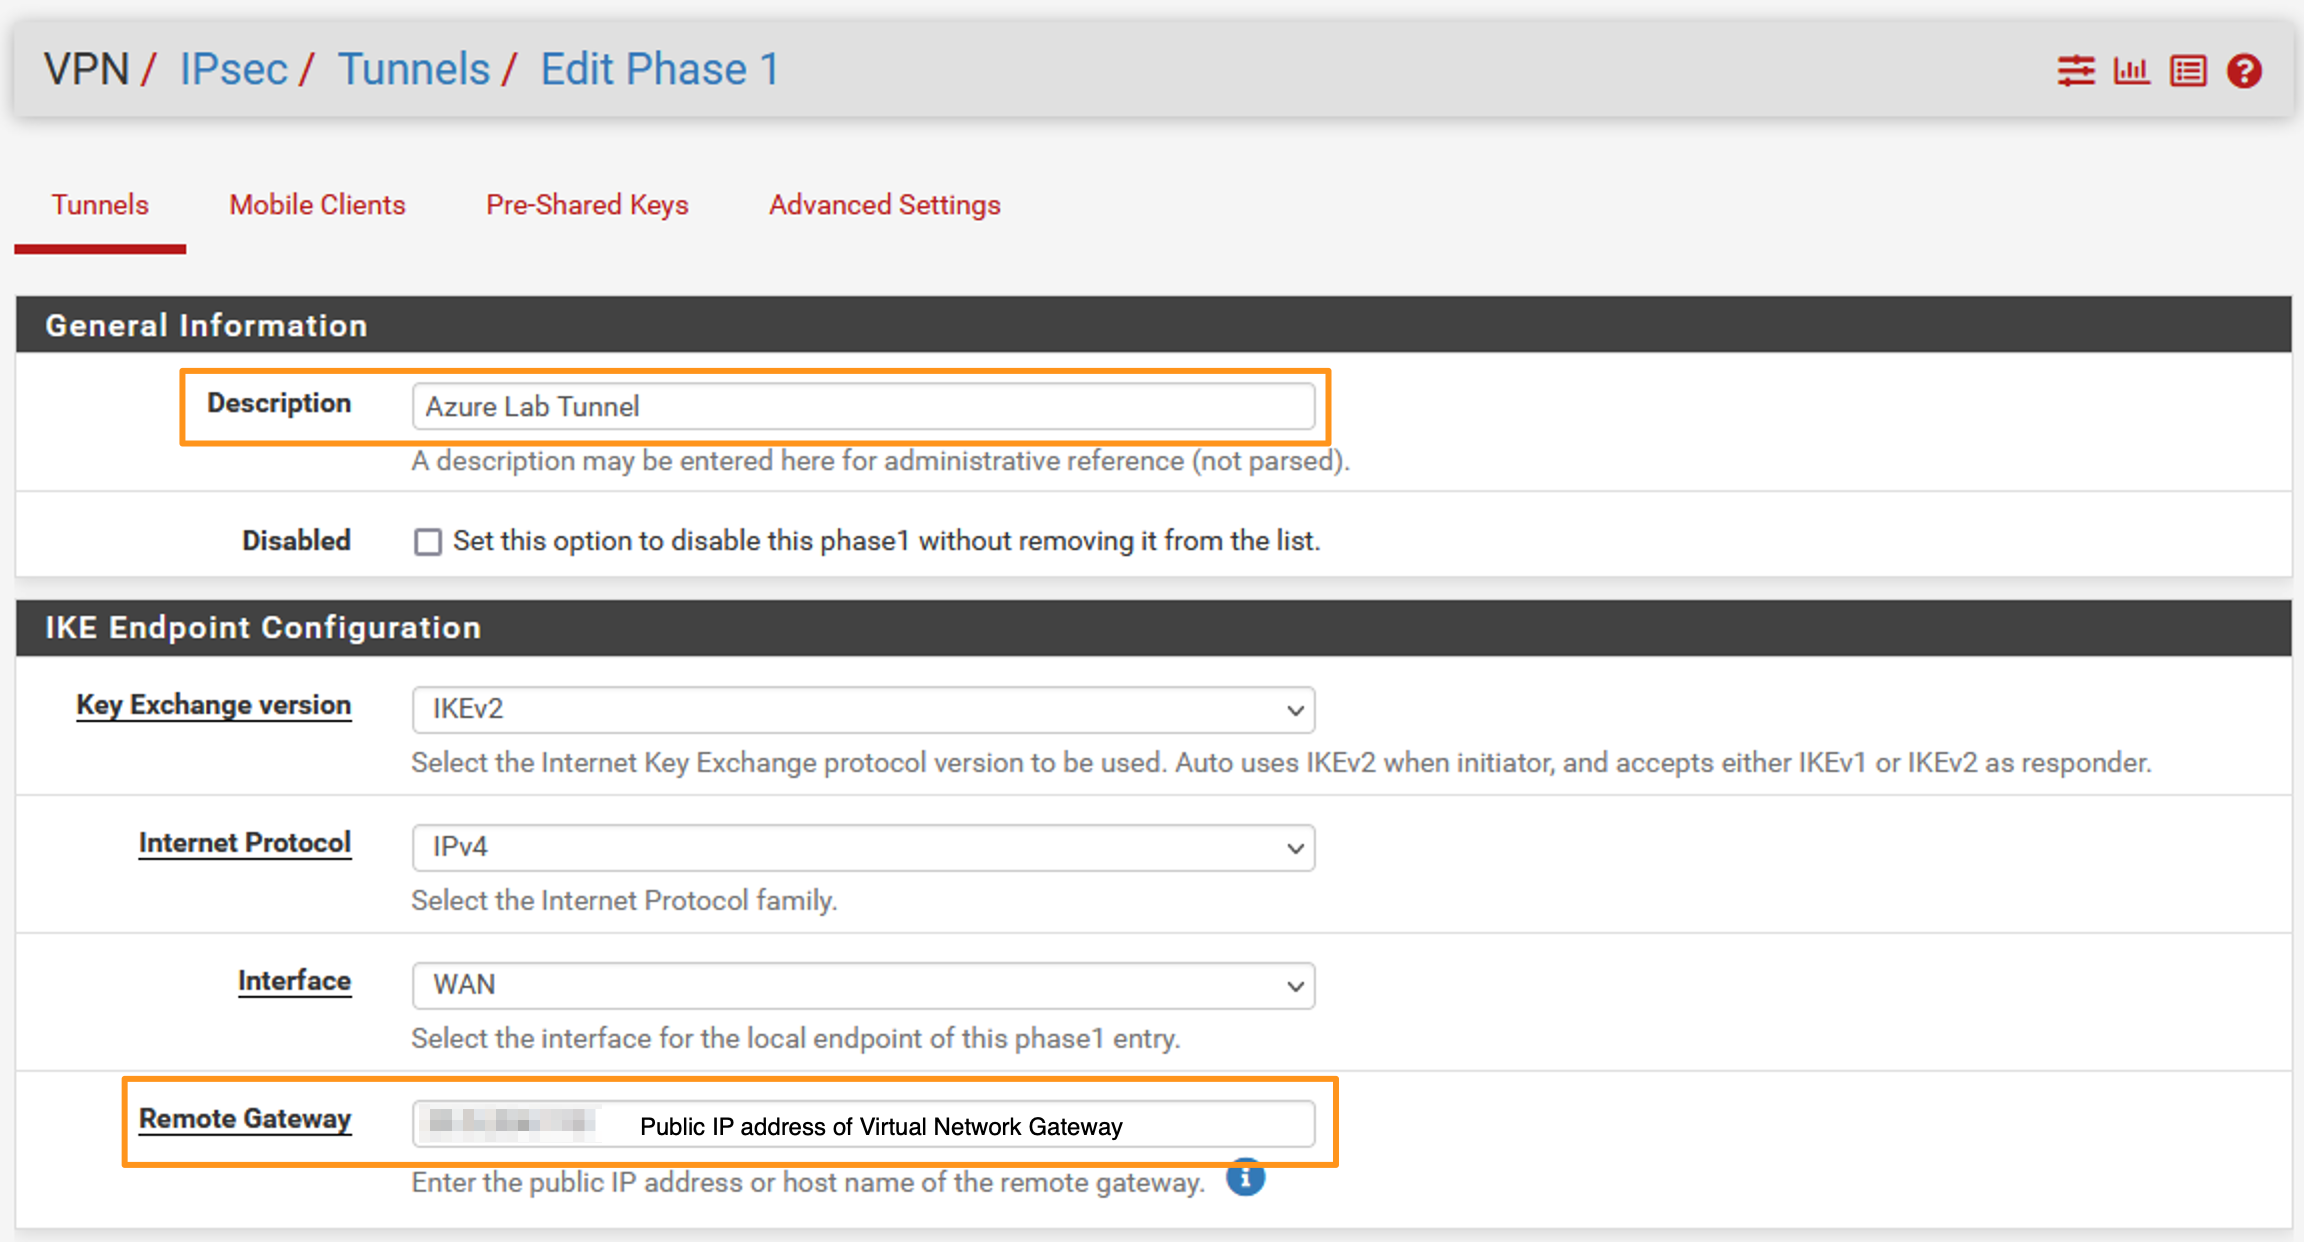
- In the wizard, start entering the details for the “General Information” and “IKE Endpoint Configuration” sections.
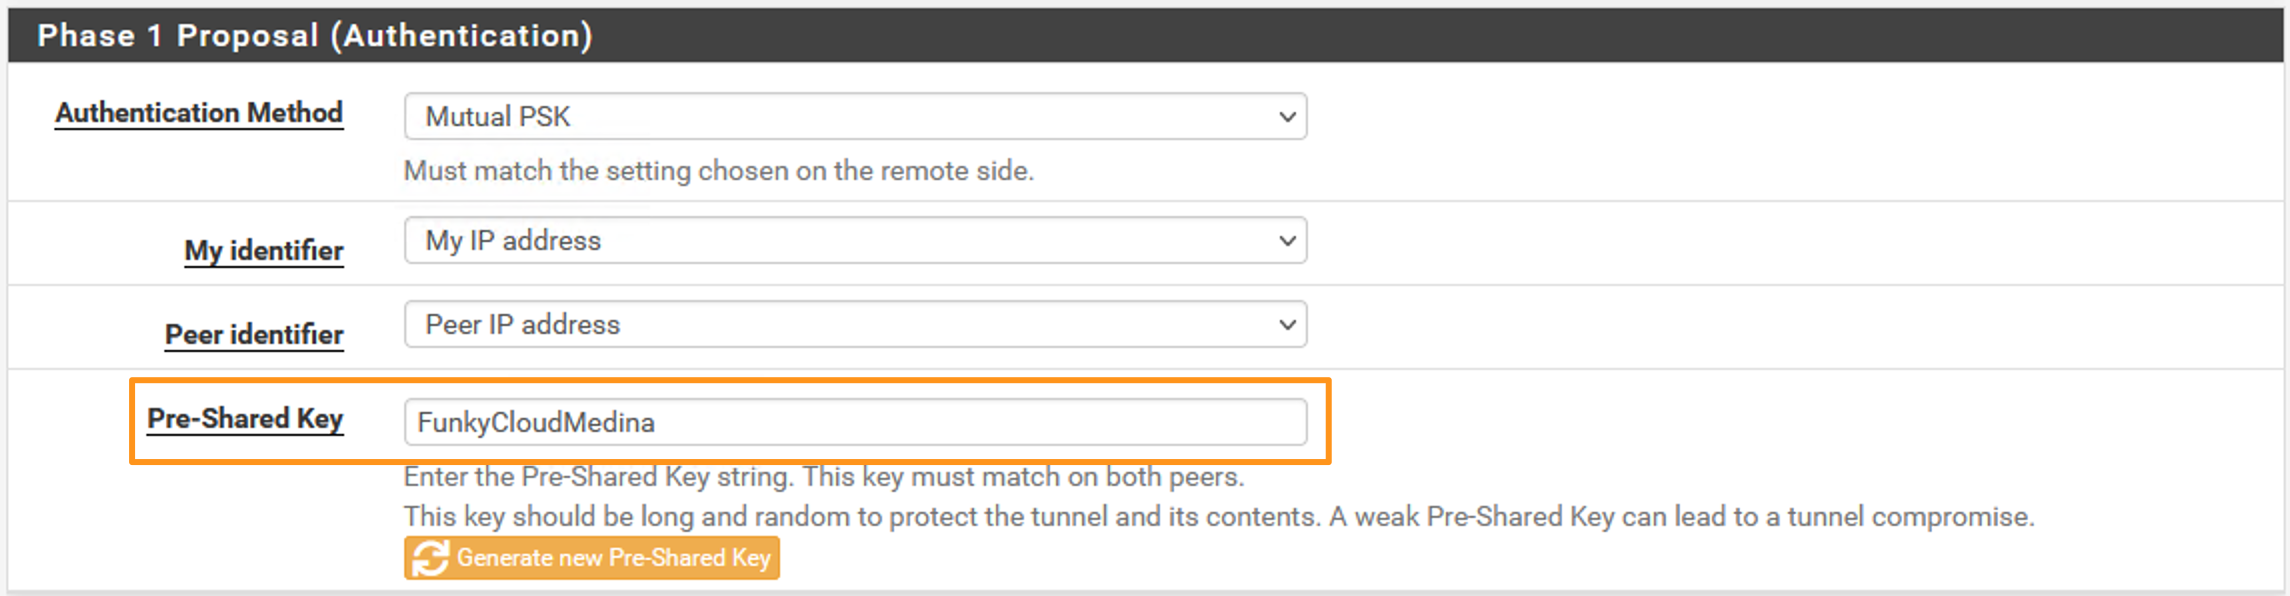
- In the “Phase 1 Proposal (Authentication)” section, enter your pre-shared key (PSK) as we did for the Virtual Network Gateway Connection.
- In the “Phase 1 Proposal (Encryption Algorithm)” section we need to specify how the initial Phase 1 communications will be encrypted. The settings here need to match Microsoft’s default configurations for Virtual Network Gateways, specifically the settings related to IKEv2 Route Based policies that we’re using: RouteBased VPN IPsec Security Association (IKE Quick Mode SA) Offers.
I use AES256+SHA256+DH2 as my configuration:

- Scroll past the two remaining sections “Expiration and Replacement” and “Advanced Options”. For our situation we don’t need to worry about them.
- Click Save.
Create IPSec Phase 2 in PFSense
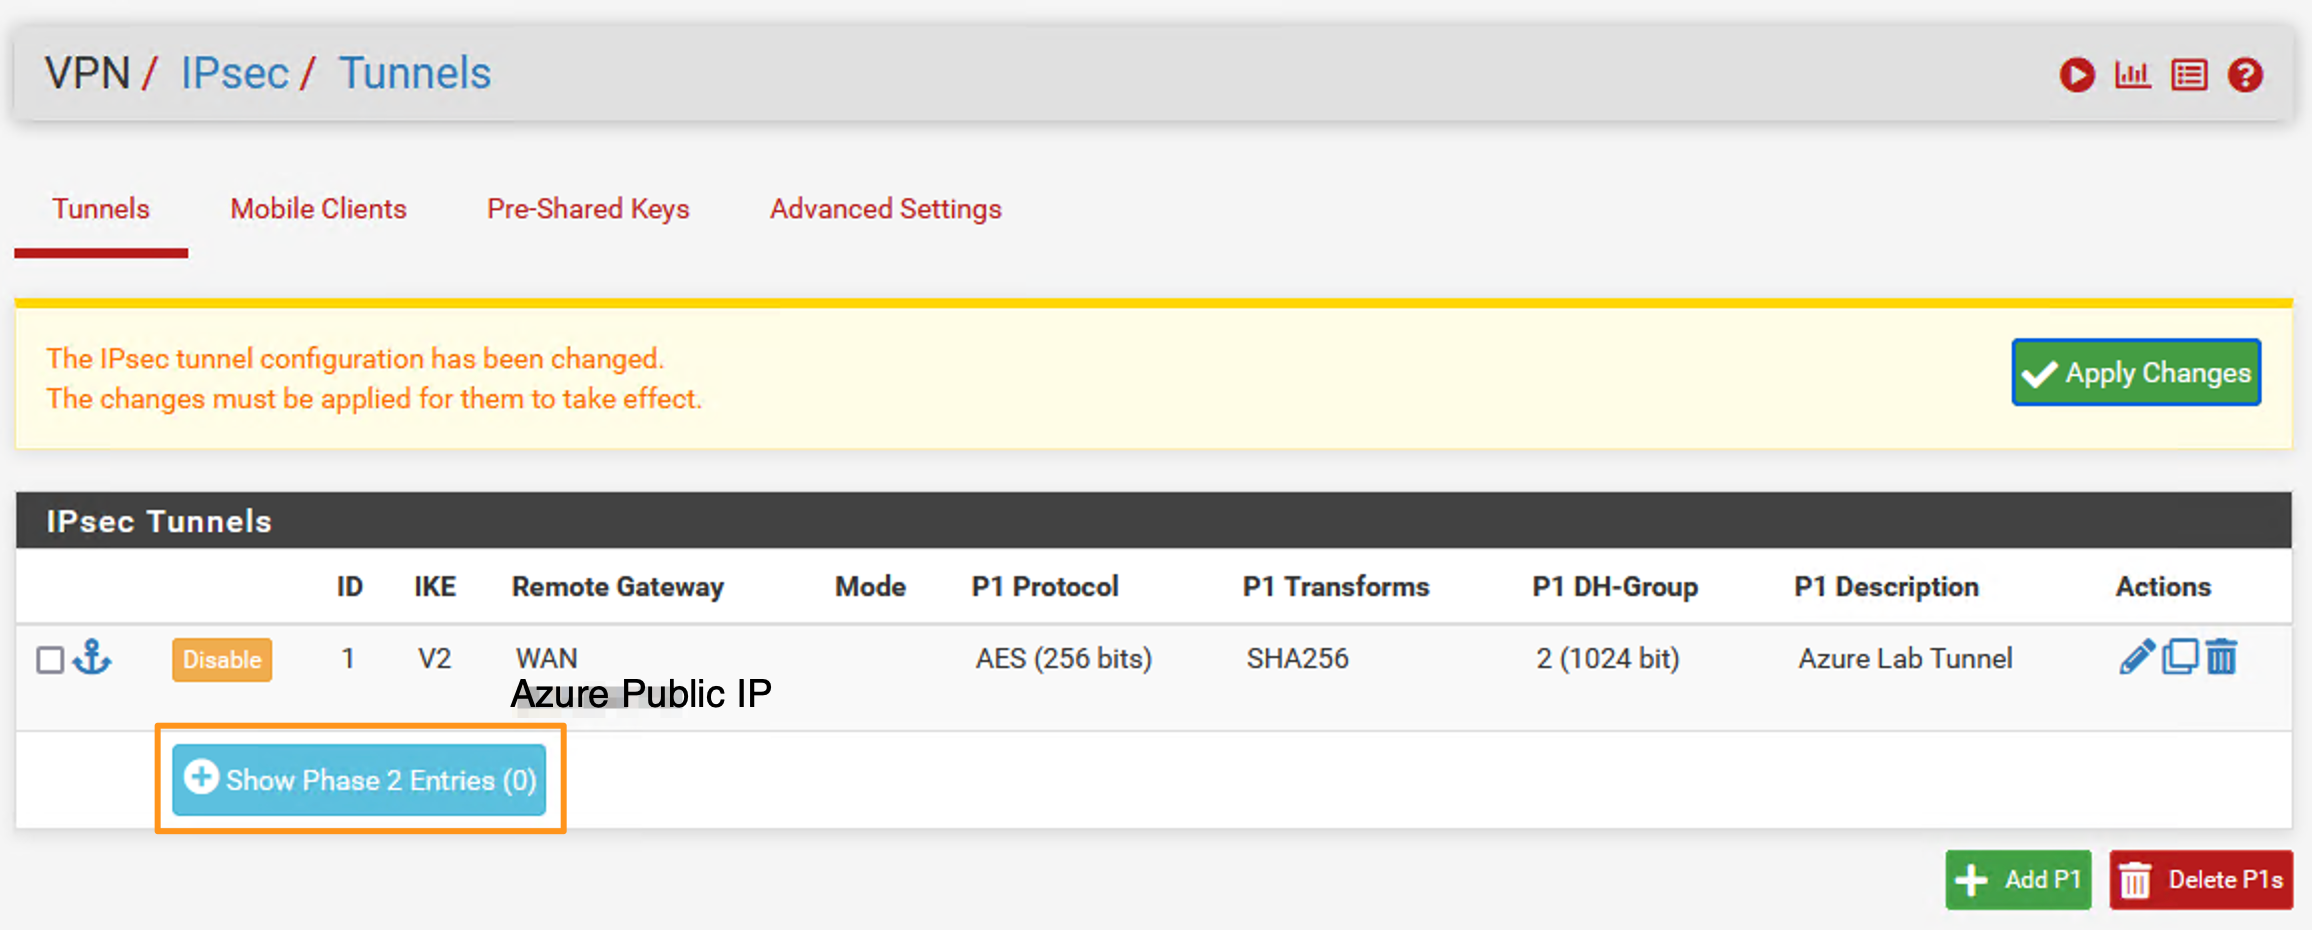
- Back on the IPSec page, click the Show Phase 2 Entries button and click Add P2.
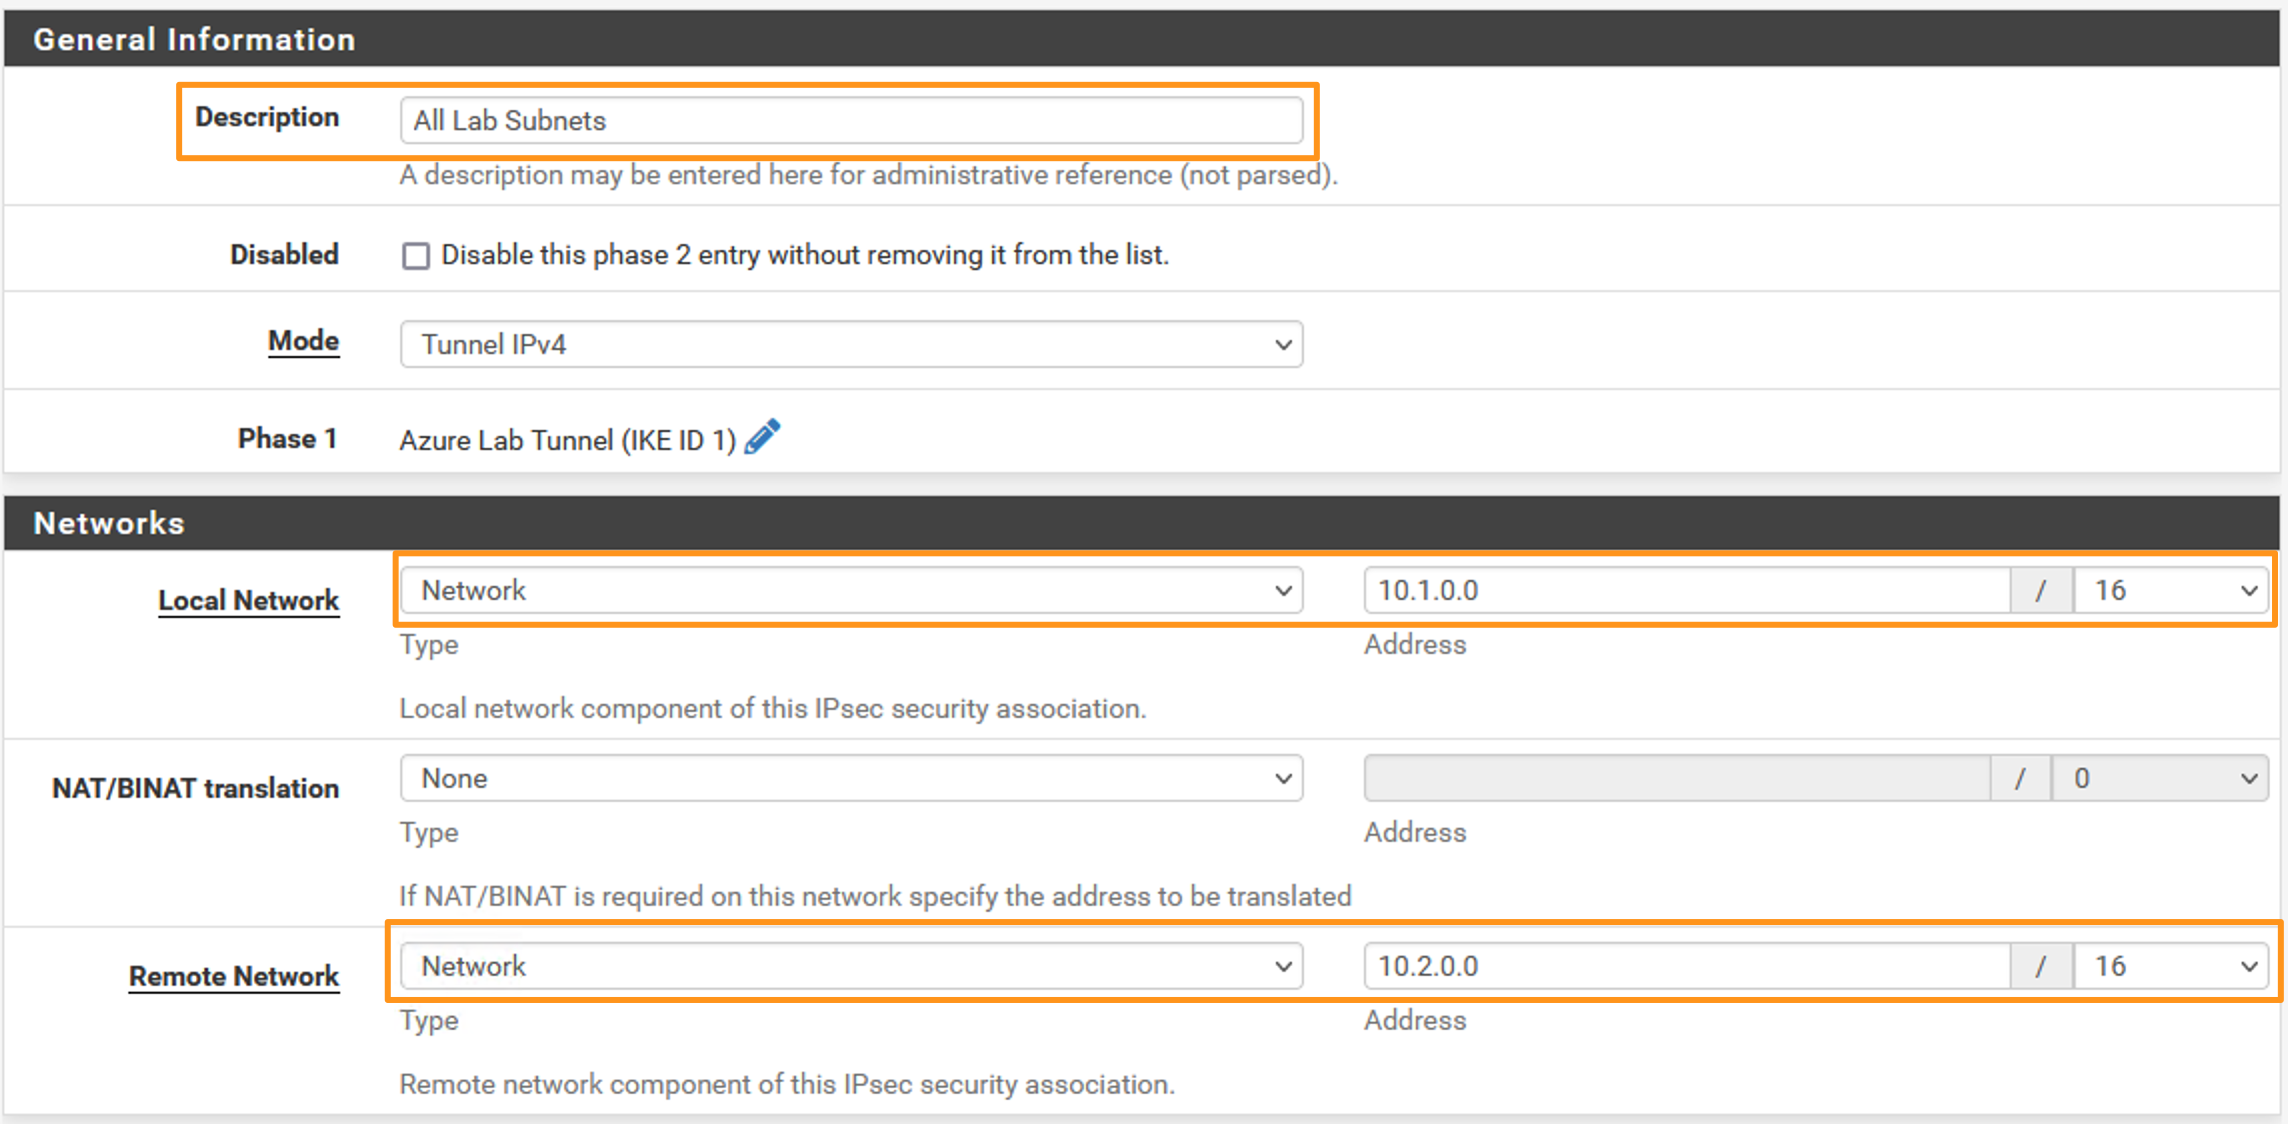
 Each “Phase 2” section defines a network (subnet) we are expecting to receive traffic from in Azure, and a network (subnet) we’re expecting to send from on-premises to Azure. We also define the encryption mechanism used for the traffic in the tunnel.
 - Start by specifying a Description and defining the Local Network and Remote Network details.
- Under “Phase 2 Proposal (SA/Key Exchange)”, select the
AES256-GCMalgorithm with a “PFS key group” value of14.
- Scroll to the bottom and click Save.
- On the “Tunnels” page click Apply Changes.

Status Check
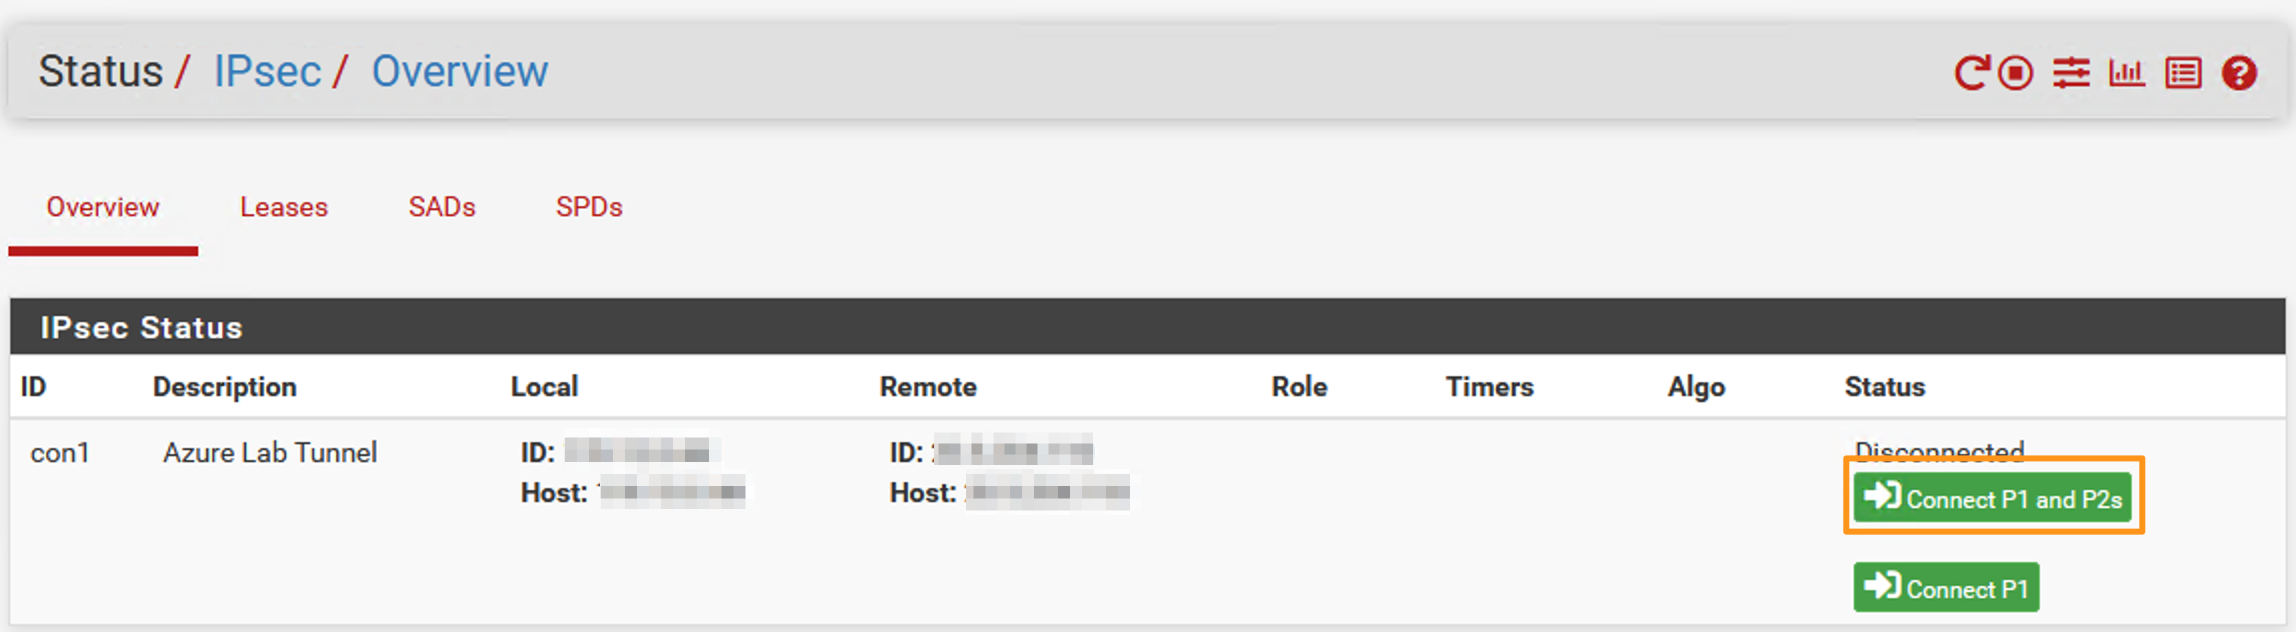
- In the top menu, go to Status > IPSec.
- You’ll see our new IPSec connection and it might be in a disconnected state. If it is (like mine), click the Connect P1 and P2s.
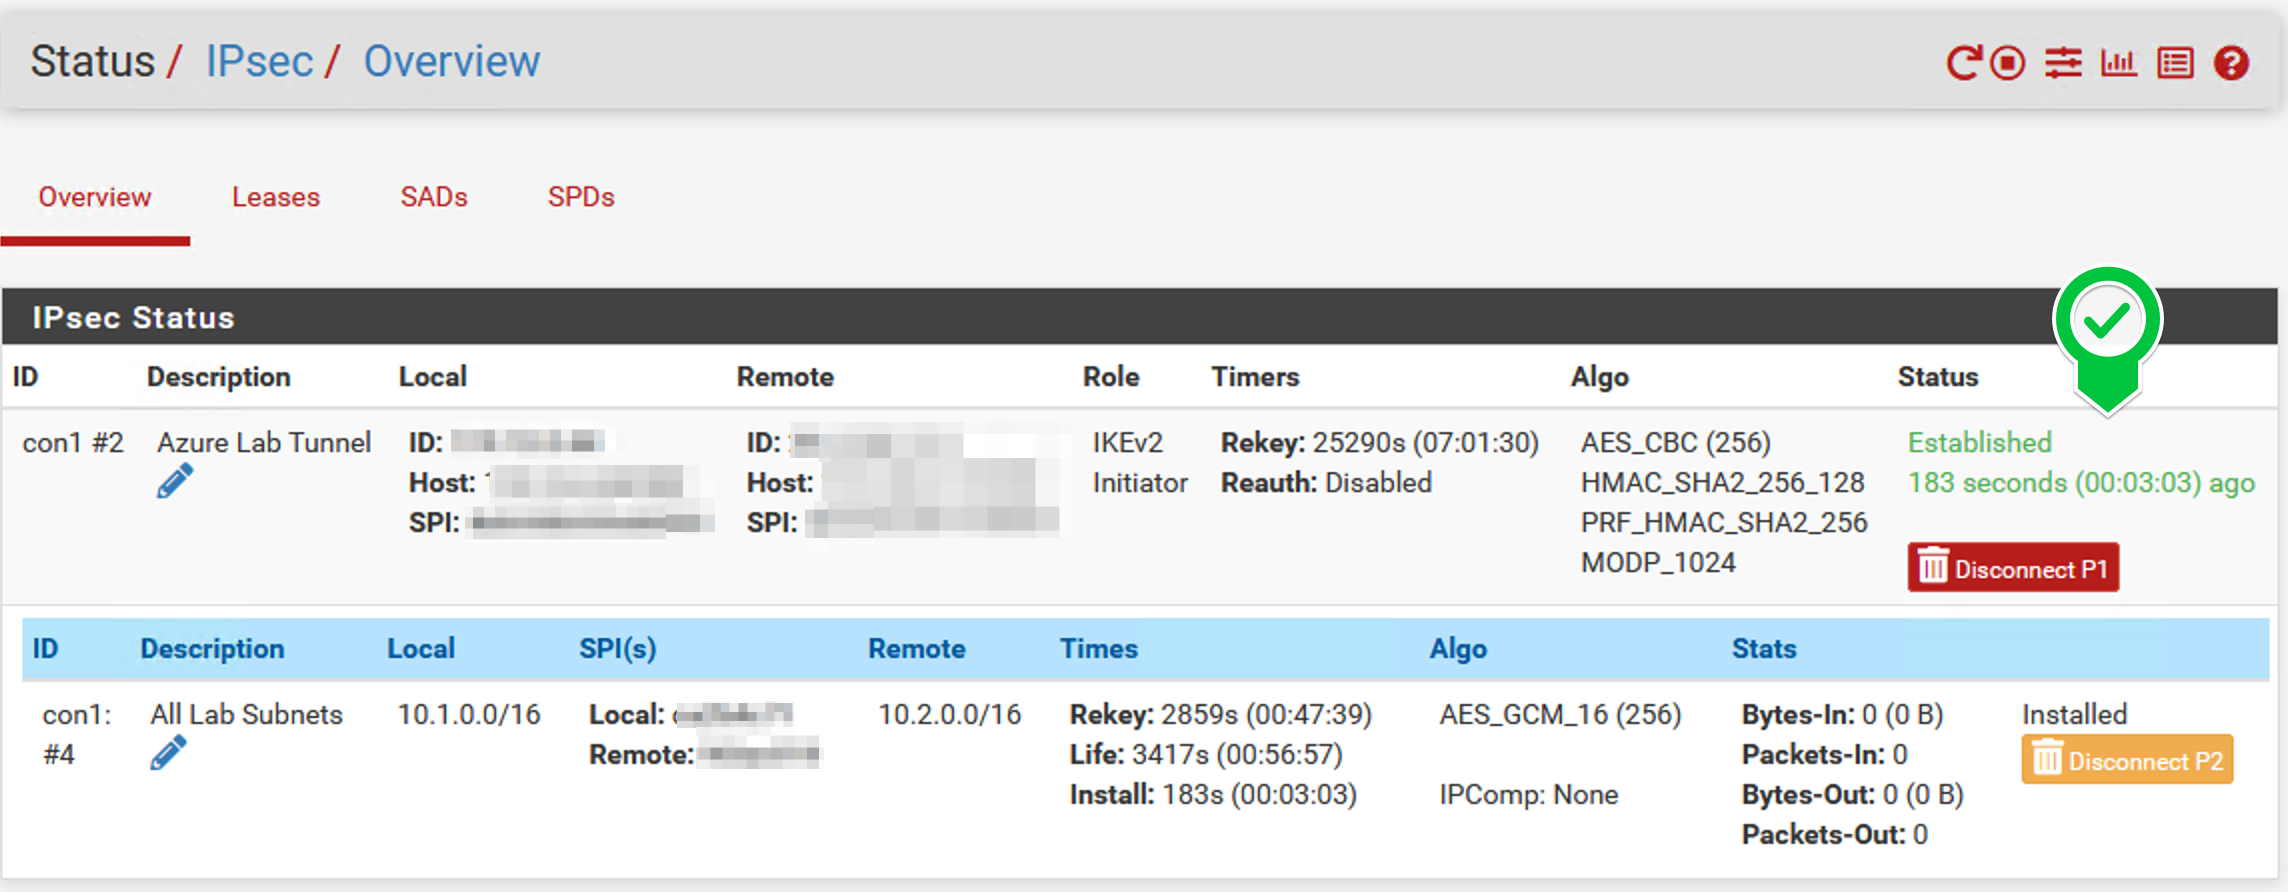
- Assuming everything is done correctly, you’ll see the Phase 1 tunnel establish. Click the Show child SA entries button to see the state of your Phase 2 that you created.
- Jumping back to the Azure Portal, find your Virtual Network Gateway and go to Connections. You’ll see the Connection we defined earlier has now changed state to “Connected”.

Testing
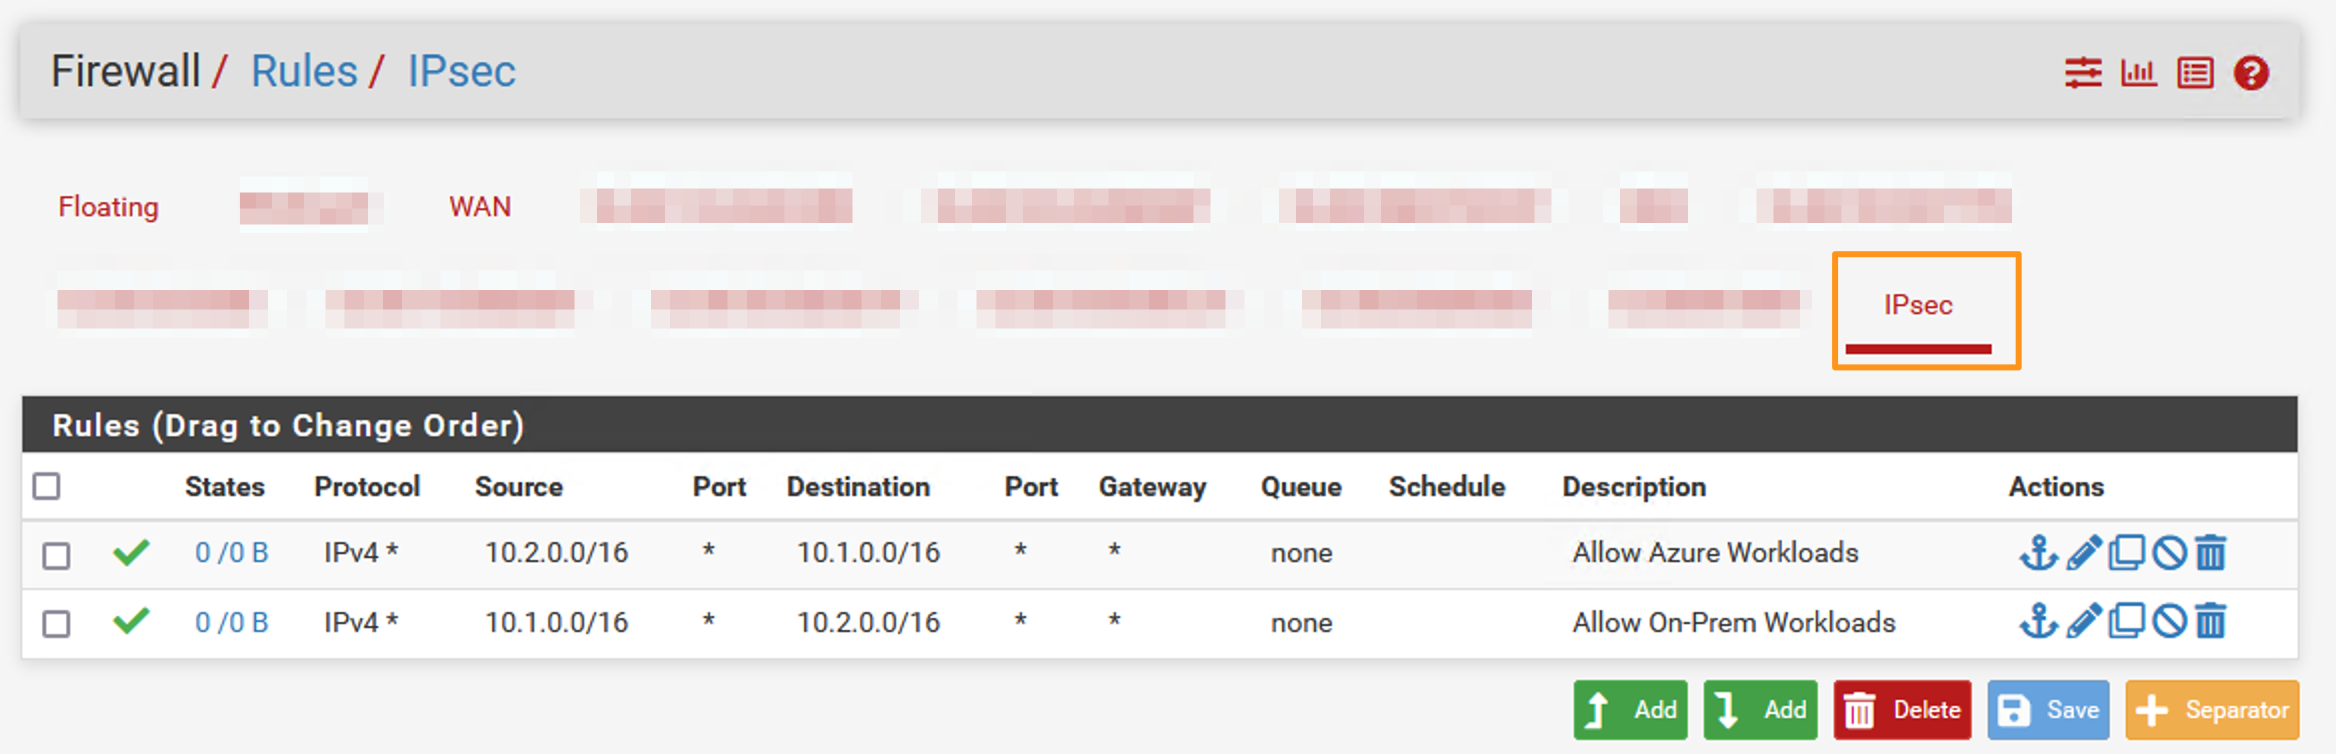
Before you start testing communications between your local networks and Azure networks, you’ll need to configure firewall rules for the IPsec interface in PFsense. Here’s a quick look at what I’ve configured to ensure my VMs in Azure can reach back to my on-prem networks:
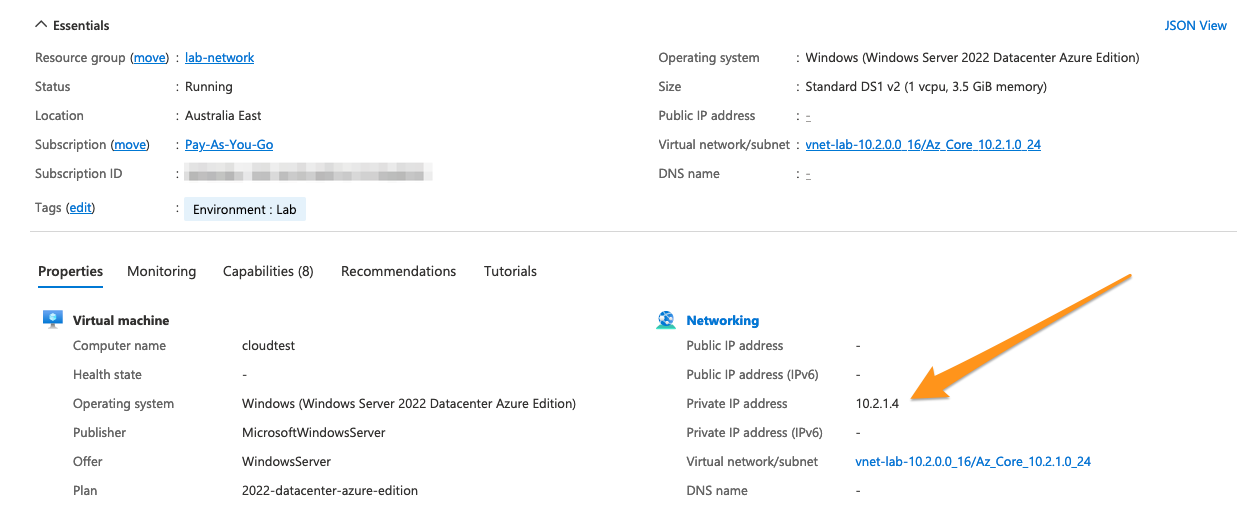
I’ve got a test machine in Azure, attached to a basic network security group and with no public IP associated:
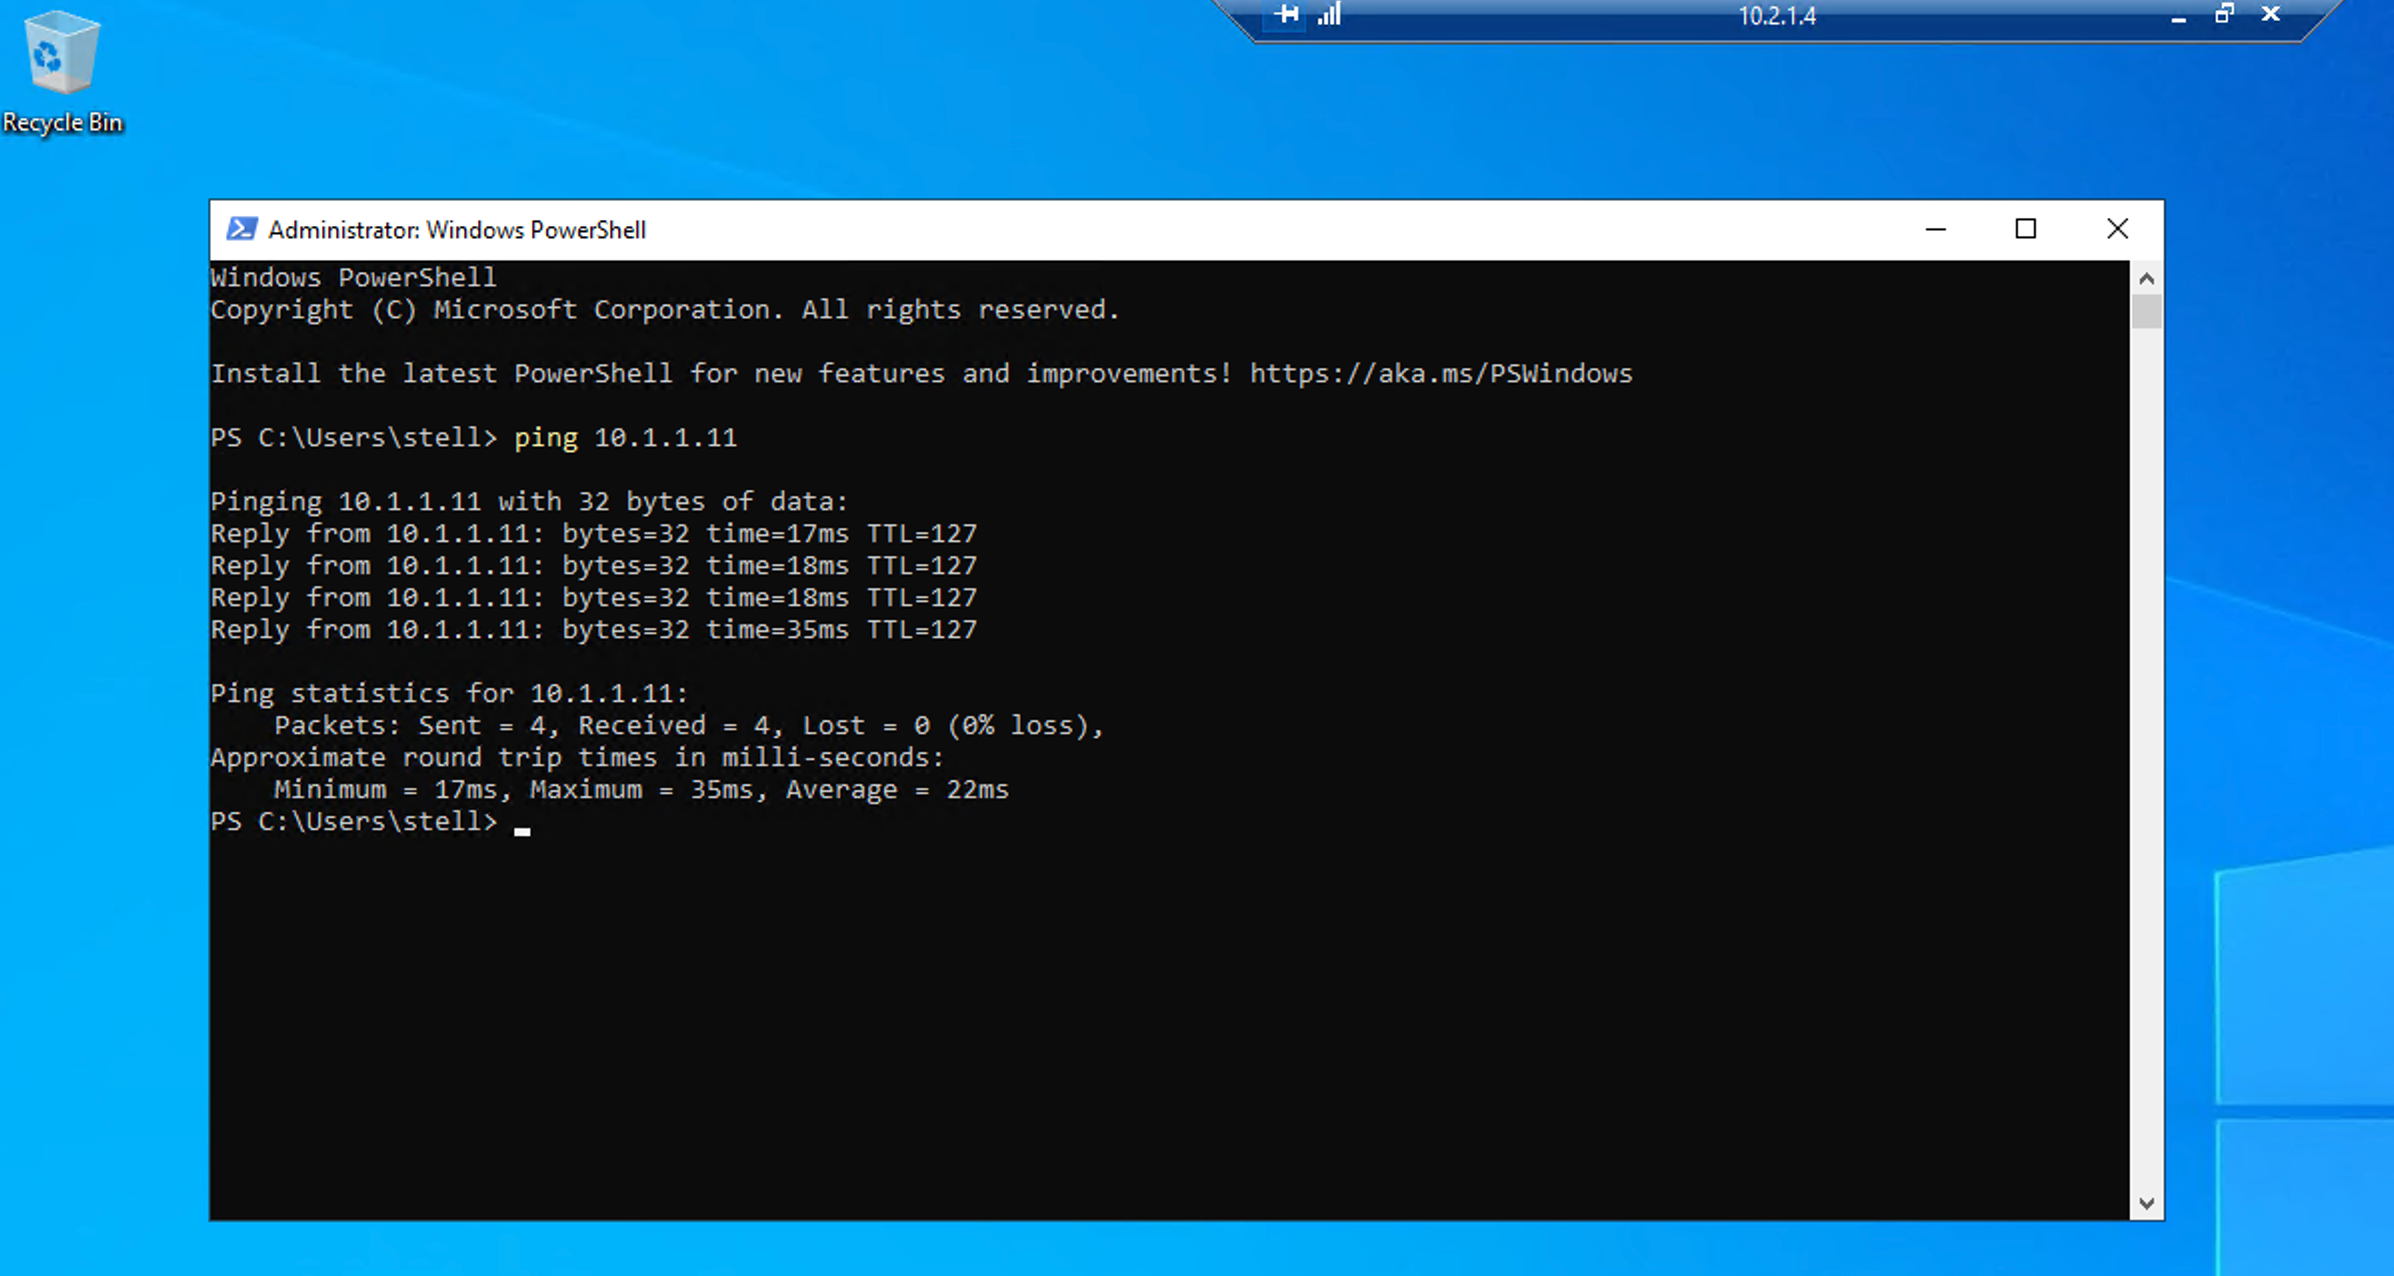
From my on-prem jumpbox I RDP to it and ping my Domain Controller:
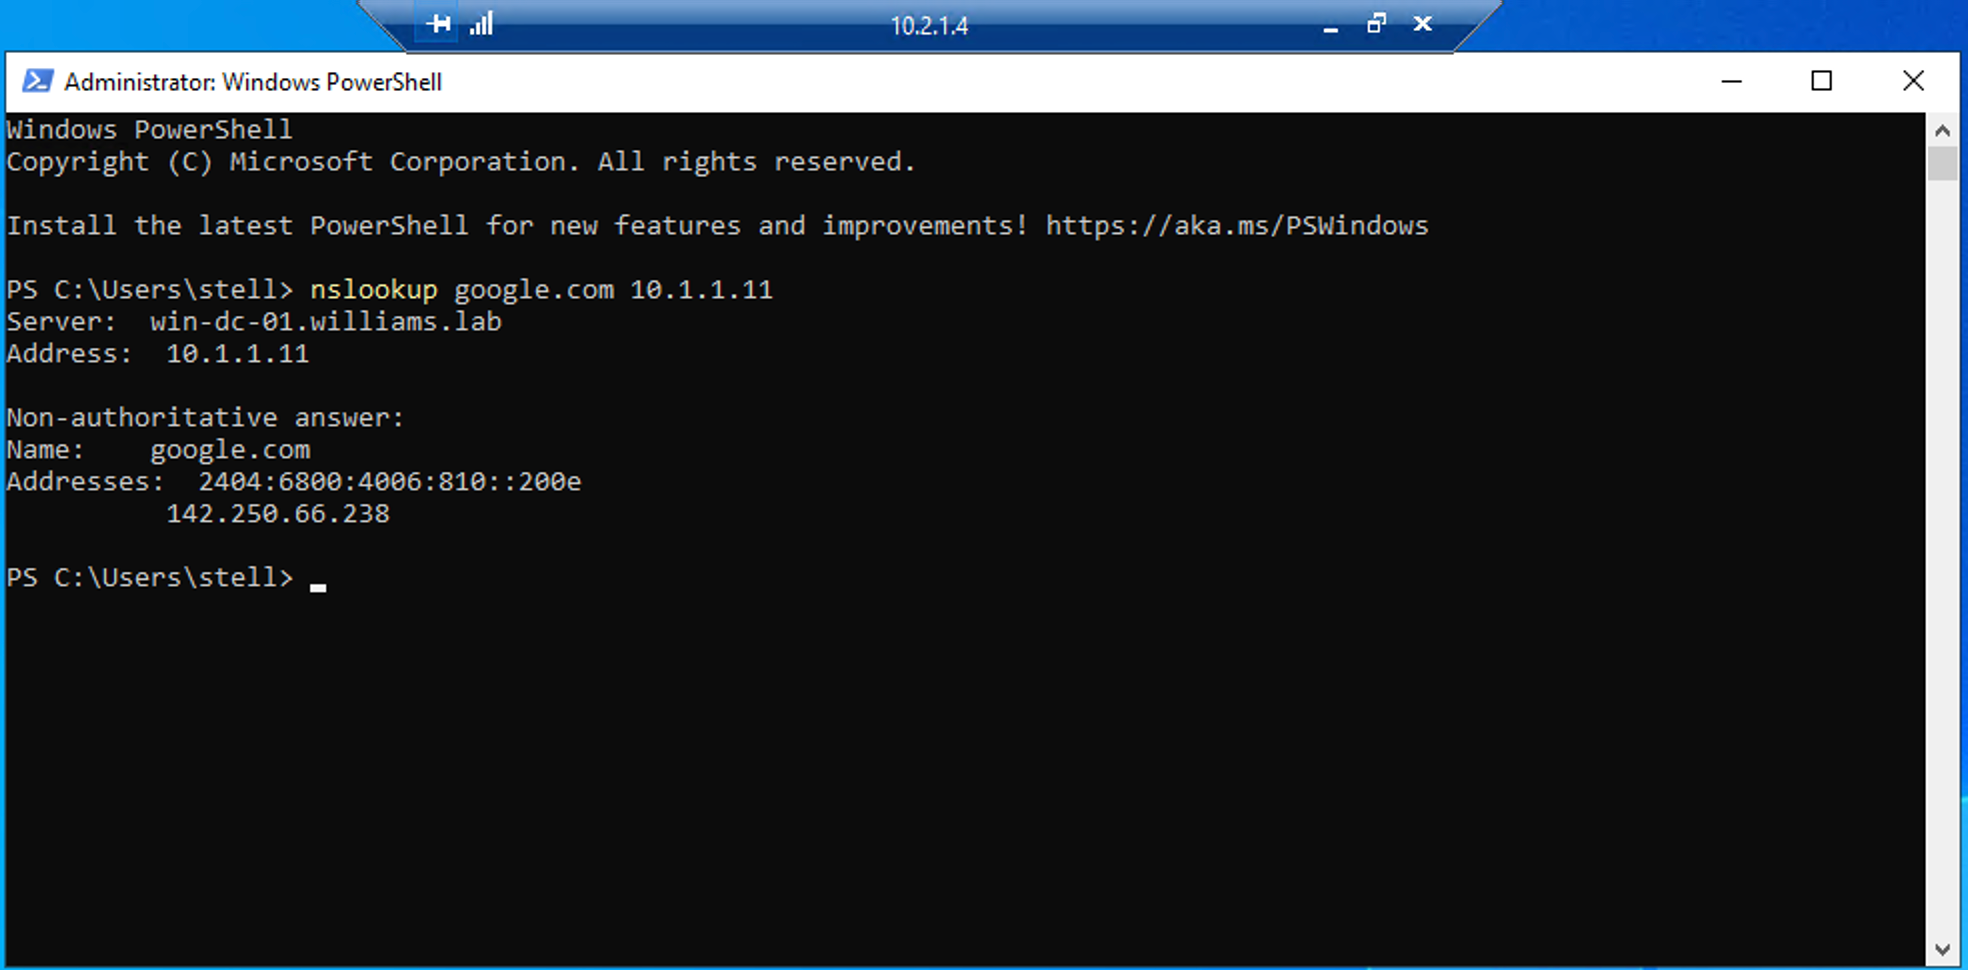
DNS lookup using my DNS server:
I’ll be exploring this capability further in future posts. Leave a comment and let me know what you think or if you have suggestions for my configurations.