While I was writing this post I had a step where I wanted to show a GIF of the operation. MacOS’ built-in screen capture was able to record a section of the screen for me as a Quicktime movie (.mov). For obvious reasons a GIF would be a lot simpler for a blog post, but there was no straight forward mechanism to do what I needed.
A quick Google returned this Medium article describing a couple of utilities that can get the job done. It’s a few extra steps that I didn’t care to do so I wrapped them in an Automator script task and integrated it with Finder for some sweet right-click action.
What you’ll need
- Homebrew
- ffmpeg (via Homebrew:
brew install ffmpeg) - gifsicle (via Homebrew:
brew install gifsicle)
- Launch Automator - use
Command + Spaceto search for Automator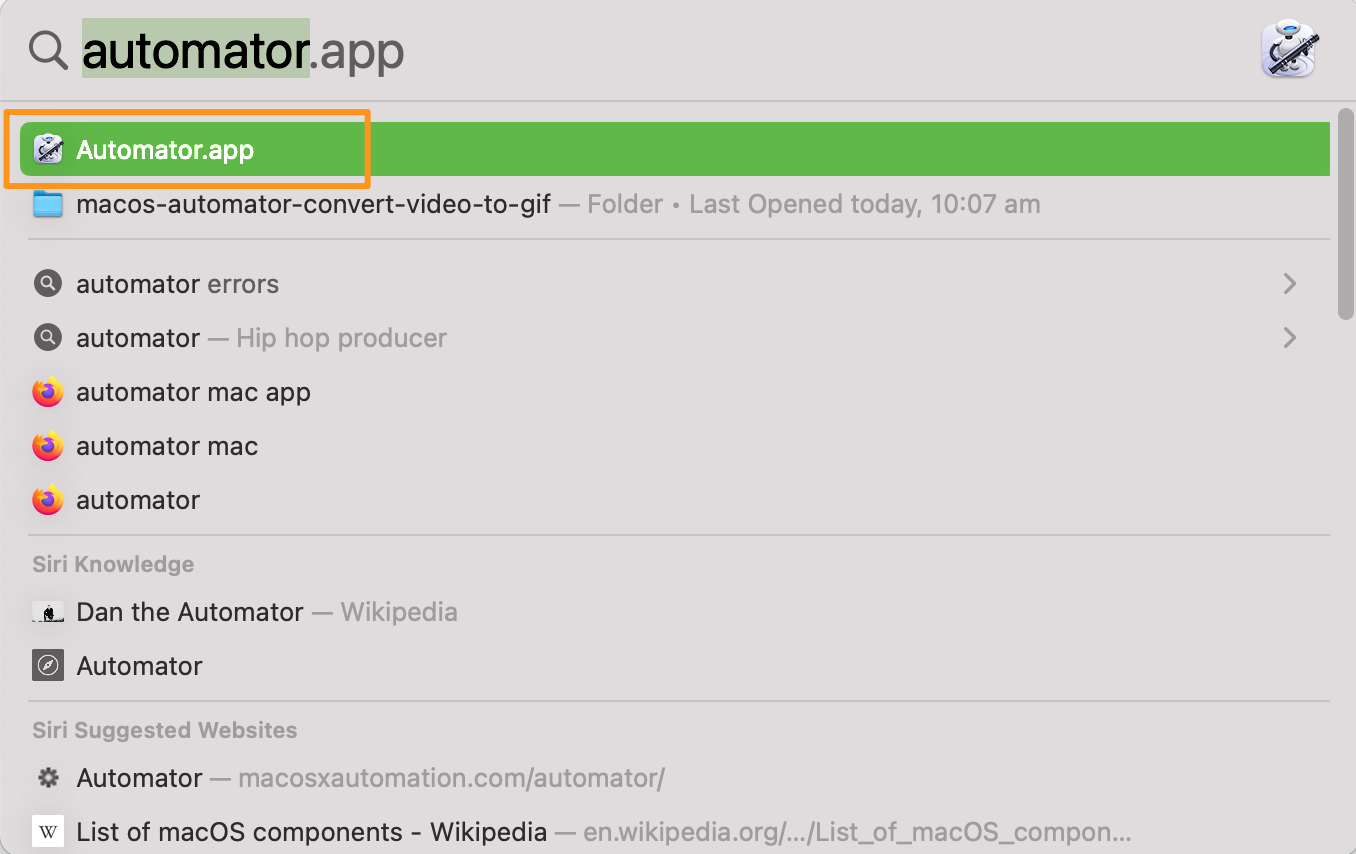
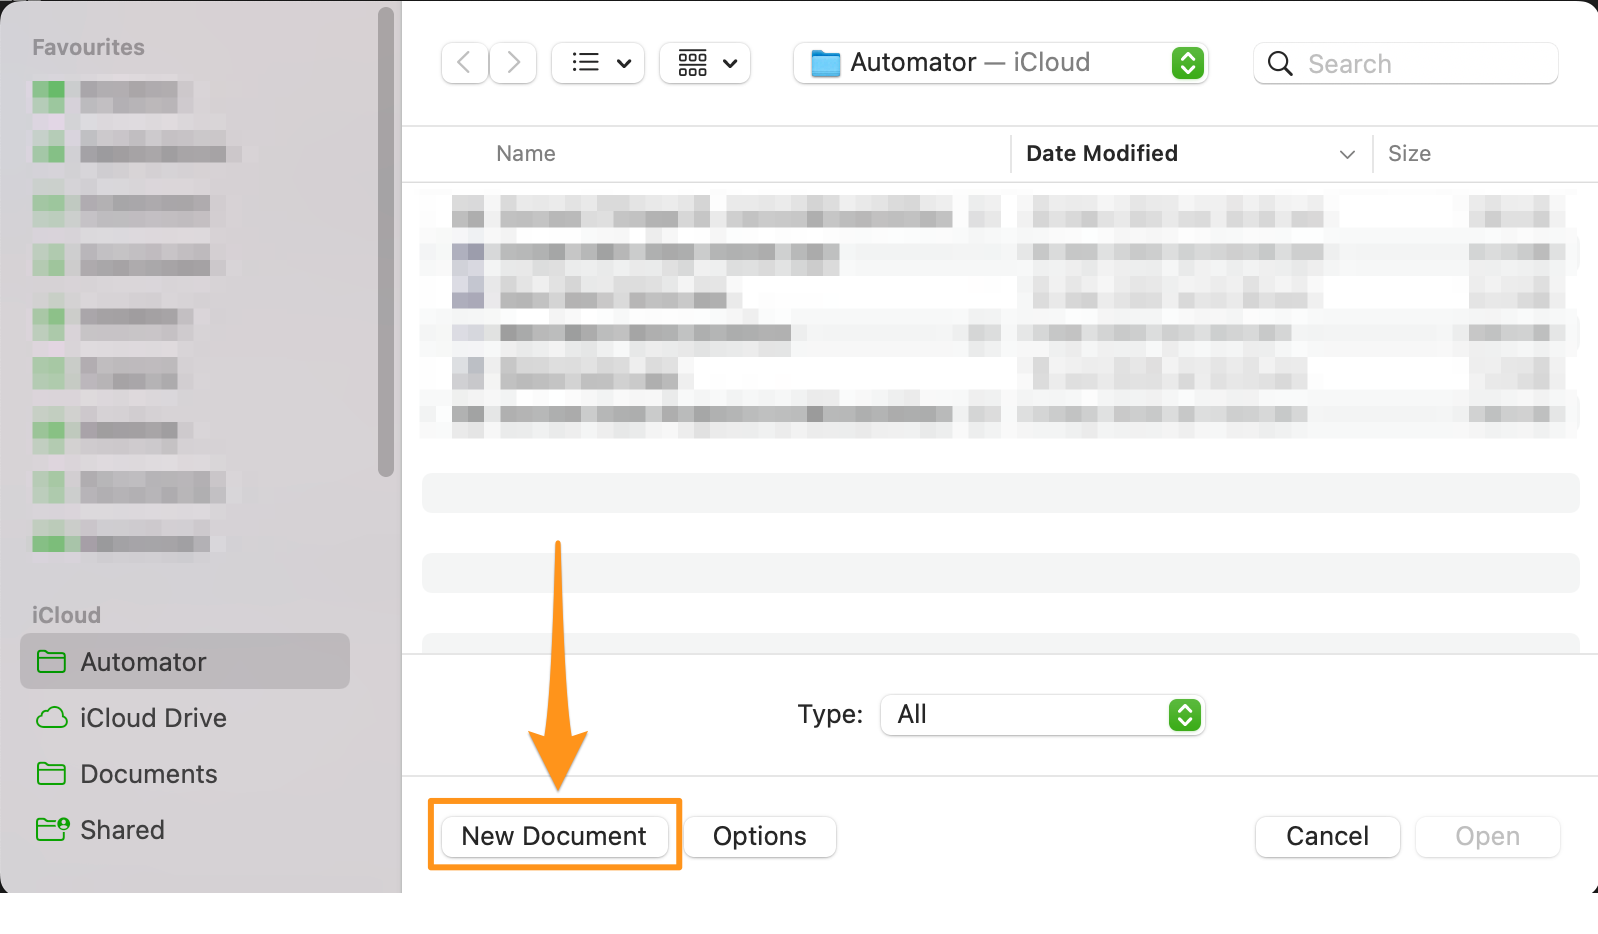
- You’ll be presented with a dialog to open an existing Automator file. Click the New Document button.
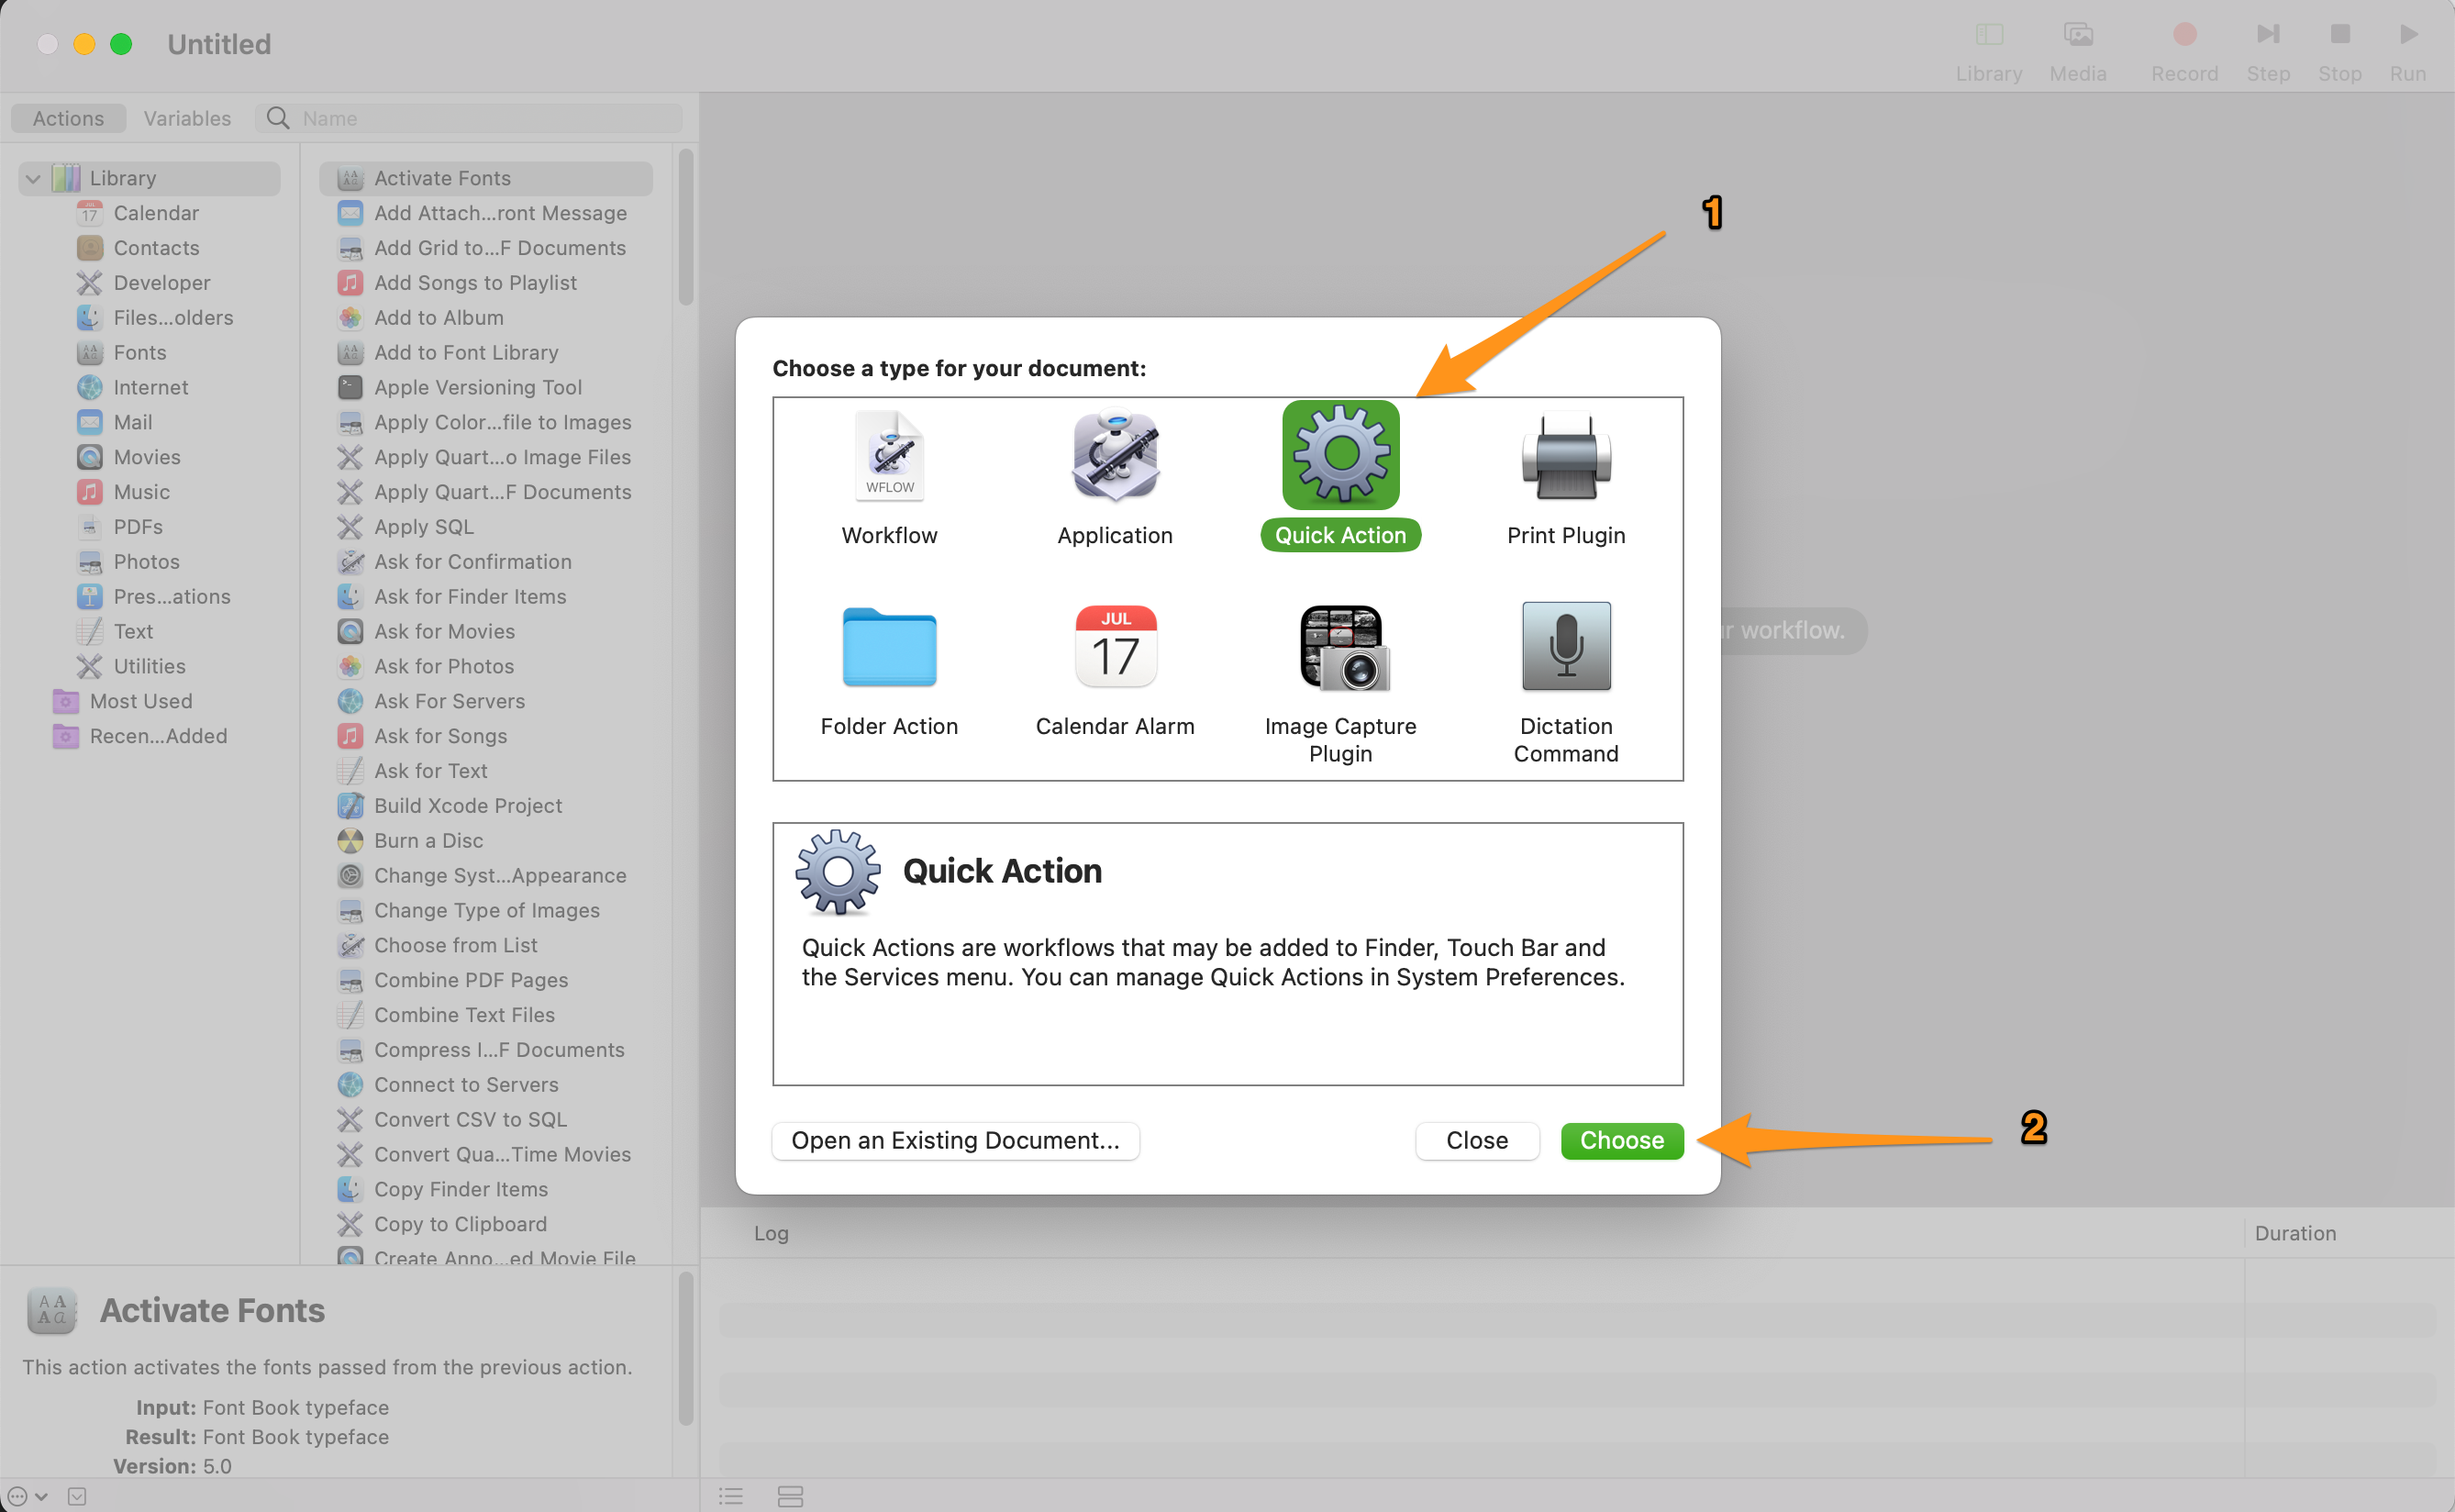
- Select Quick Action for the document type and click Choose.
- Welcome to the Automator canvas! In the “Library” on the left, search for
Shelland drag theRun Shell Scriptitem to the canvas on the right hand side.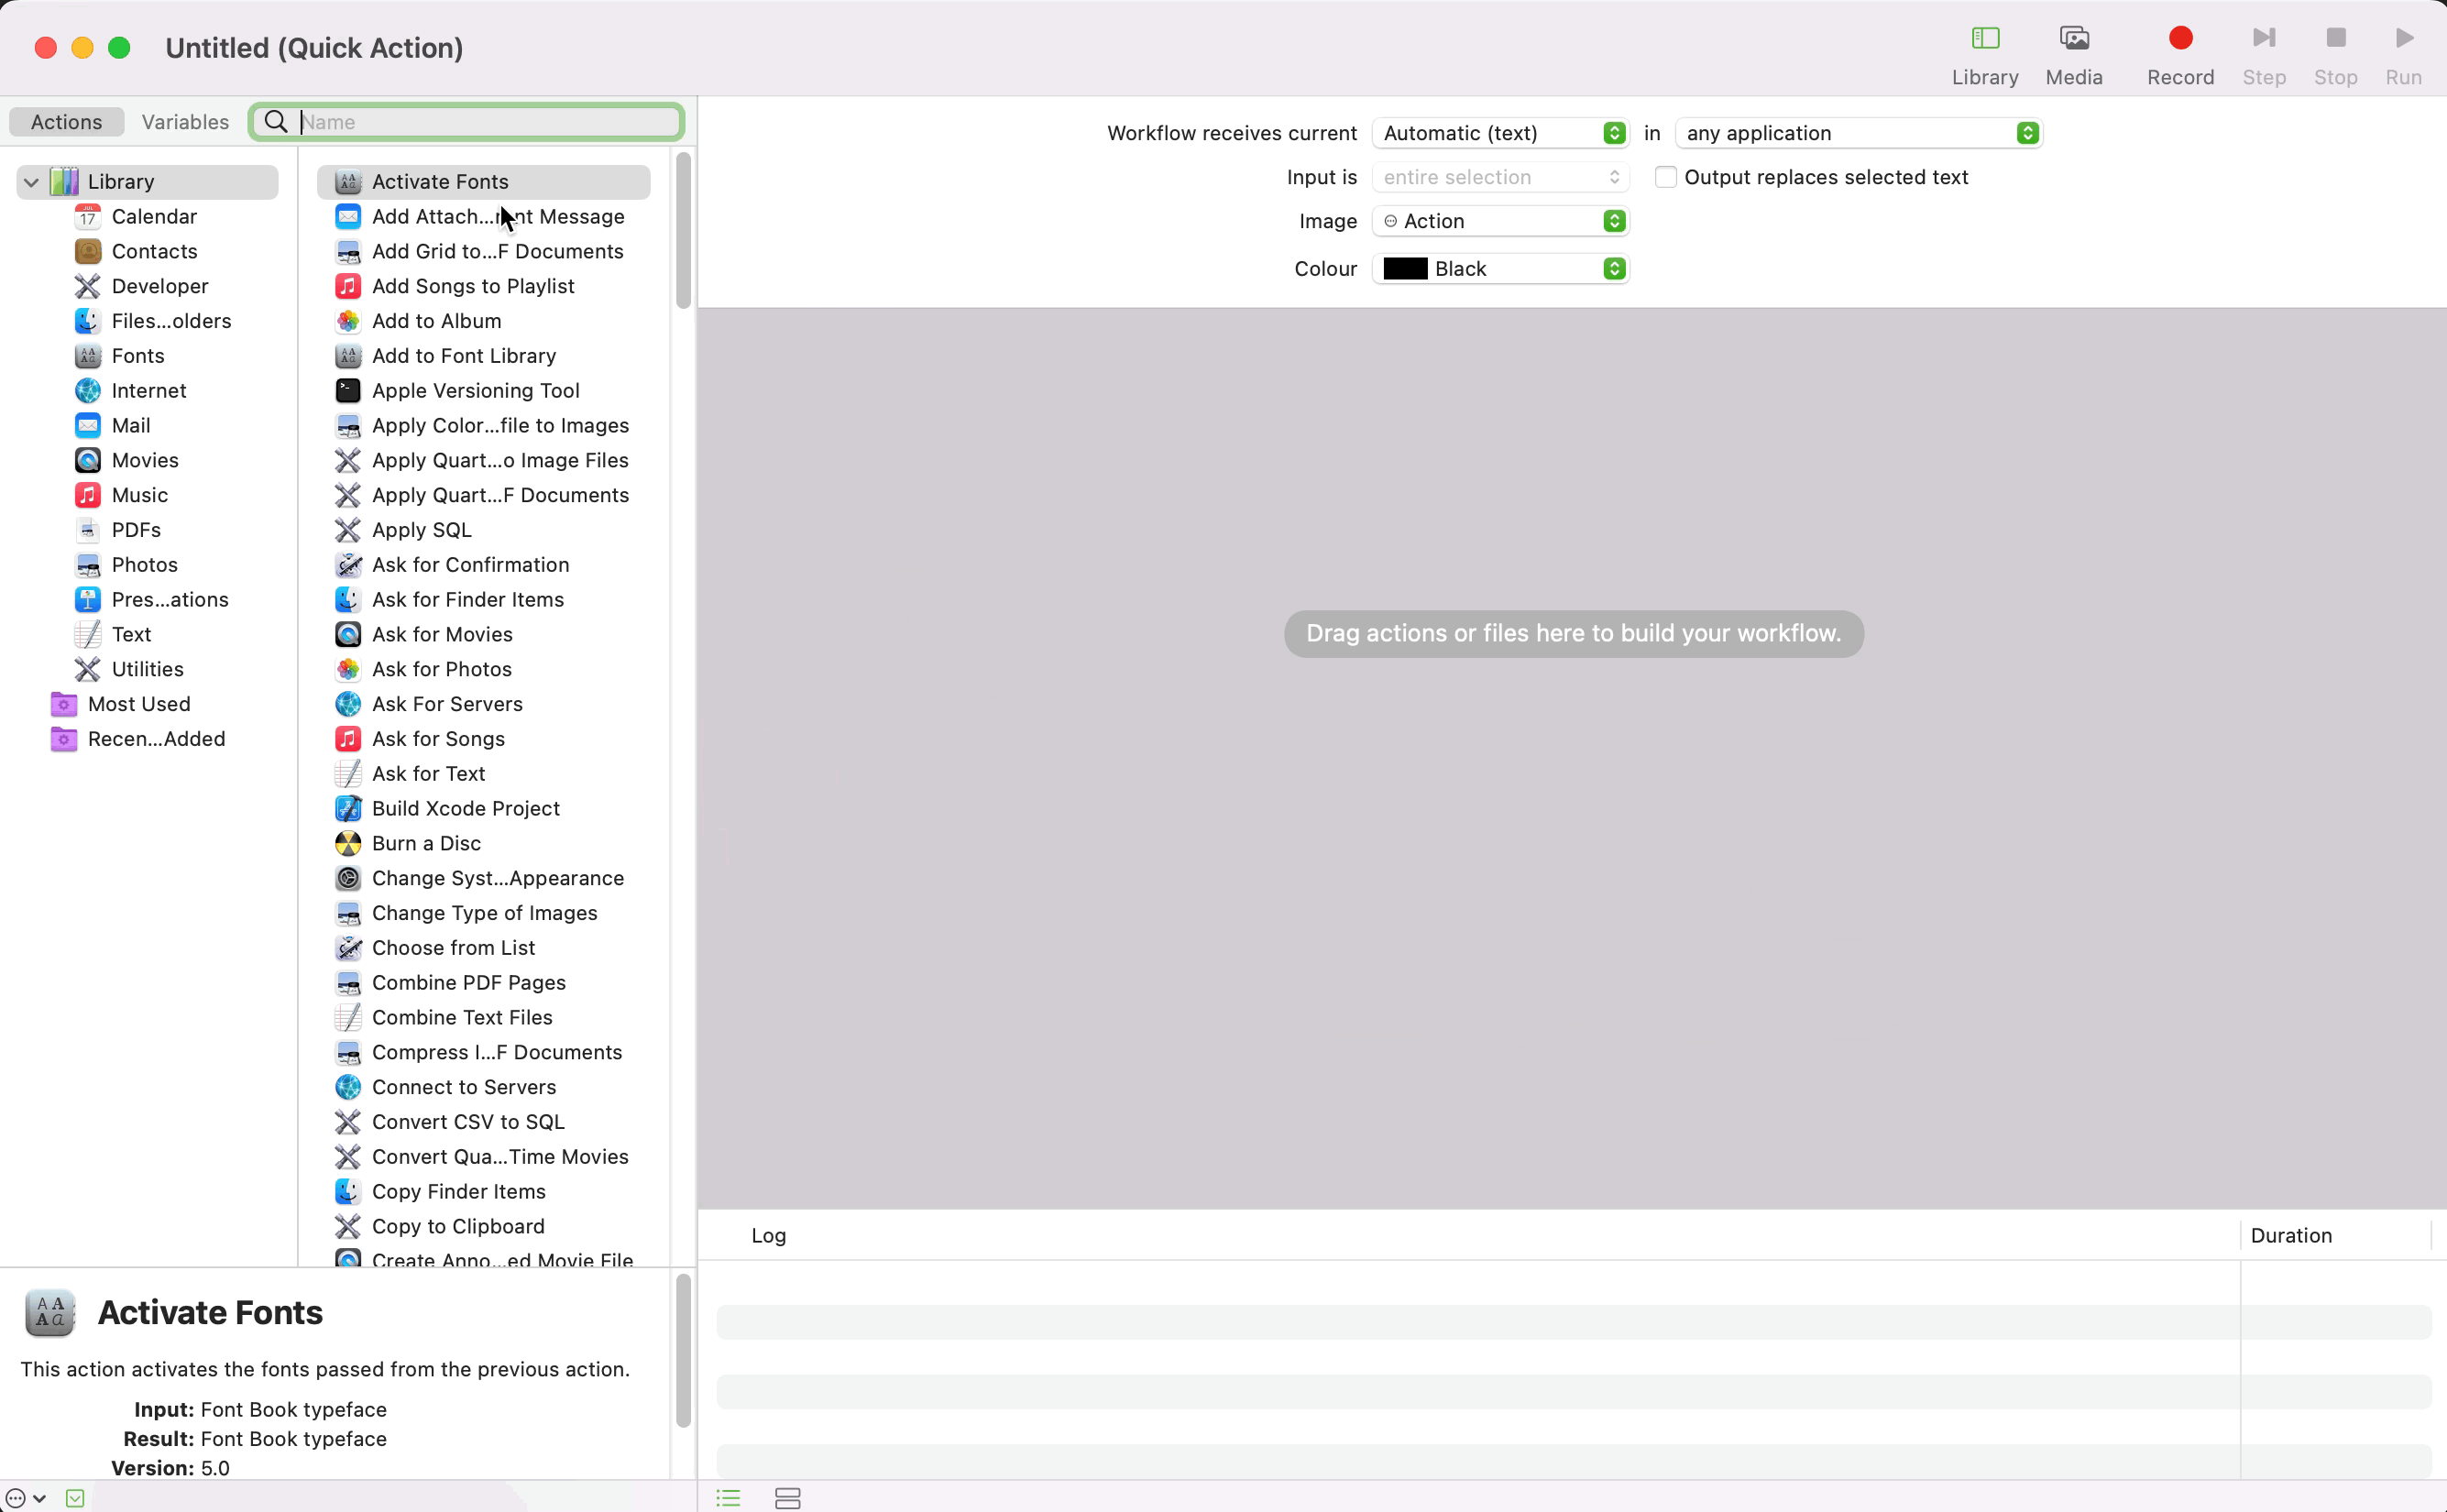
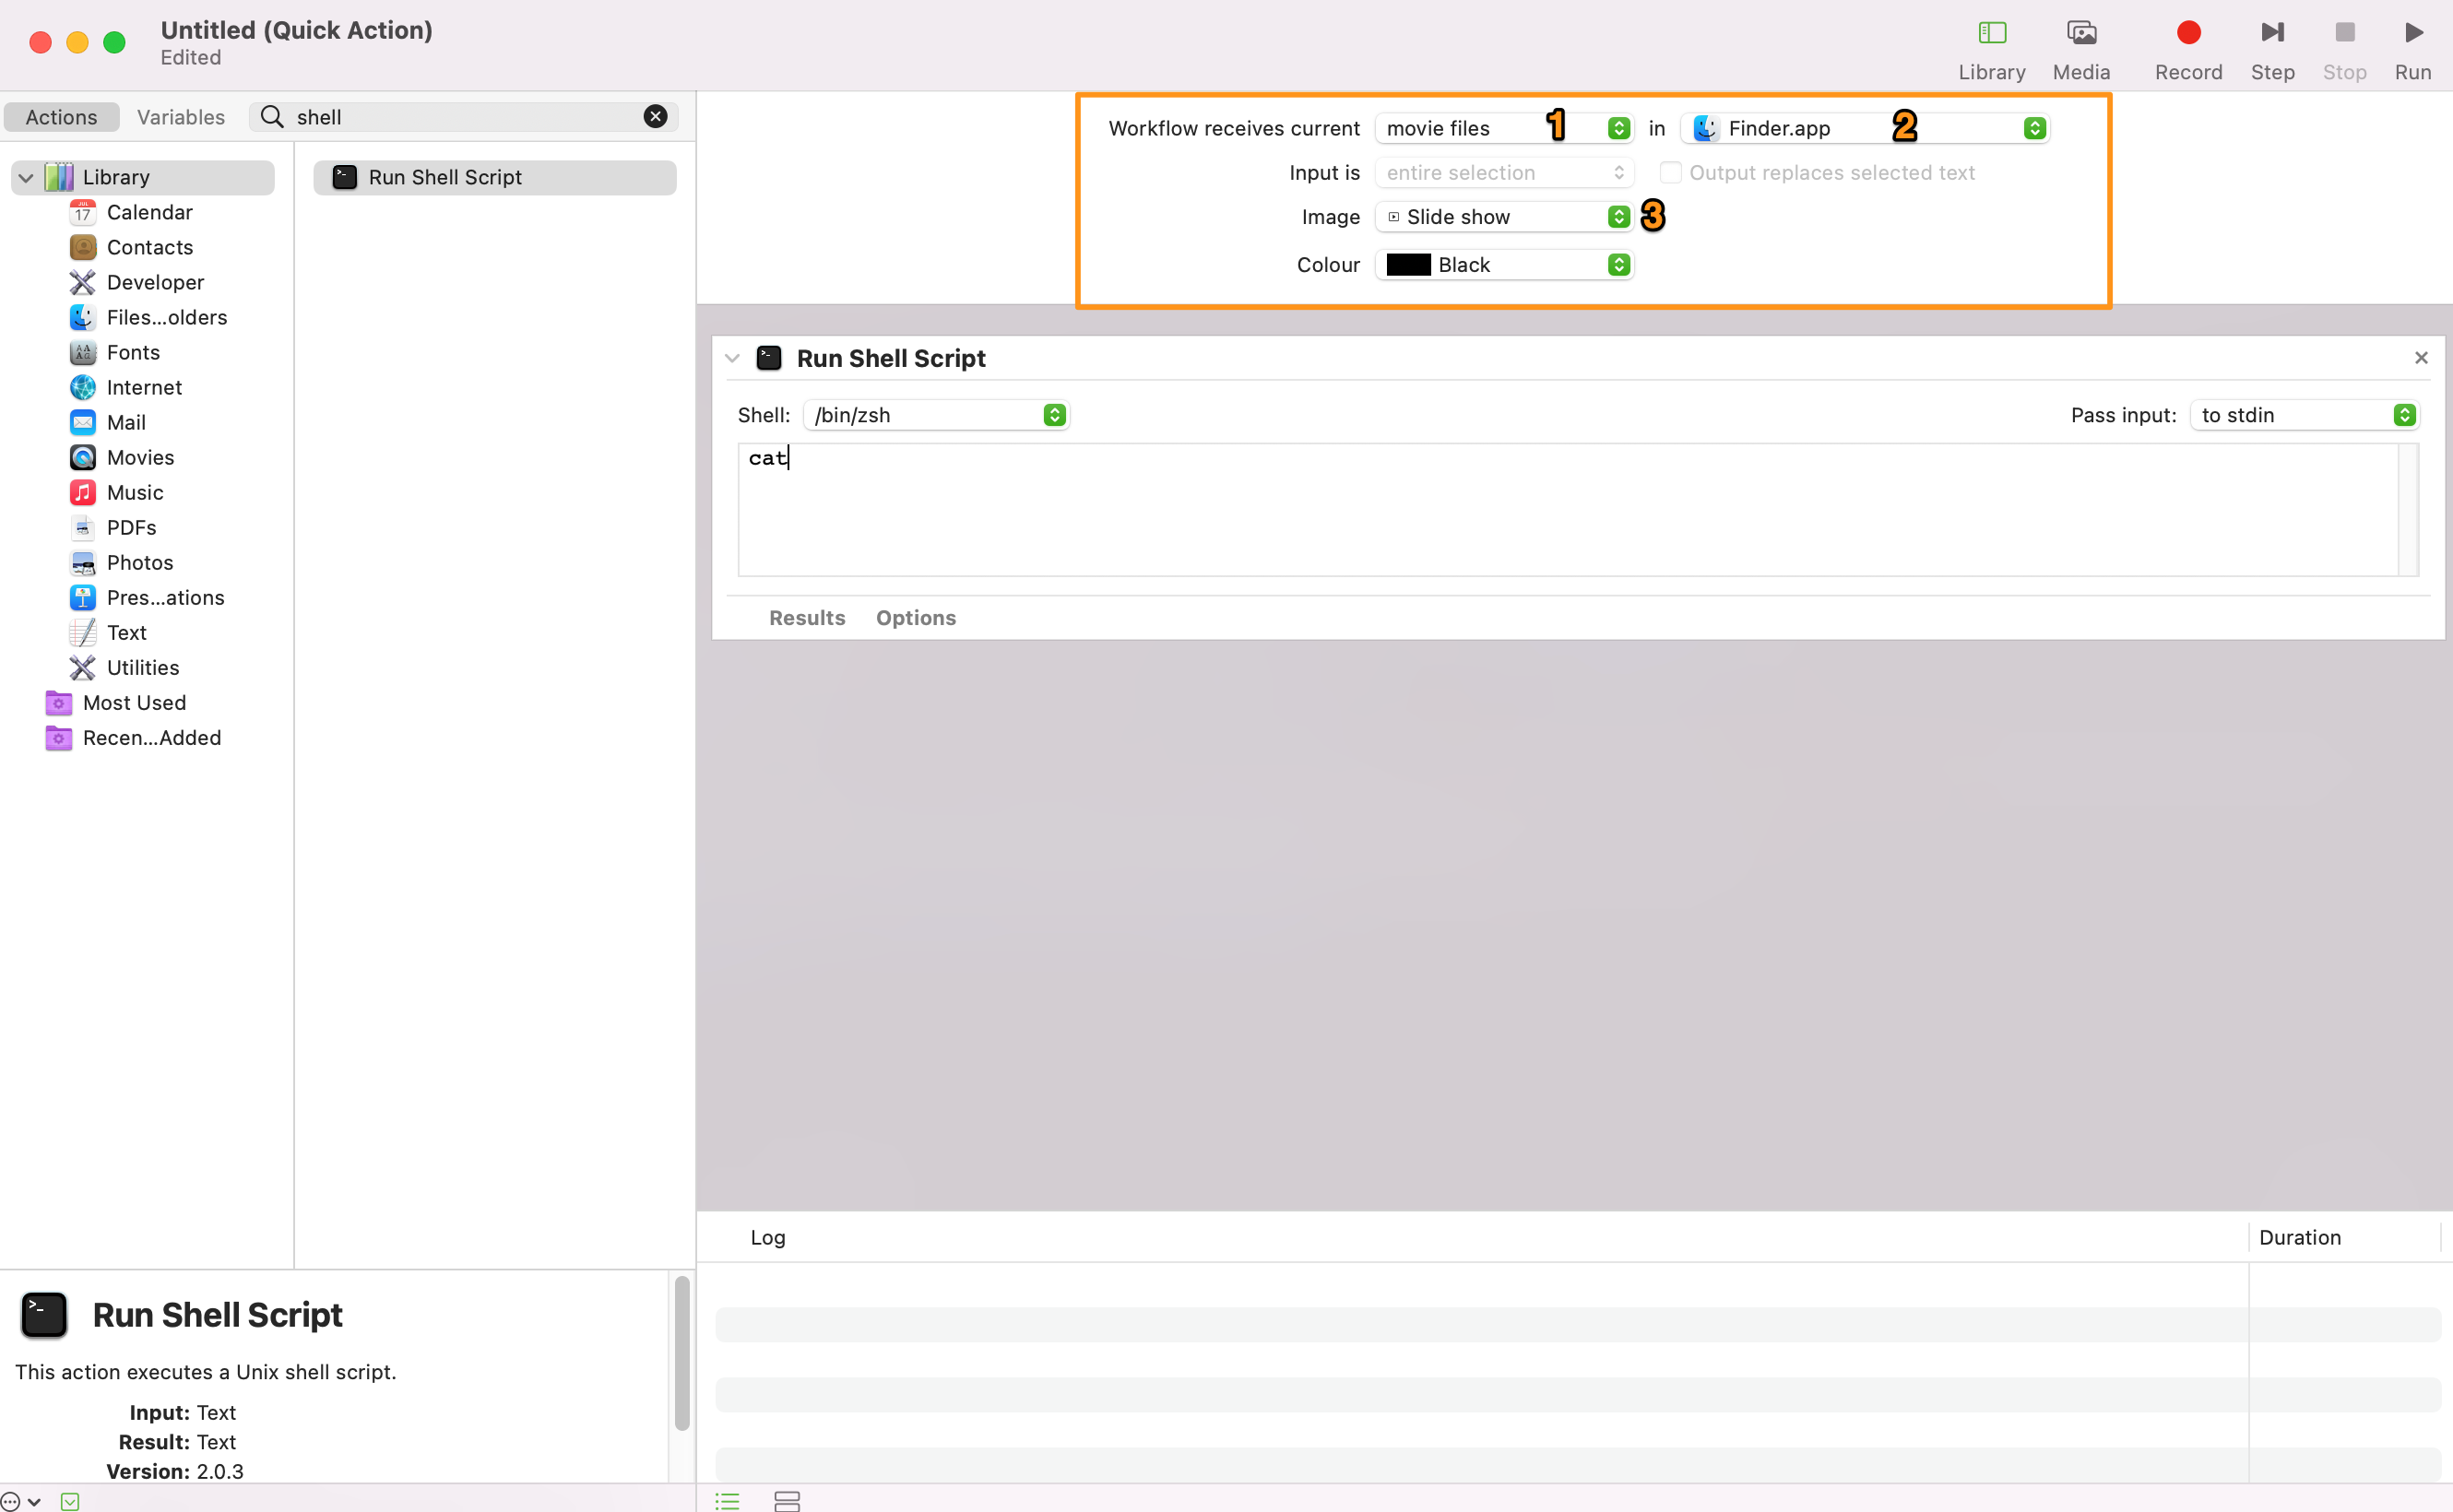
- Above the canvas, you’ll see a handful of settings you can configure. Change them to the following:
- Workflow receives current: movie files in Finder.app
- Image: Slide show
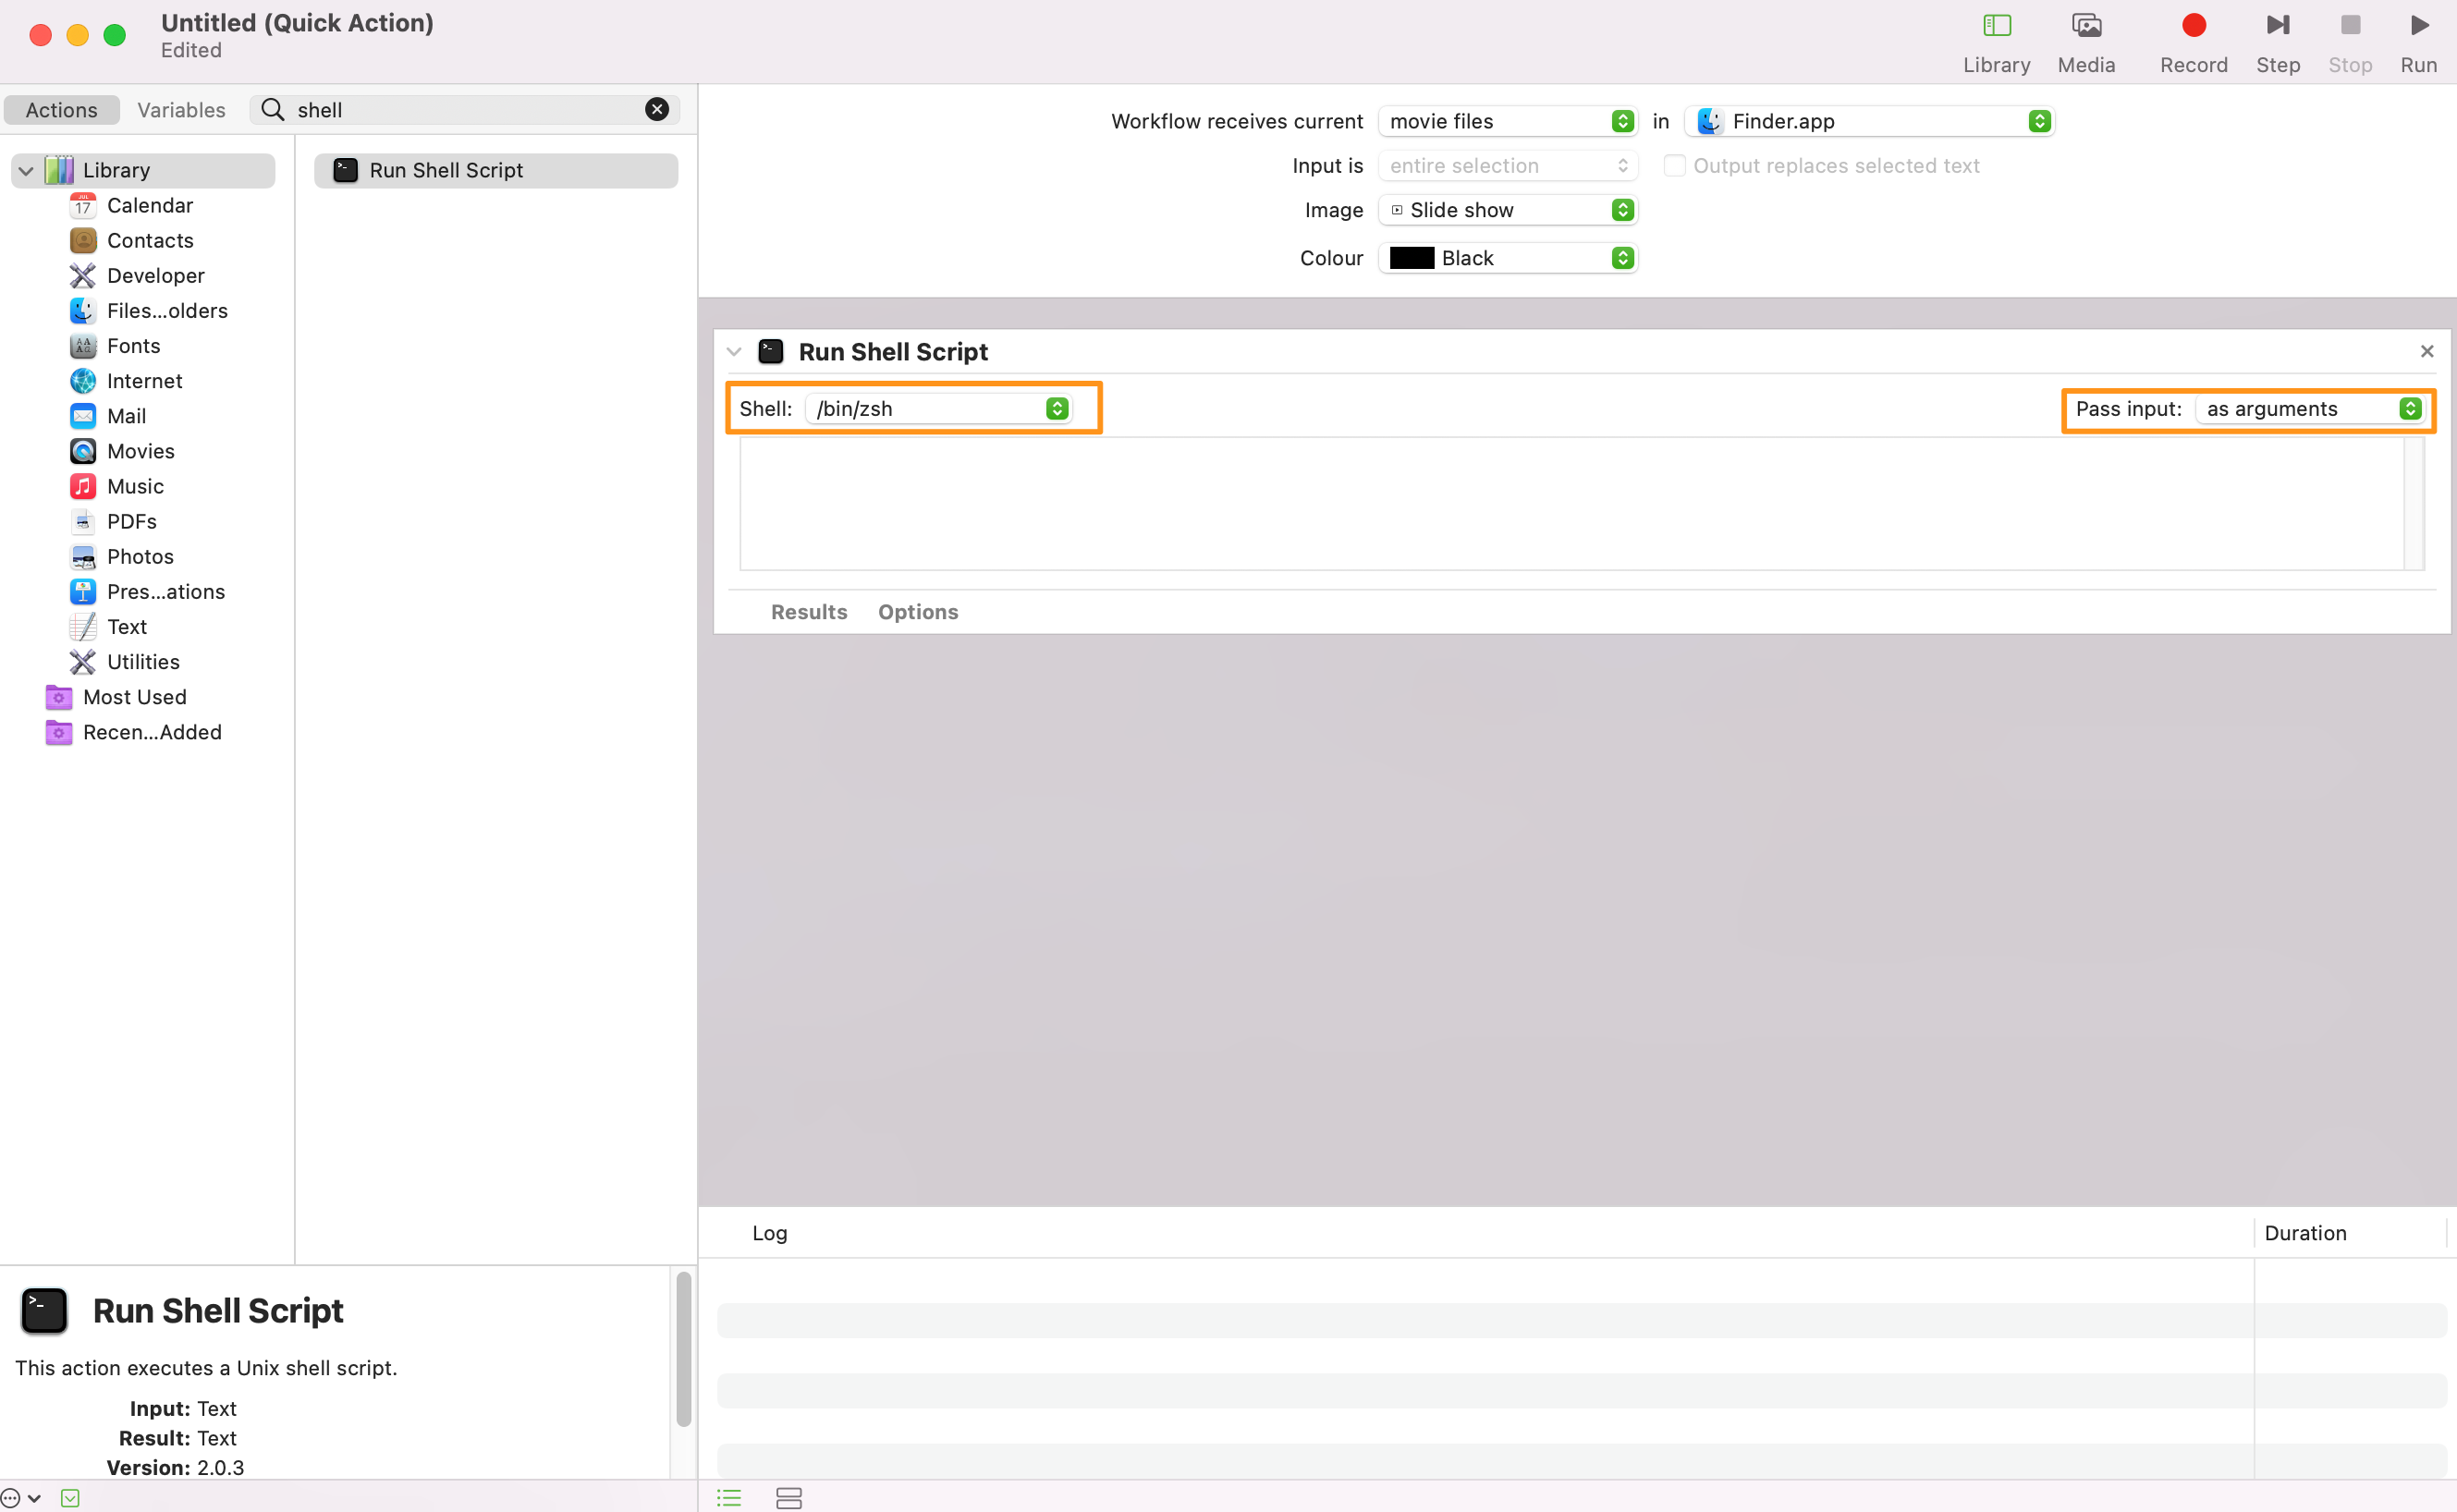
- In the Script task, select your preferred shell environment. I stuck with my usual zsh. You’ll also want to set the “Pass input” value to as arguments.
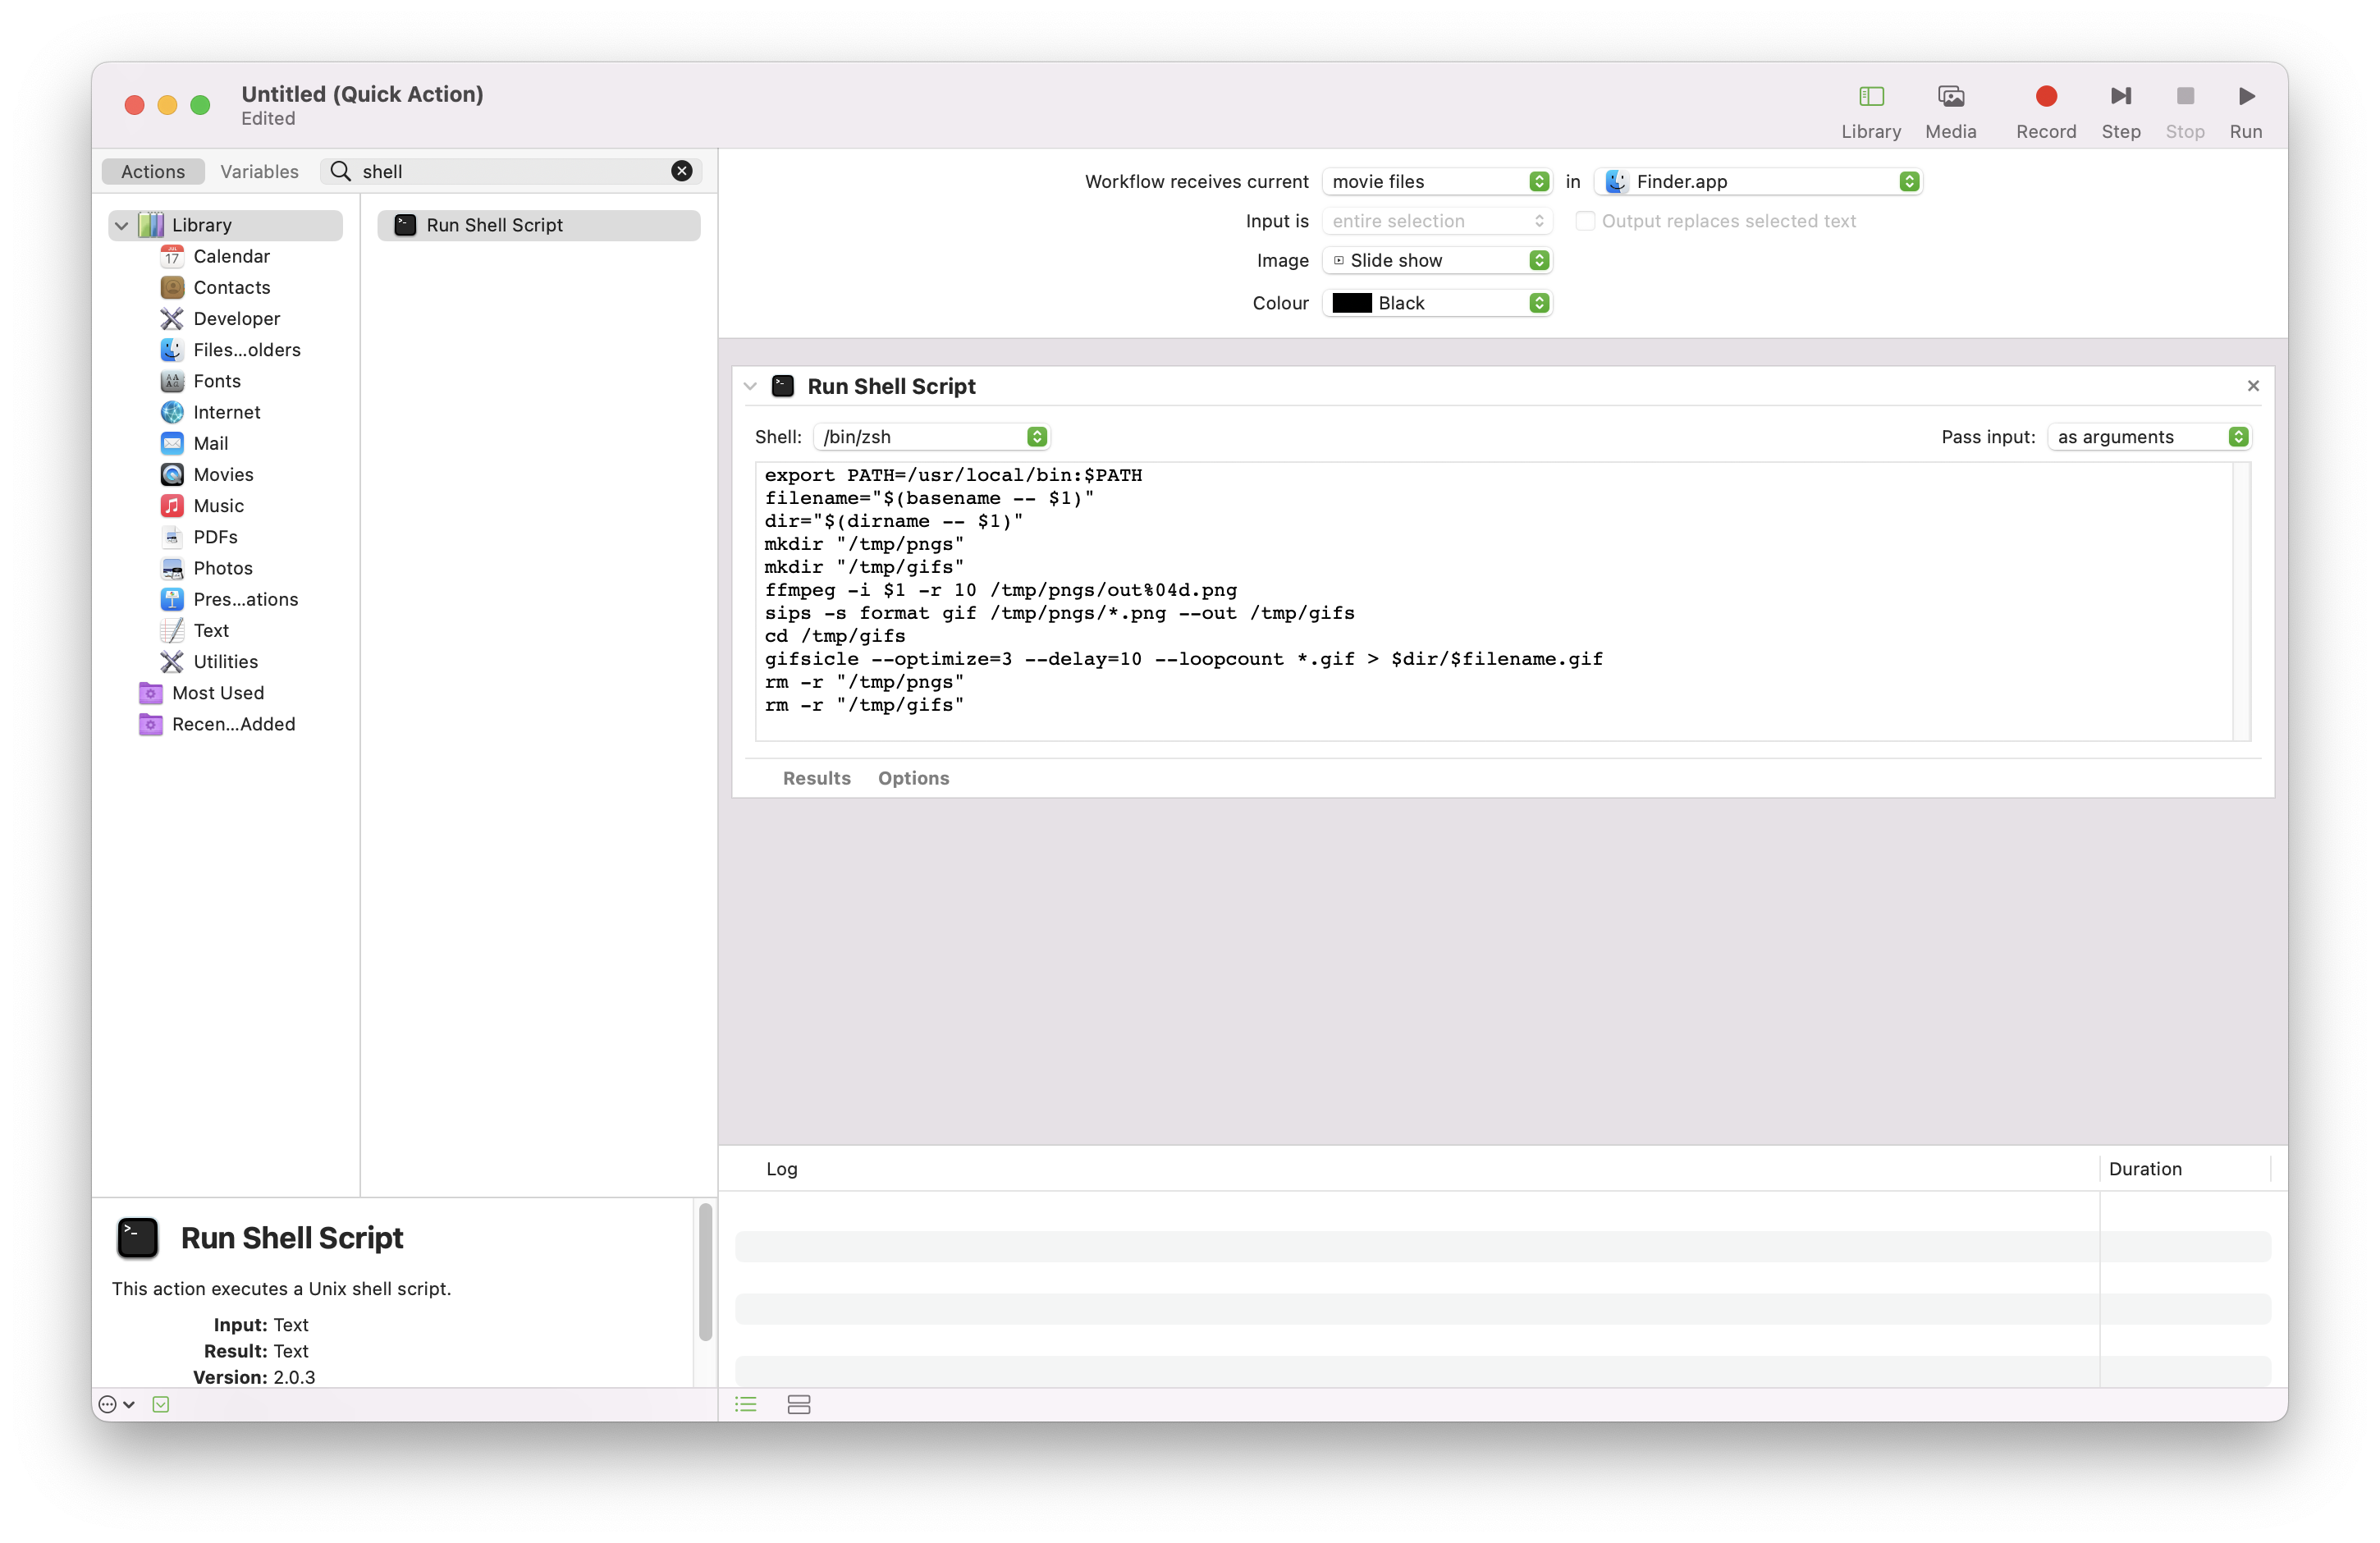
- Paste the following block into the contents of the script task:You’ll notice that the first line appends
 1
 2
 3
 4
 5
 6
 7
 8
 9
10
11
export PATH=/usr/local/bin:$PATH filename="$(basename -- $1)" dir="$(dirname -- $1)" mkdir "/tmp/pngs" mkdir "/tmp/gifs" ffmpeg -i $1 -r 10 /tmp/pngs/out%04d.png sips -s format gif /tmp/pngs/*.png --out /tmp/gifs cd /tmp/gifs gifsicle --optimize=3 --delay=10 --loopcount *.gif > $dir/$filename.gif rm -r "/tmp/pngs" rm -r "/tmp/gifs"/usr/local/binto $PATH. This is to get access to the Homebrew installed utilities ffmpeg and gifsicle. Let’s break down the rest:filenameanddirget me the name of the file and the files directory, respectively.- Then we make some temp directories.
- Run ffmpeg to convert the video file to a series of PNG files.
- Run sips to convert those PNGs to GIFs and put them in another folder.
- Run gifsicle to combine the individual GIF files into a single GIF animated image. You’ll notice the output is the directory the source file was in, with the same name, except for the additional .gif extension.
- Remove our temp directories.
- Your final task should look like this:
- Go ahead and save it with
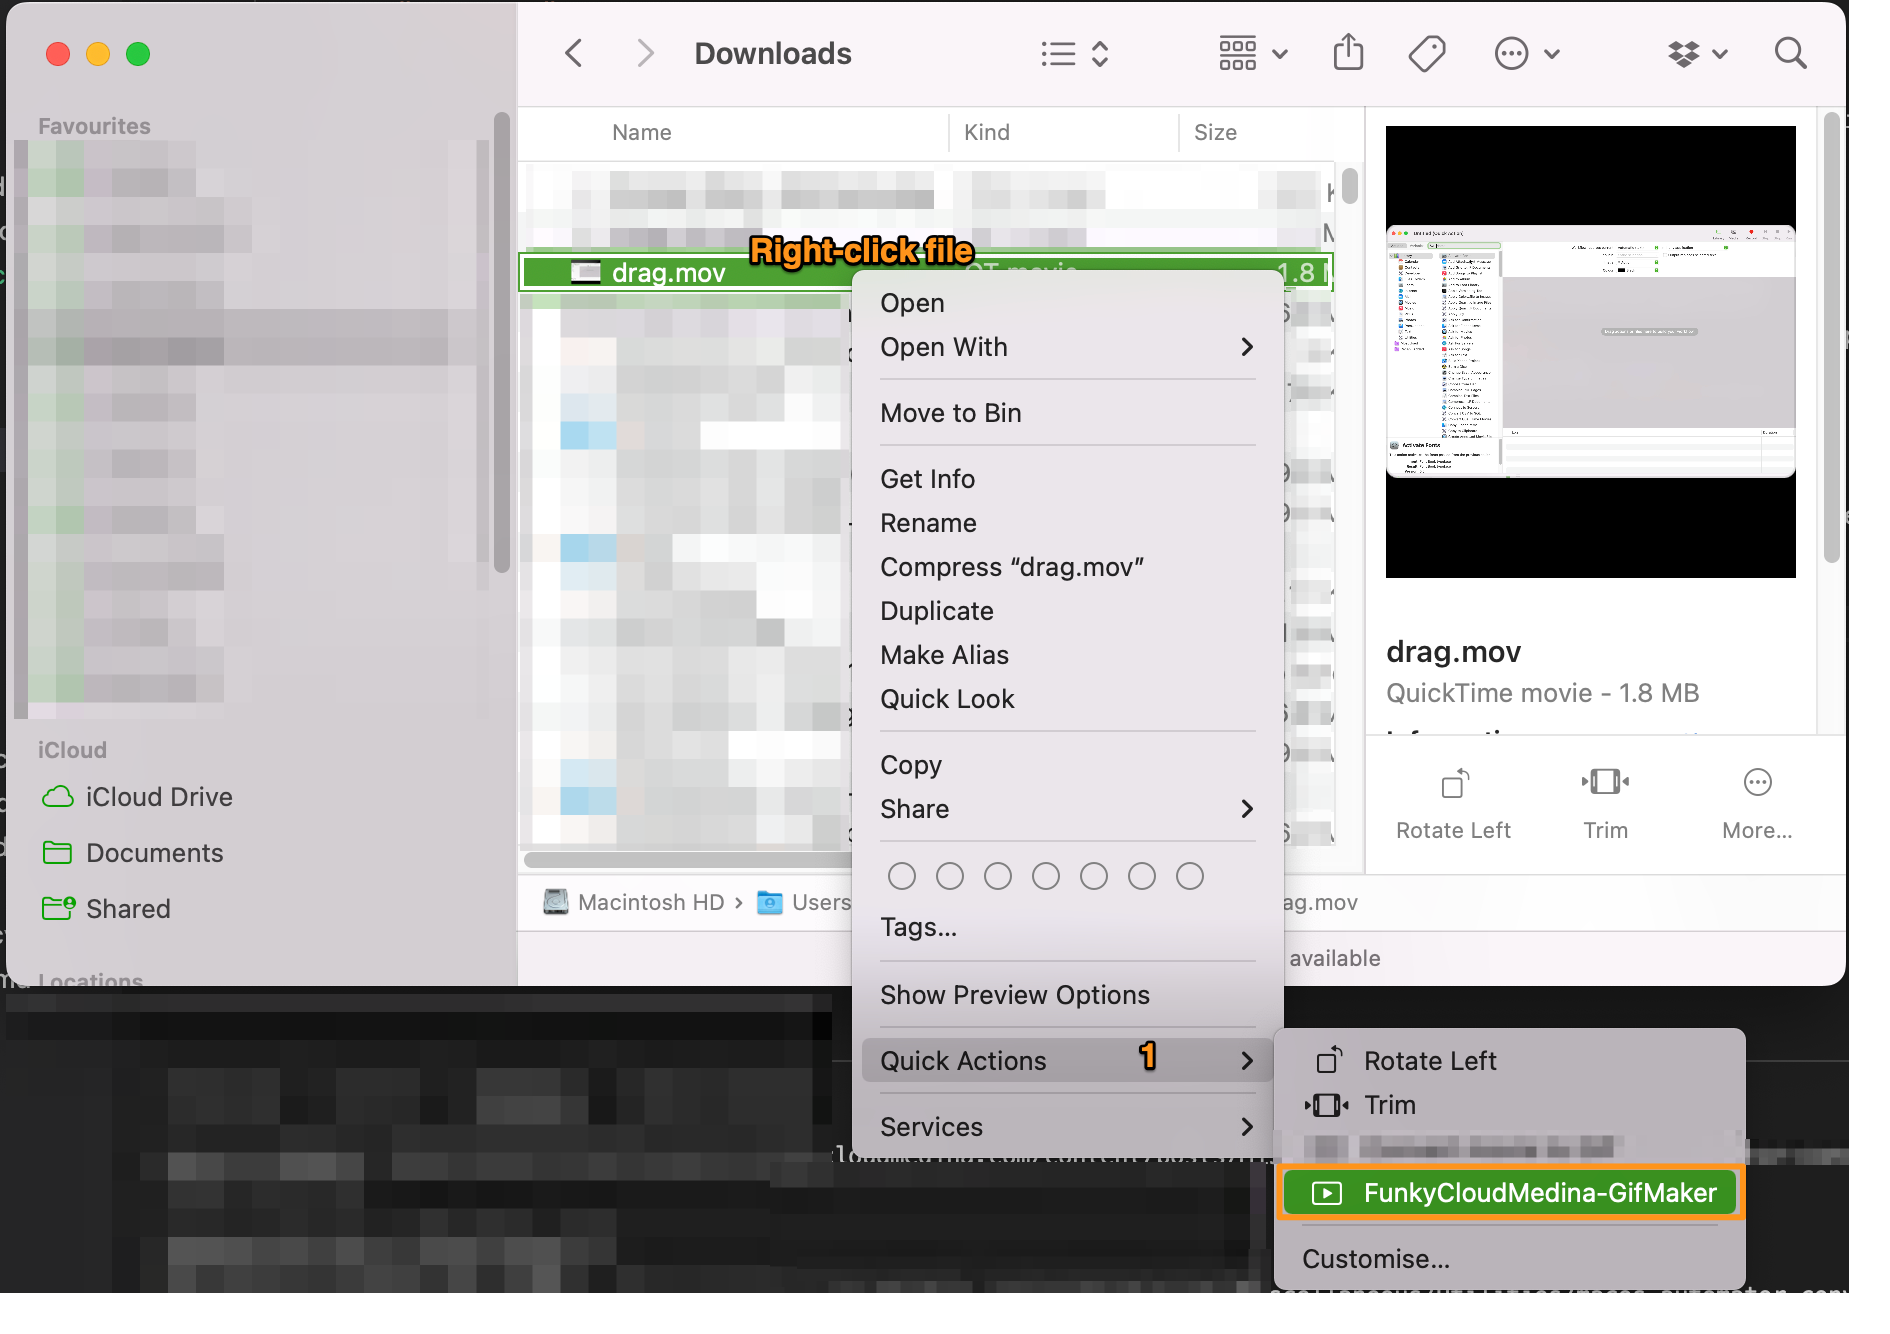
Command+Sor File > Save. The name you give this action is the same name that will appear in the Actions menu in Finder. - Open Finder and locate a video file. Right click your file and go to Quick Actions > Name of your new action
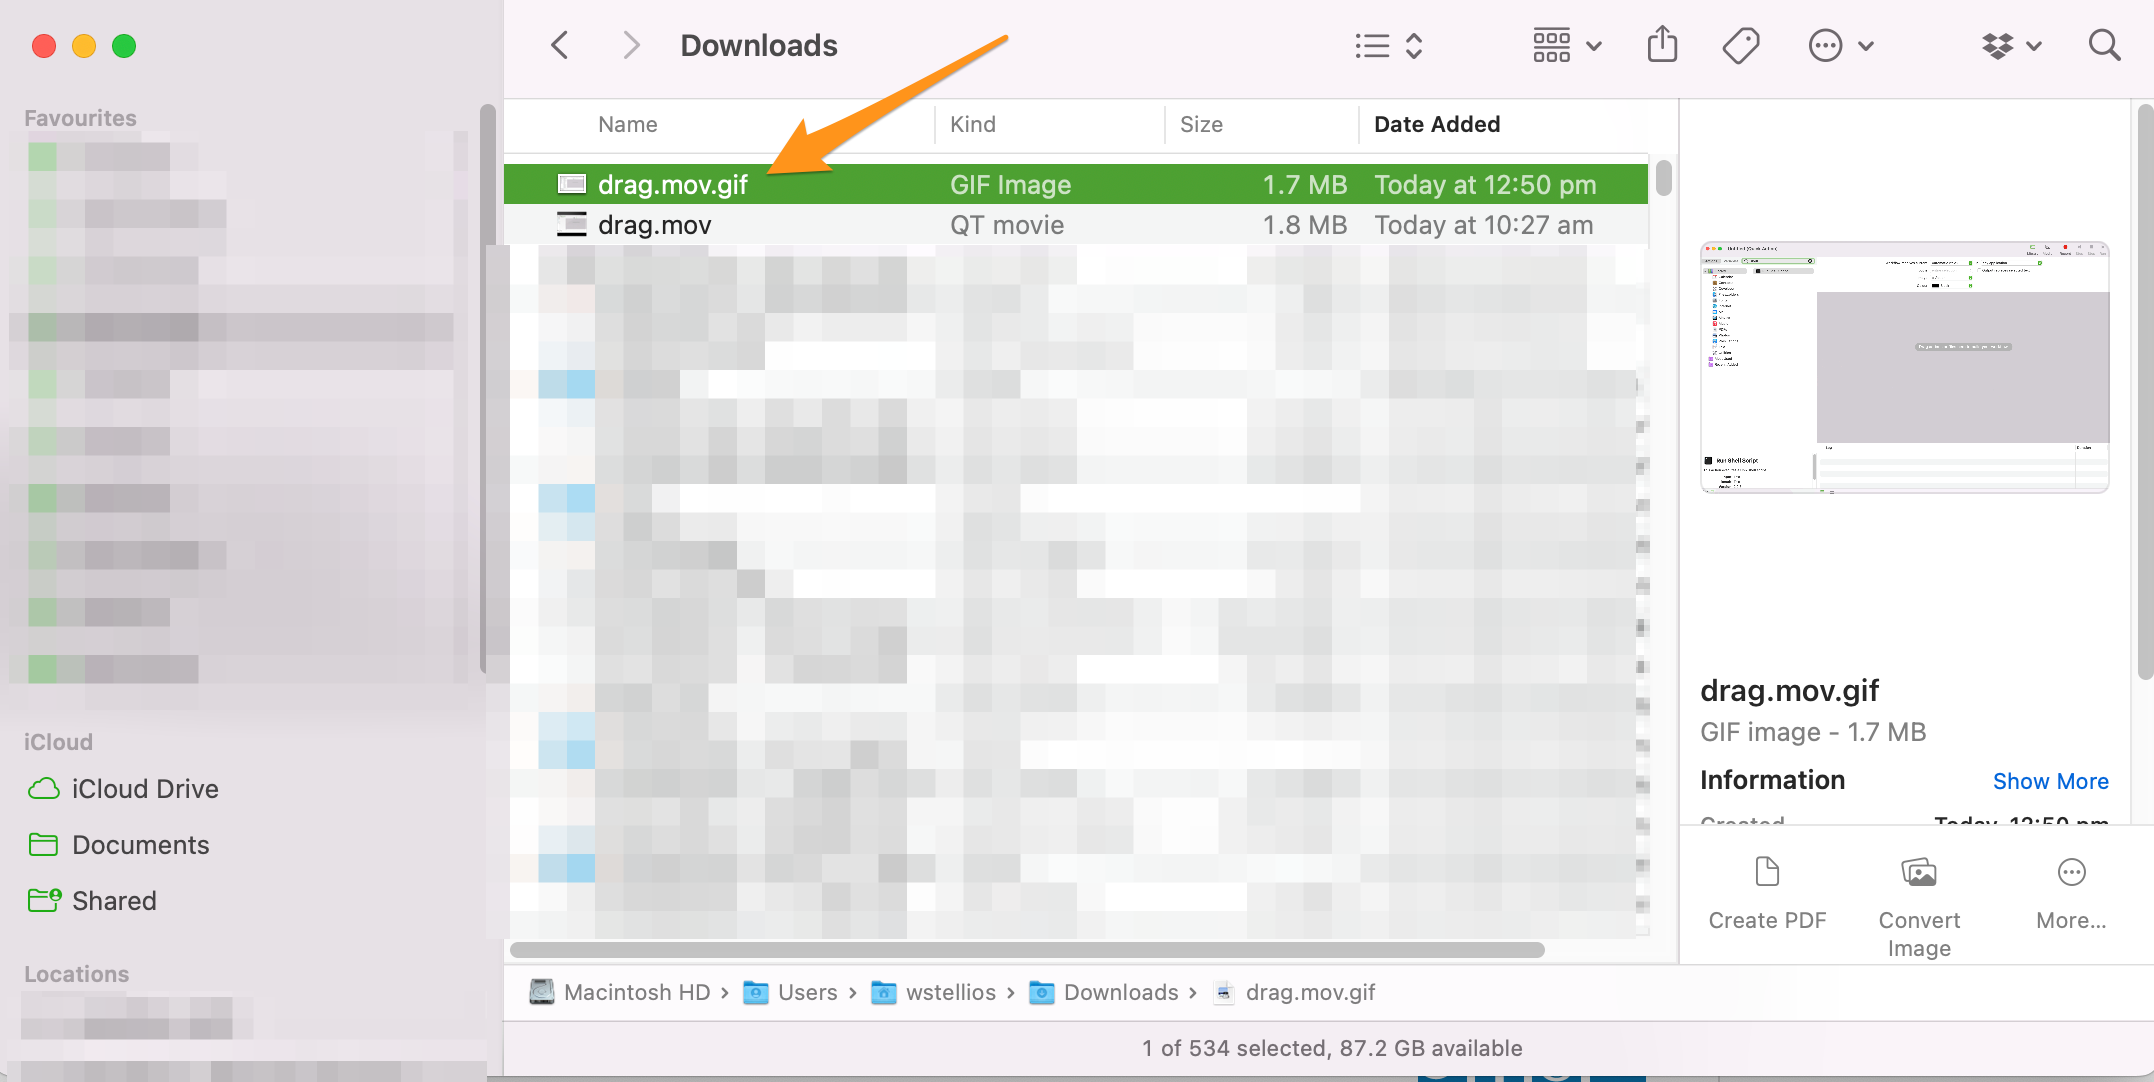
- Depending on the size of the source video, you’ll have a new animated GIF land in the same directory as your source video:
That’s it! Any questions or suggestions please let me know.