I don’t like doing things manually. My previous post showing how to replace vRealize Suite Lifecycle Manager certificates using the GUI is straight forward, but it’s far too manual. I’m going to show you how to replace the certificate using the vRSLCM 8.1 API(which you can wrap in a script). You can use any tool to interface with the API. I stick to Postman, curl, or if the application provides it, a Swagger UI.
Lucky for us, vRealize Suite Lifecycle Manager has a Swagger UI available. We can view and execute all available REST APIs available in vRSLCM:
We’ll use these API’s and the simplicity of Swagger to model our order of operations and test the values we want to use. Additionally, we can take those APIs and values and put them into a script for a more automated approach. Although, I’ll be frank, unless your script is running on a Windows machine it’s difficult and tedious to submit a certificate request and download the certificate using just the CLI from a Microsoft CA. Something else for me to look at.
Create the CSR
- Log in to vRealize Suite Lifecycle Manager
- Click the User drop-down at the top right of the page and select API. Having already logged in to vRealize Suite Lifecycle Manager, we don’t have to authenticate using the APIs.
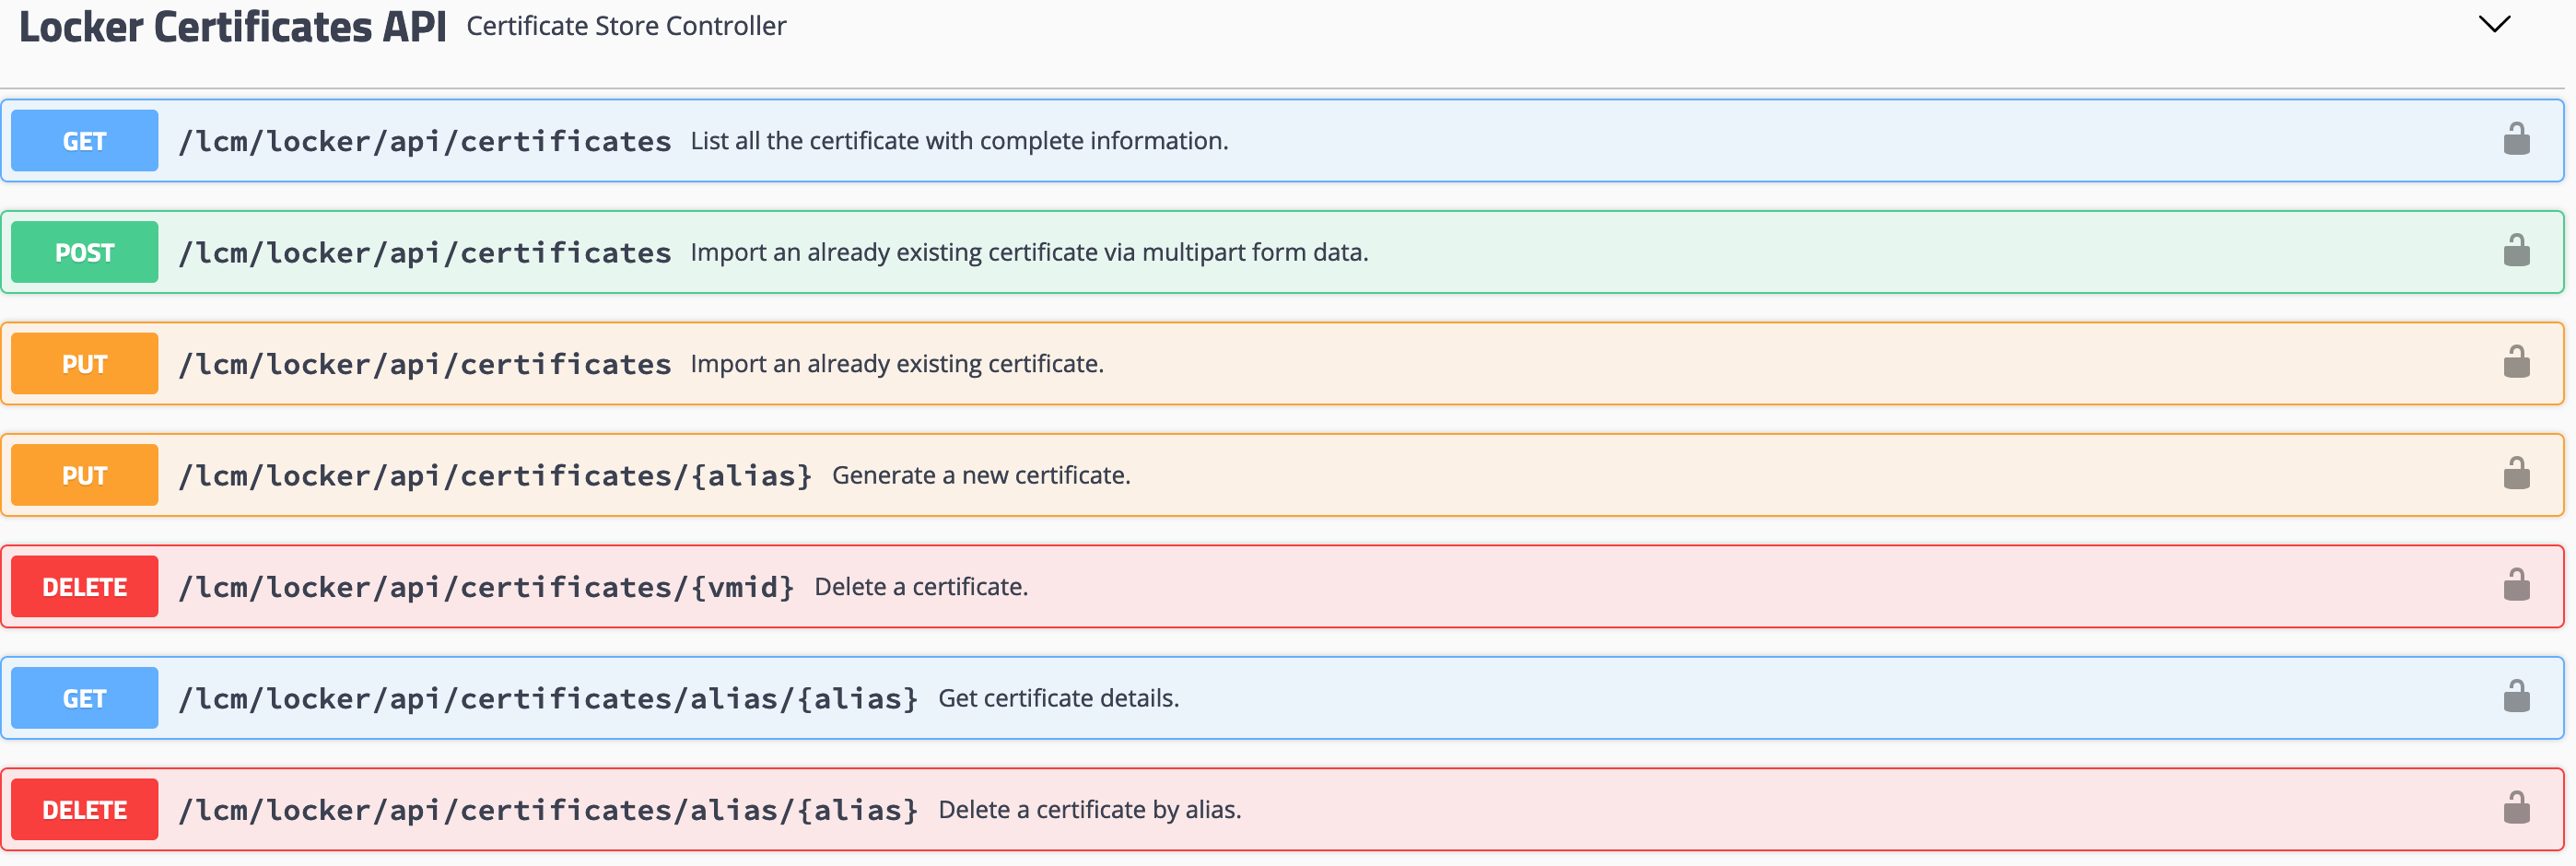
- Scroll down to Locker Certificates API section. Click it to expand the section.
- Find the POST /lcm/locker/api/certificates/csr API. Click to expand it.
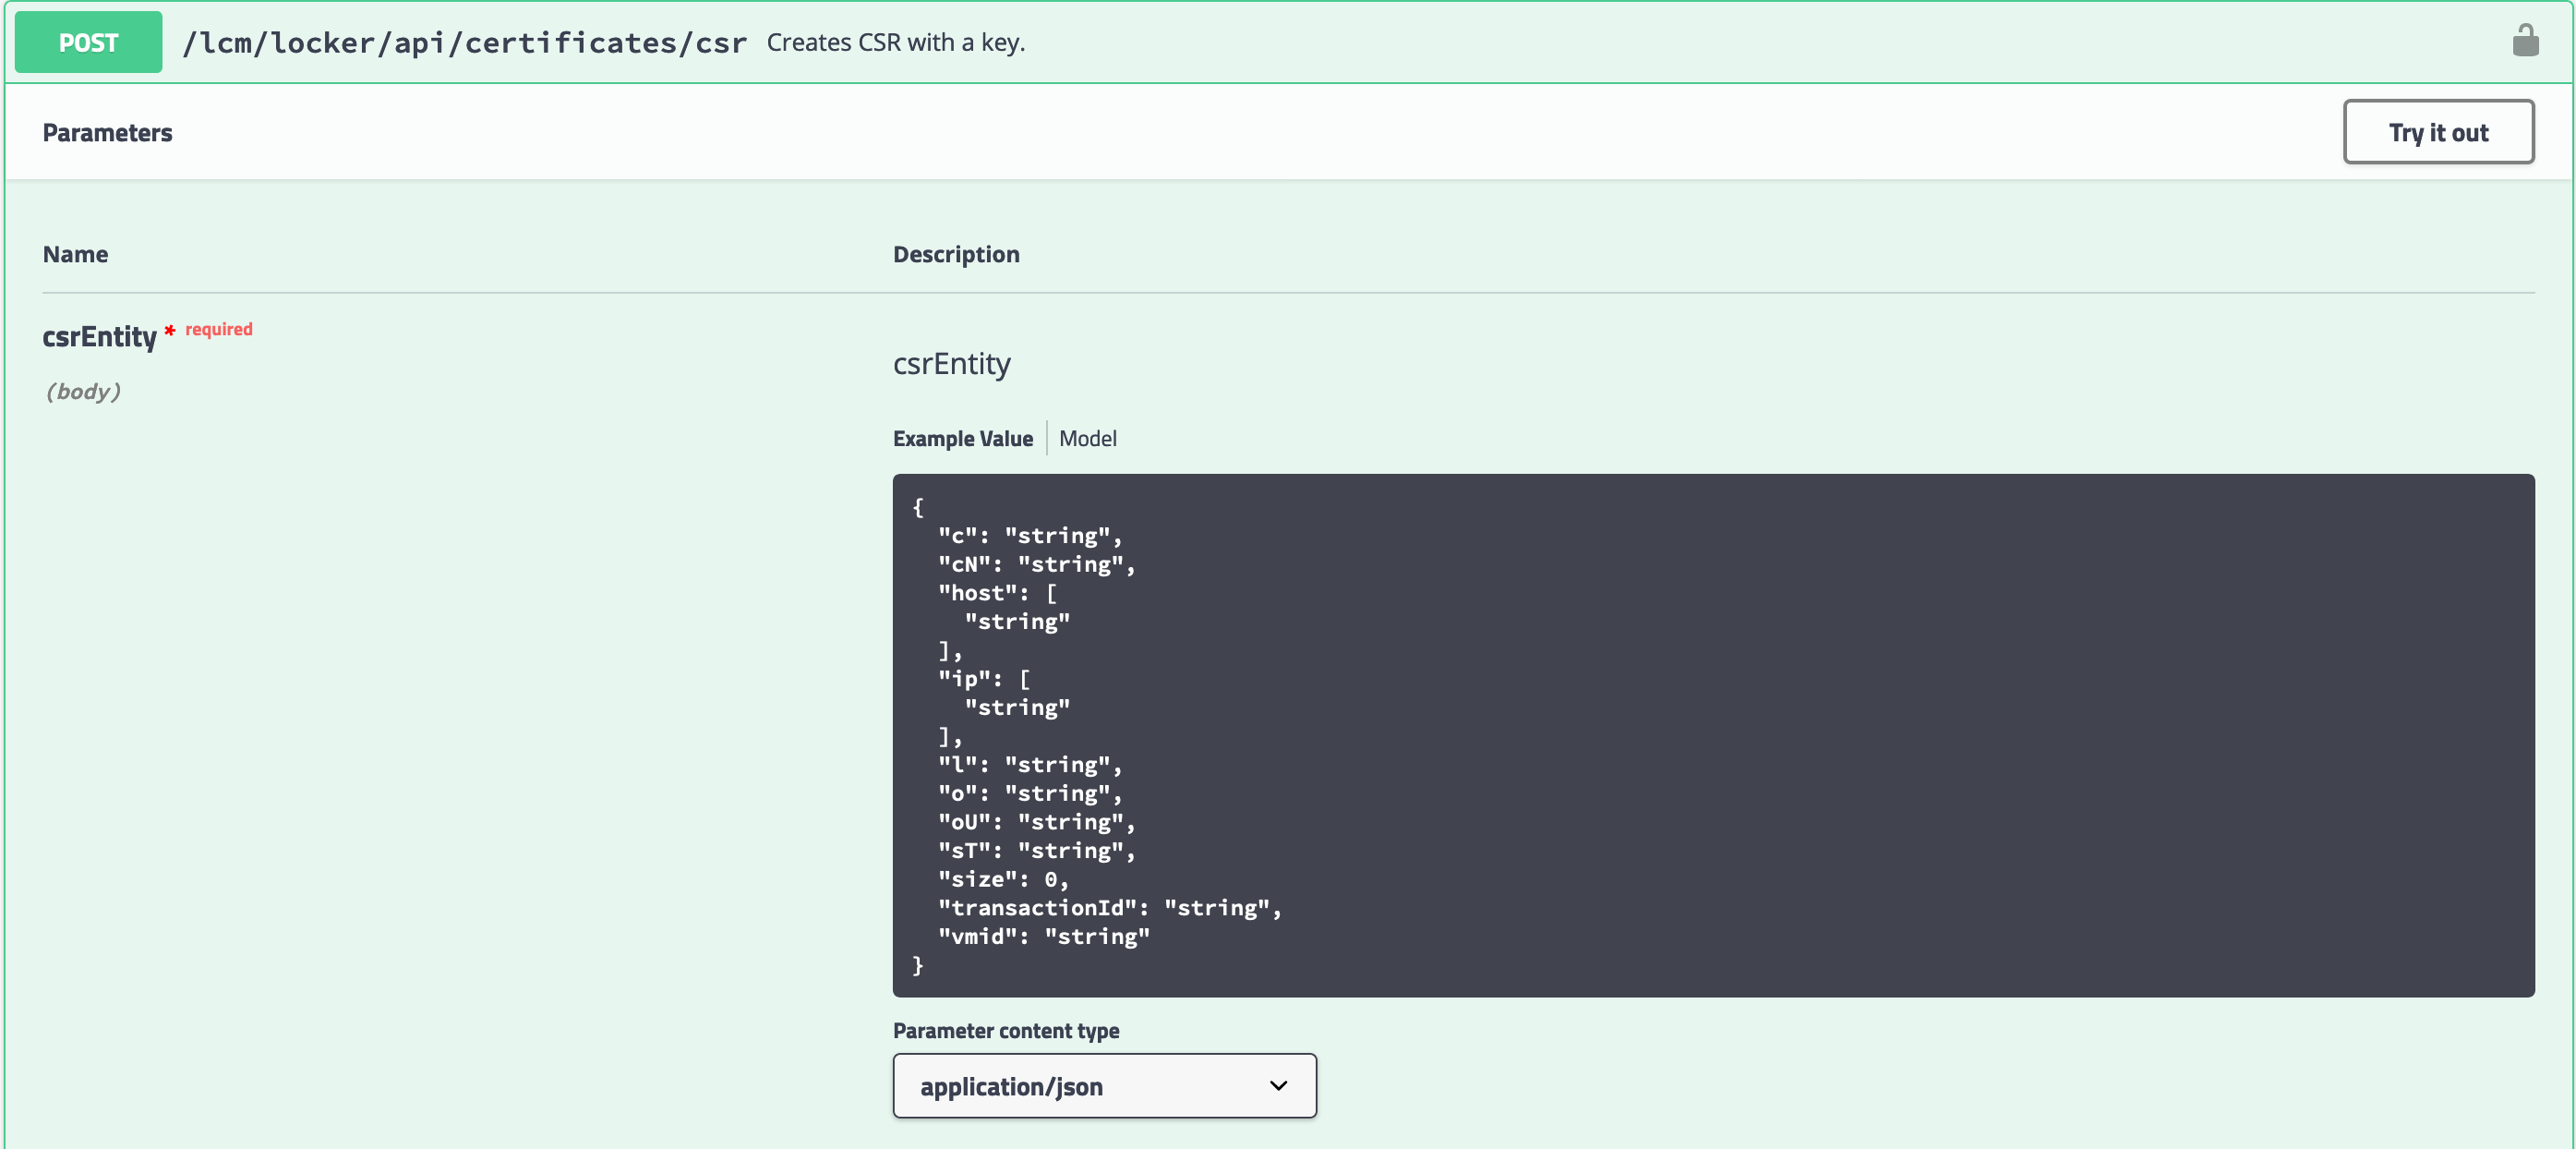
- The text box contains an example of a request body for the API. The expected values in the request body align with the values from the CSR request form in my previous post.
- Click the Try it out button to edit the request body.
- Modify the provided request body with the CSR values of the new certificate:
- c - The 2-letter code for your country.
- cN - SSL requires the Common Name to match the web address (see here and here).
- host - Enter the FQDN, Hostname, and any CNAME records you’re using for this service. It’s a JSON array of strings, you’ll need to separate the entries with a comma.
- ip - Enter the IP address of the service. It’s a JSON array of strings, you’ll need to separate the entries with a comma.
- l - Locality, the city the service is operating.
- o - The name of your organisation.
- oU - The name of the unit within your organisation. I like to use OU’s that reflect the team/group/silo that is responsible for the certificate.
- size - Equivalent to key length. Stick to 2048 unless your organisation requires a greater key length.
- The remaining field values are not required.
Here’s what my request looked like:
| |
- Click the wide Execute button underneath the text body.
- Swagger will return details of the request including the curl command used to request the CSR.
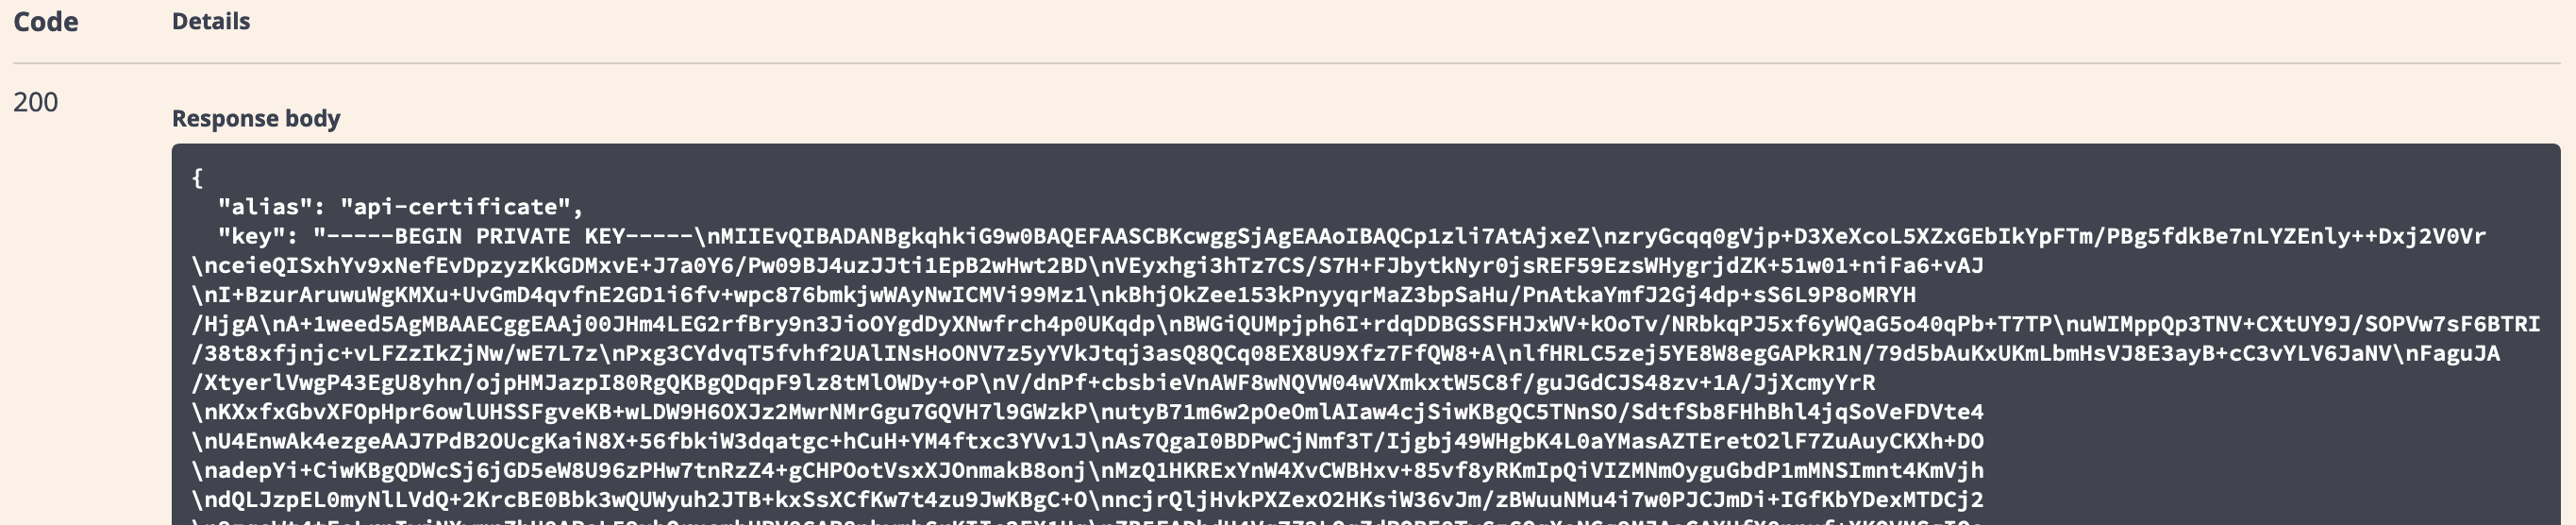
- Scroll down further to find the Request body.
- The Request Body contains the Certificate Request and the Private Key.
From this point, the steps in my previous post under Submit the certificate request to your CA are relevant. Submit the CSR to the CA, retrieve the certificate or the certificate chain and insert the private key.
Submit the certificate chain to vRealize Suite Lifecycle Manager
With the certificate chain (including private key) at hand, it is ready for vRealize Suite Lifecycle Manager. However, when using the API, we need to ’escape’ the contents of the certificate for use in a JSON body. Several tools and libraries exist to do this. In my lab, I use a simple online tool to do the dirty work. If that’s not palatable, there is a great VSCode Plugin - JSON Escaper that can do the job locally.
- Log in to vRealize Suite Lifecycle Manager
- Click the User drop-down at the top right of the page and select API. Having already logged in to vRealize Suite Lifecycle Manager, we don’t have to authenticate using the APIs.
- Scroll down to Locker Certificates API section. Click it to expand the section.
- Find the PUT /lcm/locker/api/certificates API. Click to expand it.
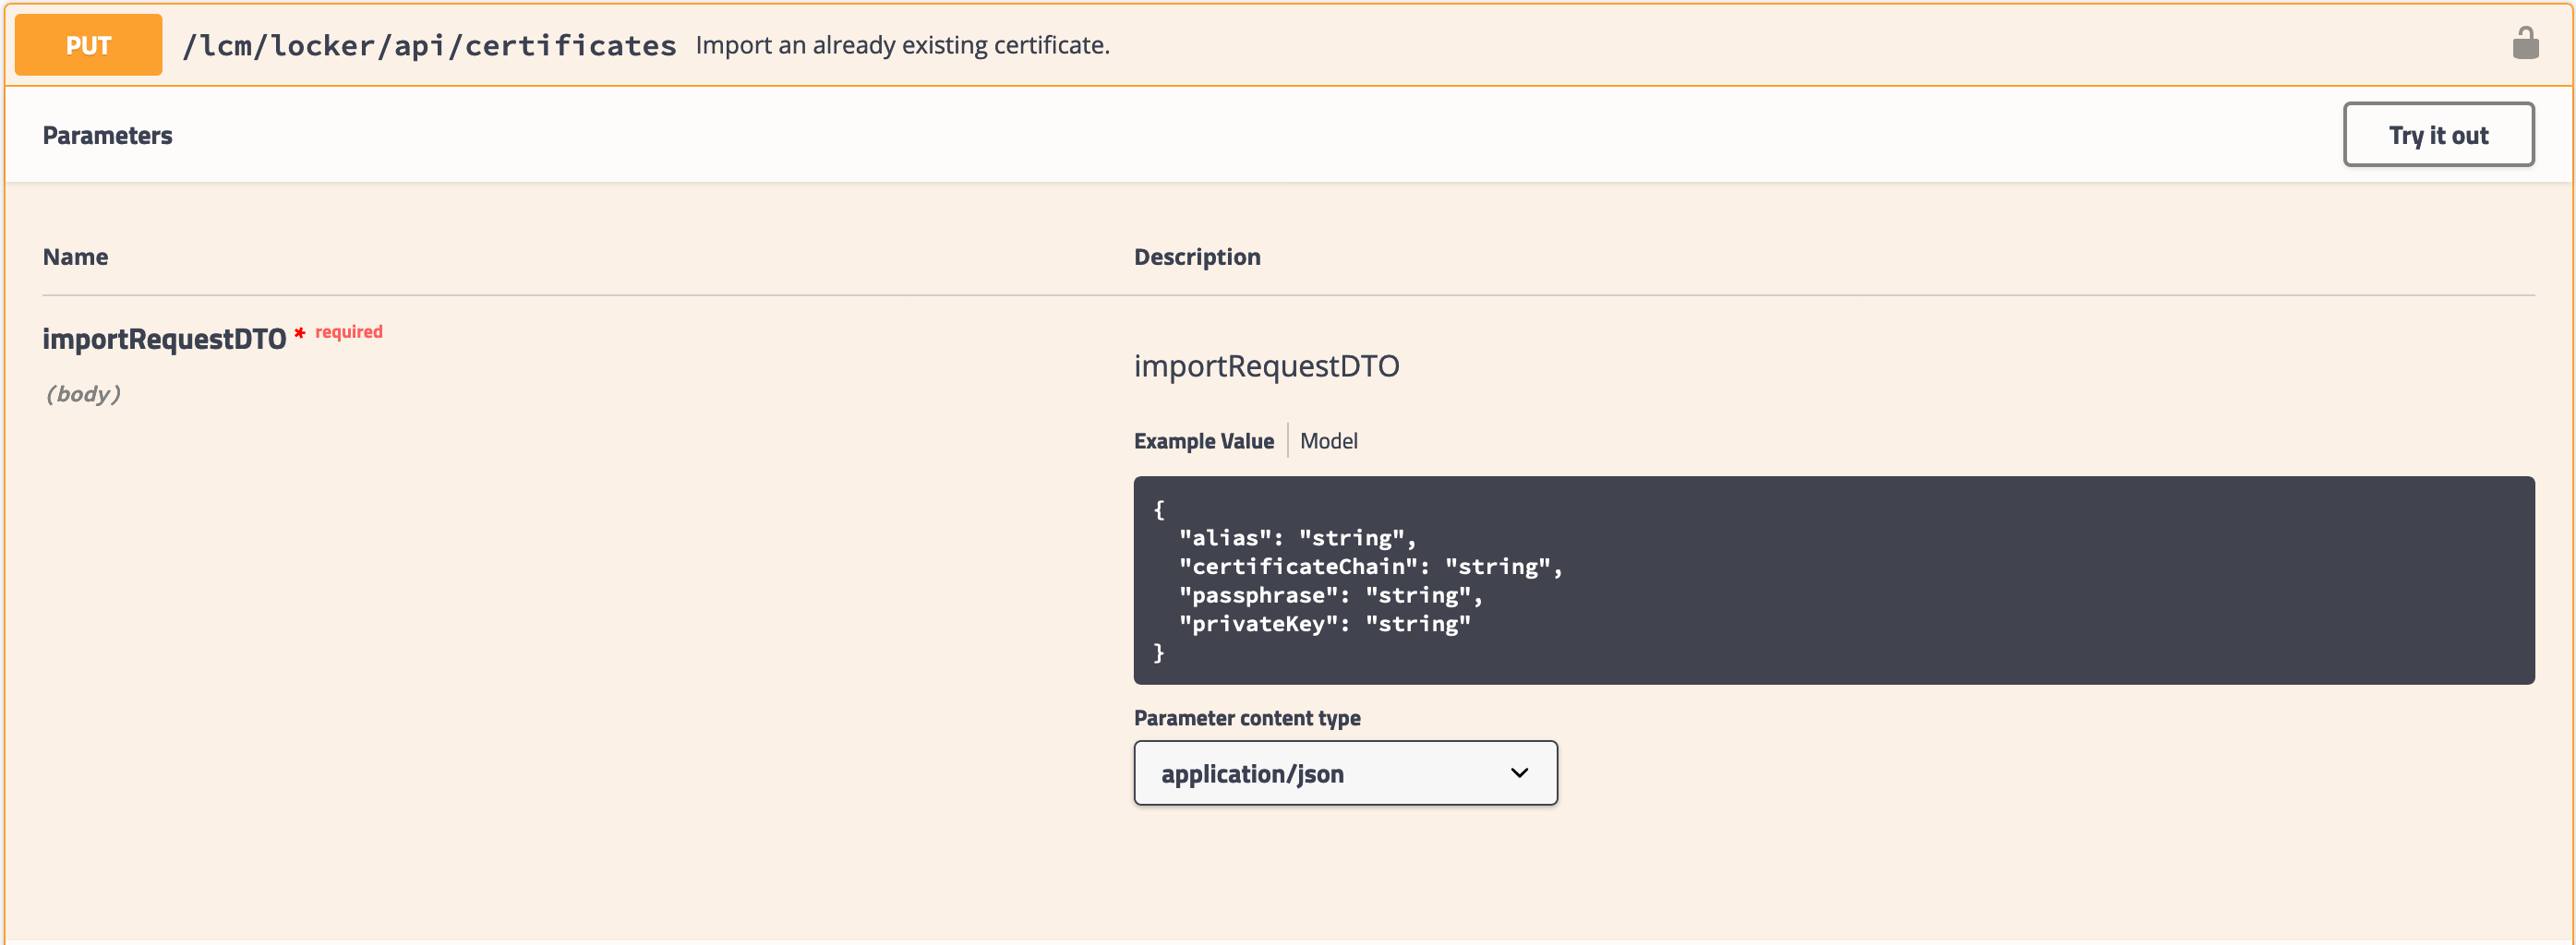
- Click the Try it out button.
- In the Request body text box, complete the fields:
- alias - the name of the certificate in the vRealize Suite Lifecycle Manager Locker.
- certificateChain - The entire certificate chain, escaped for JSON using one of the tools mentioned above.
- passphrase - If the certificate chain has a passphrase, enter it in this field.
- privateKey - the private key generated as part of the CSR process, escaped for JSON using one of the tools mentioned above.
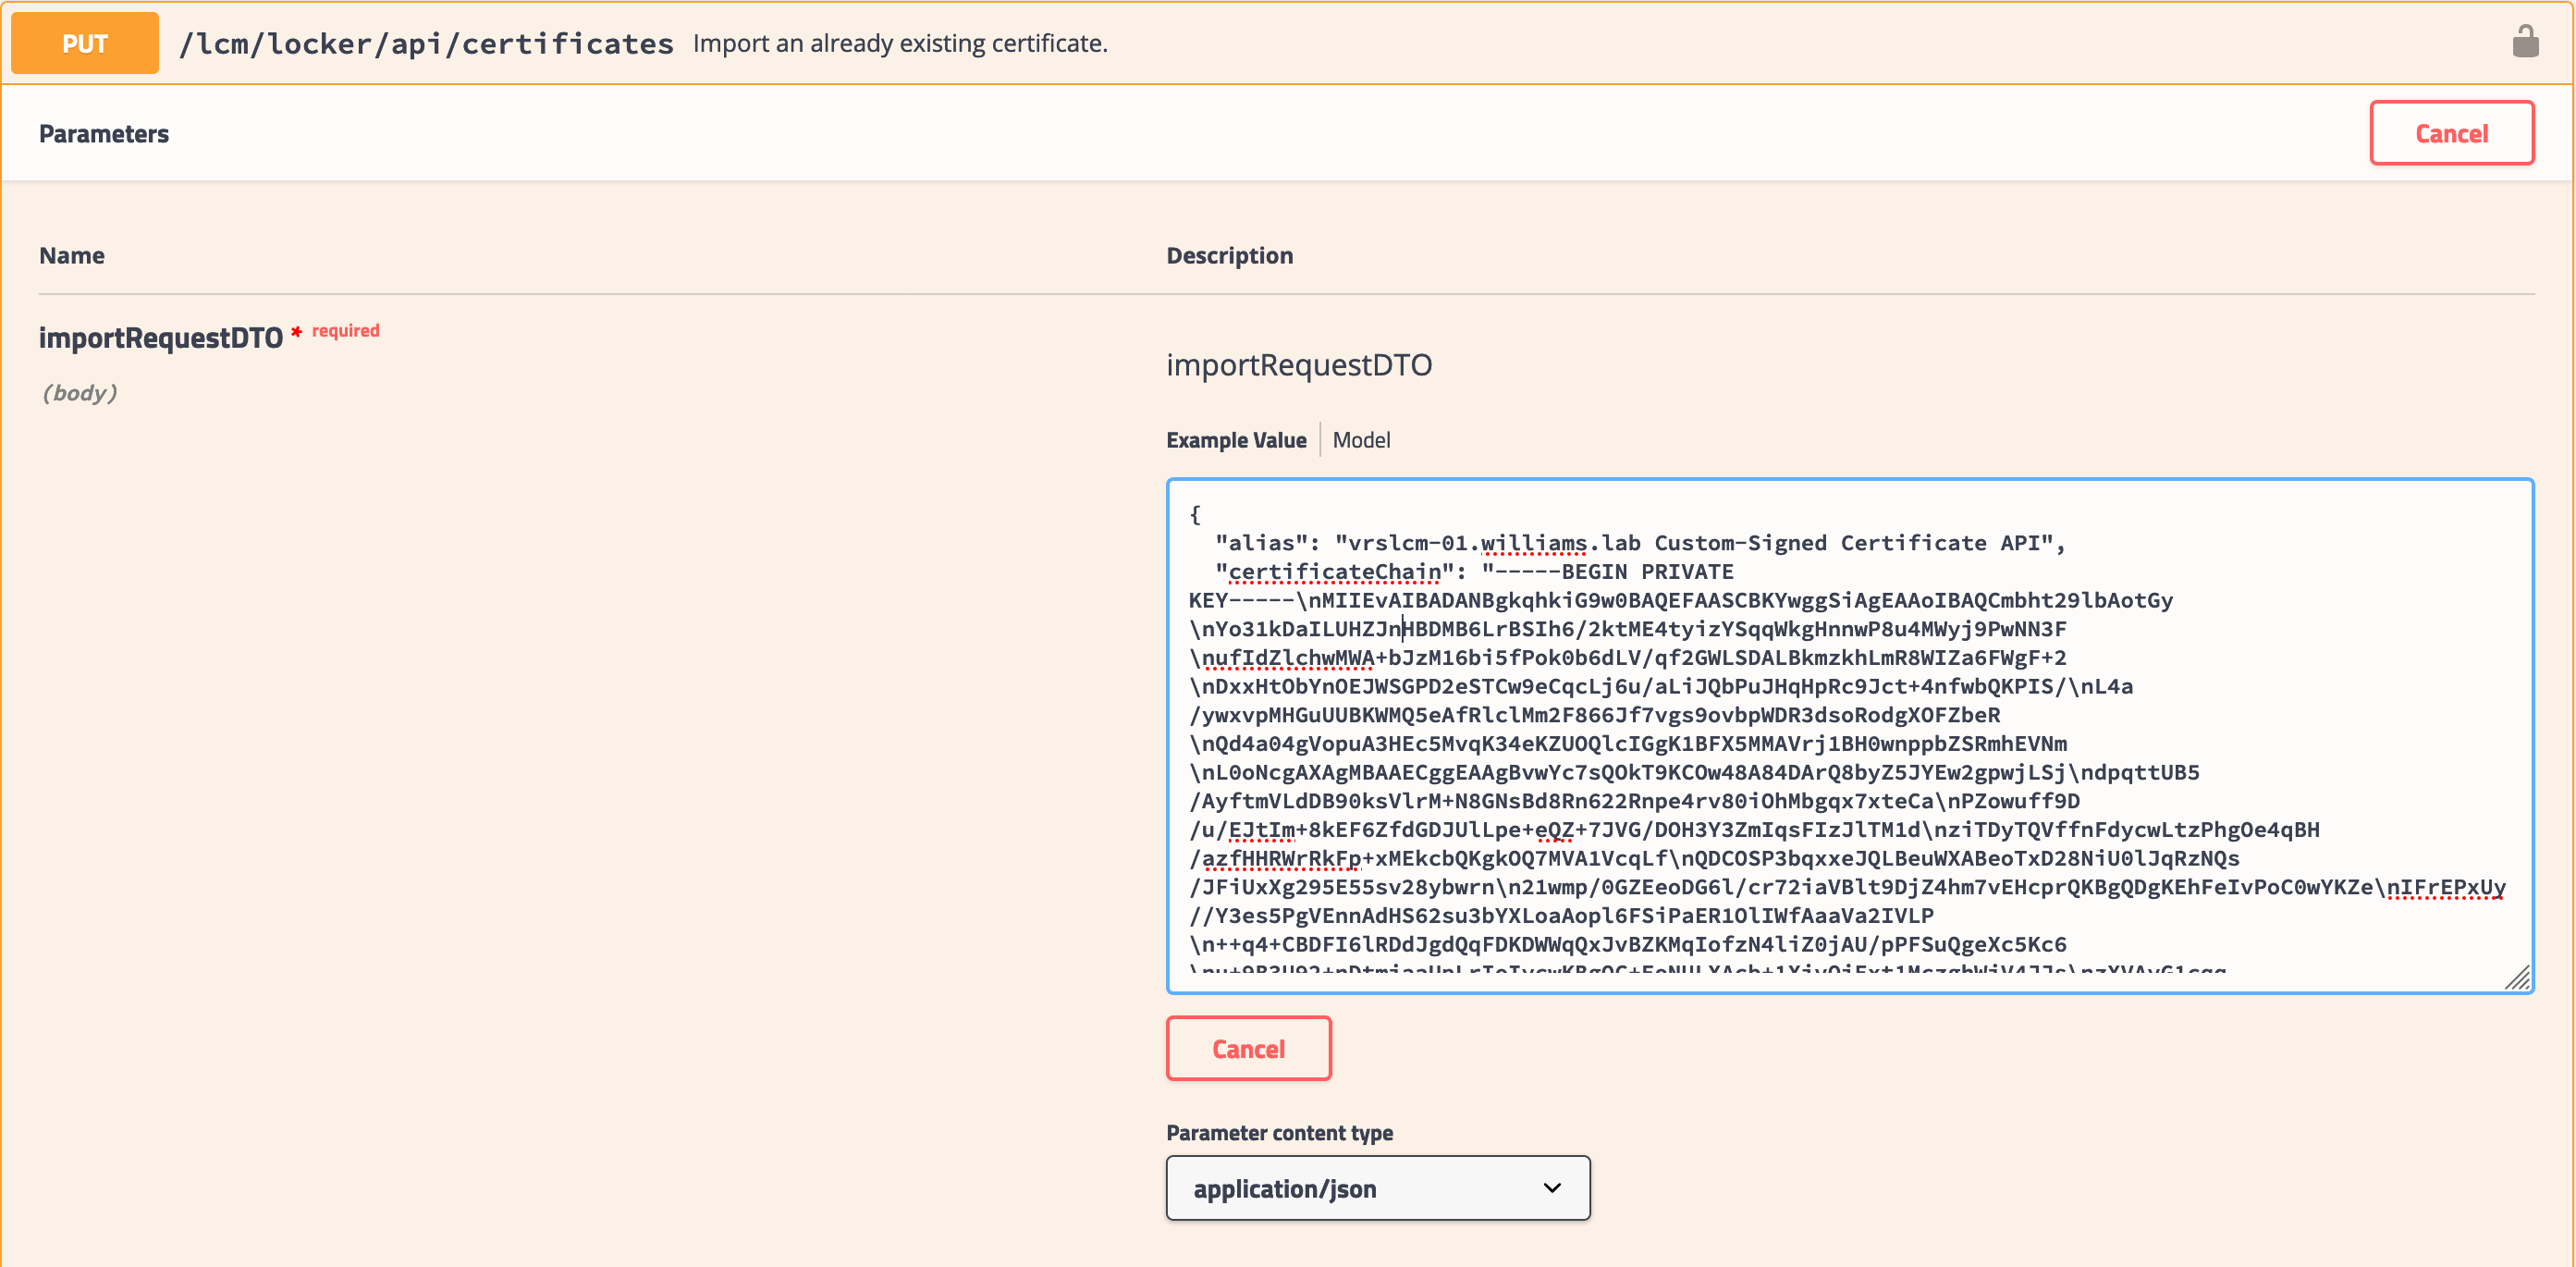
1
2
3
4
5
6
{ "alias": "vrslcm-01.williams.lab Custom-Signed Certificate API", "certificateChain": "!! Full certificate chain - JSON escaped", "passphrase": "", "privateKey": "!! Private key - JSON escaped !!" }
- Click the wide Execute button underneath the text body.
- Swagger will return details of the request including the curl command used to request the CSR.
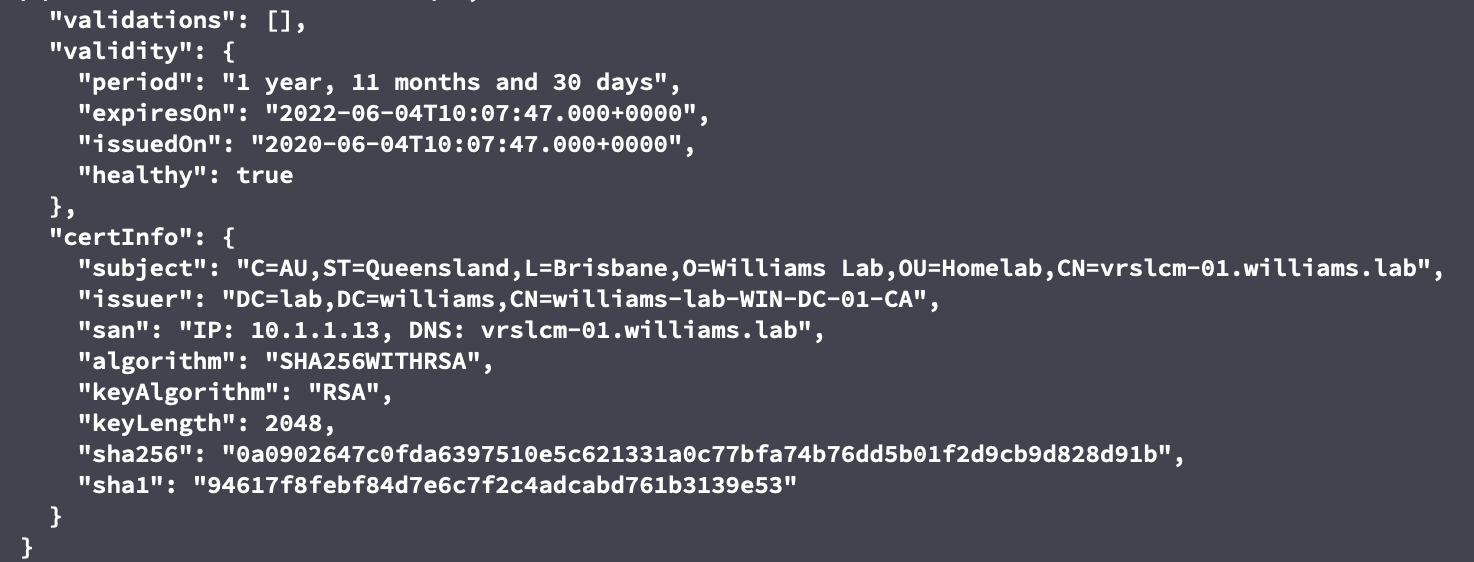
- Scroll down further to find the Request body.
- The returned Request Body confirms the certificate submission was received:

Change the vRealize Suite Lifecycle Manager Certificate
Disclaimer: Using the /lcm/lcops/api/environments/{environmentId}/products/{productId}/updatecertificate API to replace the vRealize Suite Lifecycle Manager 8.1 is unsupported by VMware GSS. The steps below take advantage of a private API.
- Log in to vRealize Suite Lifecycle Manager
- Click the User drop-down at the top right of the page and select API.
- Locate Locker Certificates API. Click to expand it.
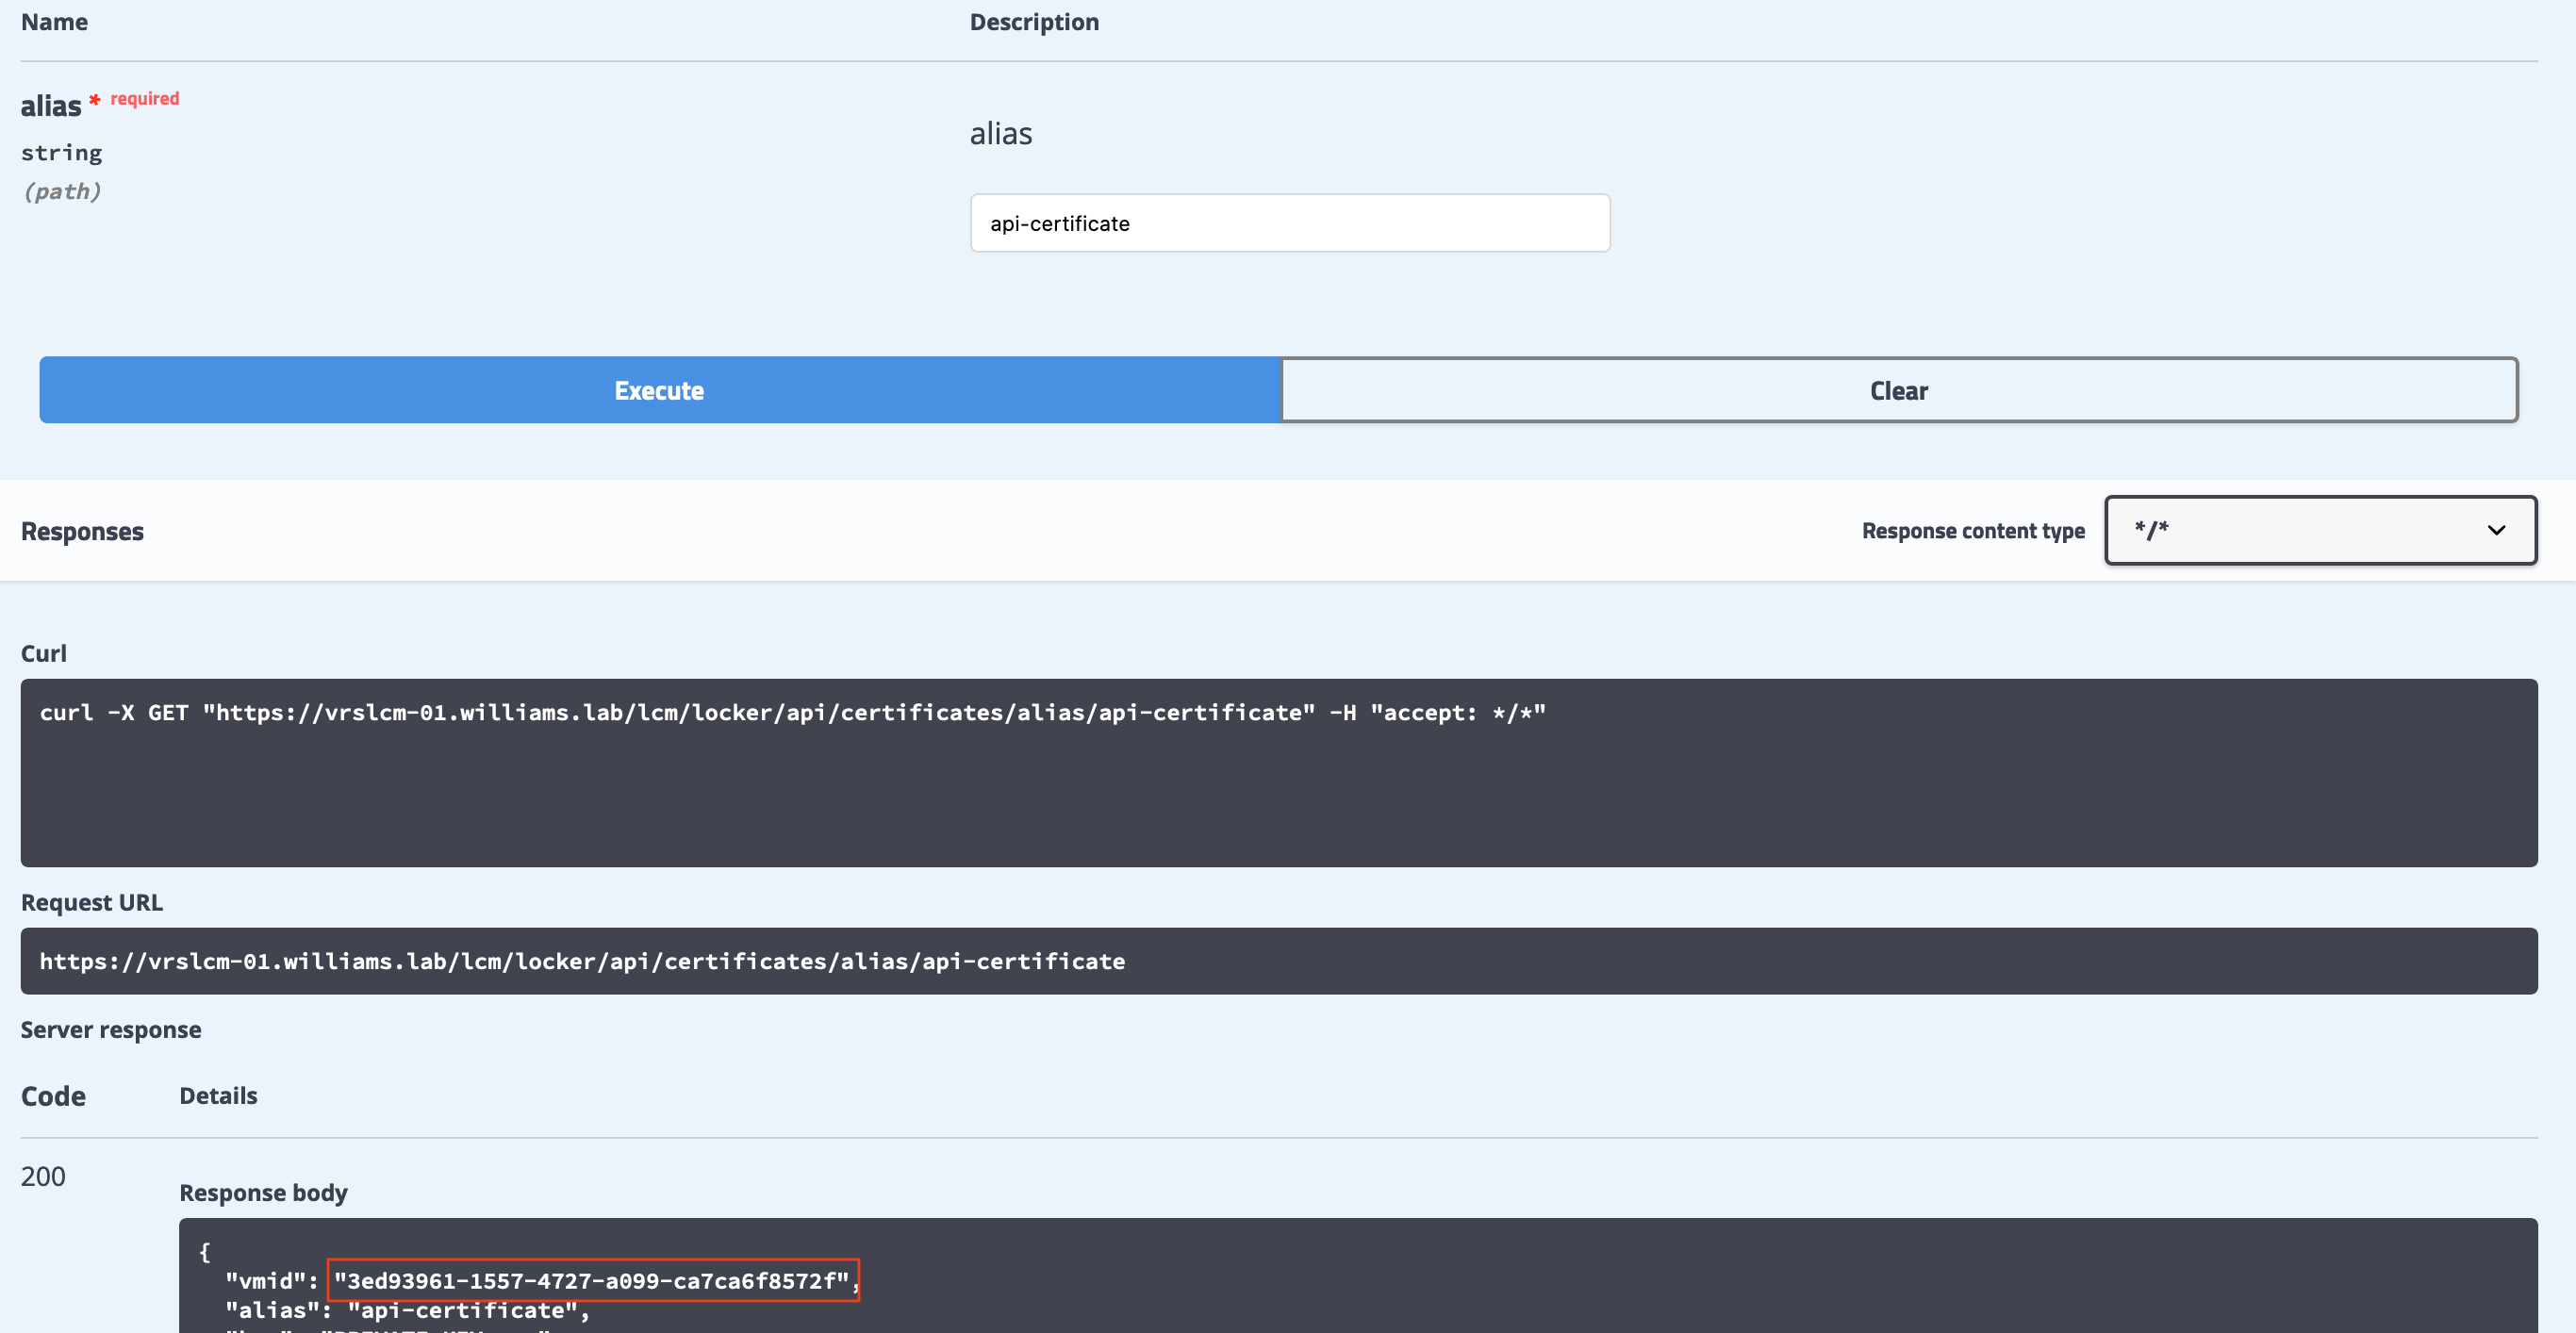
- Find the API GET /lcm/locker/api/certificates/alias/{alias}. Click to expand it.
- Click Try it out.
- In the alias field, enter the alias of the certificate submitted in the previous section.
- Click the Execute button.
- Certificate details in the Locker are returned in the response body. Copy the vmid value from the response.
- In the Swagger UI, find the deployments-controller section. Click to expand it.
- Find the API POST /lcm/lcops/api/environments/{environmentId}/products/{productId}/updatecertificate API. Click to expand it.
- Click the Try it out button.
- For the environmentId and productId fields, enter lcm.
- In the certificateUpdateProductRequestDTO field, enter
{"certificateVmId": "$vmid"}replacing $vmid with the vmId in step 8. - Click the Execute button.
- Swagger will return a requestId.

- The status of this request can be monitored in the vRealize Suite Lifecycle Manager Lifecycle Operations > Requests section. You can also check the status of the request using the request-controller > GET /lcm/request/api/requests/{requestId} API.
- In my lab, the certificate replacement was immediate. A hard refresh of the Swagger UI page shows the new certificate.
Following the SwaggerUI process above is more work than the standard admin interface. However, each API call made in Swagger provides a curl one-liner. These commands can be copied and re-used in bash scripts or easily ported to PowerShell’s Invoke-RestMethod. With a little time, a vRealize Orchestrator workflow can handle this as a scheduled, repeating workflow.
If this is your first time using the Swagger UI, I hope this post has been a suitable introduction. If you have any questions, please leave a comment and let me know.