Following along the theme of one of my previous posts on vRealize Suite Lifecycle Manager (vRSLCM) and its REST API, here’s another on replacing the password for a vCenter Server in a vRSLCM “Datacenter”.
Similar to my previous post, we’ll be doing this in the Swagger UI as the ability to replace the password is not available in the standard vRSLCM UI (v8.1). The APIs used in this post are private and, as such, not supported by VMware.
The gist of what we’re doing:
- Retrieve the new password’s alias from the Locker
- Retrieve existing vCenter details
- “Create” a new vCenter Server with the same details as the original, but replacing the password value with our new password from the locker.
This workflow is one you’d expect when a service account has aged out, or someone entered incorrect credentials when adding the vCenter Server.
I’ve currently got two passwords defined in my vRSLCM Locker. One is the active password (funkycloudmedina-old-vcenter-password), and the other is the new password (funkycloudmedina-new-vcenter-password) I want to use.
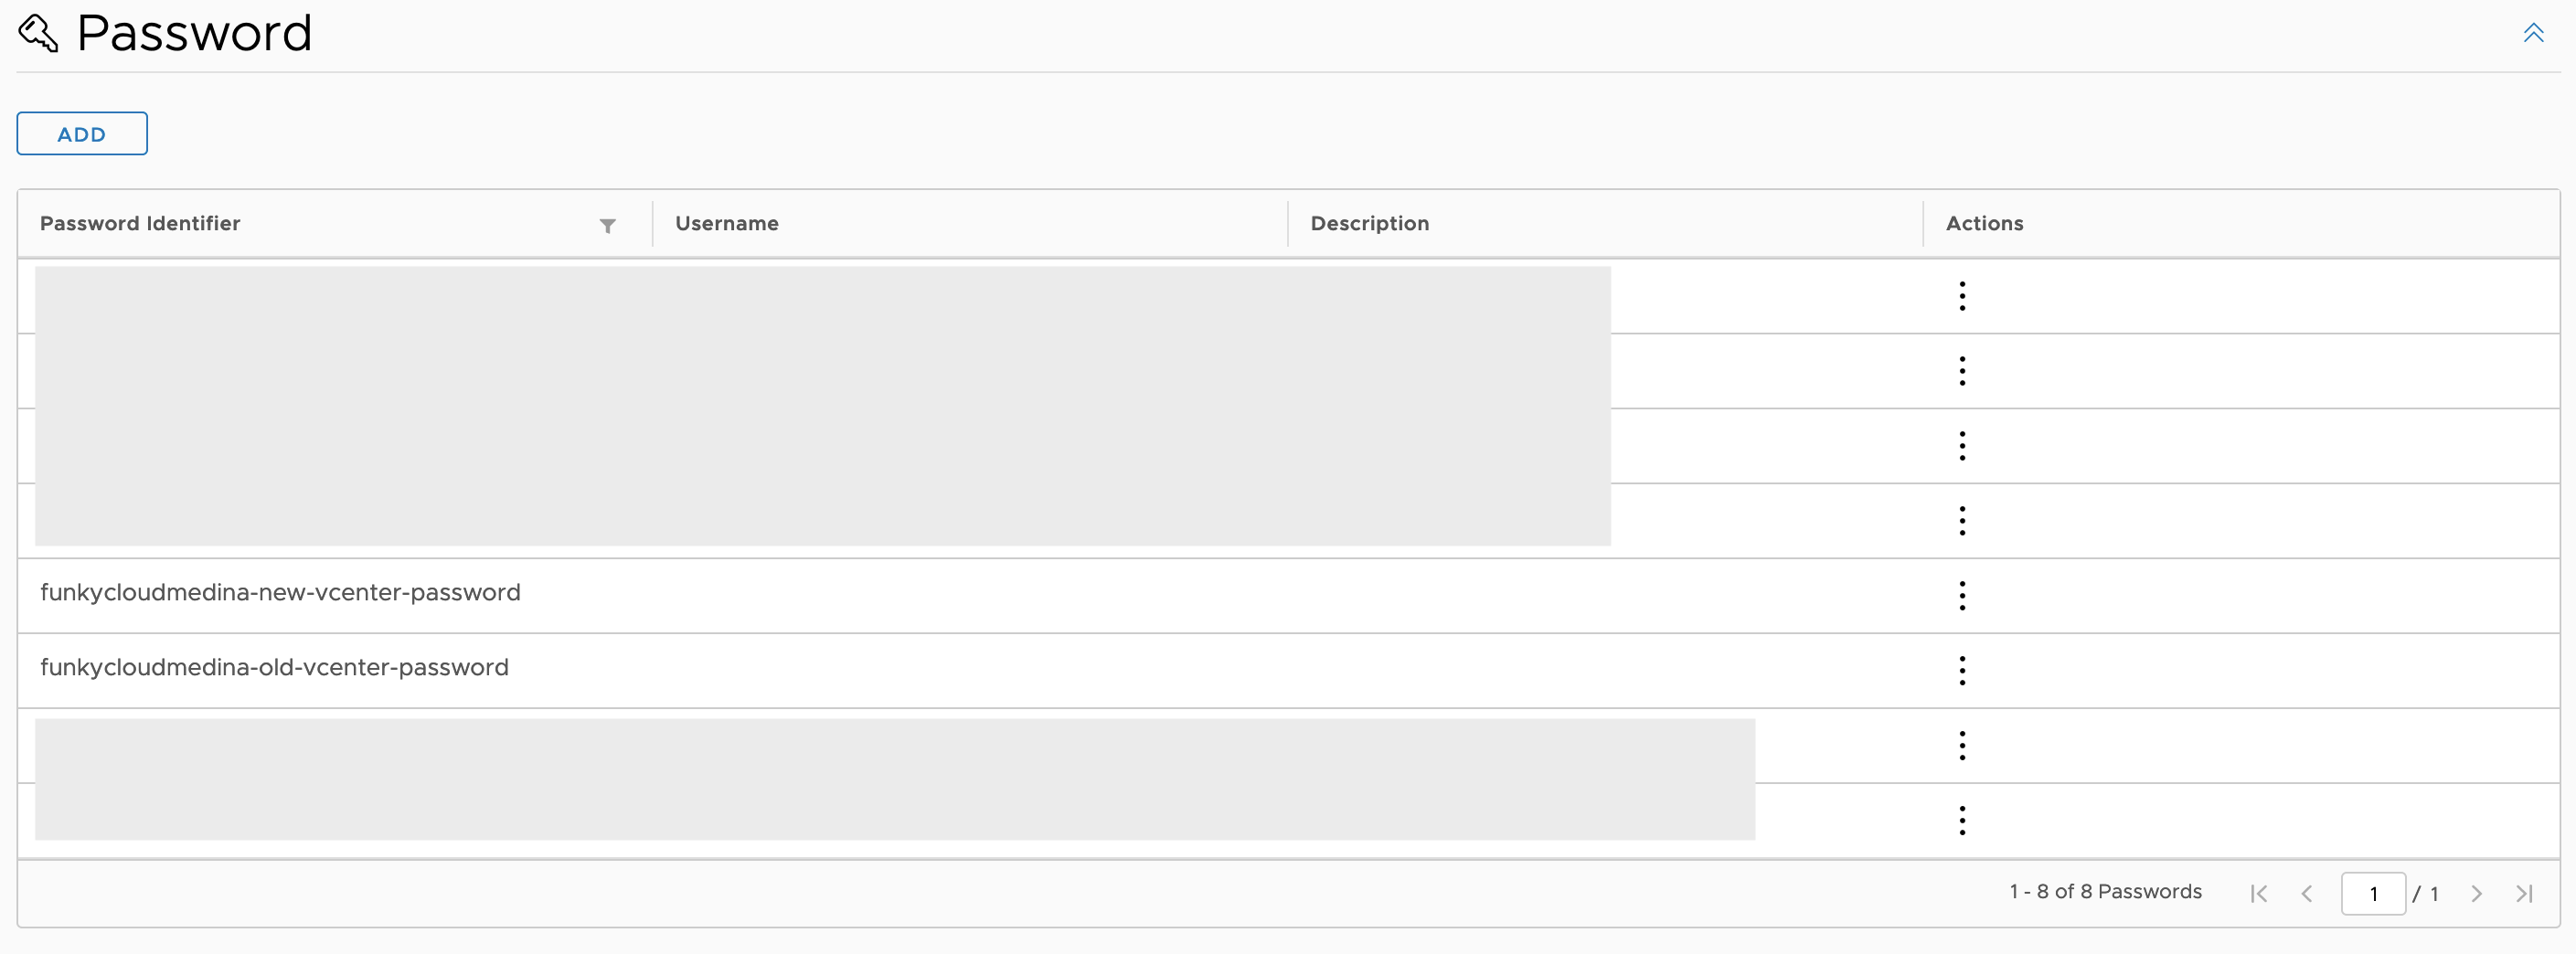
Note: I’m assuming you already have the new password added to your vRSLCM Locker.
- Log in to vRealize Suite Lifecycle Manager
- Click the User drop-down at the top right of the page and select API. Having already logged in to vRealize Suite Lifecycle Manager, we don’t have to authenticate using the APIs.
- Find the Locker Password and License API heading. Click to expand it.
- Find the GET /lcm/locker/api/passwords API. Click to expand it.
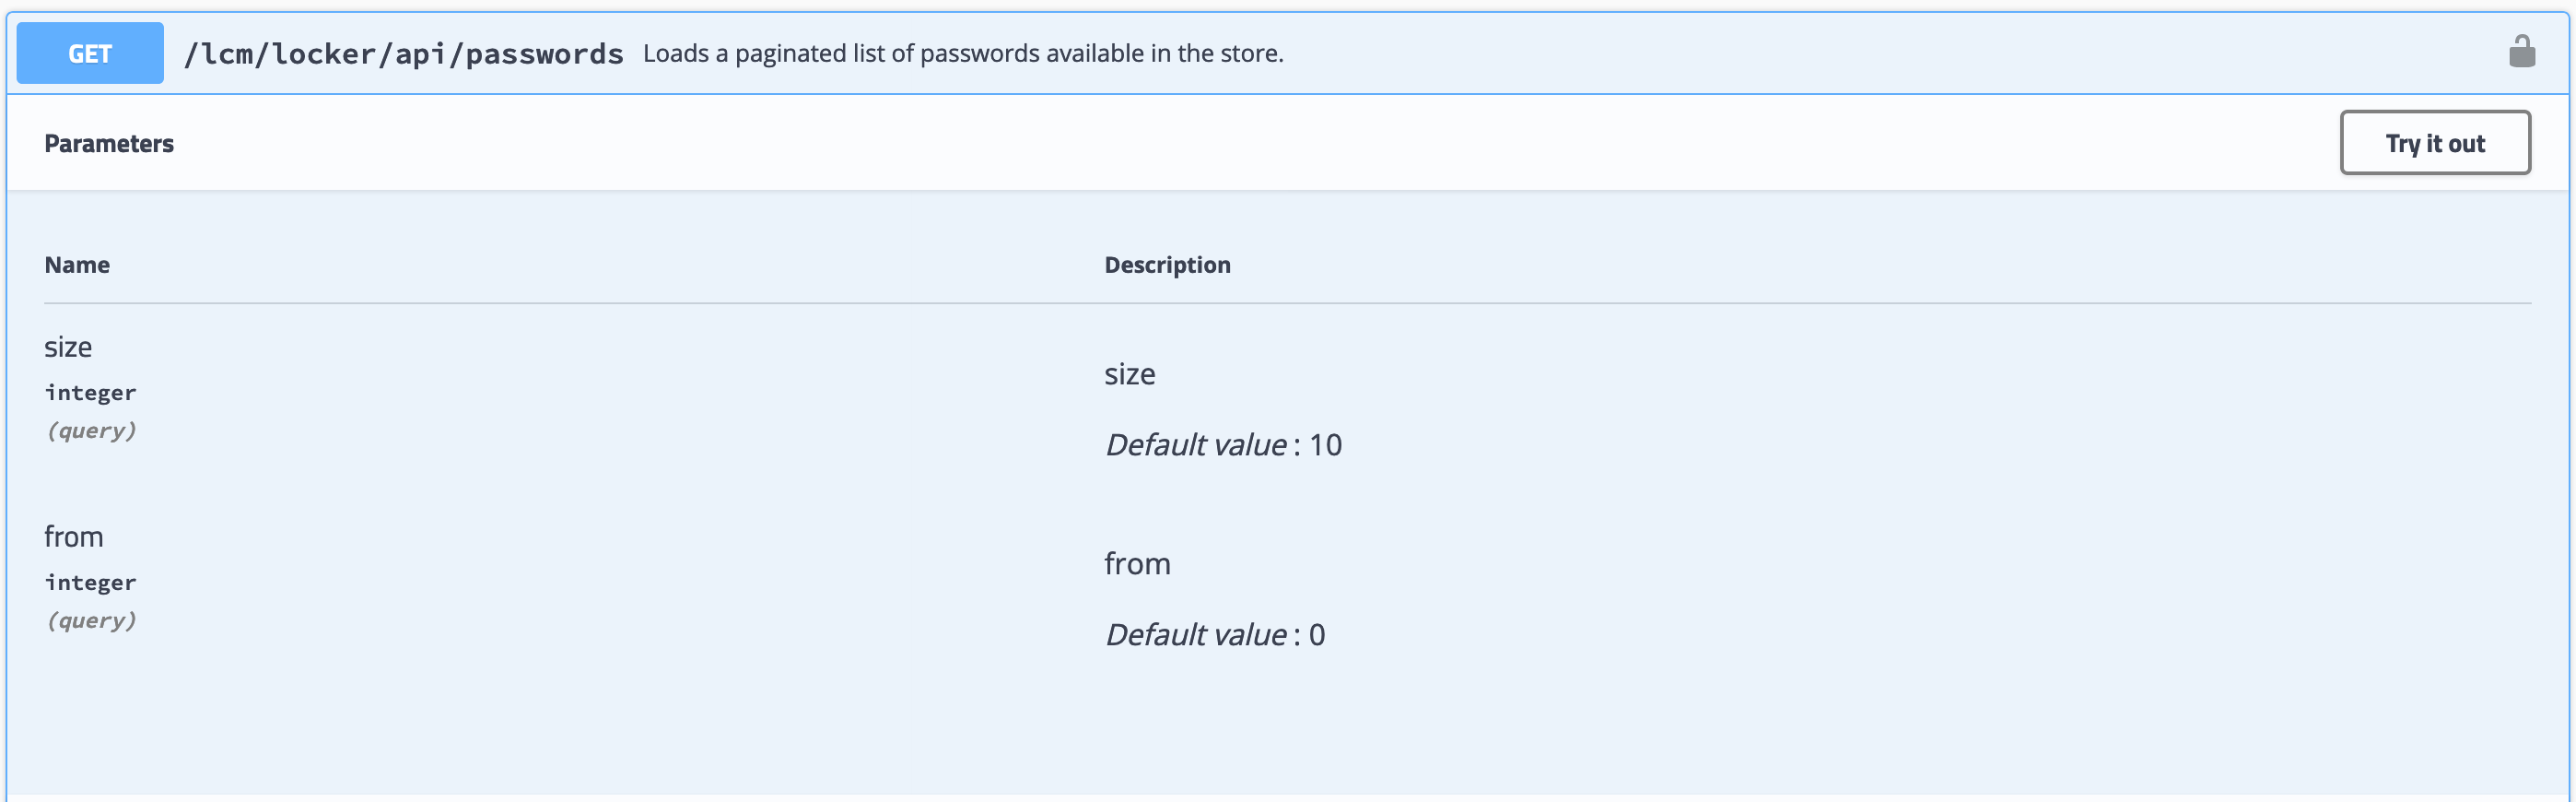
- Click the Try it out button then click the Execute button.
- In the response body, locate your new password using the alias value. For me, the alias was funkycloudmedina-new-vcenter-password.
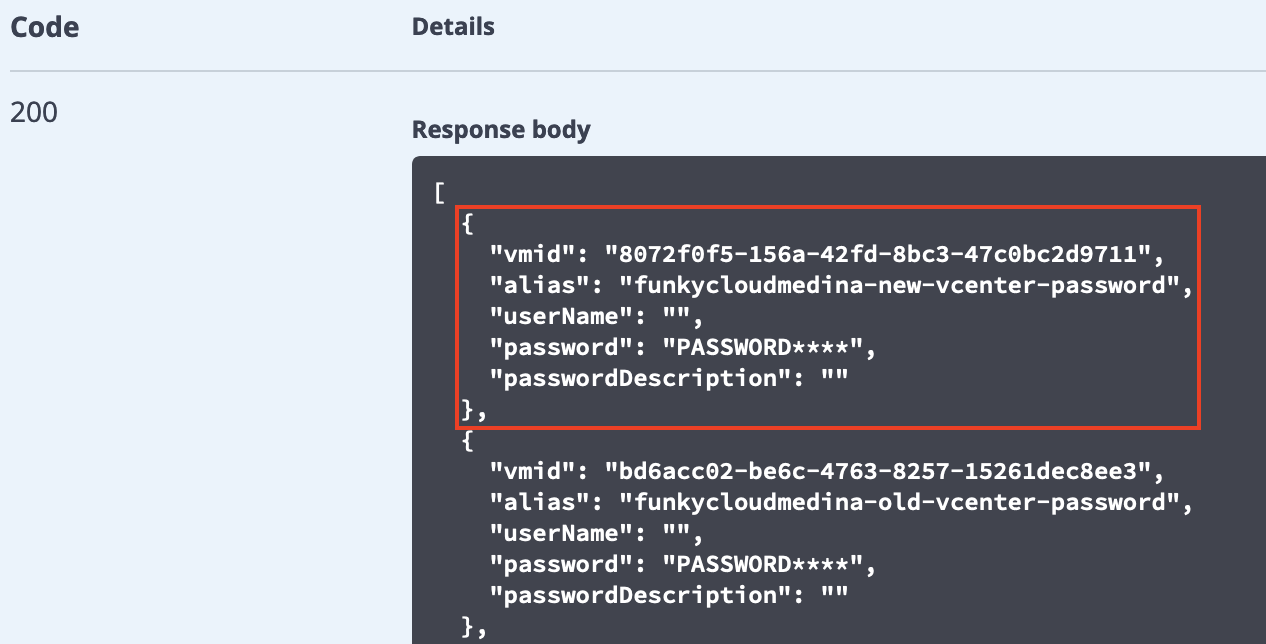
- Copy the vmid and alias values and keep a note of it.
- Find the data-center-controller heading. Click to expand it.
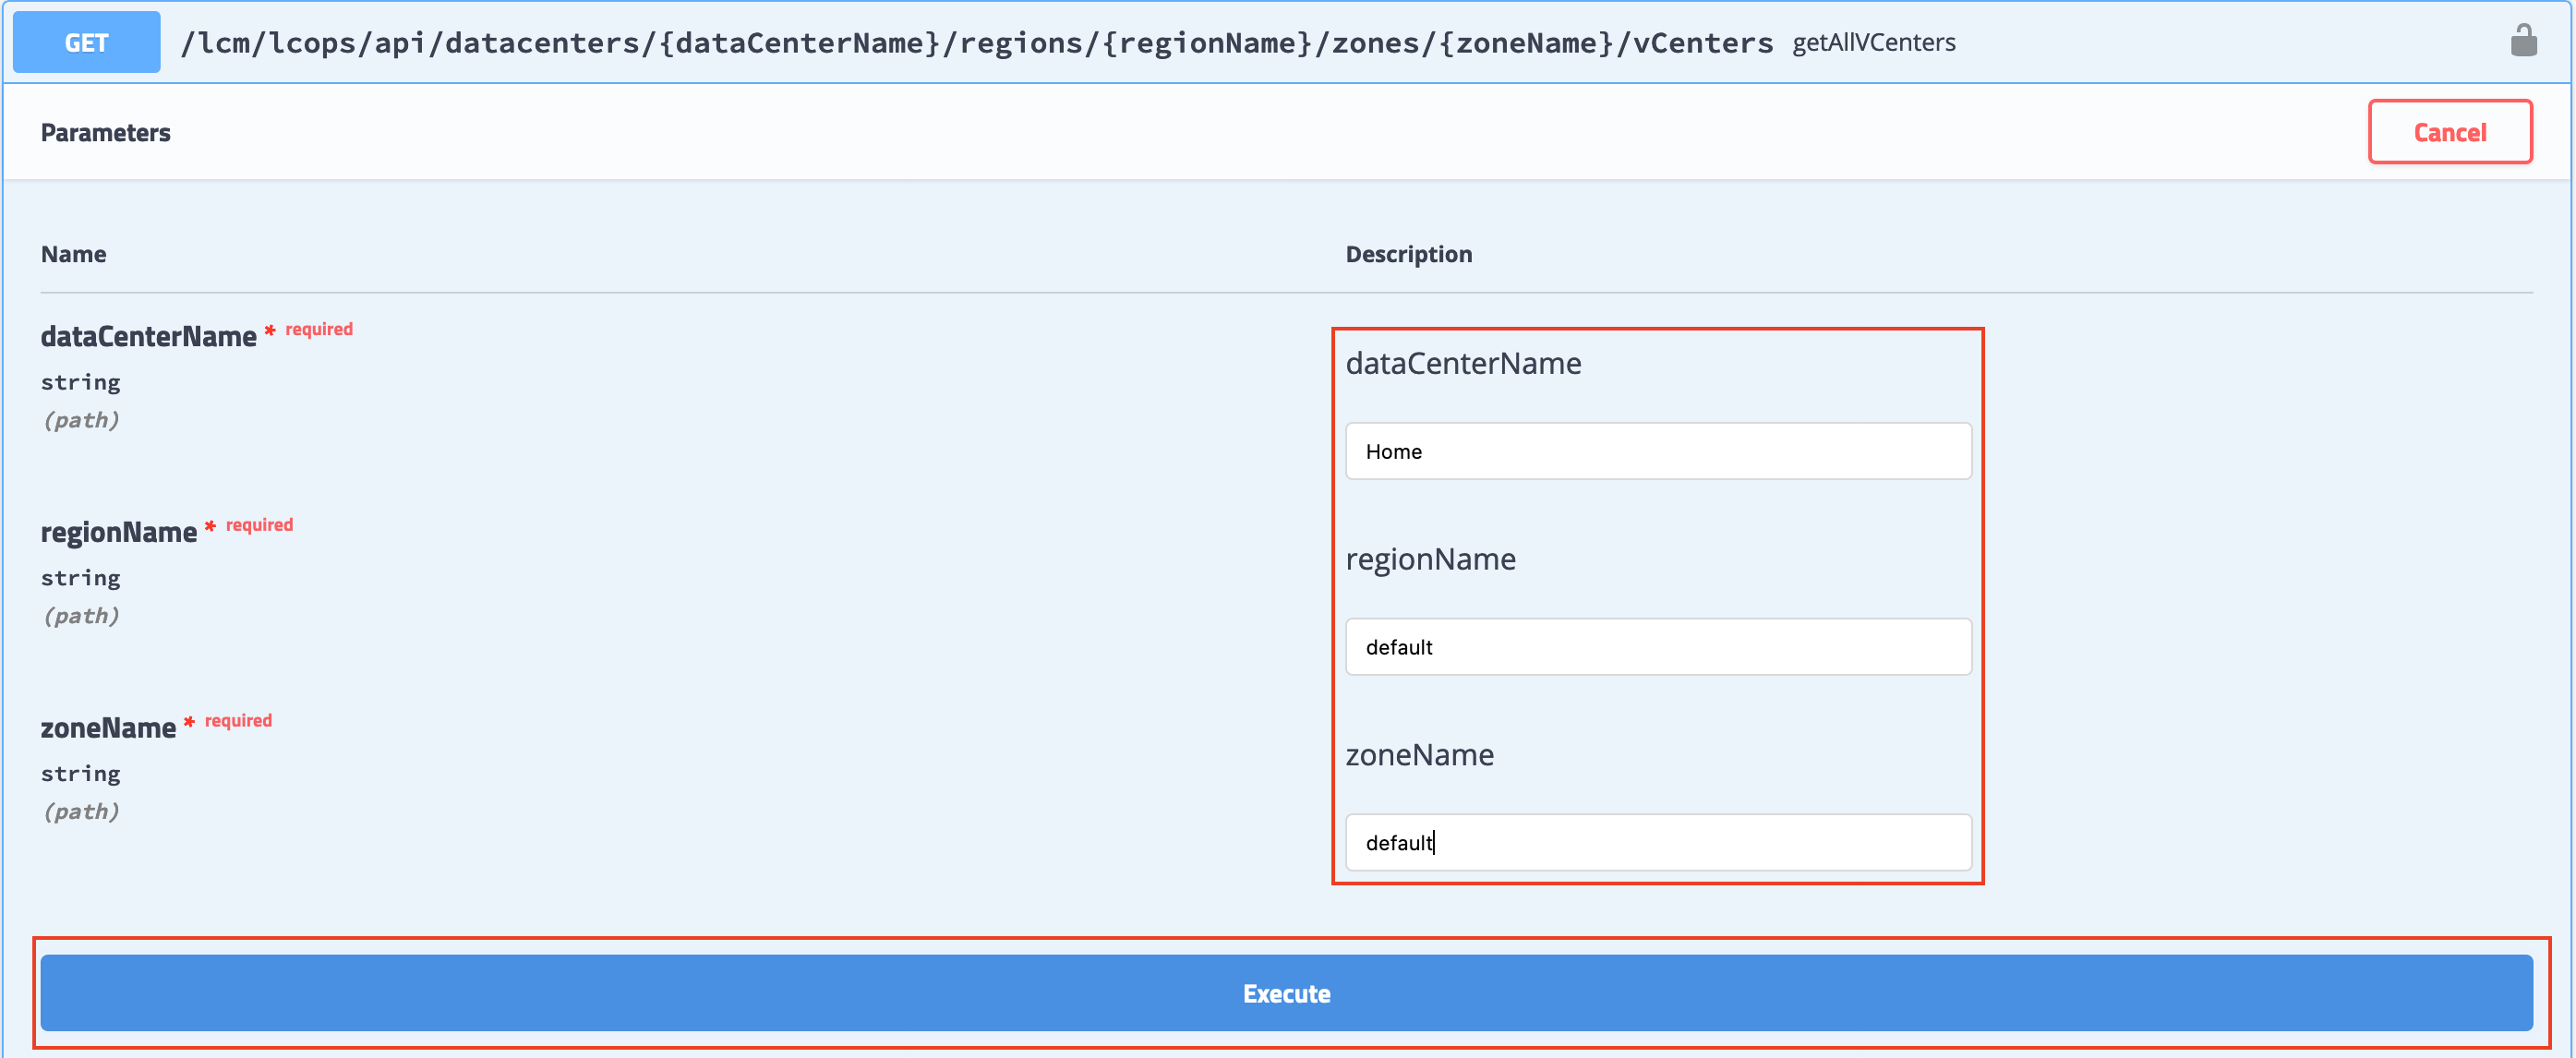
- Find the GET /lcm/lcops/api/datacenters/{dataCenterName}/regions/{regionName}/zones/{zoneName}/vCenters API. Click to expand it.
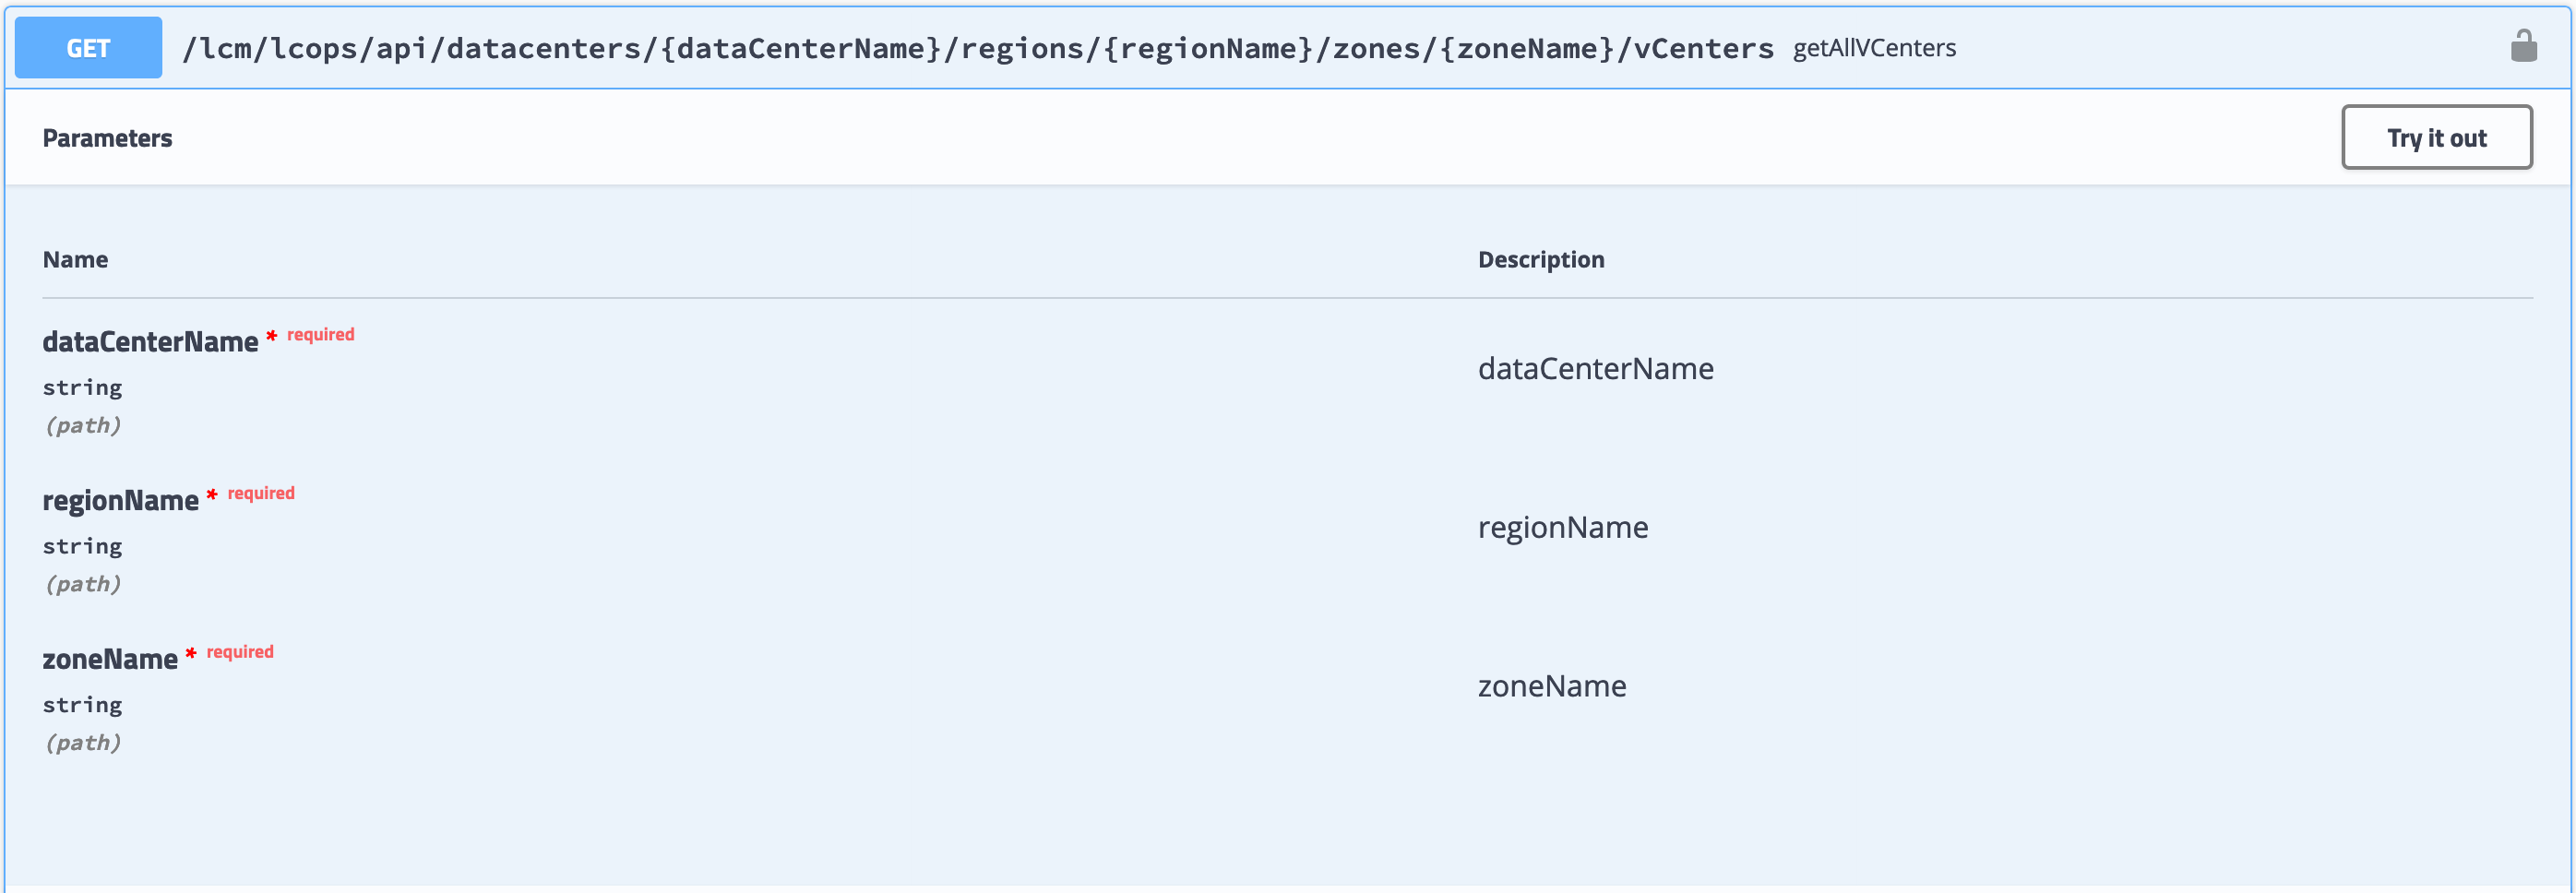
- Click the Try it out button.
- Complete the request form that displays:
dataCenterName- the name of the vRSLCM datacenter containing the target vCenter Server.region- Use ‘default’ as the value.zoneName- Use ‘default’ as the value.
- Click the Execute button.
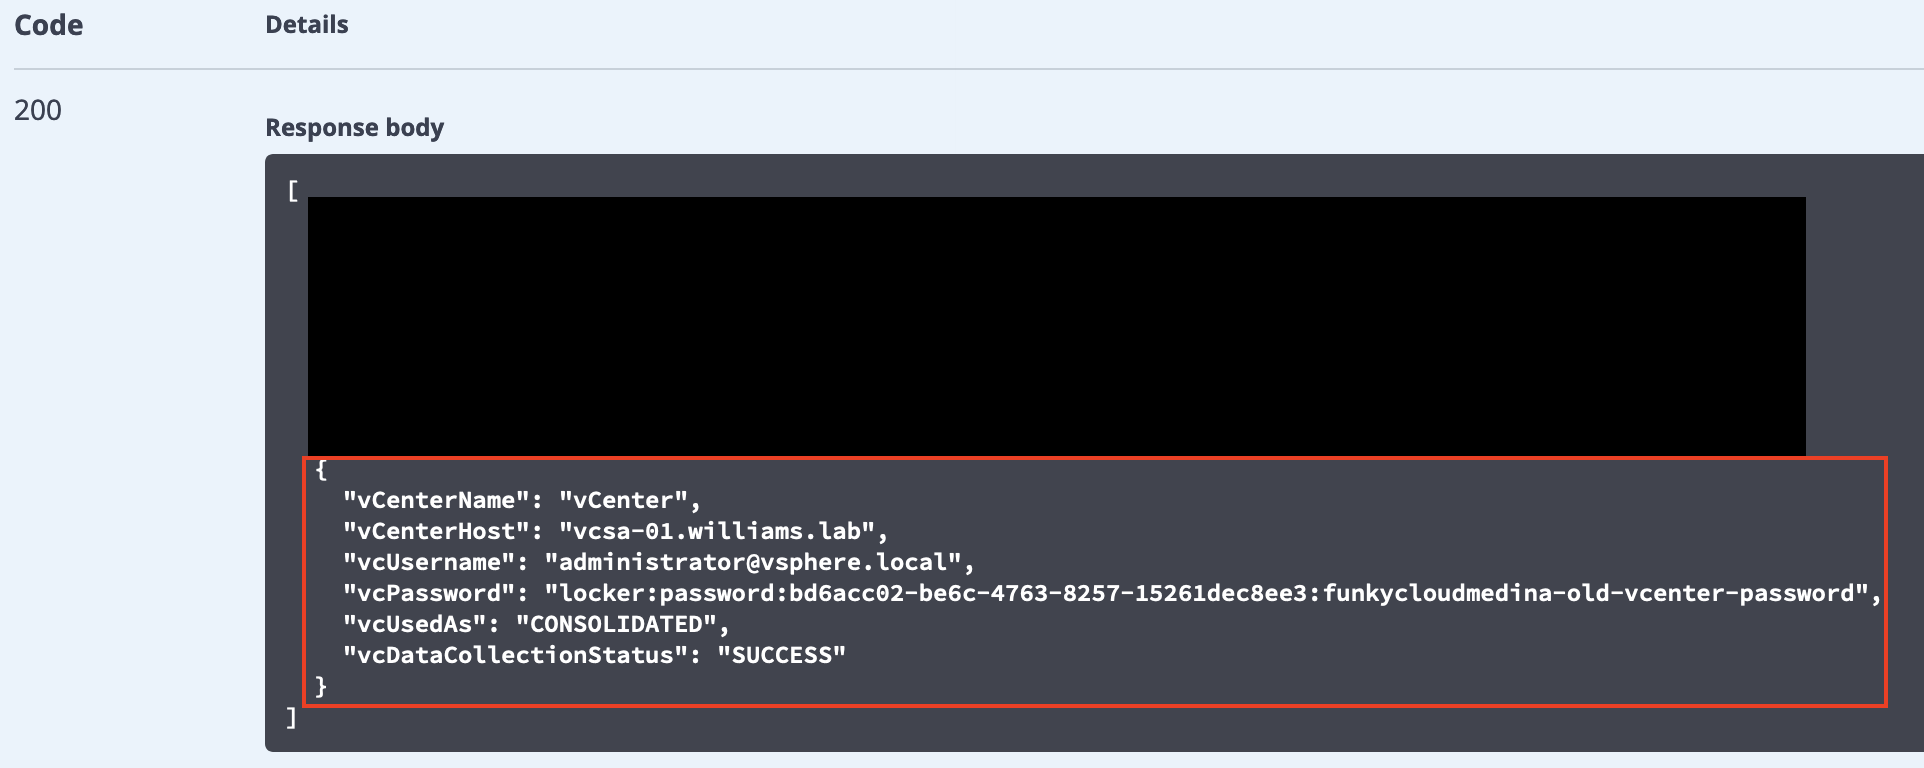
 The response body will list the vCenter Servers for that datacenter.
 - Locate the target vCenter server in the response, and copy all of the values returned for it.
- Below this API, you will find the POST /lcm/lcops/api/datacenters/{dataCenterName}/regions/{regionName}/zones/{zoneName}/vCenters API. Click to expand it.
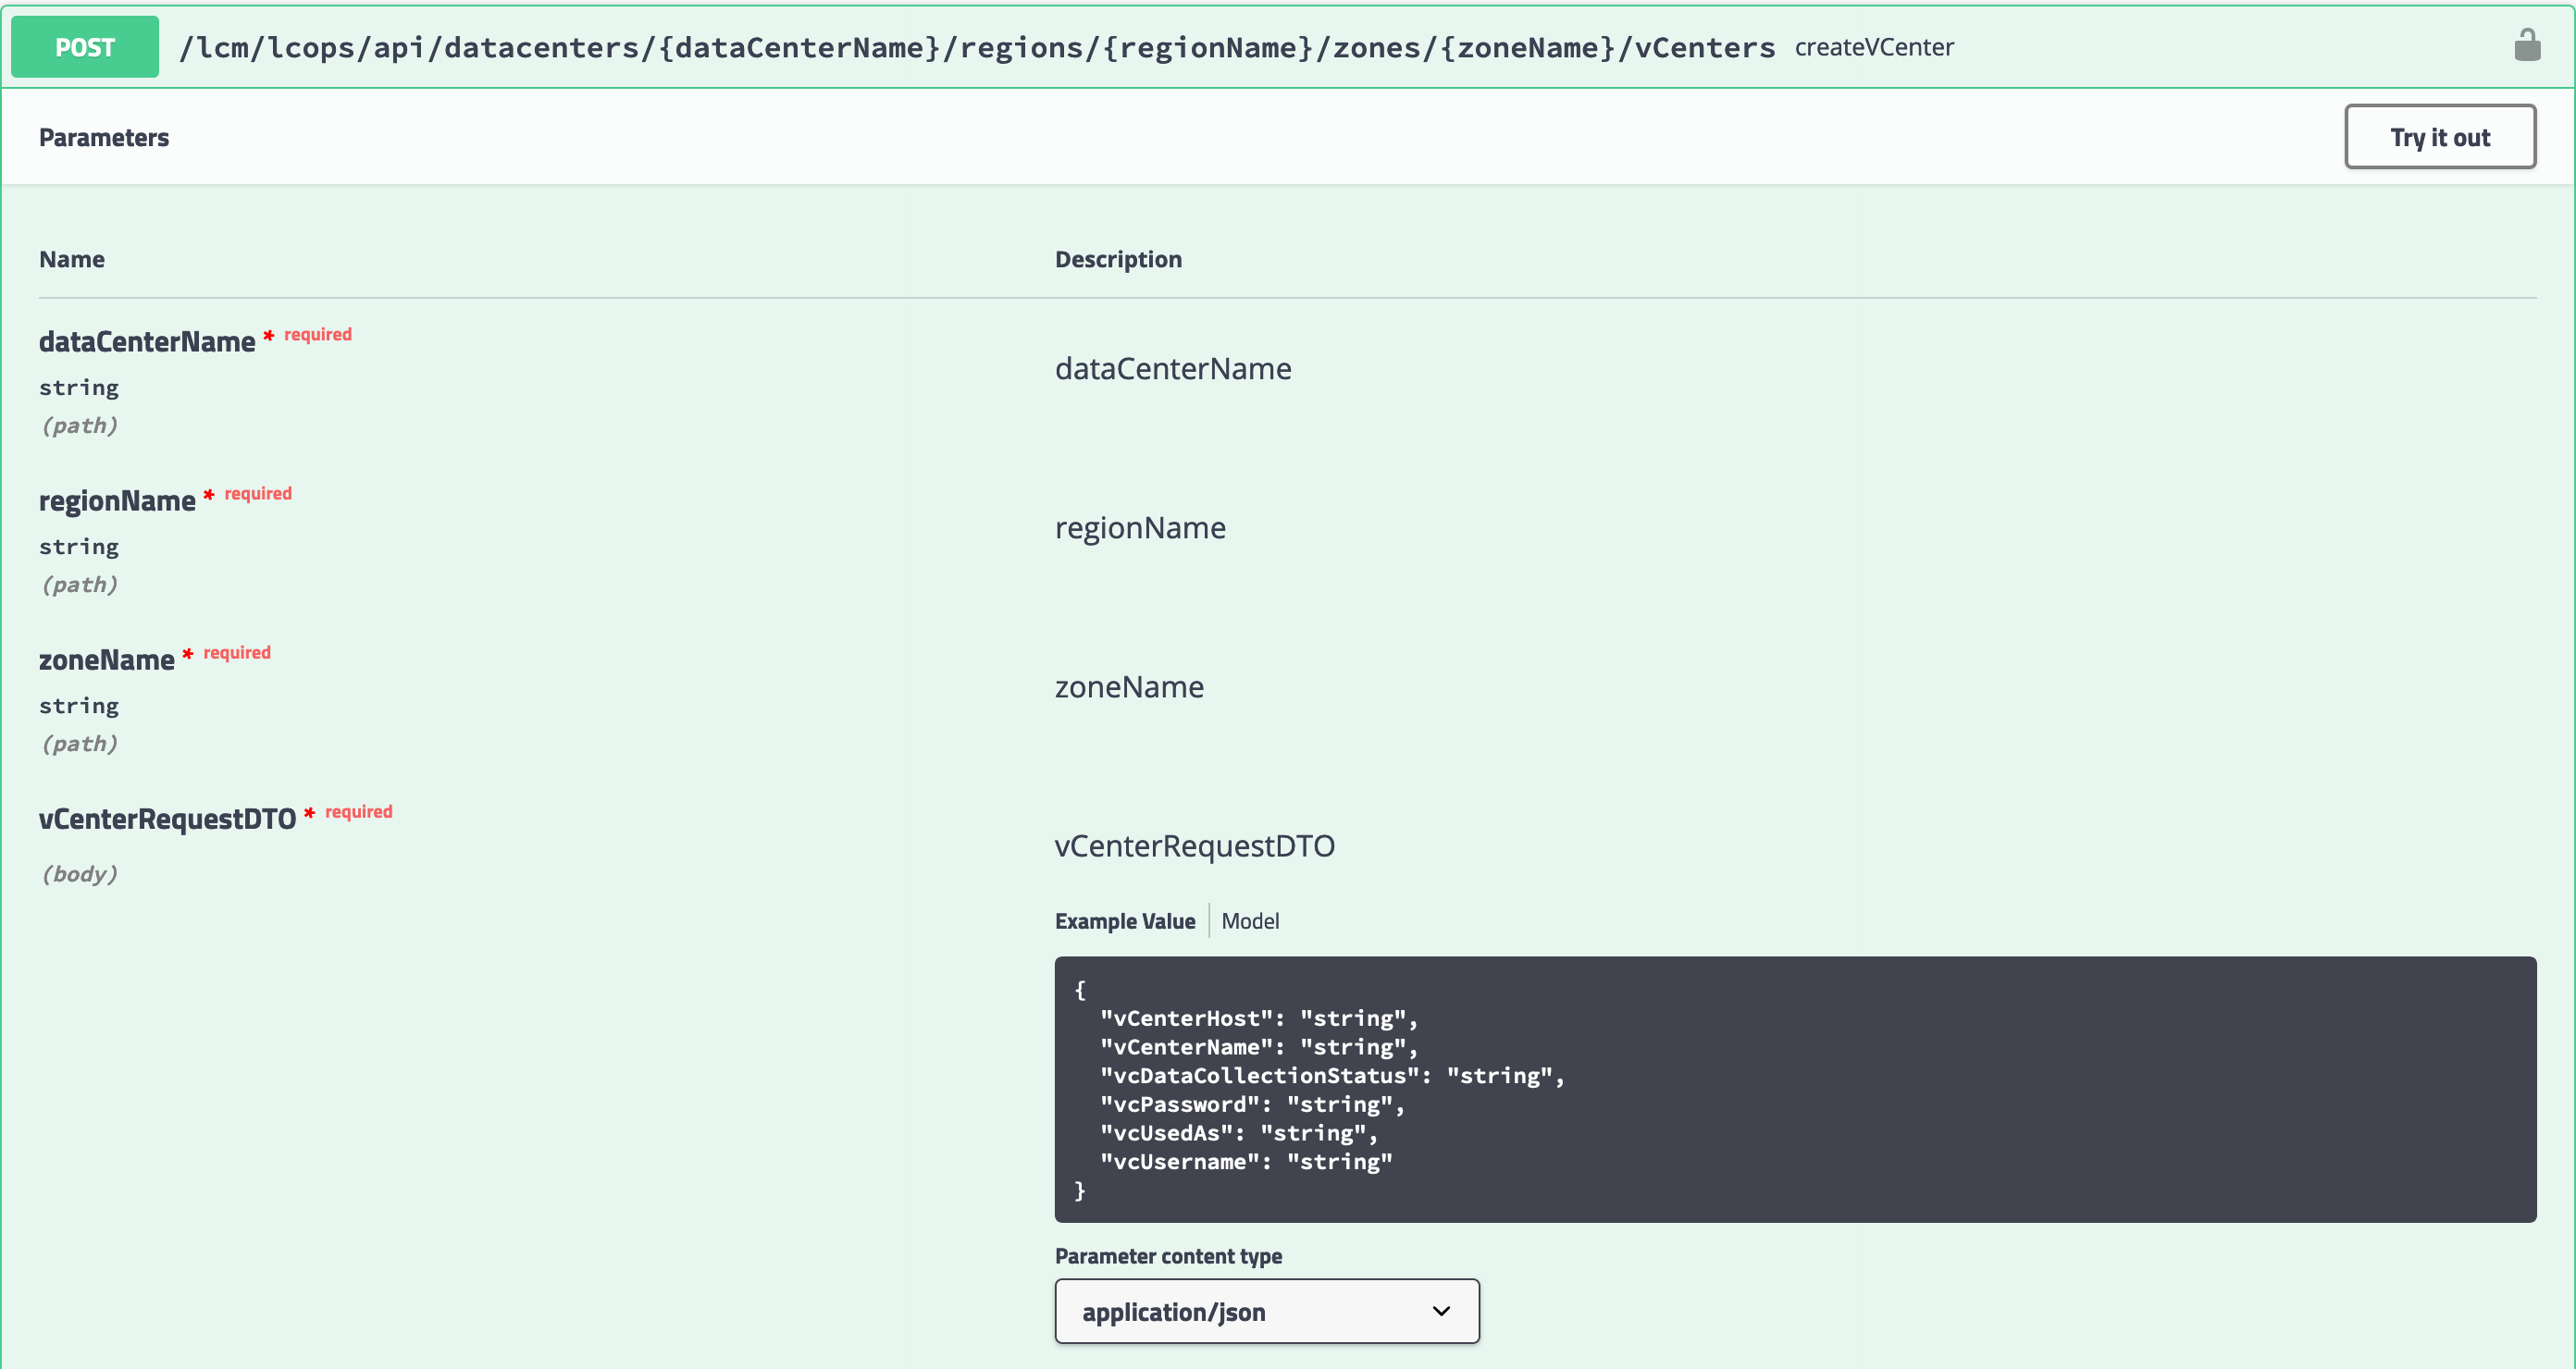
- Click the Try it out button.
- Complete the request form that displays:
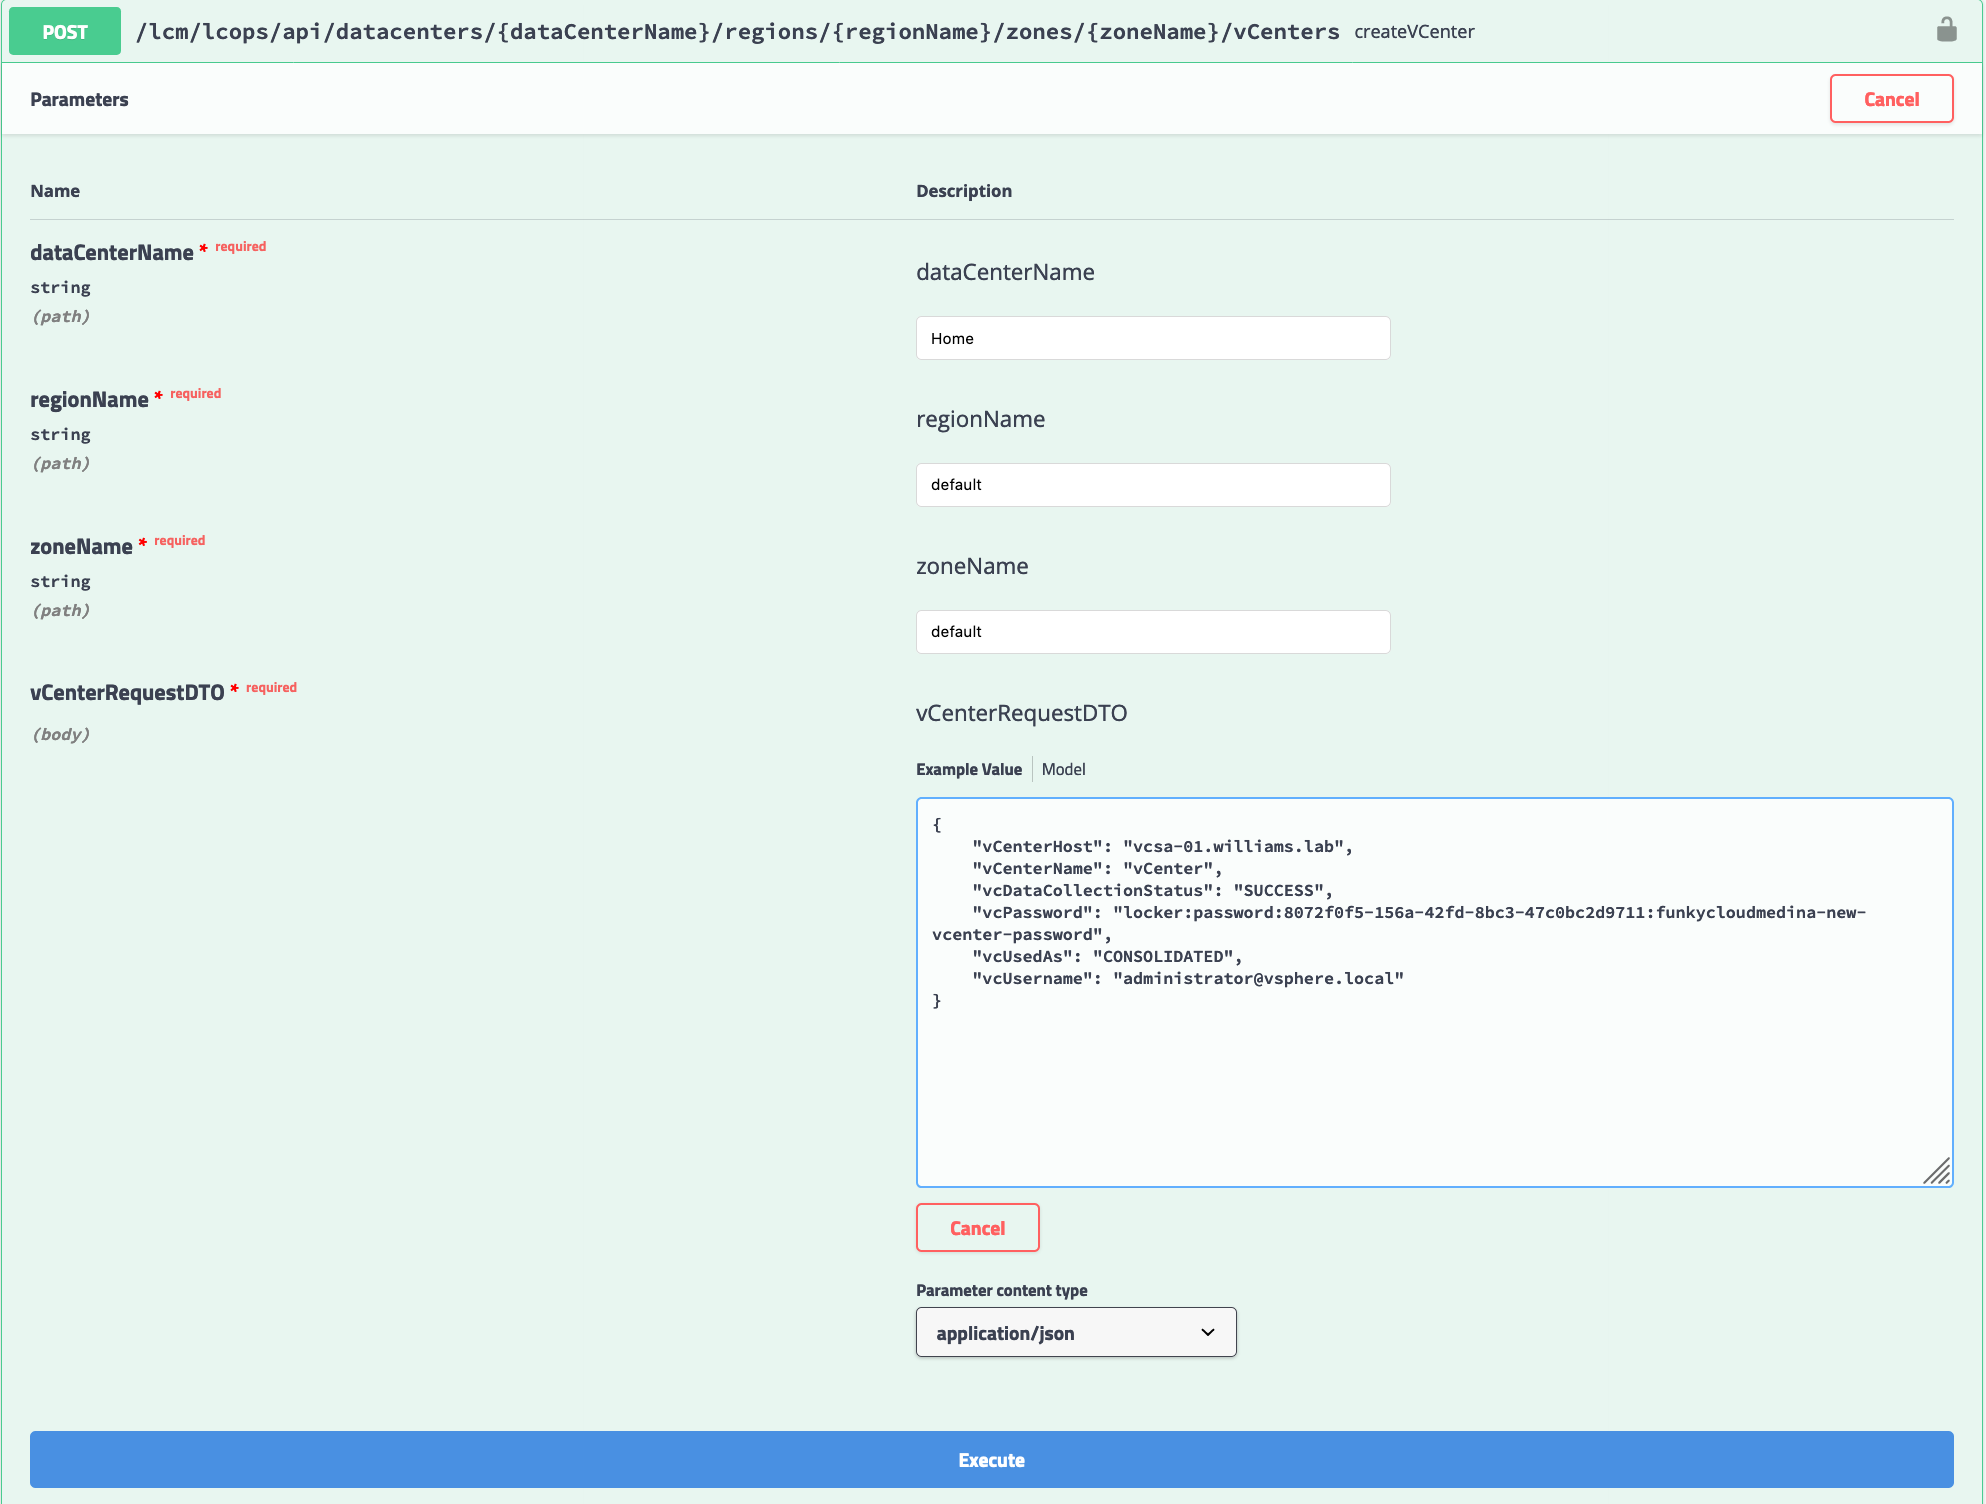
dataCenterName- the name of the vRSLCM datacenter containing the target vCenter Server.region- Use ‘default’ as the value.zoneName- Use ‘default’ as the value.vCenterRequestDTO- We need to modify the values of each of these properties to reflect, identically, the target vCenter Server except for the vcPassword property. The following snippet is my returned vCenter Server details from step 13 with the old password reference:
| |
And here you’ll see the new JSON body I will use for the vCenterRequestDTO body.
| |
Notice they are almost identical, except for the vcPassword field. I’ve used the vmid and the alias of the Locker Password response in step 7 to create a new reference for the vcPassword field. The structure for a Locker Password reference is locker:password:$vmid:$passwordalias.
- With the vCenter details in the vCenterRequestDTO field, click the Execute button.
 The response will be a request ID that you can track in vRSLCM’s Lifecycle Operations section. When the request is complete, you can use the API from step 9 to get the new vcPassword value:
| |
I hope this post has been useful. If you have any questions or suggestions, please feel free to leave a comment.